Table of contents
Abstract
A Christmas-themed quiz - judged by a Raspberry Pi and a Lego BuildHat. You won't know who's won until your prize is delivered. Will you get the chocolate or the brussels sprout?
Project
Overview
The plan for the project
Our family love Christmas, and they really love a quiz. This Christmas themed project pits to players against each other. They'll be asked a series of questions and have to find the answer amongst the cards layed out in front of them. Find what you believe to be the right answer and hold the card up to the Lego colour sensor on your side before the timer runs out. Maybe you got it right and maybe you didn't! The scores are kept secret until the end of the game when your prize is dropped using a Lego motor. The winner is awarded a chocolate and the loser... gets a brussels sprout.
What's all this about sprouts?
I've no idea if this is just a UK thing or it goes further afield, but brussels sprouts generally get a bad rap - they're the bit of the Christmas Dinner that tend to divide opinion. Some people love them, but there are plenty of people who think the bitter little mini cabbages are pure evil. (You can probably guess where I stand on the matter.) If they're new to us then you can think of them as like pineapple on pizza or salted licorice.
Why the BuildHat?
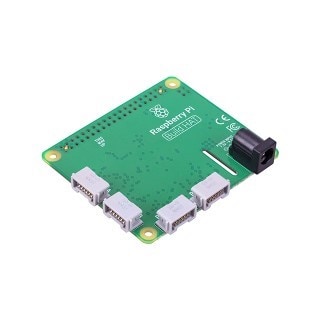 In our house Christmas tends to involve Lego too. Both my sons - age 12 and almost 10 - love Lego. The oldest isn't really interested in electronics or coding, but the younger one has shown some enthusiasm. He's had a go at some of the Lego microgames in Unity and enjoyed learning some Python recently. Over the years I've bought them both Lego Boost and Lego WeDo 2.0. When the Raspberry Pi BuildHat was announced I was excited to potentially revive some of these. Unfortunately, at the time Lego had decided to move on to a new platform called Spike Prime and support for the previous sets was missing. Luckily over the last year support for the older (but still physically and electrically compatible) devices has greatly improved. Doing something with Lego Boost or WeDo 2.0 and Python seemed like a great way to create something alongside my son.
Prototyping
It's been really fun getting my youngest involved in developing something from start to finish. He's played with Python but he's just been learning and never had a final goal in mind. Having a project goal obviously helps with focus. It's also good to go through the various stages of prototyping and ensuring that the bits of your plan are feasible and realistic. The main parts of the project are:
- using a Lego colour sensor to detect whether you have the right answer
- coding the flow of the game to collect the answers
- working out the winner
- using a Lego motor to drop the prizes
- physically putting it all together
The first thing we had to do was ensure that the Lego motor and sensors would do the job. From the Lego Boost we had:
- One "Motor" that could be instructed to rotate in either direction for a set number of degrees. It's open-loop and has no position feedback like the later Spike Prime motors.
- One "ColorDistanceSensor" that measures distance (over a short range), ambient light, and RGB color.
The Lego WeDo 2.0 had some different devices
- One "PassiveMotor" that allows you to set speed and direction, but nothing more.
- One "TiltSensor" that mesures up to 45 degree tilt in two axes
- One "DistanceSensor" that measures distance over a short range
None of these really worked properly when the BuildHat was initially announced, but I'm glad to say they all work fine now. We decided to go with the Motor and ColorDistanceSensor from the Boost and set about ensuring they did what was needed.
Testing the Lego Motor
We did a quick check to make sure the motor was up to the job of delivering the "prize" at the end. One the BuildHat python module has been installed as per the documentation on the Raspberry Pi site, controling it is as simple as:
from buildhat import Motorimport time
motor_a = Motor('A')
motor_a.set_default_speed(7)motor_a.run_for_degrees(60)
time.sleep(3)motor_a.run_for_degrees(-60)
Testing the Lego ColorDistanceSensor
The colour and distance sensor is fairly easy to work with. The examples give a method called get_color() which returns values such as "red", "green" or "blue". This sounds ideal. However, whilst it was easy to use, it wasn't very reliable. As you brought something green close to it, it would often briefly report it as blue. It took a bit more prototyping, but eventually I came up with some stable code. I found that checking only when the distance was 1 or less (out of 10) and evaluating thresholds at 1/3 and 2/3 of the maximum colour values gave a reliable result. Less than 1/3 for the R, G or B channel was "no" and over 2/3 was "yes". anything in between was ignored. It tested a few different colours of paper from my boys' craft box. Using the following code and picking the most reliable shades (red, green, a cyan-ish blue and yellow) gave good results. There would be nothing worse that getting the right answer but being told you're wrong due to flaky code!
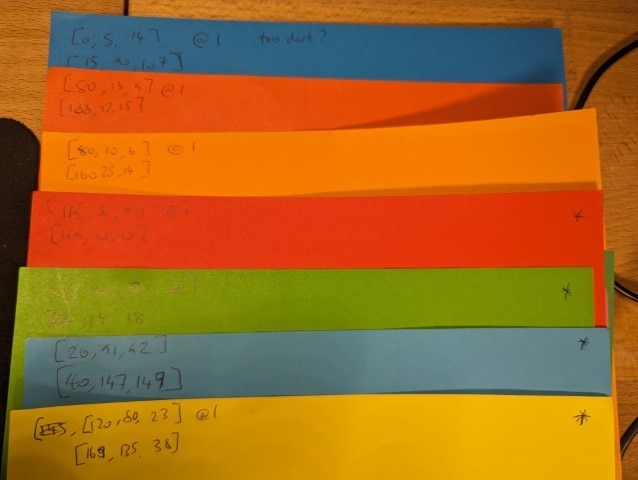
This was the test code that proved reliable enough to give us confidence it was going to work:
def get_color(sensor):


  distance = sensor.get_distance()

  # too far away

  if (distance > 1):

    return ""


  color = sensor.get_color_rgb()

  min_val = min(color)

  max_val = max(color)


  # too dark

  if (max_val < 30 or (max_val-min_val)< 5):

    return ""


  lower = (min_val+min_val+max_val)/3

  upper = (min_val+max_val+max_val)/3

  red = color[0]

  green = color[1]

  blue = color[2]


  # unclear

  if (red > lower and red < upper) or (green > lower and green < upper) or (blue > lower and blue < upper):

    return "  unclear"


  if (red > upper and green < lower and blue < lower):

    return "RED"

  if (red < lower and green > upper and blue < lower):

    return "GREEN"

  # more like cyan, but that's what we're using

  if (red < lower and green > upper and blue > upper):

    return "BLUE"

  if (red > upper and green > upper and blue < lower):

    return "YELLOW"

  # ignoring another colour

  return ""
Lego build prototype
So, the Lego build is gradually evolving. Here's a version one of building two ramps so the dropped prize comes out of the front of the machine.
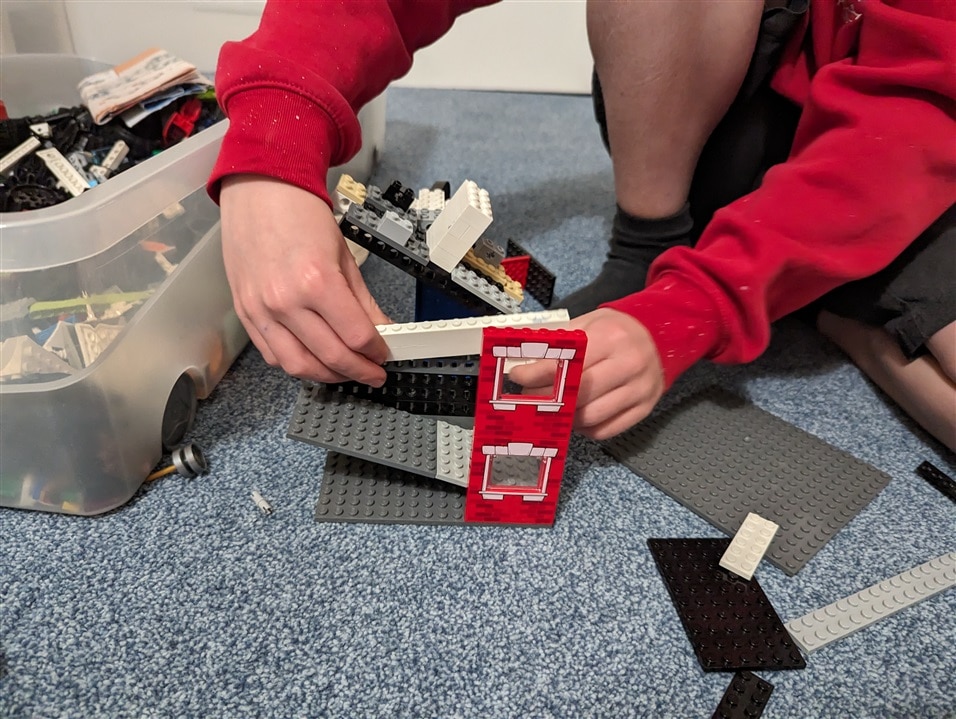
Getting better... The ramps are in place and a bit sturdier. The dropper is attached to the motors which are firmly embedded in the walls. The colour sensors are on top of a handmade Lego Raspberry Pi case (to the rear)- although Farnell had some Lego i cases on offer, so a few are on the way to be added to the mix soon. That pocket-sized switched mode power supply is one of my favourite electronics purchases. It might not have the greatest specs, but it's perfect for this sort of thing when you need a random 8V for the BuildHat.
Lego build continues
I find it can be easy to order lots of "that's bound to be useful" parts thinking that you're advancing your project, but I managed to hold off and ensure that the concept was sound before jumping into buying parts.
The Lego Boost only has one motor and one color sensor, so it was off to eBay to find some more. I ended up paying £28 for the electronic parts from the Boost, but I have seen whole sets go for similar prices (or less). We now have all the Lego parts we need.
My Farnell order also turned up. Using a proper BuildHat power supply should make the project a little less fragile. I'm also hoping that my son's interest in using the BuildHat continues, and this shoud make it easier for him to do things on his own. No more setting voltage on a PSU and plugging in banana leads. No risk of releasing any magic smoke.
It also turns out that with a Dremel and a set of needle files you can just get a Pi3 and a BuildHat into the Multicomp Lego (sorry generic building block) case that Farnell stock here.
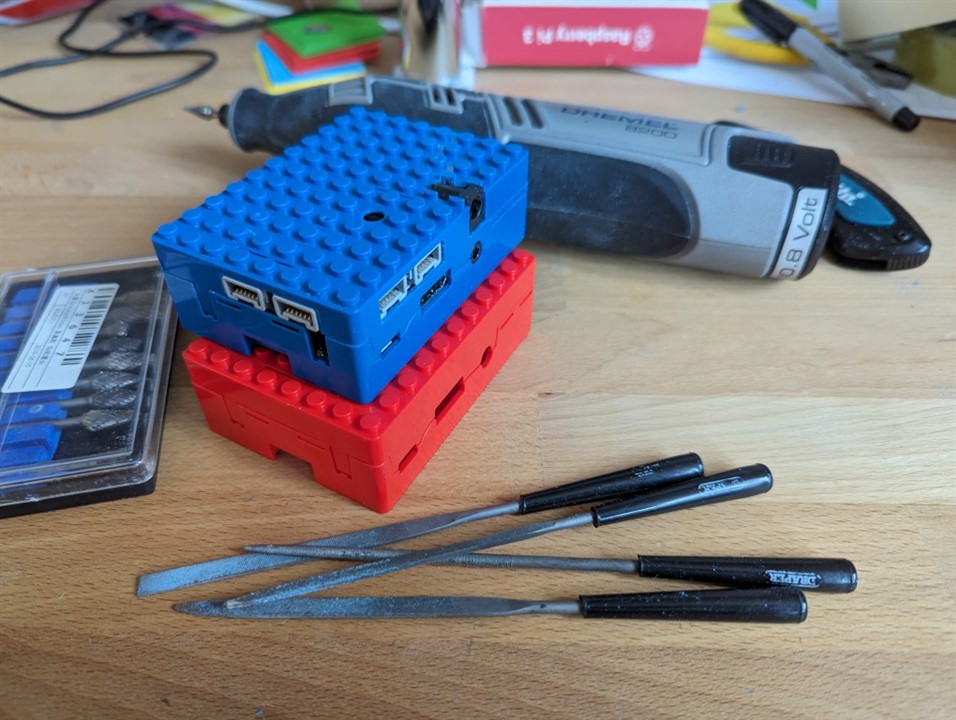
It's a very tight fit. Because of the connectors poking through on two sides, you have to flex and squeeze the lid onto the BuildHat first and then clip the lower part of the case on. Some internal supports for the Pi's mounting holes and the unused camera mounting have to be removed too.
The playing cards
The way the game is to be played is that a question will be asked and the players have to find the card with the correct answer. Some cards will have images on them - e.g. flags to match "Which country has stollen as their traditional Christmas cake". Some will have text. However, each on needs a colour on the back so the sensor can detect whether the answer is correct. Here's a set of cards cut to size and ready to be laminated together with their answer colours.
As a bonus, it seems that we can leave a few blank. That way anyone who wants to set their own questions can write the potential answers on the front with a whiteboard pen. We won't be limited to our initial set of answers and this should extend the lifetime of the game. It's a bit like having an extra set of questions for Trivial Pursuit!
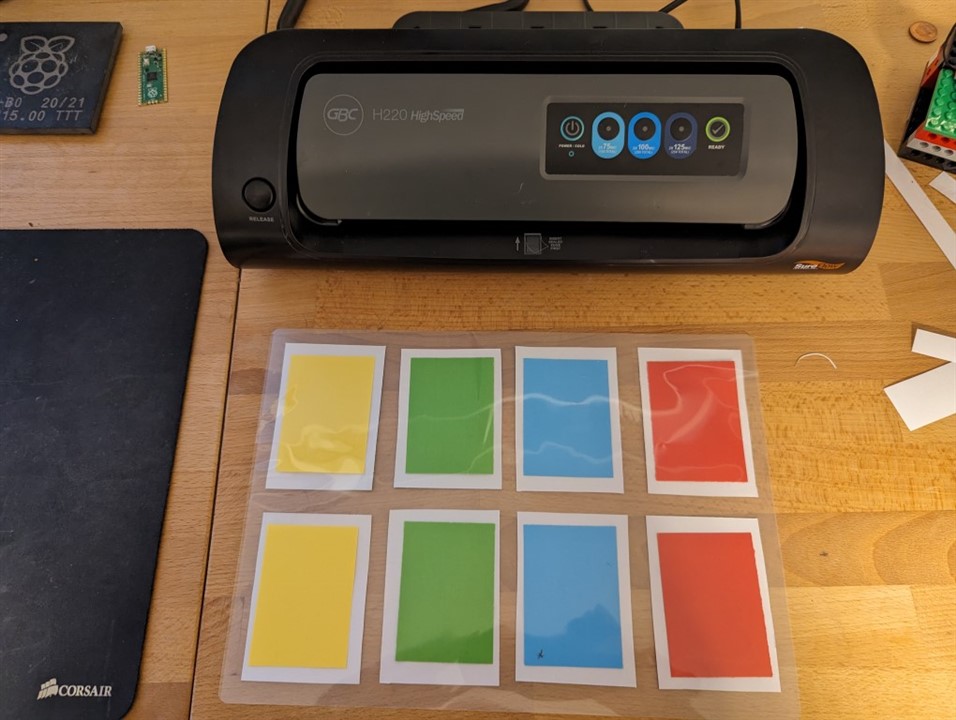
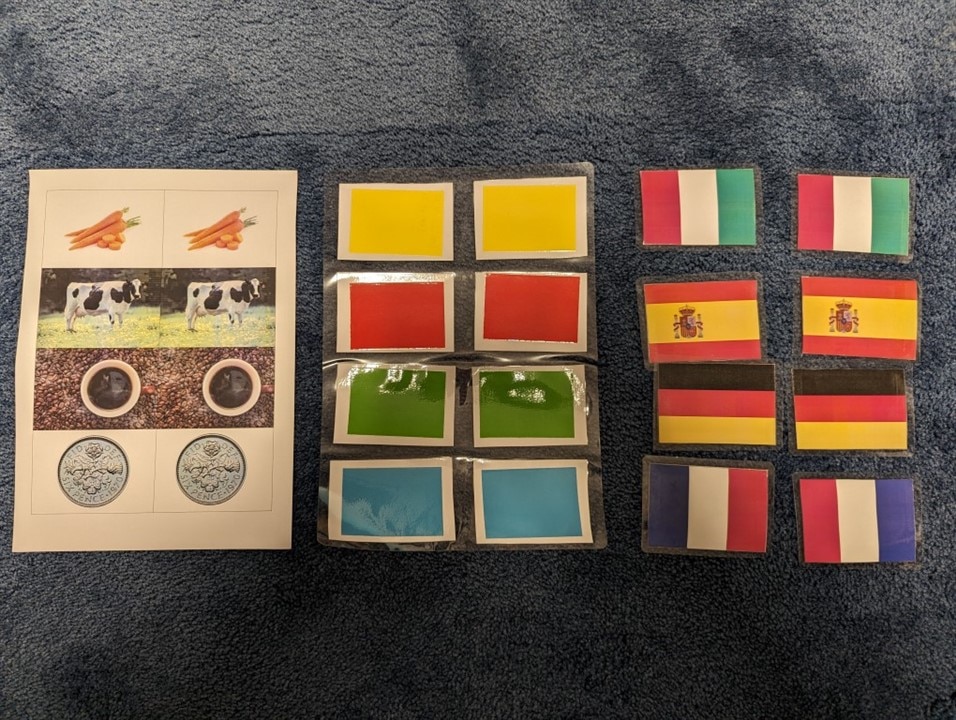
Here's an overview of the process. Two copies of each card and printed onto an A4 piece of paper and cut out. They're then laminated with a colour on the back. We've been careful to have only 4 numeric answer, four answers that are a country, 4 objects, 4 colours, and four photos of people. The photos are members of our family who will be at Christmas, giving it a personal touch. As the colour sensor can only reliably detect 4 these colours, we need to make sure there aren't two identical answers in each category.
The final build
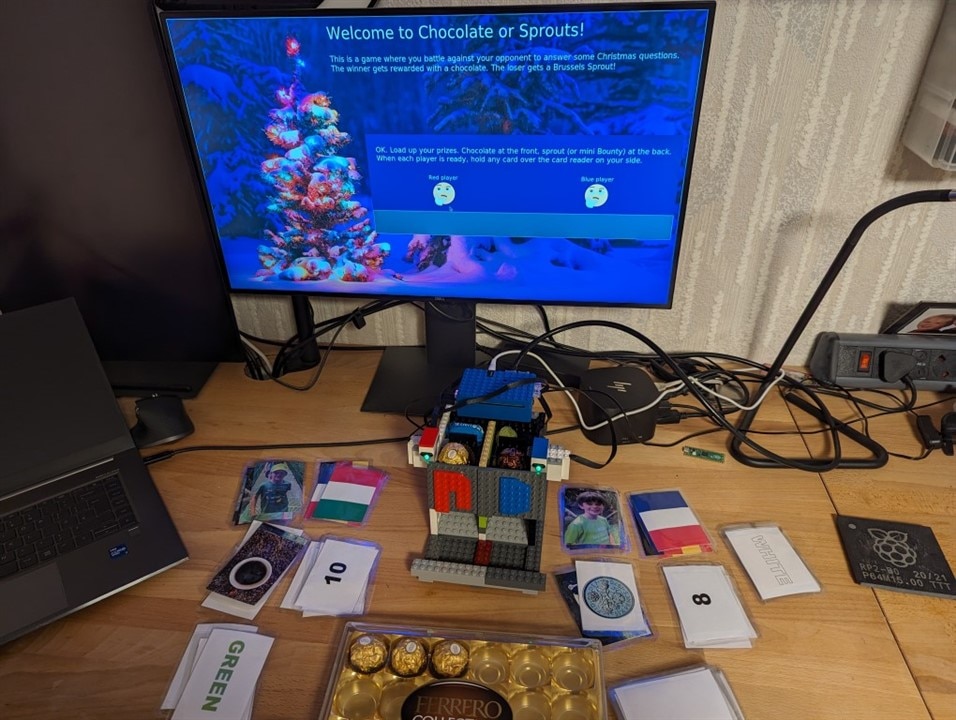
So, with 3 days to go before we all meet up, the game is ready! The Lego build is complete. The Python code is all working. The cards are laminated and a set of questions created with the answer being a colour that matches the appropriate card.
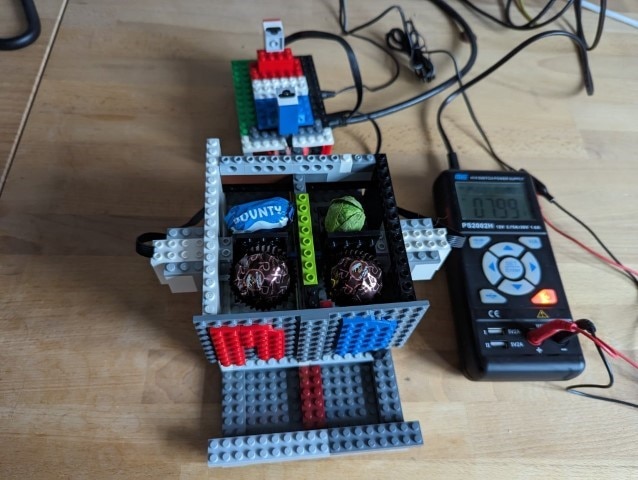
Here you can see the UI which has been created in Tk, the Lego unit with the Boost components built in and the Pi hidden in the modified case at the back, and a selection of answer cards. The game is loaded up with chocolates, a sprout and a mini Bounty bar. (Some of my relatives like sprouts, so a backup is needed.) As you can see, our stock of test chocolate has become mysteriously depleted. Time to buy a box of Maltesers!
If anyone is interested in the Python source code, you'll find it here in GitHub.
The rules of the game
We've not decided on the exact rules of the game yet, Obviously two people answer the questions and we can work out who got the most right. But, if two people answer correctly, do we give a point to both of them or is only the fastest? Do we move on once both have answered or can you change your answer within the time limit? Do the players each have their own set of cards or do they fight to grab a single correct answer card? We'll have to work this out in play-testing. Or maybe we can chose a style for each game.
For the initial rules, we're going to start with an allowance of 10 seconds to answer each question. If both people answer correctly, they both get a point. We never reveal the scores, so you don't know how you've done until the end of the game. The winner gets a chocolate. The loser gets a sprout - or whatever they've loaded as their booby prize.
We'll start with these rules and adapt it as our week away for Christmas goes along. It will be nice to take suggestions, and good to show we can adapt the game once people get used to it and maybe know most of the answers. We have an initial list of 20 questions of which you get a random selection of 10, so with a bit of luck that should extend playability a bit too. I'm hoping that the blank laminated cards (and a whiteboard marker) mean that kids can write their own questions and they can be added too.
Play testing
Here's a shortened play test of the game, with just 3 questions instead of 10. As this game is intended for a family Christmas gathering, some of the questions like "Who's cooked the most Christmas dinners?" only make sense to our family. There are some like "What colour is Rudolph's nose?" for the kids, and some random Christmas trivia for the adults
.
Christmas Day!
The game was finally unveiled on Christmas Day, after all the usual stuff like going for a long walk, taking a dip in the sea ( yes - it was as cold as you think it'd be), an enormous lunch, opening presents, drinking too much, etc. We started with a set of cards each and plenty of time for both players to get the answer right. However, it seems like Daniel's idea of making both players fight for the single correct answer card got the thumbs up. Here's the game in action. You can probably tell that Daniel's really enjoying showing everyone how it works.
We've got some friends and their children coming round on New Year's Eve. Daniel's very proud of what we've created together, so we've got a few things to do before we get it out again and he can show it to his friends. Over the next couple of days we're planning to replace some of the questions to be a bit more relevant to them. We'll also tighten up "battle mode" so it doesn't wait for the second player to answer. I won't video that as there will be other people's kids playing, but I'm hoping it goes as well as it did for Christmas.
References
Raspberry Pi 3
BuildHat
Lego Boost
Lego WeDo 2.0


Top Comments