Table of contents
Abstract
For those who use voice assistants to play Christmas music playlists, here is a panic button to skip the songs you don't like!
Project
The Christmas Music Panic Button
Why Everyone Needs a Button Like This
As tends to happen at this time of year, the holidays are upon us once again, and holiday music fills the room.
These days it's even more convenient, with voice assistants serving up holiday playlists like it's no big deal. Just ask, and you receive musics everywhere.
We have Amazon's Alexa cheerfully helping us out for all such things now: those things that used to require us actually getting up from the couch. It's very convenient. I wish she would also do the dishes and feed the cat. Maybe some day.
But there is a downside.
This is all fun and games until that one song comes on that you just cannot listen to, not even one more time, not even while soothing yourself with egg-nog and cookies.
You want to yell out "Alexa! NEXT!" to make it go to the next song, but you have your mouth full of egg-nog and cookies, so you can't.
Besides, even if, for some strange reason, against all odds, you happened to be between sips and bites, if you were to actually yell out to get Alexa to skip that song, there will surely be someone else in the house objecting to your decision and then they will likely force you to listen to that song on repeat as a punishment.
For this reason, I have built a very inconspicuous little button that lets you be very sneaky about skipping songs. No one will suspect a thing, and you can enjoy the holidays a little bit more this year.

At only about 4 inches (10 cm) across, this super secret button blends right in with the background, as you can see.
Trigger warning (if you're a voice assistant)
My videos include keywords that may upset your own Alexa, should you have one. This may cause unwanted musical behaviours. It might even... <gasp> skip your FAVOURITE song, and we don't want that.
You've been warned. Cover her ears.
Parts and "Circuit"
This project requires fewer electronic components than you might imagine. Everything is based on a DY-SV5W sound module that does all of the work. No microcontroller is required, and therefore there is also no need to program anything. For this reason there also really is no "circuit", other than hooking up a button and a speaker.

There are only a few things you need to add to make this module work:
- a speaker, which I salvaged from some random electronics years ago
- a micro-usb charger
- a micro-SD card to hold the sound file
- some wire. I used a verrrrryy long pair of wires from an old Cat3 ethernet cable.
- and a button to press when you want to play the sound.
You'll also need a computer to create the sound file and to write the sound file onto the SD card.
I used my iPhone to record myself telling Alexa to skip to the next song: "Alexa, Next", and then exported it and sent it to my Mac.
The sound module wants the sounds to have specific names, and in mp3 format. Since I only want it to play just one sound, I named it 00001.mp3, and I set the switches such that each pin correspond to a specific sound file, ie pin 0 = sound file 00001.mp3, pin 1 = sound file 00002.mp3, etc. This setting allows 8 sounds to be played.
For projects requiring more sound (or music) files, the switches can be set such that the pins respond to binary coded input, or to serial input - these cases generally would use a microcontroller to select the sounds.
Testing The Sound Module Setup
Or, more accurately... which pin am I supposed to be soldering this wire onto?
Before getting too deeply into the project, I wanted to make sure that the sound module would work the way I was hoping it would work, so I did some testing.
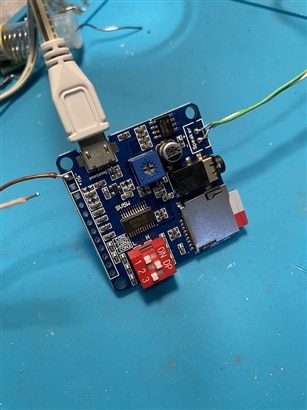
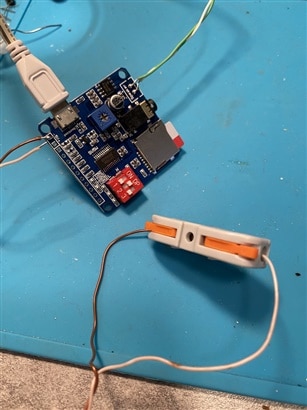
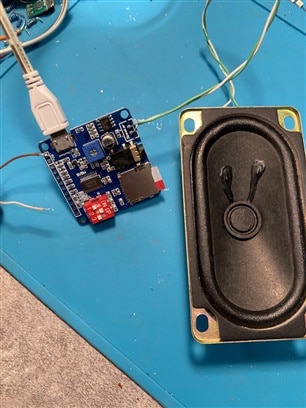
This sequence of pictures kind of shows what I did as my first test:
1. I soldered the speaker wires to the board (make sure to match the + and - of the board to the speaker) , and I soldered one wire to the gnd position.
2. On the other end of the twisted pair of wire I used an inline connector to temporarily connect them together. A handy feature of the wire being salvaged from an ethernet cable is that the wires are already neatly twisted together!
ps, that's a cheap connector I got from (the online equivalent of a dollar store) and I would not trust it for anything more than this sort of low-voltage non-critical use. (I use proper tested and certified Wago connectors for "real" uses).
3. check: SD card has the sound file on it and is inserted
4. Plug in the power adapter. Any cheap or leftover micro-usb charger should do the trick.
5. Touch the loose end of the wire onto pin-0, the one with the square outline. That should play sound 1. I wasn't sure if the sound file for pin-0 should be named 00000.mp3 or 00001.mp3. I suppose I could have just copied that same file to all 8 names and then soldered onto any of the first 8 pins
In my case, things went as planned, and it played the sound. Quite loudly enough too (I think that little screw-pot might adjust the volume, not sure).
Now that the sound part was working as expected, I soldered the other wire onto the pin for sound-1.
Button and Box
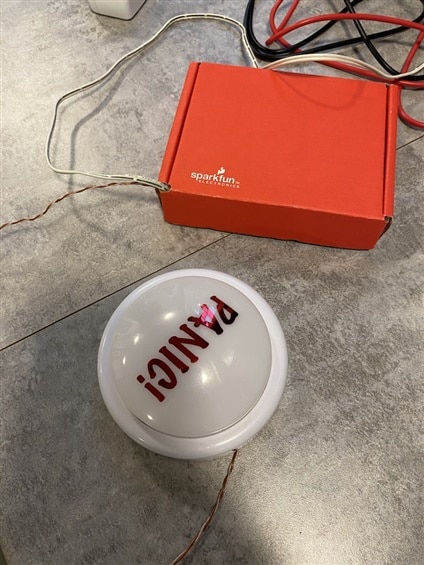
For the electronics to blend in with the surroundings (aka, Christmas decorations), I found this neat little red box from SparkFun that was just the right size, and the right colour.
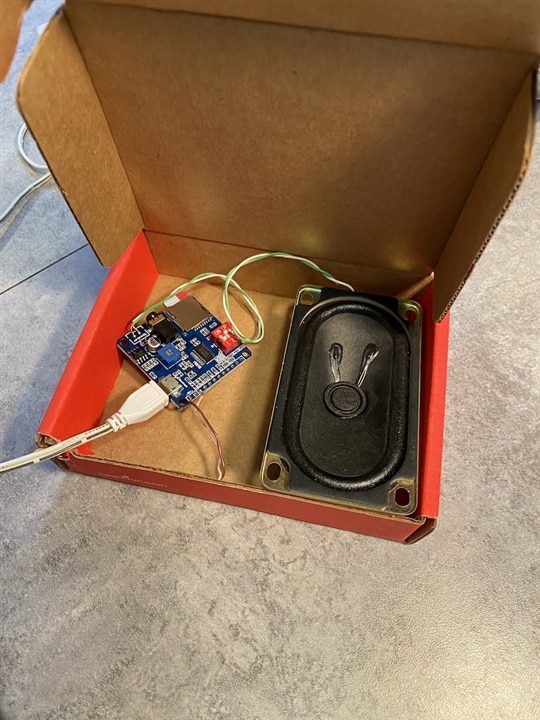
I didn't even bother to glue anything down, but you could use some double-sided foam sticky tape or hot glue. In my case things stayed in place well enough just the way it was.
For the button, I used a push-light that I got at the dollar store many years ago.
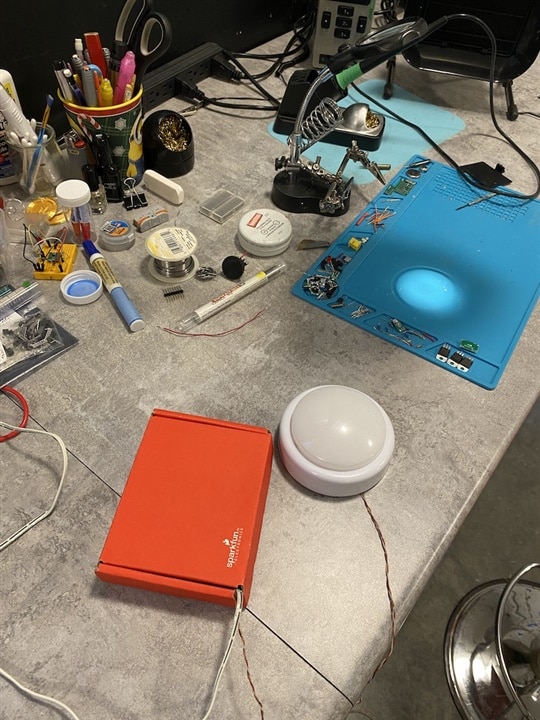
A rare glimpse of my "work" bench.
The above is what the button looked like before my brilliant modification that made it practically disappear amongst the usual Christmas decorations (more on that later)
Modifying the Button
The button I used was actually a push-light, powered by batteries. You push the dome of the light itself to turn the light on and off.
For my circuit to work, I needed a pushbutton that doesn't stay on - just a connect-disconnect with each push.
I was thinking of modifying the little on-off button inside, but found it much easier to just connect the ends of the wire near the button so they make temporary contact every time the button is pressed. I probably should have used hot-glue to hold it more securely, but amazingly enough it worked very reliably just the way I left it. Silly me, I didn't even think of using hot glue until just now - I tried using super-glue, which was so not super at all, and didn't even glue anything.
Maybe the button material is made of the same plastic that the super-glue cap is made out of
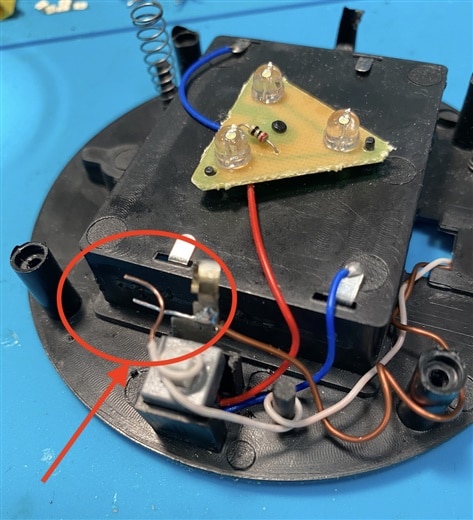
This picture shows how I placed the wires - they are just sort of held in place by looping them around existing button plastic posts. The contact behind the existing push-button actually uses a strip of spring metal from another battery box, remnants of my first approach - I thought I would need the extra area to make contact. But it does hold the wire very securely, with the metal strip pushed into the space beside the existing button.
Testing again... sometimes the easy hacky route actually works!
Cleverly Disguising the Button
My wife has a Cricut Maker machine for her art things, and it is actually quite handy for random techy projects too.
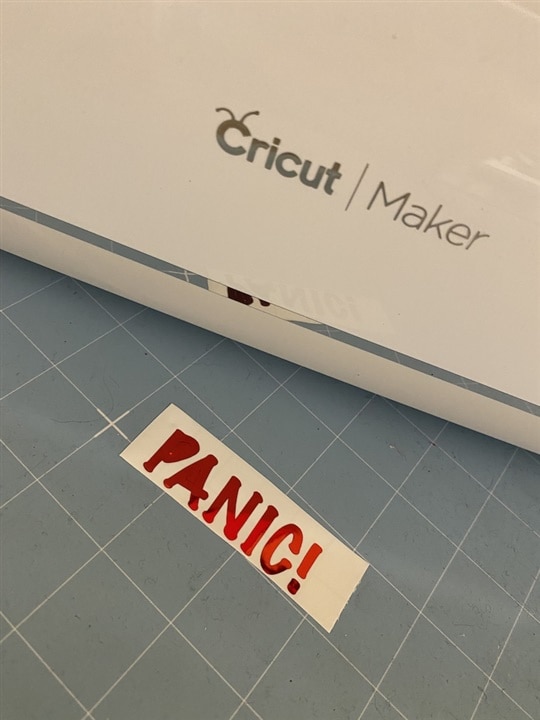
As you can see, I very cleverly used a shiny red vinyl to blend it seamlessly into the Christmassy surroundings. Looks exactly like a Christmas ornament.
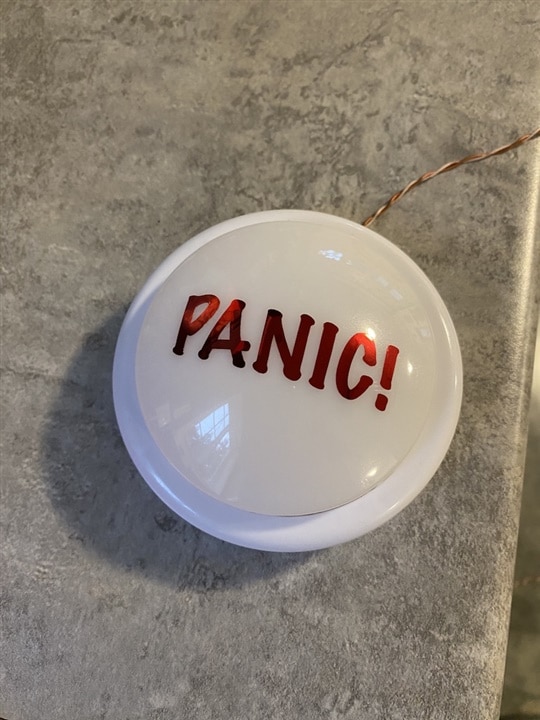
The only reason you can still see the button in this picture is because there are no seasonal decorations anywhere nearby.
Between the red box and the shiny decorations on the button, it should be easy to hide in the house now.
The Button In Action
Now all that was left to do was hide the button in the room where nobody would notice it. I placed the red box with the electronics near the Echo speaker so that Alexa could hear it, and then I ran the wires discreetly across the room. Not at all noticeable because the box is red and that's a Christmas colour.
And I'm sure nobody would notice the button in my hand because it is so small, and is cleverly disguised with Christmassy tinsely colours.
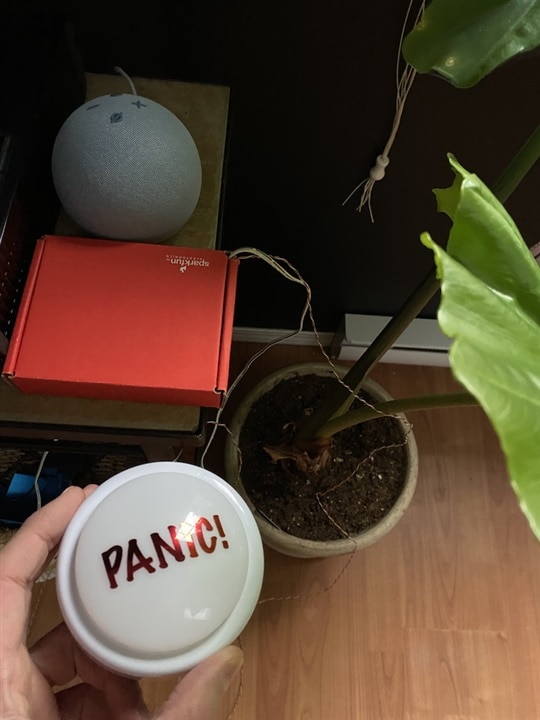
And here it is shown in action. It's actually quite surprising that Alexa could hear the sound through the box! I honestly thought I'd have to do a lot of tweaking to make that happen
As a bonus, you can also restart the music after stopping it, as shown here while I was testing the button. You can see Alexa lighting up to listen
Possible Upgrades and Modifications
If you want to be even more discreet with hiding the box, you might try adding a festive bow and some ribbons. I mean, it's nearly impossible to spot it as it is, but with some gift wrapping and a bow it will look just like a present. The danger then, of course, is that someone will move it under the tree. No problem - simply move the Alexa speaker into the tree, claiming that it's more festive to have the music coming out of the Christmas tree.
I suppose you could make the button wireless, but that requires effort, and where's the fun in that? I thought about using a set of Pi-Picos with NRF modules. Maybe that's another project.
Have multiple buttons with multiple Alexa commands! You can record any command the same way I did for the single "skip" command. Maybe there's a way to use an old gaming controller for that? Or a multi-button type of box? So you could have a magic button that specifically plays your favourite song! Or turns on the tree lights.
Happy Holidays to all!

