

Table of contents

Abstract
VIBE Coding for Capybara's Merry Chrismas
Project
1 Story of Capybara's Merry Chrismas
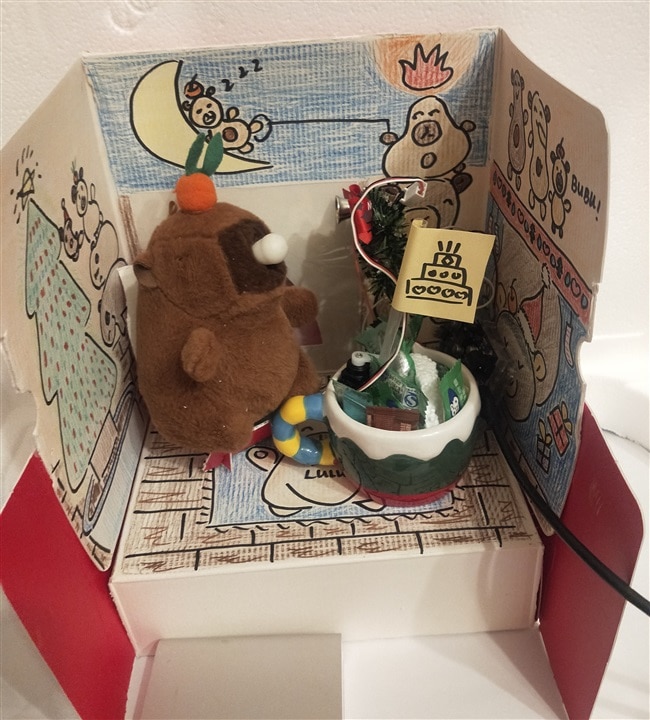
To pair this cozy capybara diorama with Arduino magic: This is a Capybara Christmas Micro-Diorama—Arduino powers twinkling LEDs on the tiny tree, a servo that wiggles the capybara’s carrot-topped head with a cake flag, and a buzzer that plays soft carols.
The kit (behind the mug) hides the microcontroller, wires, and battery, blending tech with hand-drawn charm for a whimsical holiday display.
2 Scenary and Themes
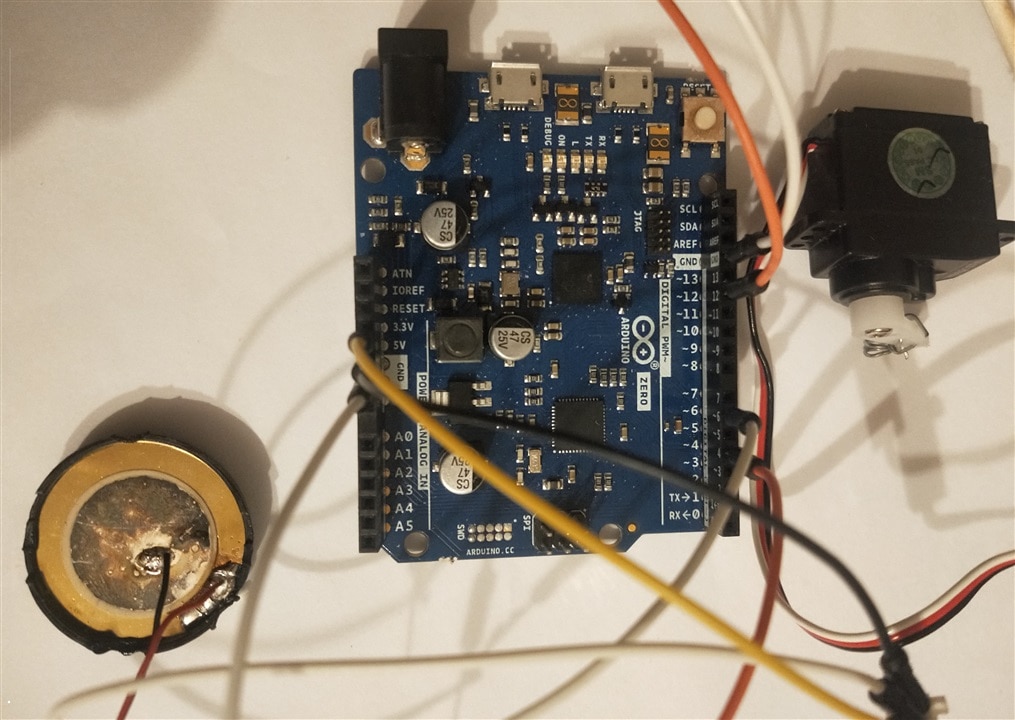
3 Hardware and wiring
3.1 LED (D12)
LED long pin (+ / anode) → Arduino D12 pin
LED short pin (- / cathode) → Arduino GND pin
better add a 220Ω current-limiting resistor in series (protect LED from burnout)
3.2 Servo Motor (D6)
Standard 3-wire servo (SG90 recommended, 9g micro servo):
Brown wire (GND) → Arduino GND
Red wire (VCC/5V) → Arduino 5V pin
Orange/Yellow wire (Signal) → Arduino D6 pin (PWM pin)
3.3 Active Buzzer (D4)
Buzzer + pin → Arduino D4 pin
Buzzer - pin → Arduino GND pin
3.4 Arduino zero board
4 VIDE Coding
4.1 VIDE Coding
According to VibeCode - Coding with Rhythm and Flow,
VIBE coding shall unlock the future of programming ,an innovative approach blending intuition, creativity, and flow state with traditional coding techniques. There may be miles way to going, I try with AI coding assisant on one of LLaM model
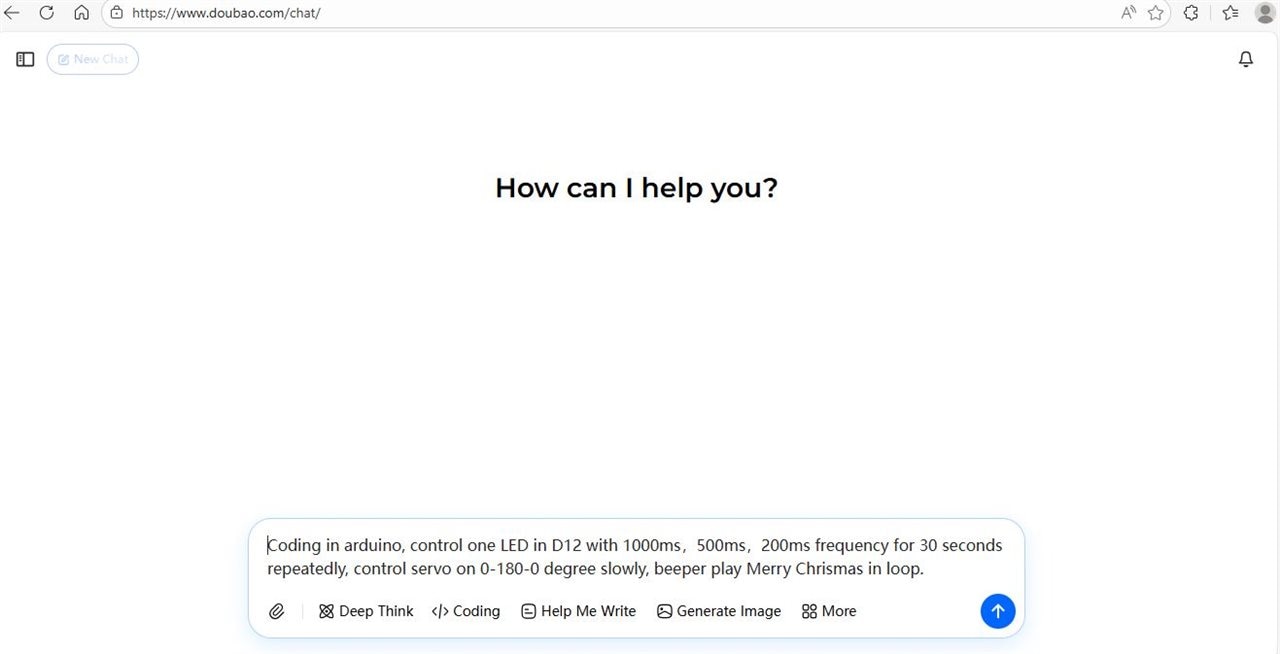
I prepare what I want as
Coding in arduino, control one LED in D12 with 1000ms,500ms,200ms frequency for 30 seconds repeatedly, control servo on 0-180-0 degree slowly, beeper play Merry Chrismas in loop.
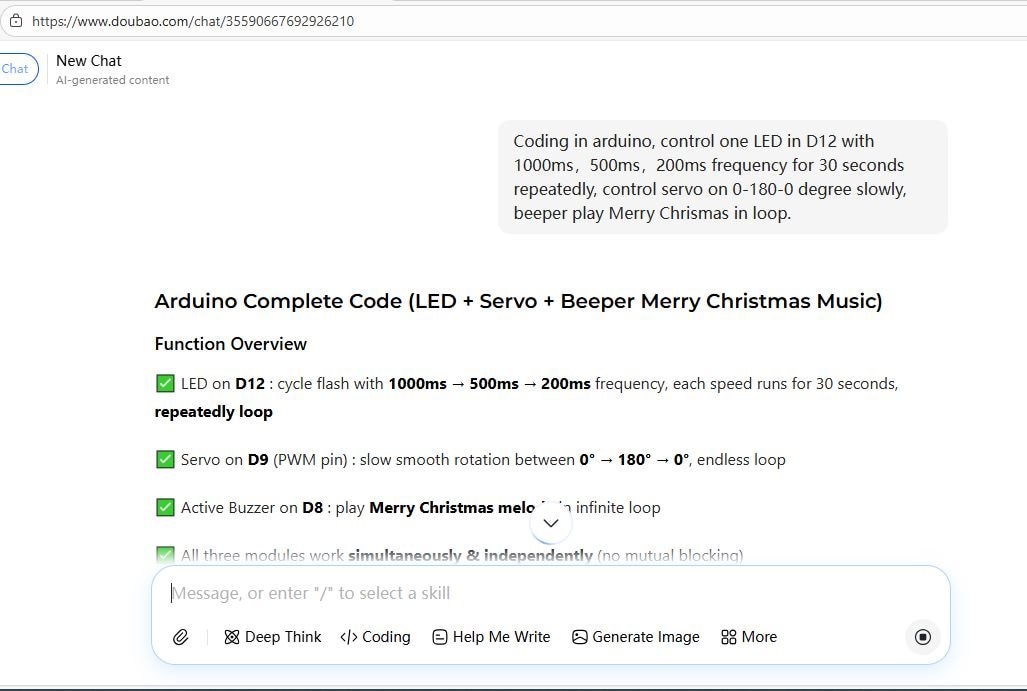
Then the screen pop up paragraph by paragraph, explain how the LLaM understand my prompt step by step and bring about arduino code.
#include <Servo.h>

// Pin Definition
#define LED_PIN     12  // LED connect to digital pin 12
#define SERVO_PIN   9   // Servo connect to PWM pin 9 (Must PWM pin for servo)
#define BUZZER_PIN  8   // Active buzzer connect to digital pin 8

// Global Variable
Servo myServo;
unsigned long ledStartTime = 0;
unsigned long servoLastMove = 0;
const int servoMoveInterval = 20;  // Servo move speed (ms) → smaller = faster, bigger = slower
int servoAngle = 0;
int servoDir = 1;                  // Servo rotation direction: 1=clockwise, -1=counterclockwise
const long phaseDuration = 30000;   // Each LED flash frequency lasts 30 seconds (30000ms)

// Merry Christmas Melody Notes & Rhythm (frequency + duration)
// Notes: 0 = silence, C4=262, D4=294, E4=330, F4=349, G4=392, A4=440, A#4=466, B4=494, C5=523, D5=587
int melody[] = {
  392,392,440,392,523,494, 0,
  392,392,440,392,587,523, 0,
  392,392,784,659,523,494,440, 0,
  659,659,659,523,587,523
};
// Note duration (ms) → smaller = faster play
int noteDurations[] = {
  250,250,500,500,500,1000,200,
  250,250,500,500,500,1000,200,
  250,250,500,500,500,500,1000,200,
  500,500,500,500,500,1000
};

void setup() {
  pinMode(LED_PIN, OUTPUT);
  pinMode(BUZZER_PIN, OUTPUT);
  myServo.attach(SERVO_PIN);  // Initialize servo
  myServo.write(0);           // Servo start at 0°
  digitalWrite(LED_PIN, LOW); // LED start off
}

void loop() {
  controlLED();   // Run LED flash logic
  controlServo(); // Run slow servo rotation logic
  playChristmas();// Play Merry Christmas music in loop
}

// ✅ LED Control Function: 1000ms →500ms→200ms flash, each 30s, repeat
void controlLED() {
  unsigned long currentMillis = millis();
  // Calculate total running time and determine current LED phase
  unsigned long totalElapsed = currentMillis - ledStartTime;
  int phase = (totalElapsed / phaseDuration) % 3; // 0=1000ms,1=500ms,2=200ms

  unsigned long flashInterval;
  if(phase == 0) flashInterval = 1000;  // 1s flash frequency
  else if(phase ==1) flashInterval=500; // 0.5s flash frequency
  else flashInterval=200;               // 0.2s flash frequency

  // Non-blocking LED flash (no delay() used)
  static unsigned long lastLedFlash = 0;
  if(currentMillis - lastLedFlash >= flashInterval){
    lastLedFlash = currentMillis;
    digitalWrite(LED_PIN, !digitalRead(LED_PIN)); // Toggle LED on/off
  }
}

// ✅ Servo Control Function: Slow smooth 0°→180°→0°→180° infinite rotation
void controlServo() {
  unsigned long currentMillis = millis();
  if(currentMillis - servoLastMove >= servoMoveInterval){
    servoLastMove = currentMillis;
    servoAngle += servoDir; // Move servo by 1° each interval

    // Reverse direction when reach limit angle
    if(servoAngle >= 180){
      servoAngle = 180;
      servoDir = -1;
    }
    if(servoAngle <= 0){
      servoAngle =0;
      servoDir =1;
    }
    myServo.write(servoAngle); // Update servo angle
  }
}

// ✅ Buzzer Function: Play Merry Christmas melody in infinite loop
void playChristmas() {
  static int noteIndex = 0;
  static unsigned long noteStartTime = 0;
  unsigned long currentMillis = millis();

  int noteDuration = noteDurations[noteIndex];
  int noteFreq = melody[noteIndex];

  // Play current note
  if(currentMillis - noteStartTime < noteDuration){
    if(noteFreq !=0){
      tone(BUZZER_PIN, noteFreq); // Play tone with target frequency
    }else{
      noTone(BUZZER_PIN);         // Silence when note=0
    }
  }else{
    // Move to next note after current note finish
    noTone(BUZZER_PIN);
    noteStartTime = currentMillis;
    noteIndex++;
    // Loop the melody when play to the end
    if(noteIndex >= sizeof(melody)/sizeof(melody[0])){
      noteIndex = 0;
    }
  }
}
4.2 Software and logic
4.2.1 No delay() function at all, and all logic uses millis() non-blocking timing, so the LED, servo, and buzzer run perfectly parallel—none of them will block each other. This is the best practice for Arduino multi-task control.
4.2.2 LED Flash Logic Detail
Phase 0: Flash with 1000ms interval (1Hz) → ON 1s, OFF 1s → run 30 seconds
Phase 1: Flash with 500ms interval (2Hz) → ON 0.5s, OFF 0.5s → run 30 seconds
Phase 2: Flash with 200ms interval (5Hz) → ON 0.2s, OFF 0.2s → run 30 seconds
After phase 2 → back to phase 0, infinite repeat
4.2.3 Servo Slow Rotation Adjustment
Modify the value of servoMoveInterval = 20 (unit: ms)
→ Bigger number (e.g.30): slower rotation (recommended)
→ Smaller number (e.g.10): faster rotation
4.2.4 Merry Christmas Melody
The melody is the classic Christmas tune (Jingle Bells core melody)
The music will play in an infinite loop and never stop
No conflict with LED/servo because it uses non-blocking playback
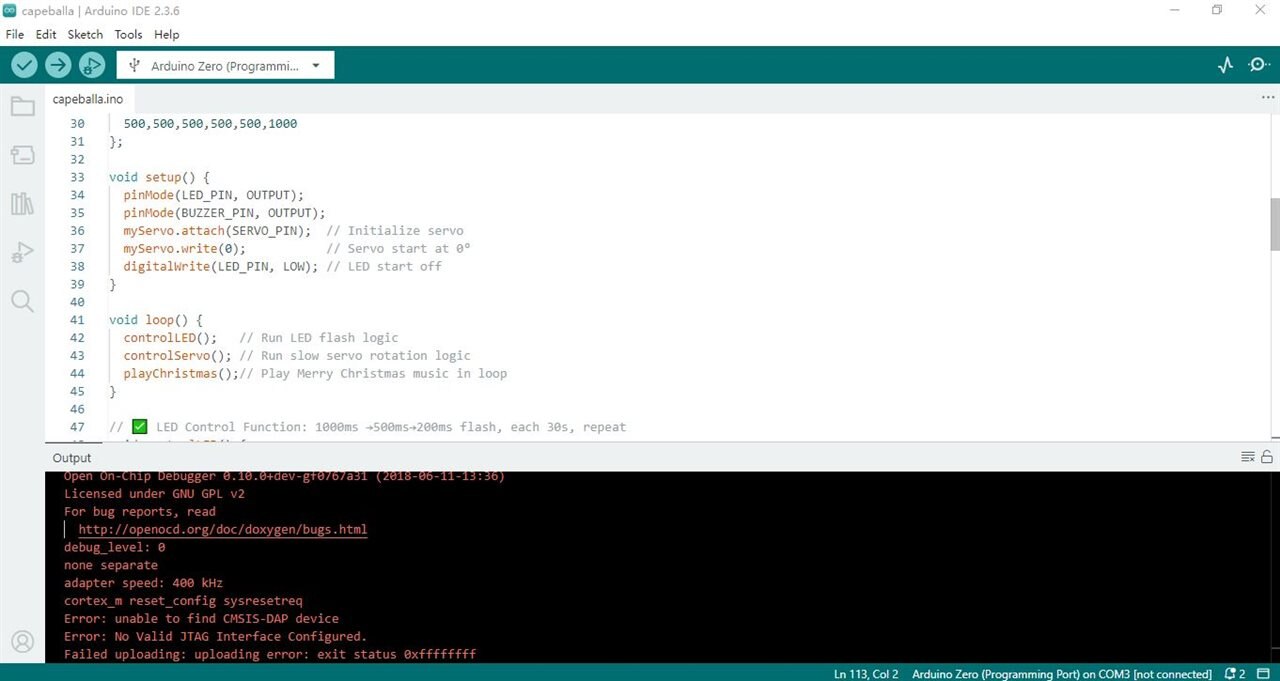
4.3 Paste the code in Arduino IDE and compile and upload
Copy the full code to Arduino IDE
Select your Arduino Zero board and correct COM port (COM3 in this case)
Upload the code
Connect all hardware according to the wiring guide
Power the Arduino → All functions work immediately!
Yes, indeed, now errors
5 Images and Video
5.1 Here is where Capybara lives,


5.2 Capybara play at daytime and night happily
6 Summary
This project is for fun and happy. Willing to share happyness to all and not to make it difficult and complex.
Most of the time , fictioning the story, doing hand-craft and drawing with crayan on cardboard. Allow little time on codeing.
I have spent most of the time last year on edge AI and AI LLaMs. It comes to me that, the traditional norm of coding is shattering. Like it or not, I have to adopt to it.
For this project, AI coding brings more fun and relief people from some hard tasks. I am good at Arduino Coding and realy like it. But if I can prepare lucent codes just with simple prompt, why not.
I have done with AI coding for some complex design. there are errors again and again, coding skill is needed. Any way, it is good with AI coding.
Strictly, this project is not VIBE coding, just AI coding. Anyway, VIBE coding is just new phrase, let us expect more magic in the coming new years.
Happy new years for all.
Cheers.