element14 Community
element14 Community
    Register Log In
  • Site
  • Search
  • Log In Register
  • Community Hub
    Community Hub
    • What's New on element14
    • Feedback and Support
    • Benefits of Membership
    • Personal Blogs
    • Members Area
    • Achievement Levels
  • Learn
    Learn
    • Ask an Expert
    • eBooks
    • element14 presents
    • Learning Center
    • Tech Spotlight
    • STEM Academy
    • Webinars, Training and Events
    • Learning Groups
  • Technologies
    Technologies
    • 3D Printing
    • FPGA
    • Industrial Automation
    • Internet of Things
    • Power & Energy
    • Sensors
    • Technology Groups
  • Challenges & Projects
    Challenges & Projects
    • Design Challenges
    • element14 presents Projects
    • Project14
    • Arduino Projects
    • Raspberry Pi Projects
    • Project Groups
  • Products
    Products
    • Arduino
    • Avnet & Tria Boards Community
    • Dev Tools
    • Manufacturers
    • Multicomp Pro
    • Product Groups
    • Raspberry Pi
    • RoadTests & Reviews
  • About Us
    About the element14 Community
  • Store
    Store
    • Visit Your Store
    • Choose another store...
      • Europe
      •  Austria (German)
      •  Belgium (Dutch, French)
      •  Bulgaria (Bulgarian)
      •  Czech Republic (Czech)
      •  Denmark (Danish)
      •  Estonia (Estonian)
      •  Finland (Finnish)
      •  France (French)
      •  Germany (German)
      •  Hungary (Hungarian)
      •  Ireland
      •  Israel
      •  Italy (Italian)
      •  Latvia (Latvian)
      •  
      •  Lithuania (Lithuanian)
      •  Netherlands (Dutch)
      •  Norway (Norwegian)
      •  Poland (Polish)
      •  Portugal (Portuguese)
      •  Romania (Romanian)
      •  Russia (Russian)
      •  Slovakia (Slovak)
      •  Slovenia (Slovenian)
      •  Spain (Spanish)
      •  Sweden (Swedish)
      •  Switzerland(German, French)
      •  Turkey (Turkish)
      •  United Kingdom
      • Asia Pacific
      •  Australia
      •  China
      •  Hong Kong
      •  India
      •  Japan
      •  Korea (Korean)
      •  Malaysia
      •  New Zealand
      •  Philippines
      •  Singapore
      •  Taiwan
      •  Thailand (Thai)
      •  Vietnam
      • Americas
      •  Brazil (Portuguese)
      •  Canada
      •  Mexico (Spanish)
      •  United States
      Can't find the country/region you're looking for? Visit our export site or find a local distributor.
  • Translate
  • Profile
  • Settings
Personal Blogs
  • Community Hub
  • More
Personal Blogs
Nico teWinkel's Blog Trying out the samples
  • Blog
  • Documents
  • Mentions
  • Sub-Groups
  • Tags
  • More
  • Cancel
  • New
  • Share
  • More
  • Cancel
Group Actions
  • Group RSS
  • More
  • Cancel
Engagement
  • Author Author: ntewinkel
  • Date Created: 18 Feb 2013 6:30 AM Date Created
  • Views 905 views
  • Likes 2 likes
  • Comments 11 comments
  • stedvavc
  • stm32f4-discovery
  • mac_os_x
  • ewarm
  • discover-mo:)
  • display
Related
Recommended

Trying out the samples

ntewinkel
ntewinkel
18 Feb 2013

This is really neat!


The samples are really well done and compile easily, and that makes me happy! image


I followed the user manual that came with the add-on boards: "DM-STF4BB User Manual".


The first thing I did was to hook up the display. That was very easy. The display comes with the ribbon cable and just plugs straight onto the base board.

The only thing to keep in mind is that the docs don't mention how to hook up the cable. From my way-back days I remembered red=pin1, and the connectors on both boards are marked with a little triangle - just make sure the red line is closest to the triangles on both sides.


I haven't tried the touch part yet, but this is a picture of it running the display demo:
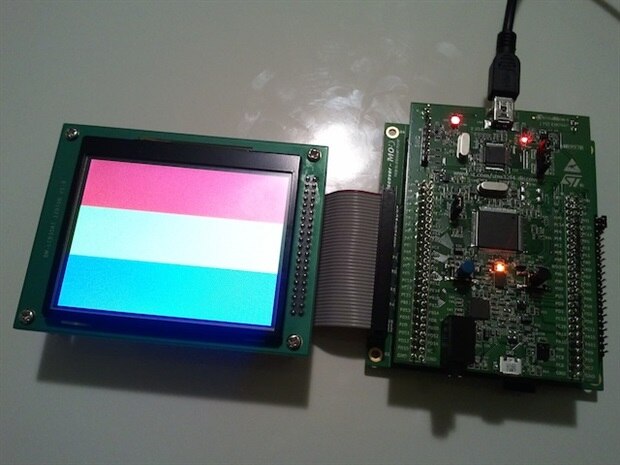
image

That went so well I thought I'd try the camera next!

I hooked up the little thin cable that comes with it, making sure that the triangles match up as before.

But oh no! what's this??
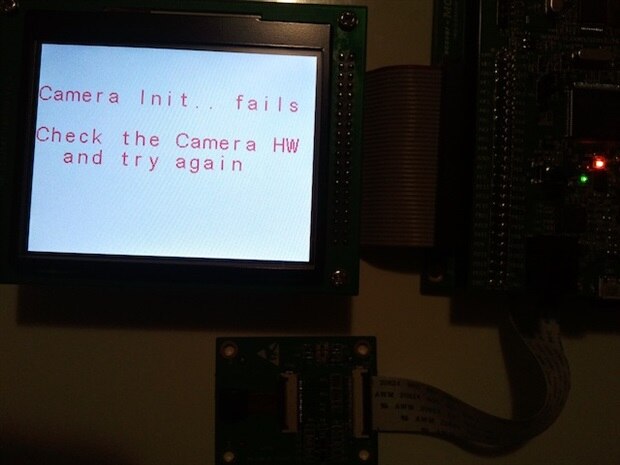
image

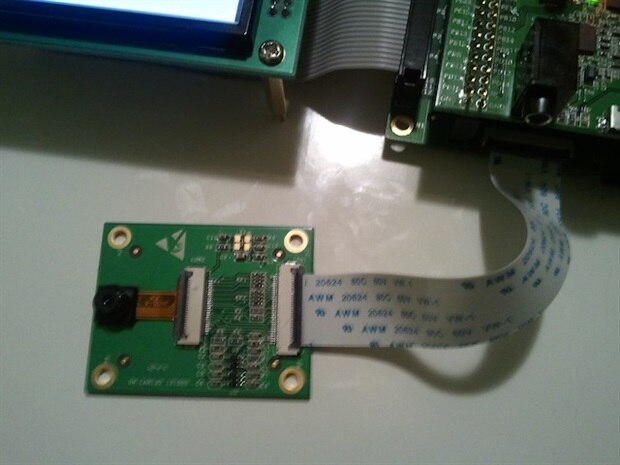
Turns out that I had the connector cable upside-down. The shiny bits of the connecting ends need to be towards the board. That's something the docs could use a tweak on too, methinks. Maybe a picture. I like pictures image

So this is the wrong way:

image

The other thing that was unclear was that the docs said to make sure JP1 and JP2 are not fitted. They meant JP1 and JP2 on the base board, not on the main STM32F4 board... oops.


And here is the camera working! The display shows what the camera sees image
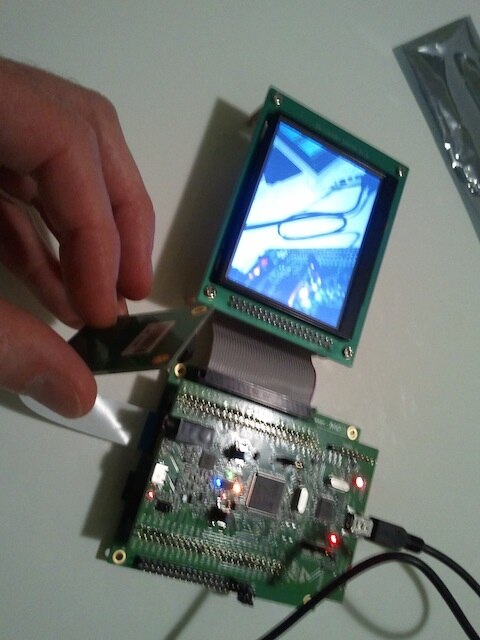
image

Apparently it's supposed to take a picture and store it to the SD card when the blue button is pressed, but for me it seemed to hang. I'm not sure if that's because it's slow to write to the card, or if my Lexar card is not compatible. I'll have to run some SD card samples some time soon.

  • Sign in to reply

Top Comments

  • shabaz
    shabaz over 13 years ago +1
    It looks like a nice kit. I'm tempted. I've never used ST products (the programmer is £50+VAT, which on it's own is not huge, but is a lot of money if I buy programmers for each manufacturer (so I tend…
  • jealderson1
    jealderson1 over 13 years ago +1
    Hi Nico, Glad you're getting to grips with it! We'll take your feedback on-board about the instructions to make them clearer
  • ntewinkel
    ntewinkel over 13 years ago in reply to e14 Contributor

    Hi Austin,


    The only thing I can suggest is to make sure that the ribbon cable is on correctly, as the docs don't mention anything about which way it goes. Basically, put the red line near the little printed triangle that are beside the connectors. In my case I have the red line of the ribbon closest to the printed "con3" on the base board (it hooks up to con3, as per the guide), and on the LCD the red line is closest to c16.


    I suppose it could also be something silly like having something not plugged in properly, which often gets me in trouble, like these:

    * for the connection of base board to the STM board, make sure none of the pins overlap the edge of the connectors, as it looks like they could possibly be connected slightly off.

    * I guess it's possible to have the base board connected backwards - I have the usb connection of the STM board above the serial port of the base board (and the headphone plug is above the camera connector and SD card) -  basically the STM board sits perfectly lined up above the base boards (no overhangs).


    I don't recall there being any other settings or jumpers to worry about.


    ps, the sample I used is LCD_35T


    Good luck, and let me know if that helps!


    Cheers,

    -Nico

    • Cancel
    • Vote Up 0 Vote Down
    • Sign in to reply
    • More
    • Cancel
  • e14 Contributor
    e14 Contributor over 13 years ago

    Hey Nico,


    Did you have any problems hooking this up and putting the demo on the board? i've been dealing with the STM32DISCOVERY for quite a while now but for some reason I cant get this thing to work... I have the LCD base board and discovery board all hooked up. I downloaded IAR embedded IDE and loaded the sample code but for some reason my LCD just stays blank. I noticed the blue and red LED's blink once or twice really quick at the beginning but nothing else happens.... Do you have any Idea what could be wrong?


    Thanks,

    Austin

    • Cancel
    • Vote Up 0 Vote Down
    • Sign in to reply
    • More
    • Cancel
  • ntewinkel
    ntewinkel over 13 years ago in reply to jealderson1

    Thanks Joe,


    Once I got through the tools install part the rest went very smoothly.

    I really think the biggest hurdle was because I'm on a Mac - on a straight Windows machine that would have likely been super quick.

    As far as I know, Arduino is the only one that runs on Mac (and I agree it's very limited in what it can do -tuned for hobby) - all the other dev boards seem to also need Windows.

    I think once I upgrade to a newer Macbook I might turn this one into my Windows machine dedicated to this sort of stuff image


    Keep in mind that I'm approaching this from a purely hobbyist perspective, so I may not be the usual audience. (I'm a software developer by day, tinkerer by night)

    • Cancel
    • Vote Up 0 Vote Down
    • Sign in to reply
    • More
    • Cancel
  • ntewinkel
    ntewinkel over 13 years ago in reply to shabaz

    @shabaz, I totally agree - for me this is all hobby (at the moment anyway), so I want something quick and easy that doesn't require me to buy a lot of extra tools.


    But on that note, as a hobbyist this kit gives me everything I need, as I will be using the board as-is rather than building my own.

    • Cancel
    • Vote Up 0 Vote Down
    • Sign in to reply
    • More
    • Cancel
  • jealderson1
    jealderson1 over 13 years ago

    Hi Nico,


    Glad you're getting to grips with it! We'll take your feedback on-board about the instructions to make them clearer image

    • Cancel
    • Vote Up +1 Vote Down
    • Sign in to reply
    • More
    • Cancel
<>
element14 Community

element14 is the first online community specifically for engineers. Connect with your peers and get expert answers to your questions.

  • Members
  • Learn
  • Technologies
  • Challenges & Projects
  • Products
  • Store
  • About Us
  • Feedback & Support
  • FAQs
  • Terms of Use
  • Privacy Policy
  • Legal and Copyright Notices
  • Sitemap
  • Cookies

An Avnet Company © 2026 Premier Farnell Limited. All Rights Reserved.

Premier Farnell Ltd, registered in England and Wales (no 00876412), registered office: Farnell House, Forge Lane, Leeds LS12 2NE.

Follow element14

  • X
  • Facebook
  • linkedin
  • YouTube