element14 Community
element14 Community
    Register Log In
  • Site
  • Search
  • Log In Register
  • Community Hub
    Community Hub
    • What's New on element14
    • Feedback and Support
    • Benefits of Membership
    • Personal Blogs
    • Members Area
    • Achievement Levels
  • Learn
    Learn
    • Ask an Expert
    • eBooks
    • element14 presents
    • Learning Center
    • Tech Spotlight
    • STEM Academy
    • Webinars, Training and Events
    • Learning Groups
  • Technologies
    Technologies
    • 3D Printing
    • FPGA
    • Industrial Automation
    • Internet of Things
    • Power & Energy
    • Sensors
    • Technology Groups
  • Challenges & Projects
    Challenges & Projects
    • Design Challenges
    • element14 presents Projects
    • Project14
    • Arduino Projects
    • Raspberry Pi Projects
    • Project Groups
  • Products
    Products
    • Arduino
    • Avnet & Tria Boards Community
    • Dev Tools
    • Manufacturers
    • Multicomp Pro
    • Product Groups
    • Raspberry Pi
    • RoadTests & Reviews
  • About Us
    About the element14 Community
  • Store
    Store
    • Visit Your Store
    • Choose another store...
      • Europe
      •  Austria (German)
      •  Belgium (Dutch, French)
      •  Bulgaria (Bulgarian)
      •  Czech Republic (Czech)
      •  Denmark (Danish)
      •  Estonia (Estonian)
      •  Finland (Finnish)
      •  France (French)
      •  Germany (German)
      •  Hungary (Hungarian)
      •  Ireland
      •  Israel
      •  Italy (Italian)
      •  Latvia (Latvian)
      •  
      •  Lithuania (Lithuanian)
      •  Netherlands (Dutch)
      •  Norway (Norwegian)
      •  Poland (Polish)
      •  Portugal (Portuguese)
      •  Romania (Romanian)
      •  Russia (Russian)
      •  Slovakia (Slovak)
      •  Slovenia (Slovenian)
      •  Spain (Spanish)
      •  Sweden (Swedish)
      •  Switzerland(German, French)
      •  Turkey (Turkish)
      •  United Kingdom
      • Asia Pacific
      •  Australia
      •  China
      •  Hong Kong
      •  India
      •  Japan
      •  Korea (Korean)
      •  Malaysia
      •  New Zealand
      •  Philippines
      •  Singapore
      •  Taiwan
      •  Thailand (Thai)
      •  Vietnam
      • Americas
      •  Brazil (Portuguese)
      •  Canada
      •  Mexico (Spanish)
      •  United States
      Can't find the country/region you're looking for? Visit our export site or find a local distributor.
  • Translate
  • Profile
  • Settings
Raspberry Pi Projects
  • Products
  • Raspberry Pi
  • Raspberry Pi Projects
  • More
  • Cancel
Raspberry Pi Projects
Blog PIK3A Retro Gaming Table Mk II
  • Blog
  • Documents
  • Events
  • Polls
  • Members
  • Mentions
  • Sub-Groups
  • Tags
  • More
  • Cancel
  • New
Join Raspberry Pi Projects to participate - click to join for free!
  • Share
  • More
  • Cancel
Group Actions
  • Group RSS
  • More
  • Cancel
Engagement
  • Author Author: spannerspencer
  • Date Created: 22 Mar 2016 10:45 AM Date Created
  • Views 18275 views
  • Likes 12 likes
  • Comments 44 comments
  • retro gaming
  • rpibeginner
  • retro
  • pi3
  • pik3a
  • raspberry pi
  • raspberry_pi_projects
Related
Recommended

PIK3A Retro Gaming Table Mk II

spannerspencer
spannerspencer
22 Mar 2016

I'm not a fan of Ikea. In fact, it's a place I usually try to avoid, until I discovered that you can hack it's ultra-cheap tables into retro video game systems! You know the one I mean: PIK3A: The Raspberry Pi 3 IKEA Retro Gaming Table.


You guys have been busy making your own versions, which I'm thrilled to be reading about. Keep those photos and top tips coming.


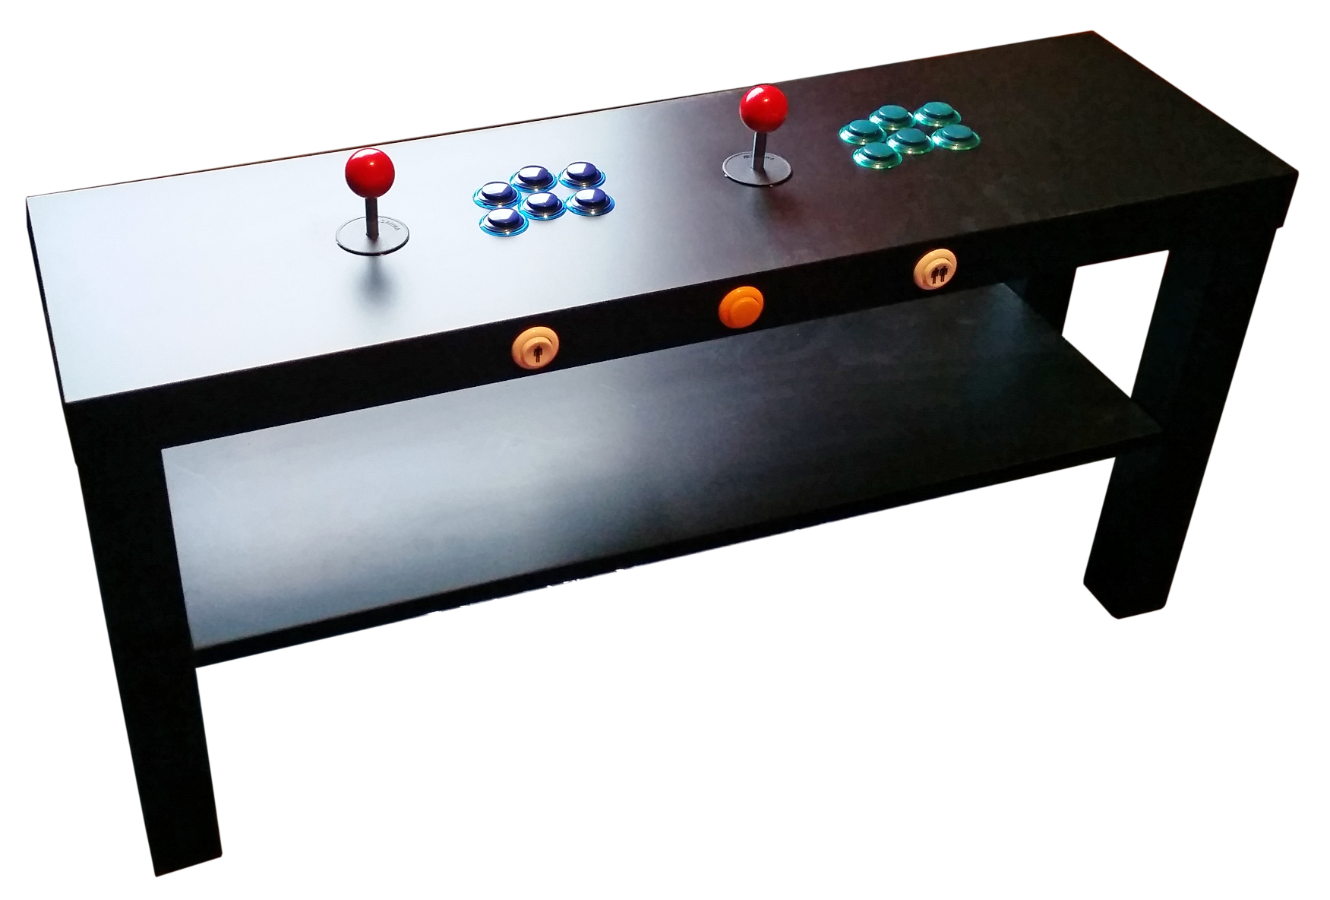
But in the meantime, meet PIK3A Mark II.
image

Hackin' the LACK

This is, in many respects, the same build as the PIK3A Mk I. The idea came about when I initially bought the square LACK tables that we mounted a monitor in, and added controls to. I was casually keeping an eye out for a table that'd accommodate two players, with six buttons each. You know. A Street Fighter II machine!image


There were definitely options, but the table size makes them prohibitively intrusive for the average living room. So I needed a way to reduce it, while maintaining the full control set.


The answer presented itself in the LACK TV stand; a narrow, 90cm by 26cm table that boasts a shelf and a table top deep enough to accept the joysticks and buttons. By dispensing with the monitor and going straight into the TV, the unit is easily accommodated in your average (well, as average as us element14 types ever really are) front room.


There isn't much to explain about the build that isn't already covered in the PIK3A Mk I. I cut two access holes in the bottom so I could get to the joystick and buttons for each player, and drilled start and coin buttons into the edge as before.
image

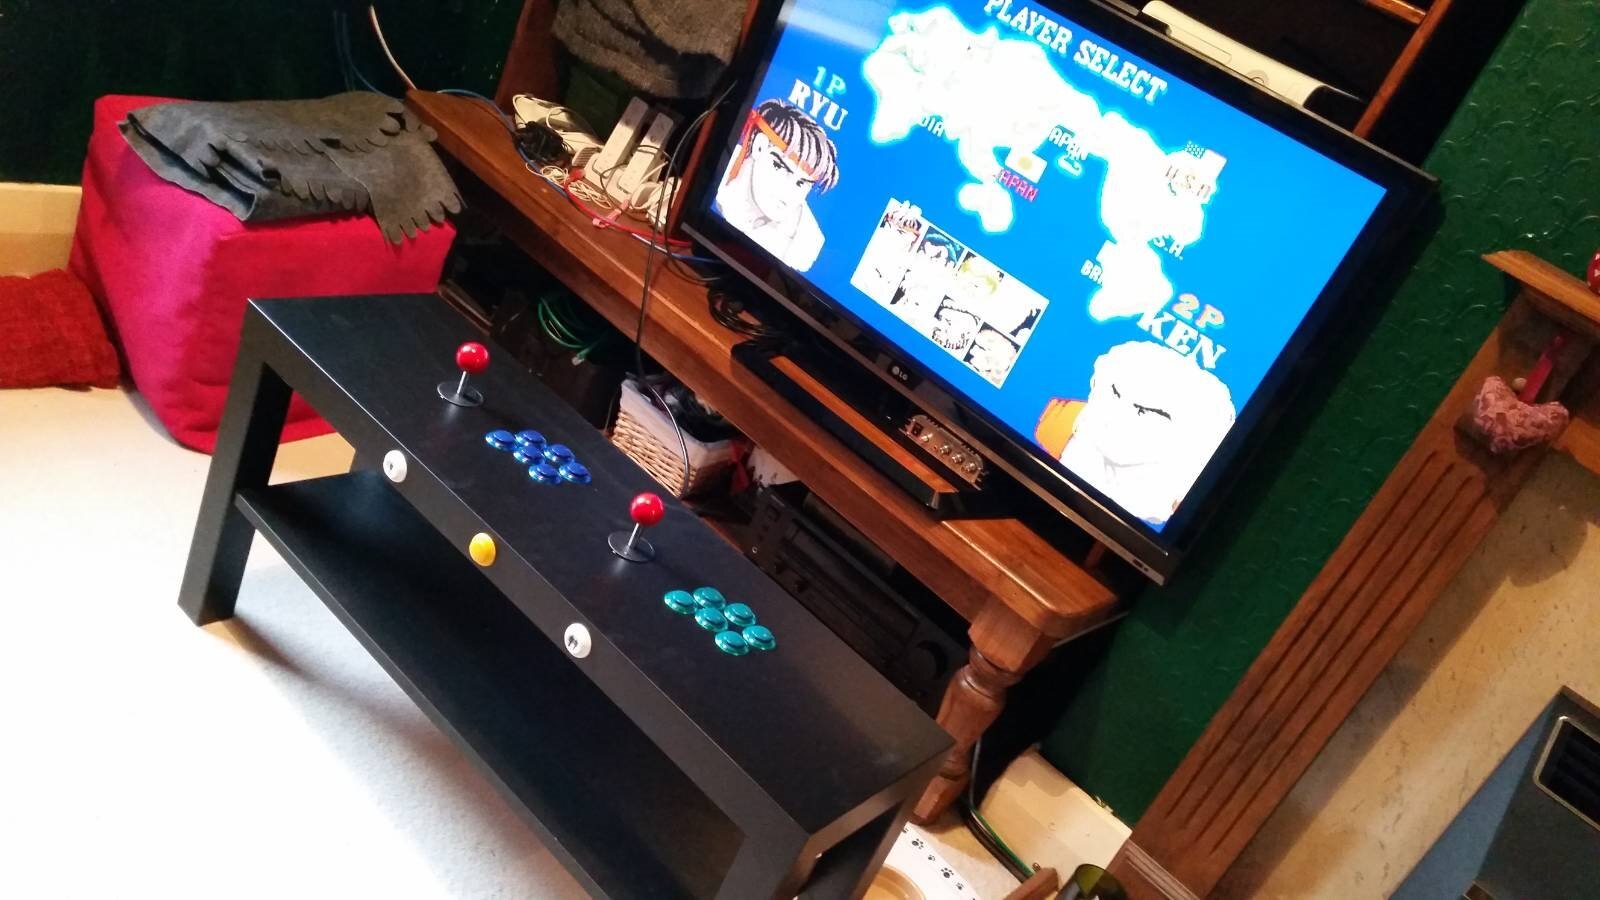
I kept the Raspberry Pi 3 external, mounting it in a case underneath the table top, in the centre. It's still nicely hidden, and there's only a short length of USB cable from the controls into the RPi. The benefits of this are that you don't need any extensions or panel mount connectors for the micro USB input or HDMI output. It also makes it easy to get to the SD card, should you need to.


There's no need for any acrylic or polycarbonate sheeting over the top either, given that there's no screen, making this a quick, simple yet highly effective variation on the PIK3A.


That said, one nice tweak might be coming up with a way to eliminate the HDMI cable and send the video to the TV wirelessly. Any thoughts on that?

You don't have permission to edit metadata of this video.
Edit media
x
image
Upload Preview
image

  • Sign in to reply

Top Comments

  • bwelsby
    bwelsby over 10 years ago in reply to shabaz +2
    Hm yes 12 inputs may not be enough, how about another hack... as in hack a genuine bluetooth keyboard
  • e14 Contributor
    e14 Contributor over 10 years ago +2
    You can hack a LG an-wl100 to wireless transmit HDMI and you can buy them for around 15 bucks on eBay. Directions for hacking Hacking the LG Wireless Media Kit AN-WL100W . Not a compact solution but it…
  • ipv1
    ipv1 over 10 years ago +1
    Awesome man!
  • e14 Contributor
    e14 Contributor over 10 years ago

    Hey, I actually did something similar when I built my conversion arcade cabinet and yes the interface to any computer is the hard part. However, I would try these:Zero Delay Arcade Controller USB PS2 PS3 PC Xbox360 Fighting Stick for Sanwa | eBay. This is a fully supported controller board by Windows, Mac, Android and Linux but also plugs into the PS3 as well as a PS2. The Xbox 360 functionality is for Windows compatibility only and does not work with an actual 360. This would give you more versatility in the table because you could connect it to an existing HTPC (If you still use one) and any other gaming consoles you might have.

    My build required some special components like this:PlayStation 2 Converter PS2 Controller on GameCube | eBay so that I could support more consoles so you might want to think about that as well. Current my four player 8 button setup works with Android, Windows, Mac, PC, Linux, OG XBox, PS1, PS2, PS3, GameCube and Wii. With homebrew what it is on the Wii, I barely have to use the PC because I can get so many classic games through that connection.

    Also, there is no lag even when I use the controller converters and it is a must if you love fighting games on the PS3.

    • Cancel
    • Vote Up +1 Vote Down
    • Sign in to reply
    • More
    • Cancel
  • e14 Contributor
    e14 Contributor over 10 years ago

    You can hack a LG an-wl100 to wireless transmit HDMI and you can buy them for around 15 bucks on eBay.

    Directions for hacking Hacking the LG Wireless Media Kit AN-WL100W .  Not a compact solution but it works.

    • Cancel
    • Vote Up +2 Vote Down
    • Sign in to reply
    • More
    • Cancel
  • hankchad
    hankchad over 10 years ago in reply to spannerspencer

    I will definitely be building one of these as my first attempt at a home arcade. I'd also like to know how you get on sending the video to a tv wirelessly as I'd like to use a projector that is ceiling mounted.

    • Cancel
    • Vote Up +1 Vote Down
    • Sign in to reply
    • More
    • Cancel
  • jkutzsch
    jkutzsch over 10 years ago

    Vey cool implementation.  Having came into "adulthood" dring the late 80s I still hold the stand up arcade systems in my heart, but I definitely appreciate the space saving and simplicity design here.  Great job and I look forward to seeing how you fine tune it more.  Seems once ideas start coming it is hard to just leave a good project be.  :-)

    • Cancel
    • Vote Up 0 Vote Down
    • Sign in to reply
    • More
    • Cancel
  • cbehrent
    cbehrent over 10 years ago

    Any more pictures of the controller cabling on the underside of the table?

    • Cancel
    • Vote Up 0 Vote Down
    • Sign in to reply
    • More
    • Cancel
<>
element14 Community

element14 is the first online community specifically for engineers. Connect with your peers and get expert answers to your questions.

  • Members
  • Learn
  • Technologies
  • Challenges & Projects
  • Products
  • Store
  • About Us
  • Feedback & Support
  • FAQs
  • Terms of Use
  • Privacy Policy
  • Legal and Copyright Notices
  • Sitemap
  • Cookies

An Avnet Company © 2026 Premier Farnell Limited. All Rights Reserved.

Premier Farnell Ltd, registered in England and Wales (no 00876412), registered office: Farnell House, Forge Lane, Leeds LS12 2NE.

Follow element14

  • X
  • Facebook
  • linkedin
  • YouTube