


We've already taken a look into the contents of the challenger kit. Now lets get started with the components of the kit.

Getting Started with Raspberry Pi 4:
Before getting started we need some hardware and software components, they are:
Hardware:
- Raspberry Pi 4
- Micro SD card
- Monitor and an HDMI cable
- USB keyboard and mouse
- Power supply
Software:
- Raspberry Pi OS written in SD card
Just insert the SD card with OS into the Raspberry Pi SD card slot and power on the Pi the Pi will automatically boot the OS and now you can use the Pi. This is a basic setup guide. However we'll be using a Headless setup for setting up the raspberry pi, Since the board will be placed in our robot, We need VNC or SSH setup. That will be discussed later. Now we have completed booting our Pi.
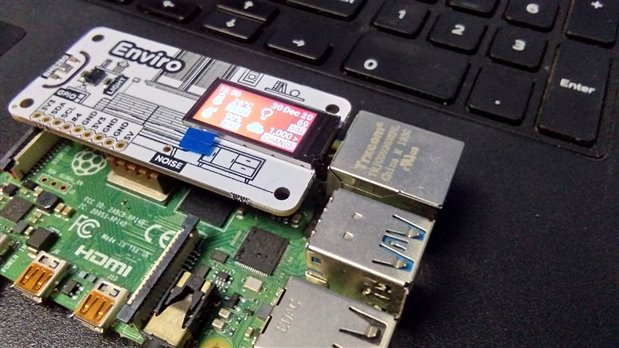
Getting Started with Pimoroni Enviro Hat:
To get started with the Enviro hat first open the terminal by entering
Ctrl + Alt + T
Now the terminal opens up. Clone the Enviro hat examples repository into the Pi using the Command,
Now enter into the examples directory and run any of the example.
cd enviroplus-python/examples/
python <example>.py
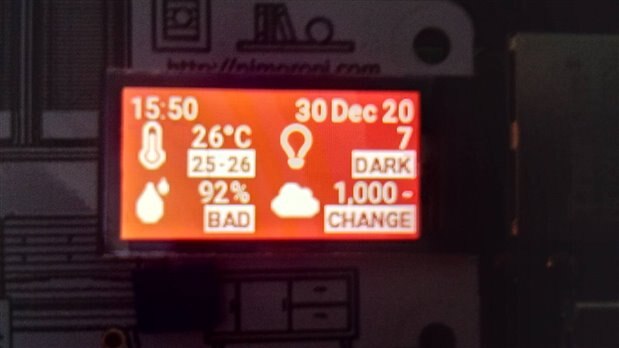
| {gallery}Enviro Hat |
|---|
|
|
 |

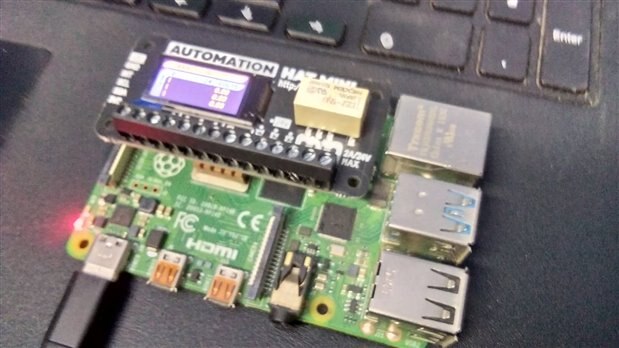
Getting Started With Pimoron Automation Hat Mini:
To get started with the Automation Hat Mini first open the terminal by entering
Ctrl + Alt + T
Now the terminal opens up. Clone the Automation Hat Mini examples repository into the Pi using the Command,
Now enter into the examples directory and run the example by using the command,
cd automation-hat/examples/hat-mini/
python <example>.py
| {gallery}Automation Hat Mini |
|---|
|
|
|


Hope you all enjoyed my blog. In the next blog I'll be sharing about the hardware components required to build The Saviour.