


Okay a couple of quick updates from when I was on Vacation but still carrying the Project Loki pieces with me.
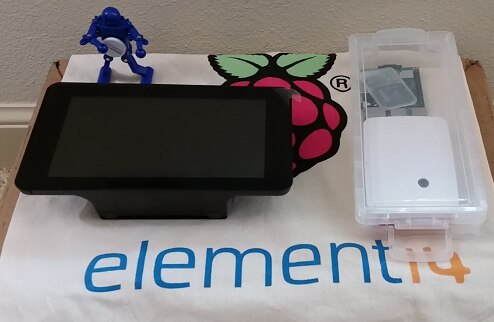
Here you see the parts I brought with me to work on Project Loki. Complete with a small cardboard box to act as my desk. :-)
In the top right is the actual Raspberry Pi 3b+, the white case holds the older 2b and the Touchscreen has a 2b as well I believe.
Since I want Project Loki to be portable I am going to use a previous projects touchscreen. Note to self, bring small screwdrivers with you! Ended up having to borrow a small enough one from my father in law, luckily he is a hardcore electronics enthusiast and had items I could use.
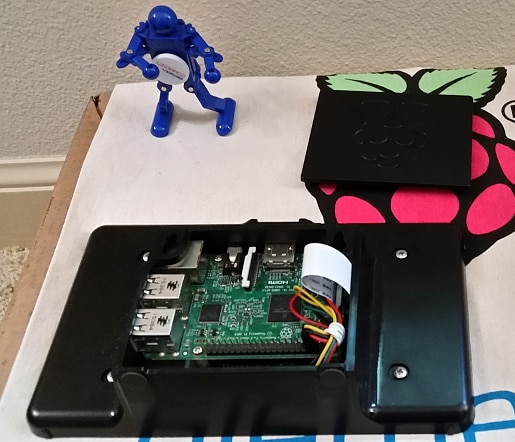
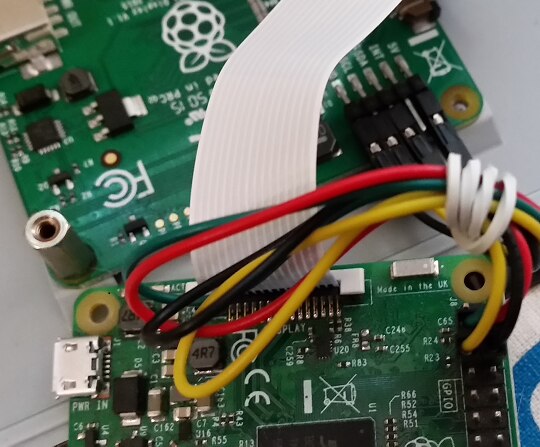
Big reason I took this picture was to have a reference to compare in wiring when putting the 3b+ in. Everything I have been reading states that the wiring will be the same.
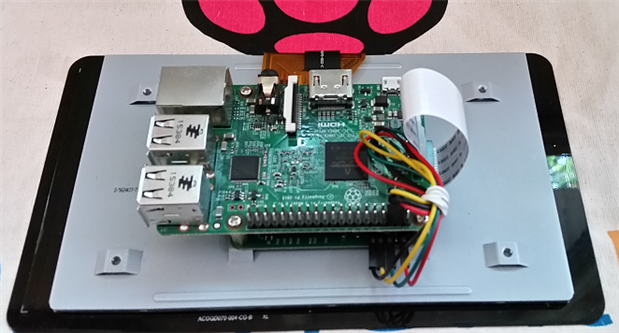
Closer/different view.
There are many available guides for implementing the 7" touchscreen. I quite simply went with taking the above pictures and reconnected in the new Board. Then with power up I can see that right away I have graphics and a working bootup!
Working with the instructions from Re4son I did the following:

I have already "cd /usr/local/src/re4son-kernel_4*"
followed by "mount /dev/mmcblk0p1 /boot"
Then I attempt to: "./re4son-pi-tft-setup -u #(updates re4son-pi-tft-setup to the latest version)"
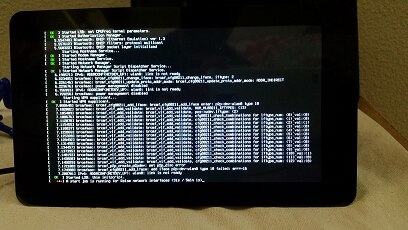
As you can see this did not work. It was unable to resolve the host address 'github.com'.
This makes perfect sense since in the instructions we don't actually add networking until later. So a quick deviation from instructions had me adding networking...
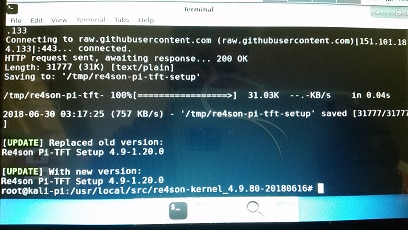
And we now have the update!
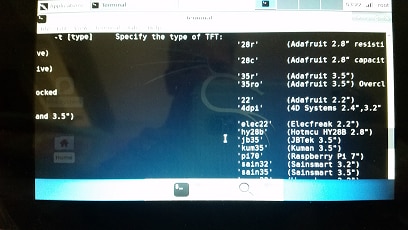
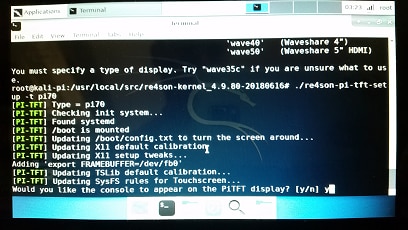
Using the command: "./re4son-pi-tft-setup -h"
Gives us the above options. I scrolled down a bit so we could see the Raspberry Pi 7" screen. pi70
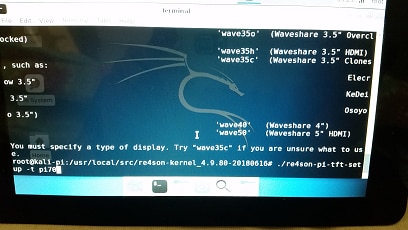
Here you can see where I should have entered: ./re4son-pi-tft-setup -t <your screen> -d /home/pi
In my rush through of things I left off the last part with the -d /home/pi. I am attributing that to being a reason I was unable to get the screen working with the StickyPi menu.
As you can see it will take the command without the -d option and no errors will appear. At this time I thought I was golden!
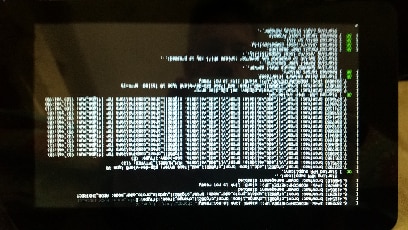
Here we can see where it has flipped the screen. Which is standard for making it work with the case since that is upside down to normal. So I still think I am doing great.
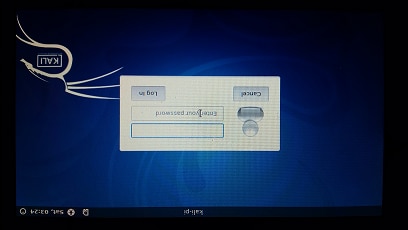
Okay. Here is a login screen. Not what I thought I would get. I was expecting that autologin with StickyPi menu.
Per the instructions:
- Optional: setup wifi and enable “Automatic boot into Sticky Finger’s Touch Interface”:
kalipi-config # Configure wifi
# Configure boot into command line interface for user pi# Change passwords for users "pi" and "root"# Set location settings, etc.
As you can see this does state optional. And since I had not caught my earlier mistake I ended up twisting off on trying various custom options for about a week. I actually think the kalipi-config program is pretty neat and will do another short update just on that.
- Edit “/home/pi/Kali-Pi/menu” to define your screensize, enable/disable screensaver and PIN:
## Adjust these:export KPSCREENSIZE=2.8
## Screensize in inch, Options= 5.0, 3.5, 2.8export KPLAYOUT=9
## Number of buttons - Currently only 9 is supportedexport KPPIN=0
## Set to "1" to enforce PIN authentication, run ./set-pin to change PIN from "1337"#export KPTIMEOUT=2## Minutes before screensaver kicks in, comment out for screensaver offexport KISMETVER=1
## Set to "2" to launch kismet github version, "1" to use classic stable versionexport TFT=1
## Set to "0": no TFT screen,## "1": TFT touchscreen,
## "2": TFT screen with external mouse,## "3": resistive HDMI touchscreen, or## "4": Raspberry Pi 7" Touchscreen ## End adjustments
Reboot and enjoy 
Going through these options and even going to the manual options and trying some steps kept me coming right back to the same issues. No StickyPi menu. I could get it to autologin eventually by some of the manual configuration options but no menu.
So I turned to the maker of the menu, Re4son.
Well technically I first perused the forums to see if I could avoid bothering the maker but eventually did ask him for his input on why this was not working.
I came across a forum discussion that gave a bunch of options for a 7" touchscreen but that seemed to not be for the Raspberry Pi one. So I asked for specifics and Re4son replied back:
the Raspberry Pi screen should work out of the box with the Sticky Fingers image. Just run
cd /usr/local/src/re4son-kernel_4*
./re4son-pi-tft-setup -t pi70 -d /root
ah, that pesky -d option that I had missed. Though he is stating to run /root instead of /pi like his instructions.
Now interesting enough I get a solid black screen. So changes!
Asking back on the forums and Re4son said:
just configure “/home/pi/Kali-Pi/menu” for the Pi70, e.g:
export KPSCREENSIZE=5.0
 export KPLAYOUT=9
 export KPPIN=0
 #export KPTIMEOUT=2
 export KISMETVER=1
 export TFT=4
That should do the trick

Ah a new image has appeared!
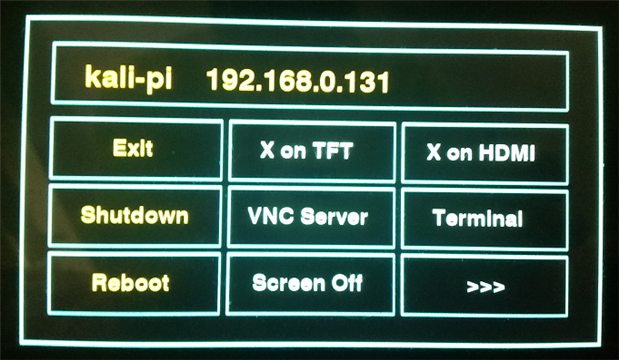
And we have StickyPi menu!
Lesson learned, make sure to note/track all your actual commands use and not what you think you used. Luckily since I was taking pictures for the blog I actually did have a copy of what I had done and was able to later see what my issue was. Unluckily due to me being on vacation I was doing a lot of work and not looking at pictures until later due to time constraints and lack of a computer to edit my pictures with for the blog. But documentation of work is good!
Top Comments