element14 Community
element14 Community
    Register Log In
  • Site
  • Search
  • Log In Register
  • About Us
  • Community Hub
    Community Hub
    • What's New on element14
    • Feedback and Support
    • Benefits of Membership
    • Personal Blogs
    • Members Area
    • Achievement Levels
  • Learn
    Learn
    • Ask an Expert
    • eBooks
    • element14 presents
    • Learning Center
    • Tech Spotlight
    • STEM Academy
    • Webinars, Training and Events
    • Learning Groups
  • Technologies
    Technologies
    • 3D Printing
    • FPGA
    • Industrial Automation
    • Internet of Things
    • Power & Energy
    • Sensors
    • Technology Groups
  • Challenges & Projects
    Challenges & Projects
    • Design Challenges
    • element14 presents Projects
    • Project14
    • Arduino Projects
    • Raspberry Pi Projects
    • Project Groups
  • Products
    Products
    • Arduino
    • Avnet Boards Community
    • Dev Tools
    • Manufacturers
    • Multicomp Pro
    • Product Groups
    • Raspberry Pi
    • RoadTests & Reviews
  • Store
    Store
    • Visit Your Store
    • Choose another store...
      • Europe
      •  Austria (German)
      •  Belgium (Dutch, French)
      •  Bulgaria (Bulgarian)
      •  Czech Republic (Czech)
      •  Denmark (Danish)
      •  Estonia (Estonian)
      •  Finland (Finnish)
      •  France (French)
      •  Germany (German)
      •  Hungary (Hungarian)
      •  Ireland
      •  Israel
      •  Italy (Italian)
      •  Latvia (Latvian)
      •  
      •  Lithuania (Lithuanian)
      •  Netherlands (Dutch)
      •  Norway (Norwegian)
      •  Poland (Polish)
      •  Portugal (Portuguese)
      •  Romania (Romanian)
      •  Russia (Russian)
      •  Slovakia (Slovak)
      •  Slovenia (Slovenian)
      •  Spain (Spanish)
      •  Sweden (Swedish)
      •  Switzerland(German, French)
      •  Turkey (Turkish)
      •  United Kingdom
      • Asia Pacific
      •  Australia
      •  China
      •  Hong Kong
      •  India
      •  Korea (Korean)
      •  Malaysia
      •  New Zealand
      •  Philippines
      •  Singapore
      •  Taiwan
      •  Thailand (Thai)
      • Americas
      •  Brazil (Portuguese)
      •  Canada
      •  Mexico (Spanish)
      •  United States
      Can't find the country/region you're looking for? Visit our export site or find a local distributor.
  • Translate
  • Profile
  • Settings
Enchanted Objects
  • Challenges & Projects
  • Design Challenges
  • Enchanted Objects
  • More
  • Cancel
Enchanted Objects
Blog Inbox multimeter 4 - Final assembly and code
  • Blog
  • Forum
  • Documents
  • Polls
  • Files
  • Events
  • Mentions
  • Sub-Groups
  • Tags
  • More
  • Cancel
  • New
  • Share
  • More
  • Cancel
Group Actions
  • Group RSS
  • More
  • Cancel
Engagement
  • Author Author: kidiccurus
  • Date Created: 26 Jun 2015 2:26 PM Date Created
  • Views 687 views
  • Likes 4 likes
  • Comments 3 comments
  • python
  • yun
  • inbox_multimeter
  • enchanted_object
  • mutimeter_inbox
  • ubec
  • multimeter
  • arduino
Related
Recommended

Inbox multimeter 4 - Final assembly and code

kidiccurus
kidiccurus
26 Jun 2015

Today I finished putting the final touches on to the inbox and the code. First of all, the code. Unfortunately, for the past few weeks there has been an intermittent issue with the inbox and activity on the element 14 website. The issue has now been resolved, and was not a major barrier to normal use, but it made prototyping code increasingly difficult as the section of the site the code was trying to observe would fail randomly, making troubleshooting incredibly difficult. As a result of this I was forced to delay writing my code until the site was repaired, hence the rather late nature of this blog post. Eventually I was able to get some python code running to provide the cookies normally seen when logged in to the site and request the HTML of the page. This HTML was then parsed to return just the number of messages in my inbox, and passed this number over to the atmega chip to drive the display to the appropriate value. I made sure that the code waited a full 20 minutes between each time it attempted to check the website. This will ensure that it does not use too much of my internet bandwidth or put an excessive load on element 14s servers.

image

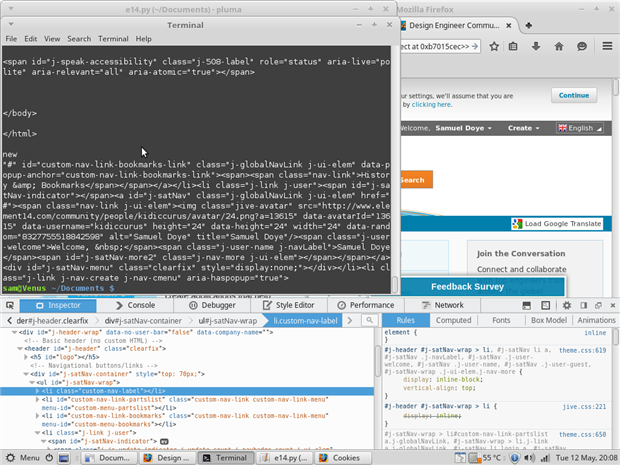
/\ Some of my first success with the parser, finding a block of code featuring my account name, also proving the cookies worked


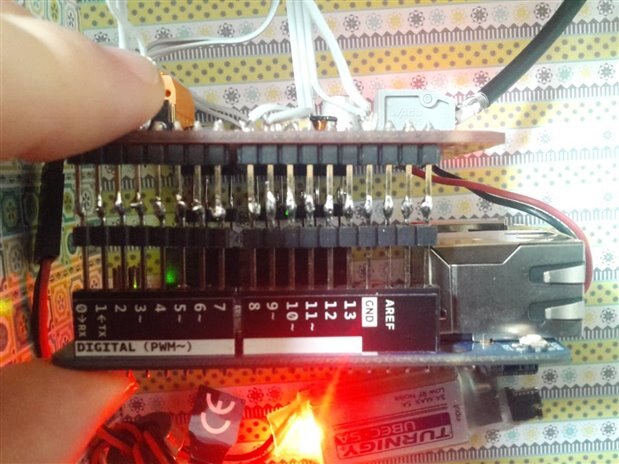
After writing the code, the time finally came to mount the circuitry. Installing the display and LEDs was reasonably easy with a little hot glue, and transferring the wiring was simply a case of transferring conditions from the breadboard one at a time. I did however run into some major issues in getting everything to fit into the case. Because of the weight of the various ports on an arduino yun, shields will often not be able to fit onto it properly. My intention was to work around this simply by having the shield at an angle with some pins not fully within the female header. Unfortunately this did not provide a good enough connection in some pins, forcing me to rethink my design. In the end I solved this issue by soldering a second set of male headers directly onto the ones I had already mounted. This effectively gave me double the height and easily allowed me to clear the ports. However, this new set of headers rendered the bord far to thick to fit correctly into the original case. In the end the only way I could solve this problem was by running a ribbon cable from inside the multimeter out to a separate enclosure containing the boards. This worked surprisingly well and the meter was soon up and running.

image

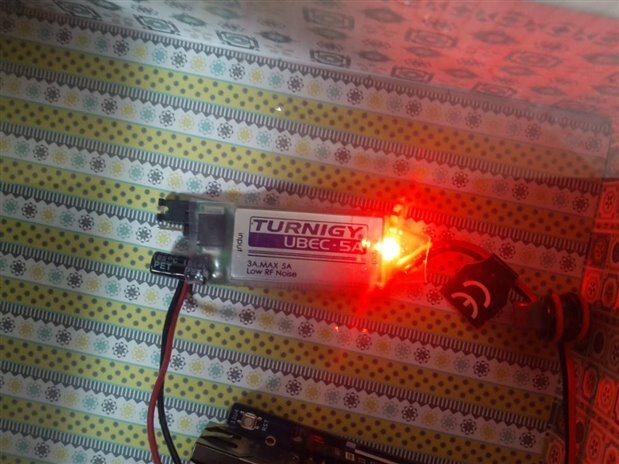
The case I chose for the boards was a cardboard box with a slide off clear colour. When I eventually install this I will try and find a better way to conceal the extra electronics, but for now I thought it would would be better to have them clearly visible for you all to see. With this done the only two parts to add were the voltage regulator for the yun and the switch to turn off the backlight. On my breadboarded version of the circuit I used a tact switch to turn off the backlight when held down. Obviously this is not practice in the actual meter so instead I desoldered one of the original switches from the multimeter circuit board and soldered it in place of the tact switch. Due to the design of the case, the switch would hold itself in place so I did not need to glue it in, allowing me to seperatge the two half's of the case for easy repairs. As for the voltage regulator, I choose to use something called a ubec. Ubecs are switching voltage regulator designed to produce a very low amount of rf noise for rc applications. I choose to use on because they are more efficient than traditional linear regulators. It also helped that I had one in my parts bin. To simplify construction, I attached the two input power lines for the ubec to the 12v power supply simply by soldering them to the underside of the power connector on the led driver board. 5v and ground were connected to appropriate pins on the shield and the whole thing was carefully checked with a multimeter before plugging in the yun. It worked perfectly.

image

The only other addition I made to the board was for photography. Because of the 20 minute delay, filming and photographing the board was going to be a very time consuming process. In order to circumvent this I added two tact switches to pins 2 and 3 using the internal pullups. As in some of the prototypes, these were programmed to increment and decrement the post count allowing me to change the value on the display without having to wait for the system to update. For some additional rigidity glued the switches to a piece of wood. It is important to stress that this was only done for the purpose of photography and is not a required part of the system.

  The system seems to be working fully. I will evaluate the success of the solution against my original specification in a separate post, but for now, here are some posture of the finished unit.
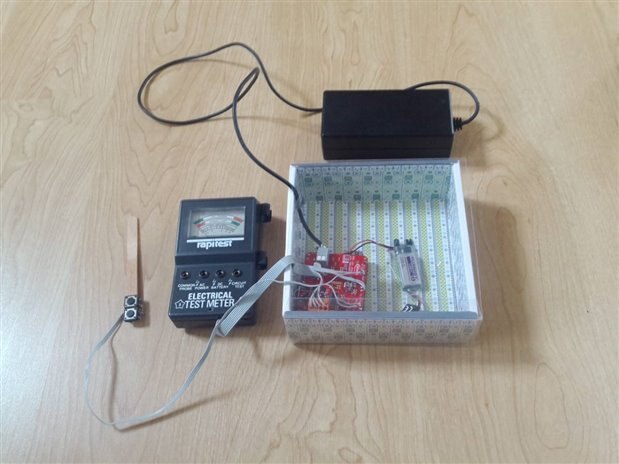
 

image

/\ The entre setup


image

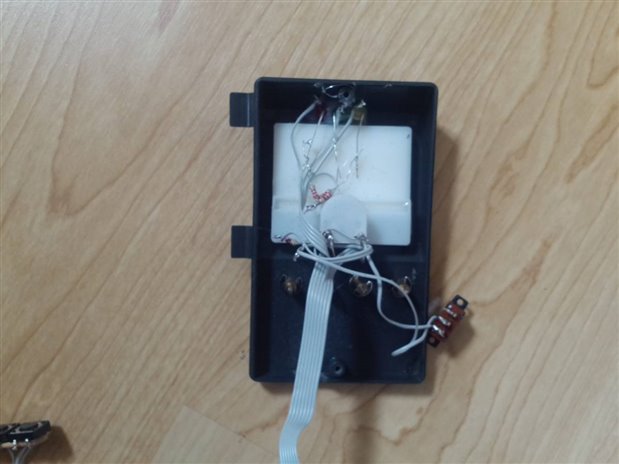
/\ The inside of the meter

image

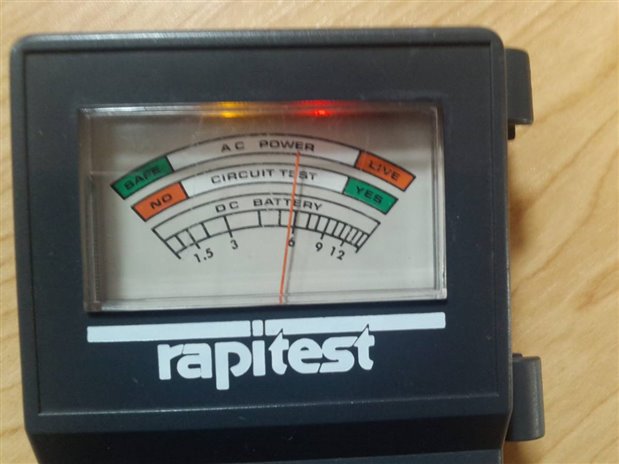
/\ The display in action

  • Sign in to reply

Top Comments

  • clem57
    clem57 over 10 years ago +1
    Very understandable obstacle, but you did prevail. Kudos to this project. Clem
  • kidiccurus
    kidiccurus over 10 years ago in reply to clem57 +1
    TThank you very much Clem. The first time I saw the issue with the site was actually whilst I was testing my code, leading to some rather frustrating troubleshooting until I realised it was the site that…
  • kidiccurus
    kidiccurus over 10 years ago in reply to clem57

    TThank you very much Clem. The first time I saw the issue with the site was actually whilst I was testing my code, leading to some rather frustrating troubleshooting until I realised it was the site that was down and not my code.

    • Cancel
    • Vote Up +1 Vote Down
    • Sign in to reply
    • More
    • Cancel
  • Workshopshed
    Workshopshed over 10 years ago

    Great write up, extra extra tall headers and extra extra tall stacking headers should be an essential for all Yún projects

    • Cancel
    • Vote Up 0 Vote Down
    • Sign in to reply
    • More
    • Cancel
  • clem57
    clem57 over 10 years ago

    Very understandable obstacle, but you did prevail. Kudos to this project.

    Clem

    • Cancel
    • Vote Up +1 Vote Down
    • Sign in to reply
    • More
    • Cancel
element14 Community

element14 is the first online community specifically for engineers. Connect with your peers and get expert answers to your questions.

  • Members
  • Learn
  • Technologies
  • Challenges & Projects
  • Products
  • Store
  • About Us
  • Feedback & Support
  • FAQs
  • Terms of Use
  • Privacy Policy
  • Legal and Copyright Notices
  • Sitemap
  • Cookies

An Avnet Company © 2025 Premier Farnell Limited. All Rights Reserved.

Premier Farnell Ltd, registered in England and Wales (no 00876412), registered office: Farnell House, Forge Lane, Leeds LS12 2NE.

ICP 备案号 10220084.

Follow element14

  • X
  • Facebook
  • linkedin
  • YouTube