


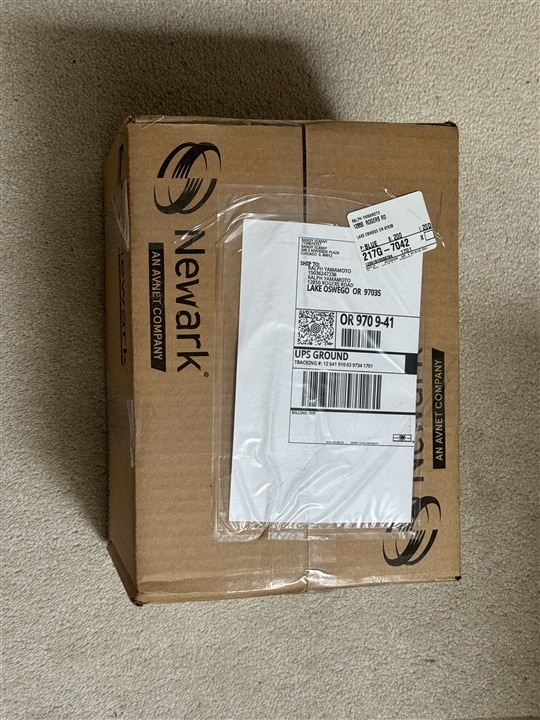
My challenge hardware kit arrived via UPS on April 2. Thanks E14 and Hammond for sponsoring the challenge. This blog will cover the unboxing of the kit, a detailed description of the components and how I plan to use them. I'll also cover other additional parts that I'll be using for the project.
Parts List
Kit Parts provided
| Product Description | Datasheets |
|---|---|
| Pi4 Compute Module | Pi 4 Compute Module Datasheet |
| Pi4 Compute Module I/O Board | Pi 4 Compute Module I/O Board Datasheet |
| Display, Alphanumeric, 20X4, I2C | Midas Display Datasheet |
| IP68 Enclosure | Enclosure Manufacturer Page |
| RF Antenna, WiFi, BLE, Thread, Wireless Hart, Zigbee | Antenna Datasheet |
| Circular Connector, Cable Mount Plug, 4 Contacts | Connectors Datasheet |
| Circular Connector, Panel Mount Receptacle, 4 Contacts |
Additional Parts
| Product Description | Datasheets |
|---|---|
| RPi Camera Module 3 | Arducam RPi Camera Module 3 Datasheet |
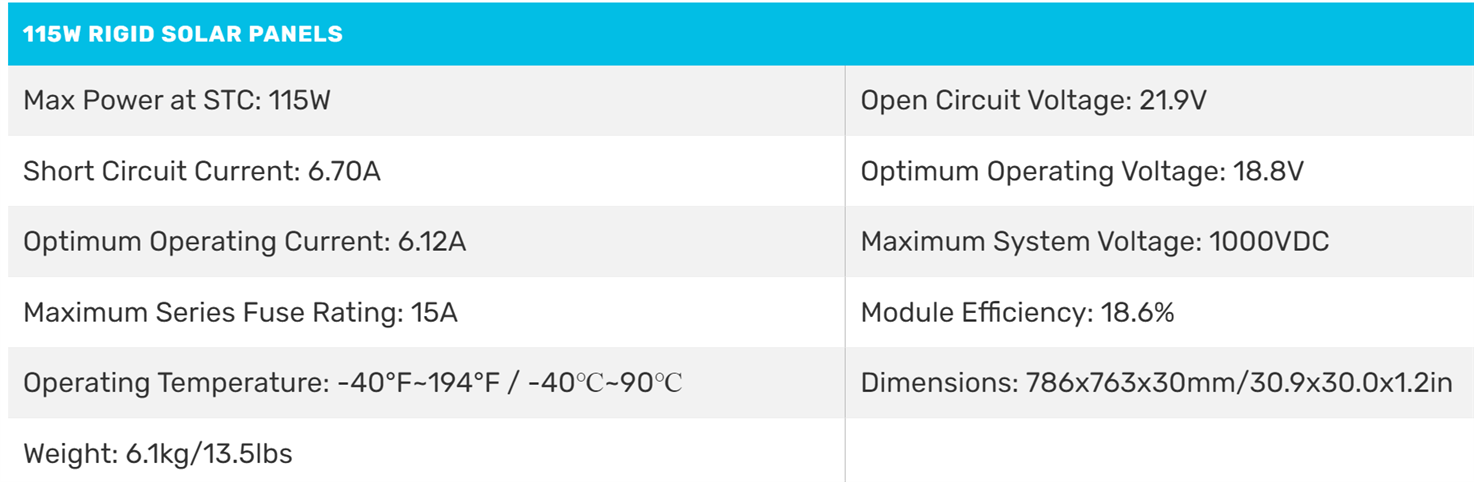
| Renogy 115W 12V Bifacial Solar Panel | Renogy 115W 12V Solar Panel Datasheet |
| Renogy 10 Amp 12V/24V Solar Charge Controller | Renogy Wanderer Charge Controller Datasheet |
| Renogy Solar Panel Tilt Mount Brackets | Renogy Solar Panel Tilt Mount Bracket Specs |
| UPLUS 12V 20Ah AGM Battery | UPLUS LP12-20 12 Volt 20Ah Battery Product Link |
| TTL to RS232 Serial Level Converter | TTL to RS232 Level Converter Product Link |
| RCWL-0516 3.2GHz Motion Detector | RCWL-0516 Github Project Link |
| BME280 PHT Sensor, I2C | BME280 Temperature Humidity Pressure Sensor Product Link |
| VL53L1X TOF Distance Sensor, I2C | Vl53L1X Time of Flight Sensor Product Link |
Unboxing
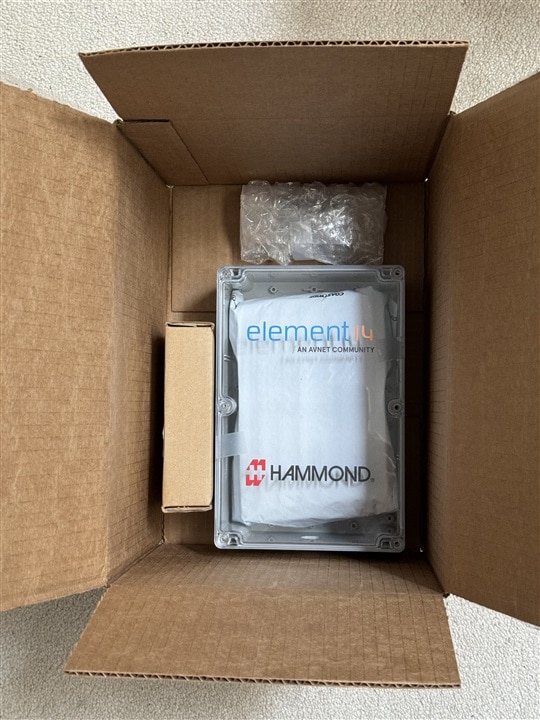
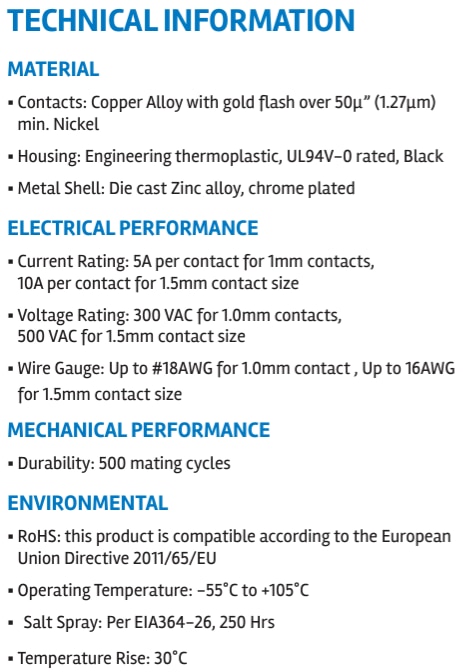
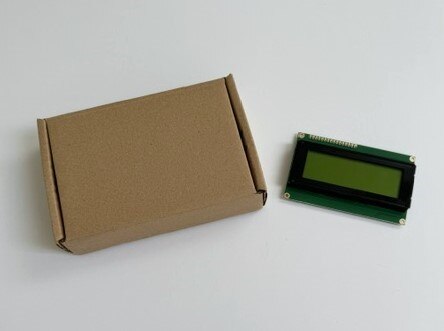
The kit parts arrived in the familar Newark brown cardboard box with lots of paper stuffing inside. The parts had been repackaged for shipping efficiency. The Pi CM4 and IO boards and WiFi antenna were packed inside the Hammond enclosure with its lid taped shut. The Midas display was in a repurposed Maxim box and the connectors were in a bundle of bubble wrap. Everything arrived in good condition.
Detailed Parts Description
Enclosure and connectors
Hammond Enclosure
The Hammond enclosure came with a clear polycarbonite lid imprinted with the Hammond and Element14 labels. The center section of the lid is clear so that is where I'll position the camera, sensors and display. It also includes a rubber gasket and 6 M4 screws to attach the lid. This is quite a "roomy" case which easily fits the CM4 IO board. For the purposes of my project I could have used an enclosure about 1/3 the size, but the larger volume will help with the heat generated by the CM4 and also saves me from needing to replace the CM4 IO board which is needed for its +12V power capability..

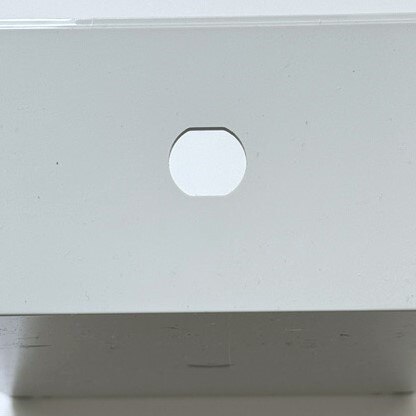
One end of the enclosure has a customized cutout to mount the 4 pin circular connector receptacle.
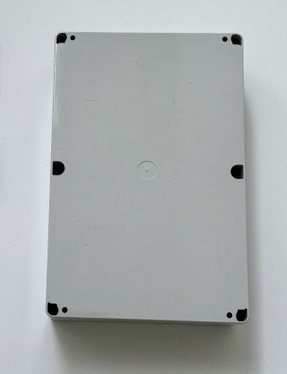
The bottom of the case has 4 mounting holes at the outer corners. I intend to attach a mounting bracket at the center using the lid screws. I'll need to find something to secure the bracket to the case bottom.
Enclosure specs:
Part number: 1554VA2GYCL
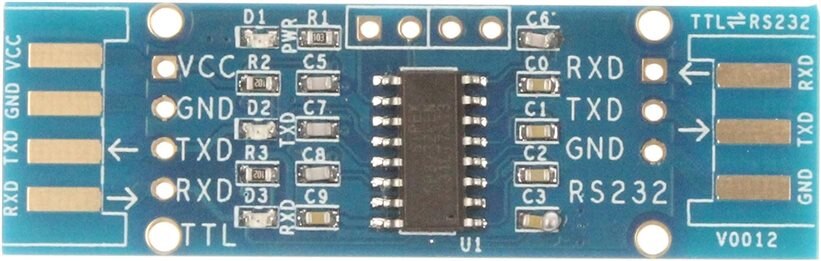
| Size L x W x H | 9.4 in x 6.3 in x 3.5 in (239 mm x 160 mm x 89 mm) |
|---|---|
| Shipping Weight | 1.35 lbs (0.61 kg) |
| Material | Polycarbonate |
| Color | Clear |
| Flame Rating | UL94 V-0 |
| IP Rating | IP68 |
| Type | Water-tight |
| NEMA Rating | 4, 4X, 6, 6P, 12 & 13 |
| Max. P.C. Board Length (mm) | 145.5 |
| Max. P.C. Board Width (mm) | 226.82 |
Amphenol 4 Contact Circular Connectors
The 4 pin connector has just enough contacts for my project (+12V, GND, UART TX and RX). Luckily the UART and power share a common ground from the charge controller. The connector has 1.5mm contacts which are rated at 10A which is well above my use case of +12V at 1A. The charge controller has load overcurrent disconnect in the event that I experience a power short.

Amphenol IP67 MRD Series Rugged Circular Locking Connectors
| MRD series male 4 position socket connector with metal latch lock | MRD-BN04-M17-000 |
| MRD series panel mount, female 4 position pin connector with metal latch lock | MRD-BG04-L13-000 |
RPi CM4 and CM4 IO
The combination of the CM4 and CM4 IO boards creates a development platform that has a superset of the features of an RPi4 Model B. The specific CM4 module that we received does not have eMMC and has WiFi so for the feature set that I'm using for this project I should be able to do most of the software development using an RPi4 and just move the uSD card to the CM4 IO. At least that's my current plan.
\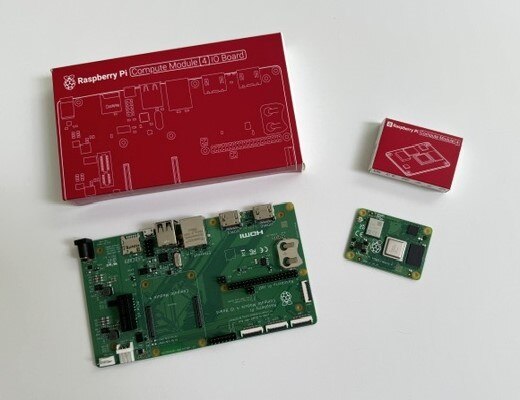
CM4 Compute Module
The compute module in the kit is a CM4104000 which means it has Wireless, 4GB of RAM, and no eMMC (uses uSD card).
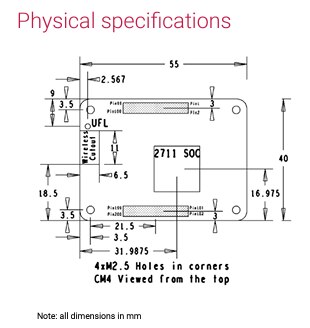
CM4 IO Board
The IO board has quite an expanded feature set than the RPi4 Model B, but for my project I'll be using the following limited set of features:
- +12V DC power Input (+7.5V to +28V possible - the charge controller source will be +11V to +15V)
- Camera CSI port
- uSD card slot
- 40 pin GPIO connector (UART, I2C, GPIO Interrupt)
- RTC
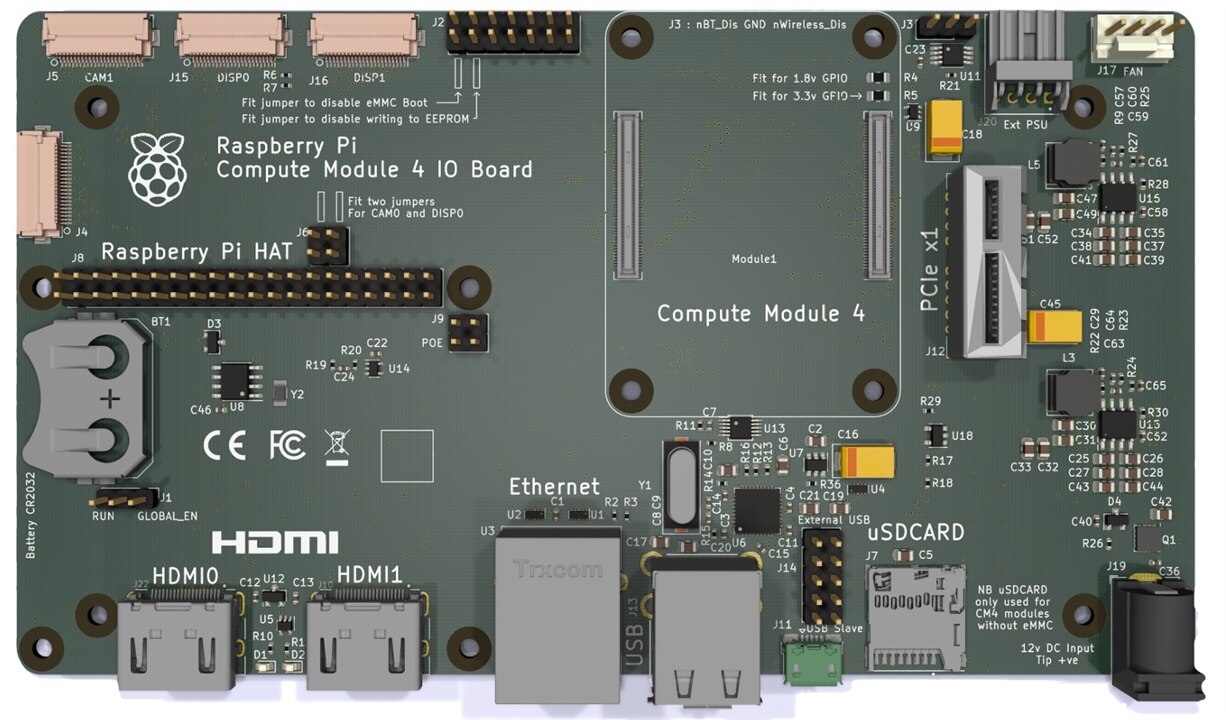
Here's the complete Feature list:
- Accepts the complete range of CM4 modules
- External +12V PSU
- 2 × Full-size HDMI 2.0 connectors
- Gigabit Ethernet RJ45 with POE support
- 2 × USB 2 Socket, with header for two more sockets
- Micro USB socket for updating the CM4
- Micro SD Card socket for CM4Lite modules
- PCIe Gen 2 socket
- Standard Fan connector
- External power connector (+5V, +12V)
- 2 × MIPI DSI display FPC connectors (22pin 0.5mm pitch cable)
- 2 × MIPI CSI-2 camera FPC connectors (22pin 0.5mm pitch cable)
- Raspberry Pi HAT connector
- RTC with Battery socket and ability to wake up CM4

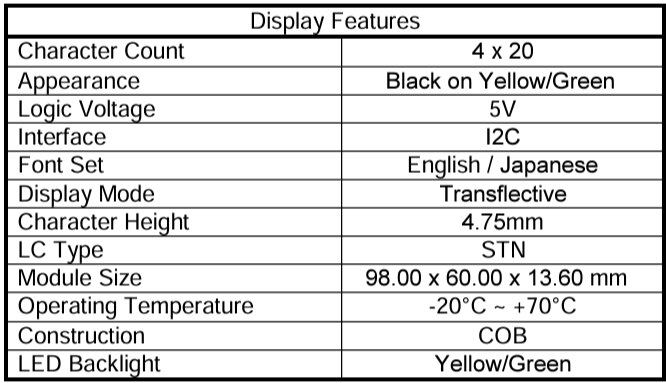
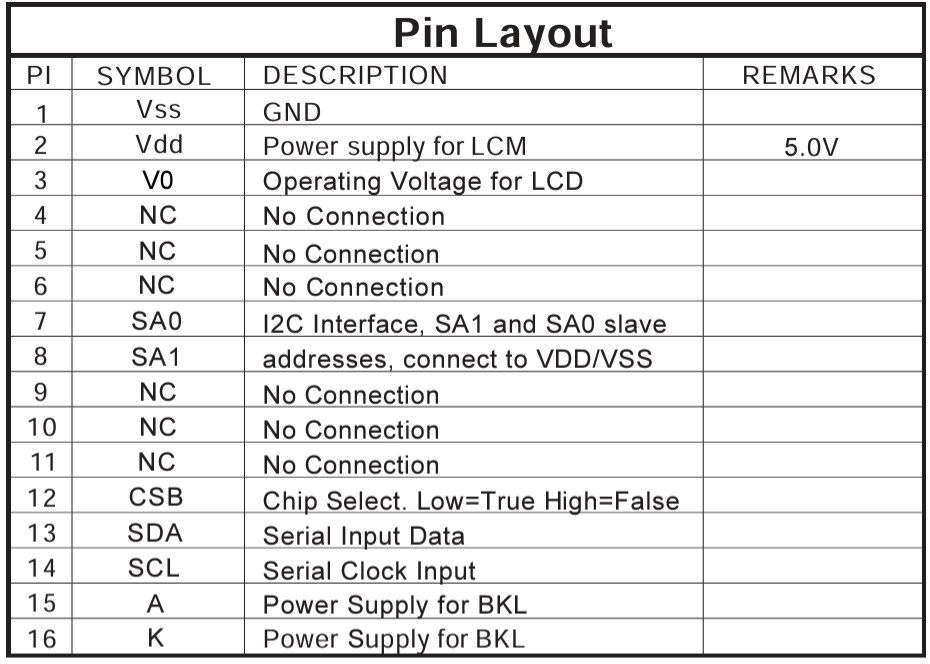
Midas 20x4 Character Display
The MIDAS display MC42005A6W-SPTLYI-V2 uses an I2C interface so it will share the bus with two other sensors (BME280, VL53LX1) . This display will be in proximity of the camera so if it causes glare on the transparent lid - I may need to shut off the backlight.
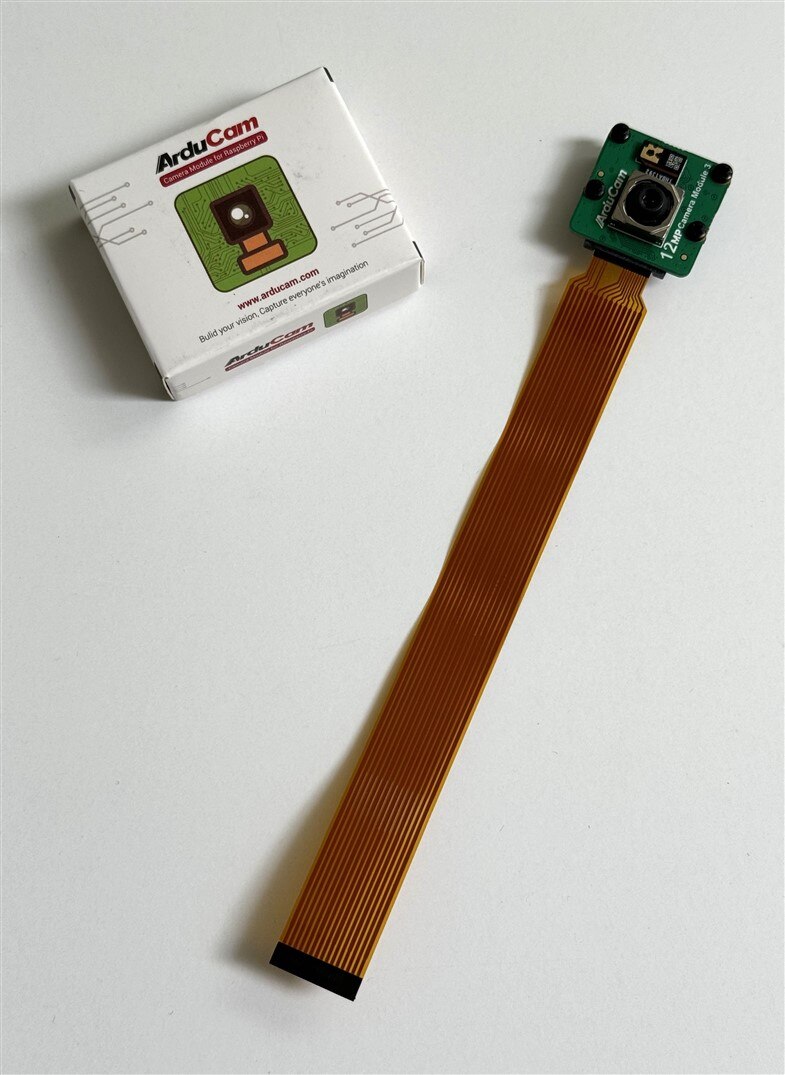
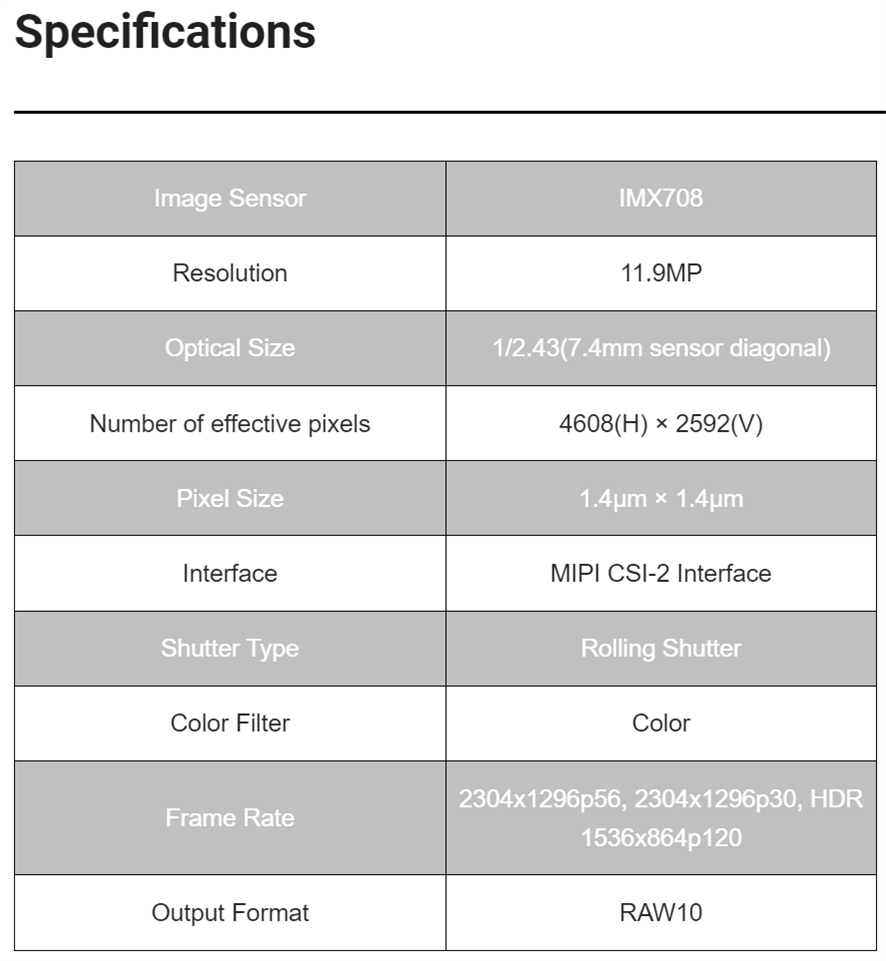
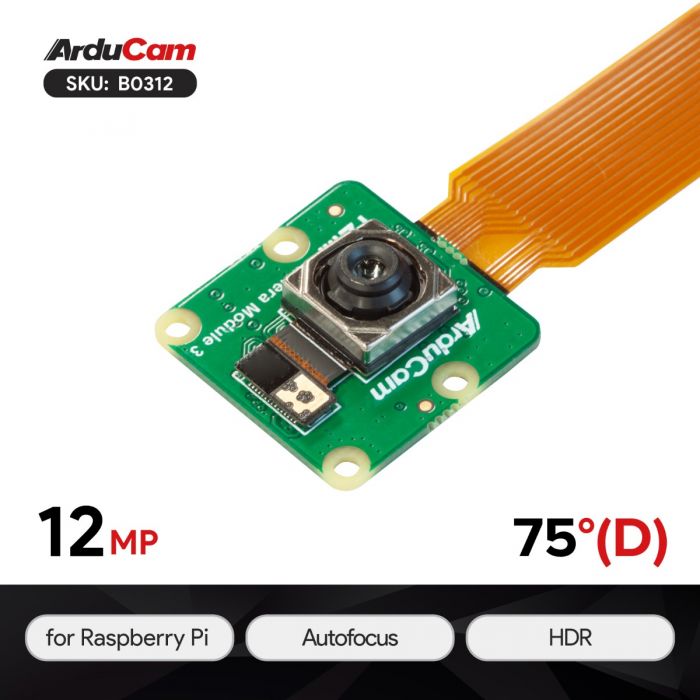
RPi Camera Module 3
I am using the Camera Module 3 from Arducam which is equivalent to the one from Raspberry Pi but it is not autodetected so a device tree entry is required in the software. It also uses a different flat ribbon cable but that is provided with the module. Luckily it is the correct length (150mm) for mounting in the enclosure.
|
|
12MP |
IMX708 |
MIPI CSI-2 |
Official Module |
Motorized Focus |
6cm-infinite |
75°(D)x66°(H)x41°(V) |
Integral IR-cut Filter |
Solar Panel and racking
Bifacial 115 Watt 12 Volt Monocrystalline Solar Panel
The RSP115DT bifacial solar panel is manufactured by Renogy and I opted to buy the charge controller and racking from them also.
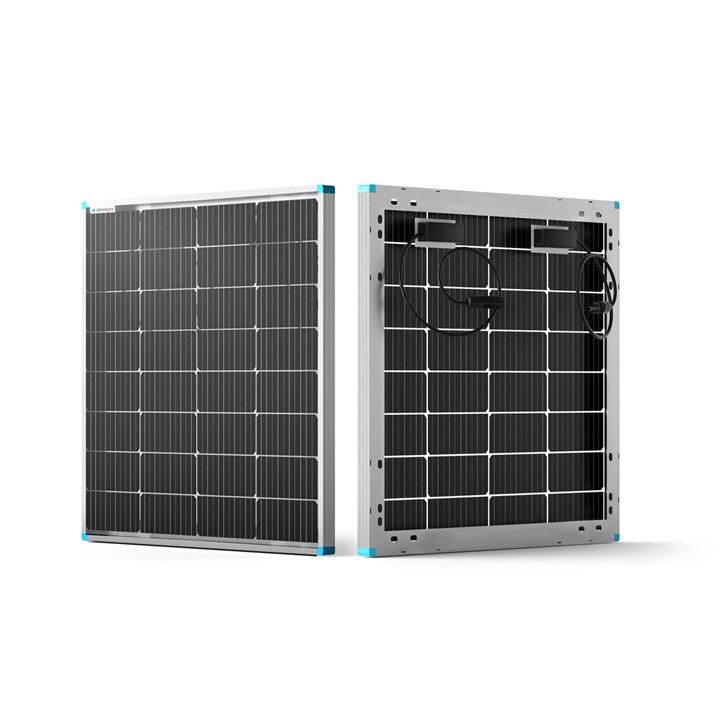
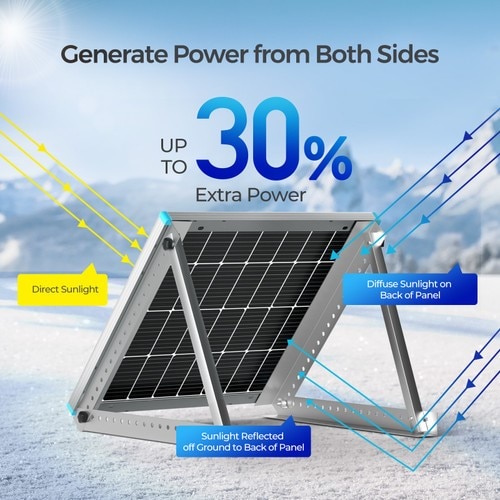
The panel is bifacial so it generates power from both the front and back surfaces.
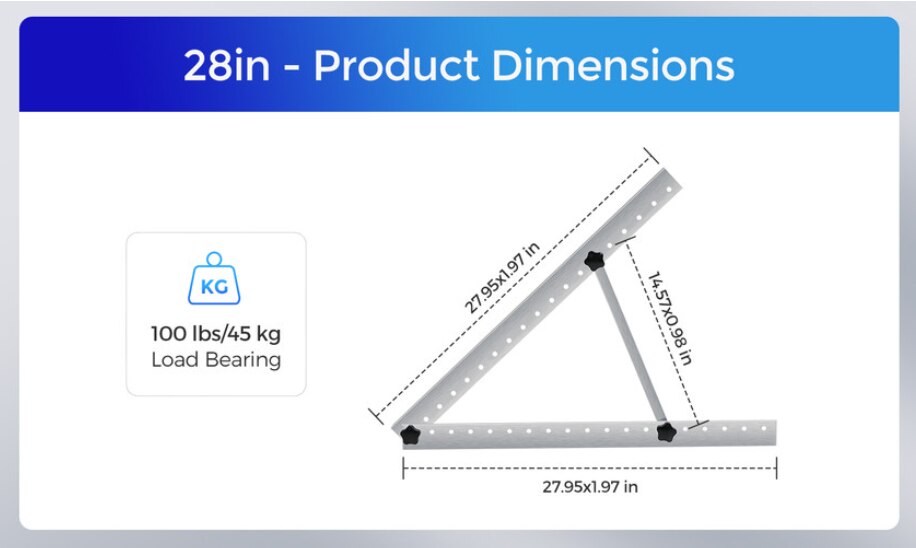
Tilt Mount Brackets:
RNG-MTS-TMB
Solar Charge Controller
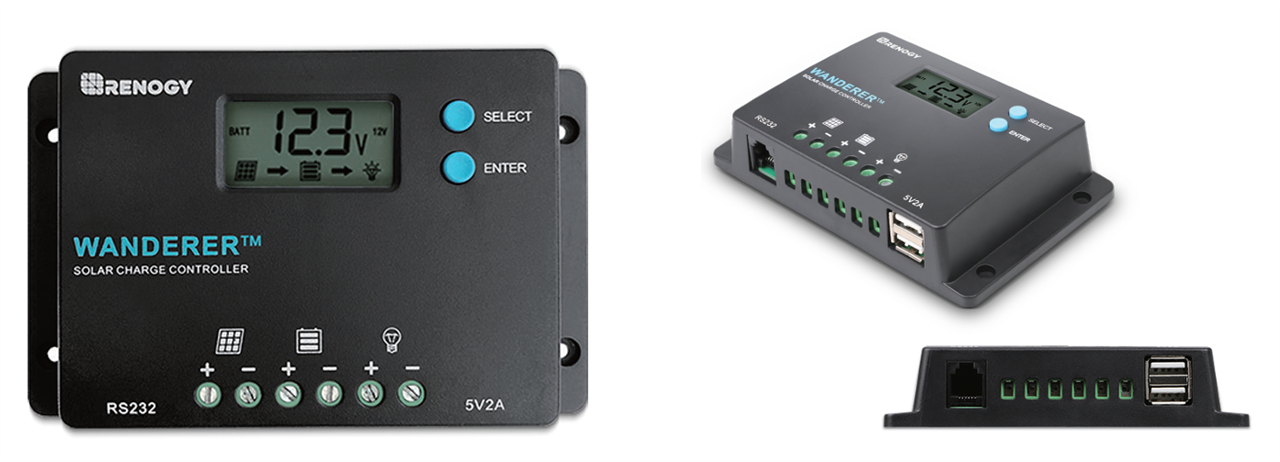
I am using a small 10A charge controller, a RNG-CTRL-WND10 Wanderer unit. It has a couple of nice added features - two USB-A ports (2.4A max) and a serial RS-232 port to read the data registers. The only negative part is that it is only rated at IP20 so it needs protection from weather but it also requires ventilation. I'll probably mount it in a ventilated plastic box tucked behind the solar panel. I wanted to put it in an enclosure with the battery but that is an explosion hazard.
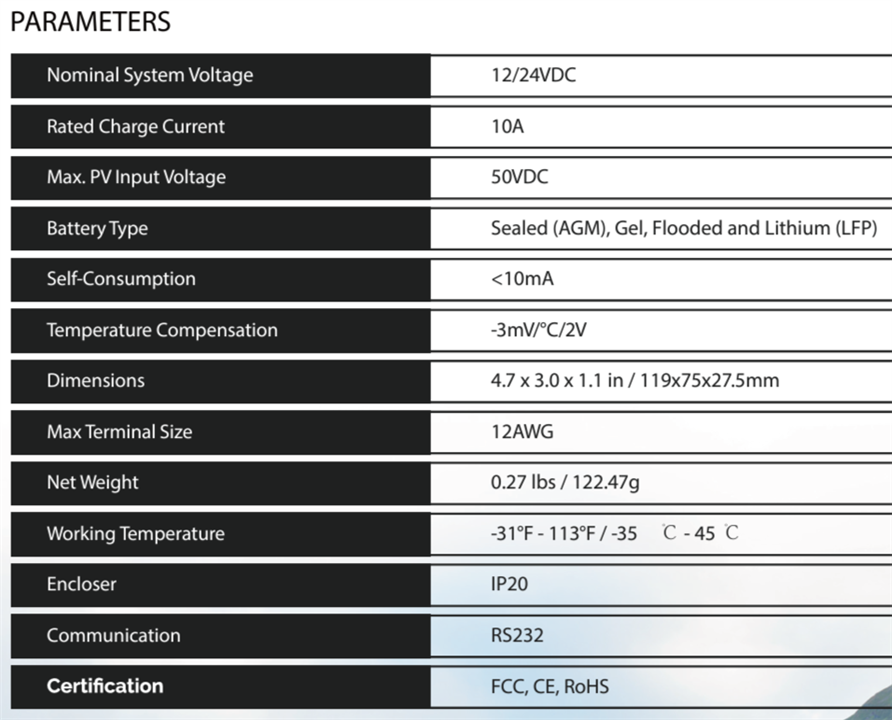
RS-232 to TTL level converter
Since the interface is RS-232 I needed to buy a level converter to interface it to the CM4.
The IC used on this board is a Sipex SP3232E which has True 3.0V to 5.5V RS-232 Transceivers.
12V AGM Battery
This is a generic sealed lead acid battery that I bought from Amazon. Haven't found the manufacturer's website but hopefully it's more battery than I'll need. And it came with terminal mounting hardware.

Sensors
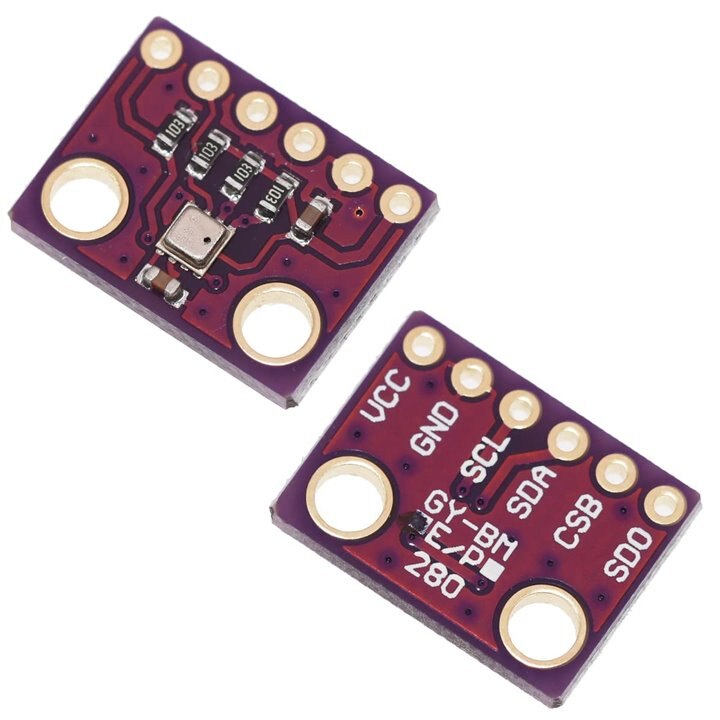
BME280
The BME280 is a pressure/humidity/temperature (PHT) I2C sensor from Bosch that I am going to use to monitor the enviroment within the enclosure.
BME280 Features:
- Package 2.5 mm x 2.5 mm x 0.93 mm metal lid LGA
- Digital interface I2C (up to 3.4 MHz) and SPI (3 and 4 wire, up to 10 MHz)
- Supply voltage VDD main supply voltage range: 1.71 V to 3.6 V
VDDIO interface voltage range: 1.2 V to 3.6 V - Current consumption 1.8 uA @ 1 Hz humidity and temperature
2.8 uA @ 1 Hz pressure and temperature
3.6 uA @ 1 Hz humidity, pressure and temperature
0.1 uA in sleep mode - Operating range -40…+85 C, 0…100 % rel. humidity, 300…1100 hPa
- Humidity sensor and pressure sensor can be independently enabled/disabled
VL53L1X
The VL53L1X is a LIDAR time-of-flight (TOF) sensor that I'm using in conjunction with the RCWL-0516 microwave sensor to determine whether a detected object is within range of the camera to be able to perform a reasonable inference from the captured image. The sensor should be able to measure up to 4m, but I'll need to determine what an appropriate range is for the camera.
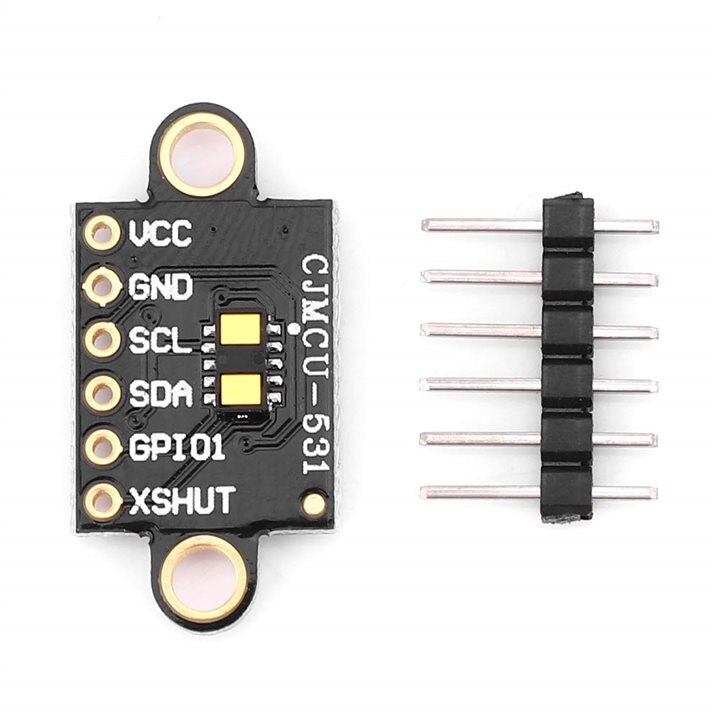
VL53L1X specifications:
- Emitter: 940 nm invisible laser (Class1)
- SPAD (single photon avalanche diode) receiving array with integrated lens
- FlightSense
 ranging sensor for fast and accurate long distance ranging
 - Up to 400 cm distance measurement
- Up to 50 Hz ranging frequency
- Typical full field-of-view (FoV): 27 °
- Programmable region-of-interest (ROI) size on the receiving array, allowing the sensor FoV to be reduced
- Programmable ROI position on the receiving array, providing multizone operation control from the host
- Can be hidden behind many cover window materials
- I²C interface (up to 400 kHz)
- Shutdown and interrupt pins
RCWL-0516
The RCWL-0516 is an inexpensive microwave radar sensor (~3.2GHz) used for proximity detection with a range of about 6m. It is somewhat omni-directional although it is more sensitive in the direction perpendicular to the component side of the PCB. I am using this sensor to interrupt the CM4 when motion is detected which would then use the VL53L1X to determine whether the object was in front of and in range of the camera in order to start an inference for object classification..
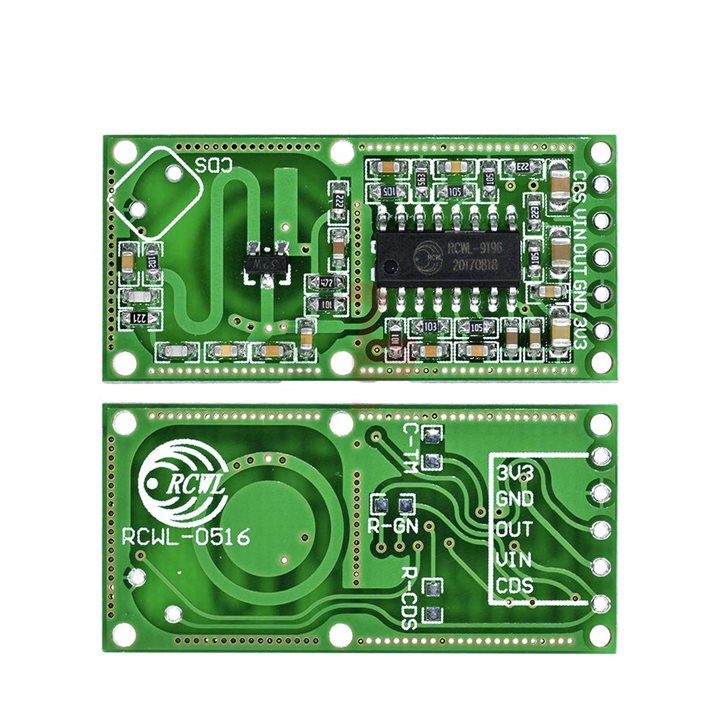
| Pin | Function |
|---|---|
| 3V3 | 3.3V regulated output. Max 100mA (?) |
| GND | Ground |
| OUT | Trigger: high (3.3V) if motion detected. 0V normally. |
| VIN | 4 - 28V supply voltage |
| CDS | LDR 10-20k RL, U_LDR > 0.7V = On |

