


Design Changes
When I tried to connect the RPi Compute Module 4 I/O board with RPi Camera v2 I realized that they were not compatible. So, As I have a USB camera I've decided to reuse it instead of purchasing an additional camera. Here is the new design diagram.

Need for Data and Test Preparation
I need to collect video recordings, so I can use them to test the application and its car (obstacles) detection processing. So I need to complete a bike ride with the prototype. I've decided to use a power bank which has a 12V output as the power source. The battery can support RPi for more than a day. And it fits well inside the enclosure.
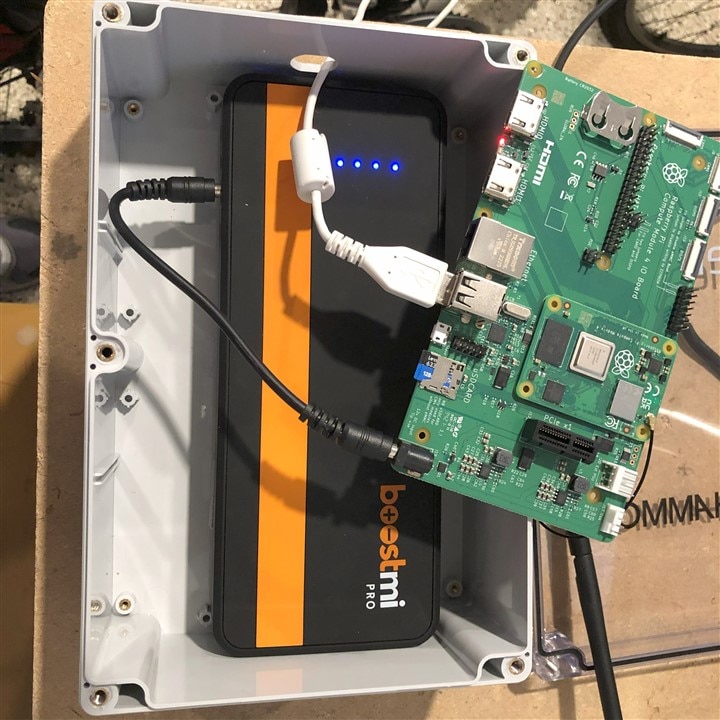
I've added some packing materials to isolate components inside the enclosure and closed it.
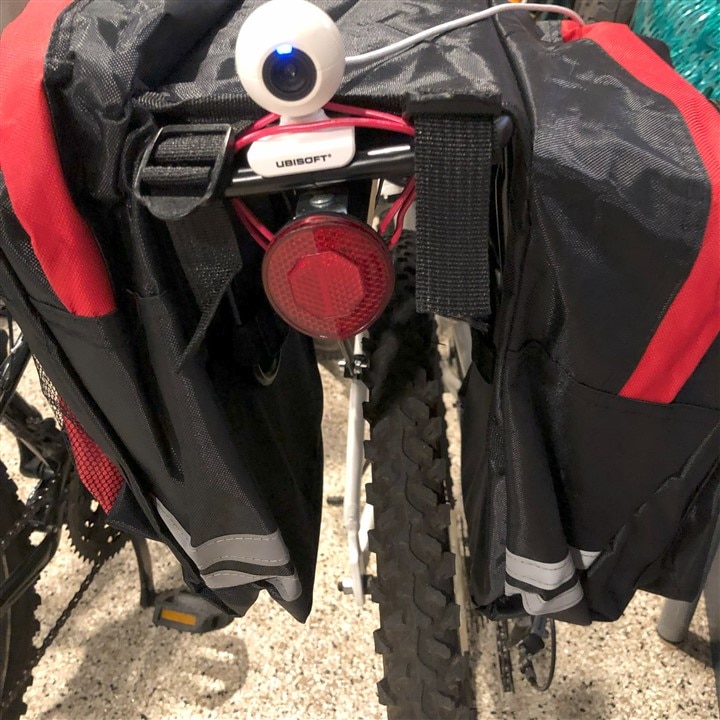
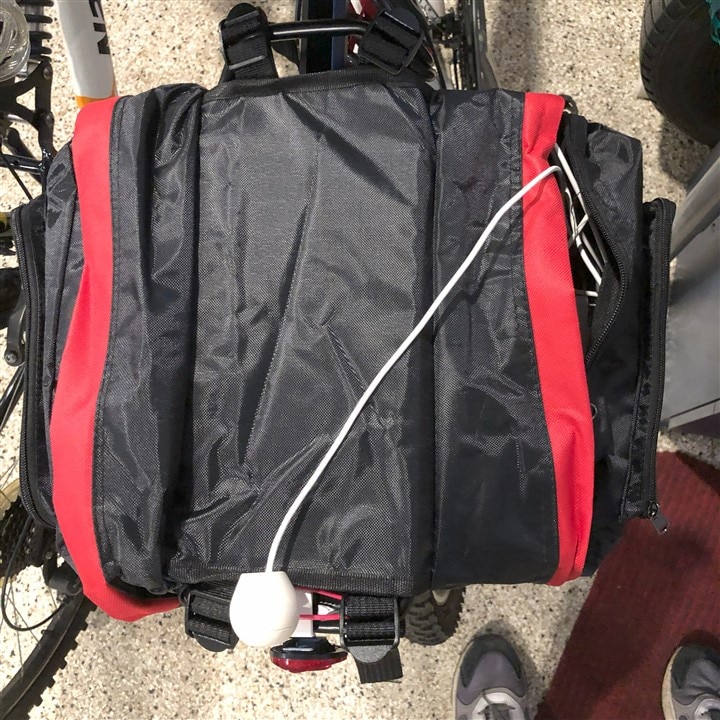
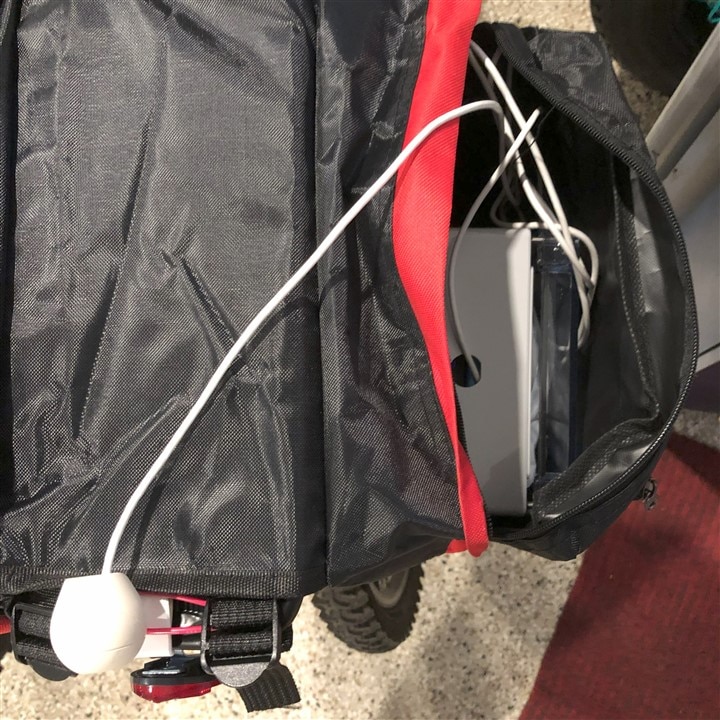
I've purchased a Large-Capacity Rear Seat Bag for Outdoor Cycling and a Bicycle Rear Seat Carrier - Luggage Cargo Rack to host my HAMMOND 1554VA2GYCL Plastic Enclosure and other components. Once the order was delivered I installed the rack and the bag on my bicycle and put the prototype inside the bag.
| {gallery}Bicycle with a rack |
|---|
|
The rack back view |
|
The rack-top view |
|
Inside the bag |
Video Recorder App
I wrote a Python app using the OpenCV library to record 20 minutes of video. Then I configured it to be started immediately after the RPi boot.
import cv2
import datetime

def get_current_datetime_string():
    """
    Returns the current date and time as a string in the format "YYYYMMDDHHMMSS".
    """
    now = datetime.datetime.now()
    return now.strftime("%Y%m%d%H%M%S")

# function video capture
cap = cv2.VideoCapture("/dev/video0",  cv2.CAP_V4L2)

if not cap.isOpened():
    print("Error: Could not open video Source.")
    exit()
"""
uvcdynctrl -f
Ubisoft camera
Pixel format: YUYV (YUYV 4:2:2; MIME type: video/x-raw-yuv)
  Frame size: 640x480
    Frame rates: 30, 20, 15, 10, 5, 1
  Frame size: 320x240
    Frame intervals: 1/30, 1/20, 1/15, 1/10, 1589/15625, 1/1
  Frame size: 160x120
    Frame intervals: 1/30, 1/20, 1/15, 1/10, 1589/15625, 1/1
  Frame size: 176x144
    Frame intervals: 1/30, 1/20, 1/15, 1/10, 1589/15625, 1/1
  Frame size: 352x288
    Frame intervals: 1/30, 1/20, 1/15, 1/10, 1589/15625, 1/1

DYNEX camera
Pixel format: MJPG (Motion-JPEG; MIME type: image/jpeg)
  Frame size: 640x480
    Frame rates: 30, 25, 20, 15, 10, 5
  Frame size: 352x288
    Frame rates: 30, 25, 20, 15, 10, 5
  Frame size: 320x240
    Frame rates: 30, 25, 20, 15, 10, 5
  Frame size: 176x144
    Frame rates: 30, 25, 20, 15, 10, 5
  Frame size: 160x120
    Frame rates: 30, 25, 20, 15, 10, 5
  Frame size: 1280x1024
    Frame rates: 15, 10, 5

"""
cap.set(3,320)
cap.set(4,320)

# rame rate or frames per second
fps = 30

# Width and height of the frames in the video stream

size = (int(cap.get(cv2.CAP_PROP_FRAME_WIDTH)), int(cap.get(cv2.CAP_PROP_FRAME_HEIGHT)))
#size = (320, 320)
"""
Create a VideoWriter object.
FourCC FourCC is a 4-byte code used to specify the video codec. The list of available codes can be found in fourcc.org. It is platform dependent.
number of frames per second (fps)
frame size should be passed.
May specify isColor flag. If it is True, encoder expect color frame, otherwise it works with grayscale frame.
"""
fourcc = cv2.VideoWriter_fourcc(*'mp4v')
videoWriter = cv2.VideoWriter('/var/lib/tail/tail-'+get_current_datetime_string()+'.mp4',
    fourcc, fps, size)
    #cv2.VideoWriter_fourcc('I','4','2','0'), fps, size)

success, frame = cap.read()

# 20 minutes maximum recording
numFramesRemaining = 20*60*fps

# loop until there are no more frames and variable > 0
while success and numFramesRemaining > 0:
    videoWriter.write(frame)
    success, frame = cap.read()
    if not success:
        print("Failed to grab the frame from the video source, Trying again...")
    #else:
    #    print(f'Height: {frame.shape[0]}, Width: {frame.shape[1]}')

    # cv2.imshow('frame',frame)
    if cv2.waitKey(1) & 0xFF == ord('q'):
        break
    numFramesRemaining -= 1

#Closes video file or capturing device
cap.release()
videoWriter.release()
cv2.destroyAllWindows()
Ready to test
At this point, I was ready to record the video and start further development.

