


Intro
My project in "Experimenting with Extreme Environments" is planned as an continuation of work I have done in "Experimenting with Waterproof Connectors", which - while giving some interesting results, have left questions unanswered and some topics omitted. Taking advantage of the fact that Experimenting With Extreme Environments is using the same enclosure as in previous contest, I have decided to do some additional research that would increase my experience with outdoor equipment usage.
Experimenting with Waterproof Connectors project brief
During my last-year project, I have developed measurement setup consisting of:
- central monitoring station - based of LattePanda SBC - running GNU/Linux with InfluxDB database and Grafana visualization tool,
- three different enclosures, each fitted with battery powered temperature, humidity and pressure monitoring sensors and transmitting data to the central station using WiFi connection,
To properly evaluate parameters of Hammond 1554VA enclosure (the same as in current competition, but fitted with a broad range of different waterproof connectors this time), I have decided to compare it to two other waterproof enclosures:
- completely sealed Kradex Z74 enclosure (rated for IP65),
- and second Kradex Z74, but with top lid seal removed, emulating typical, non-sealed enclosure
The whole setup was then installed on the roofed balcony during the spring in Central European climate - which shouldn't be demanding for water immersion rated enclosure. Reality proved slightly different - even limited day-night temperature changes has caused enough water vapor migration to make observable constant humidity increase inside of enclosures.
During the experiment, several problems were identified:
- to limit equipment cost, sensor array consisted of different hardware, which could be viewed as a factor increasing uncertainty of results,
- hardware of different make had various idle power consumption, leading to different battery lifespans (one of the sensors needed to be recharged every several days - which was problematic as every enclosure opening changed parameters inside),
- there was not battery undervoltage protection, which in connection to - seemingly - lack of working brownout protection has led to undefined behavior when battery voltage was low,
Experimenting with Extreme Environments - preparations
Raspberry PI unboxing
In this challenge, Sponsors and Element14 were so kind as to give us some good quality hardware to make our experiments. Those components will be described in more detail in the following material, starting with Rasoberry PI SBC.
As of active components, we were granted:
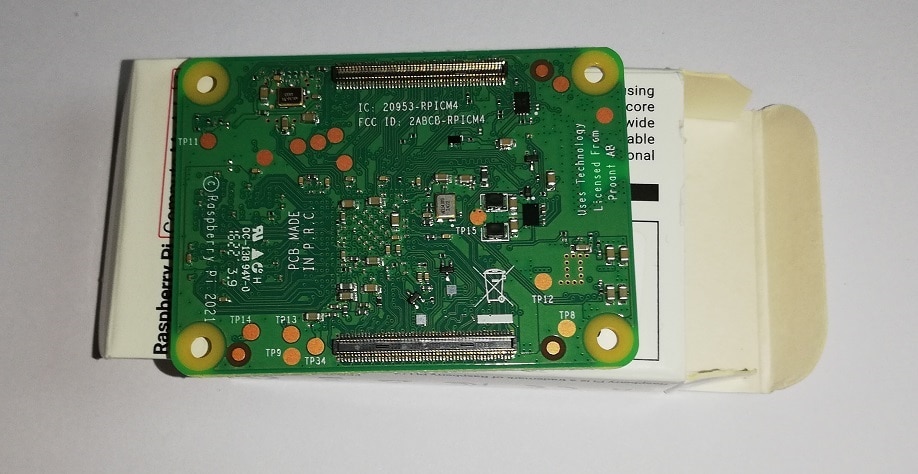
- Raspberry PI Compute Module 4,
- Raspberry PI Compute Module 4 IO Board,
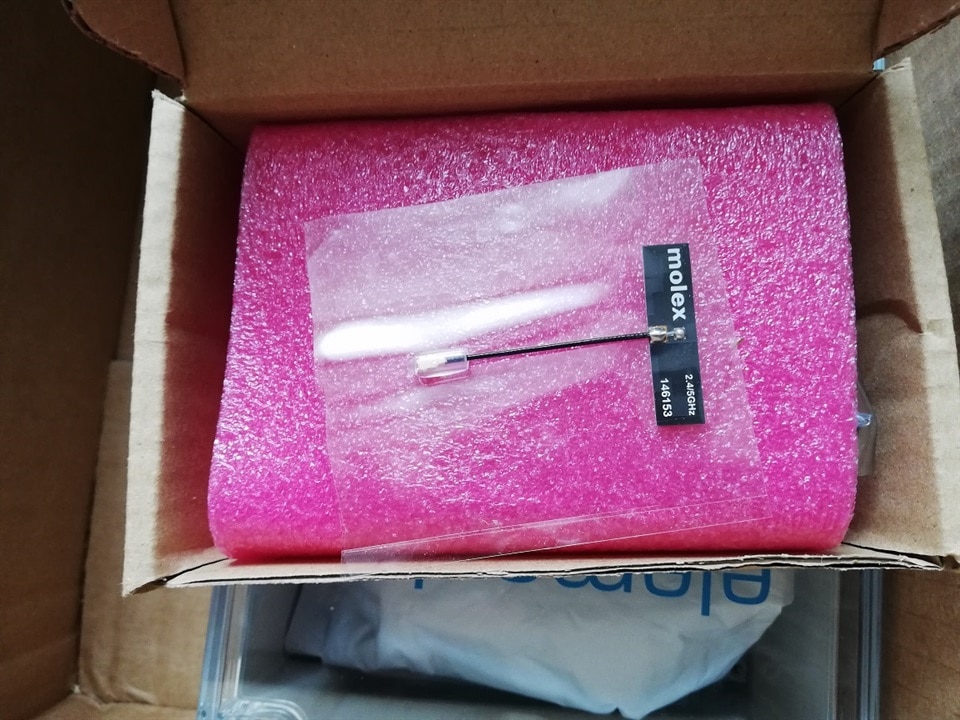
- Molex internal 2.4GHz/5GHz antenna
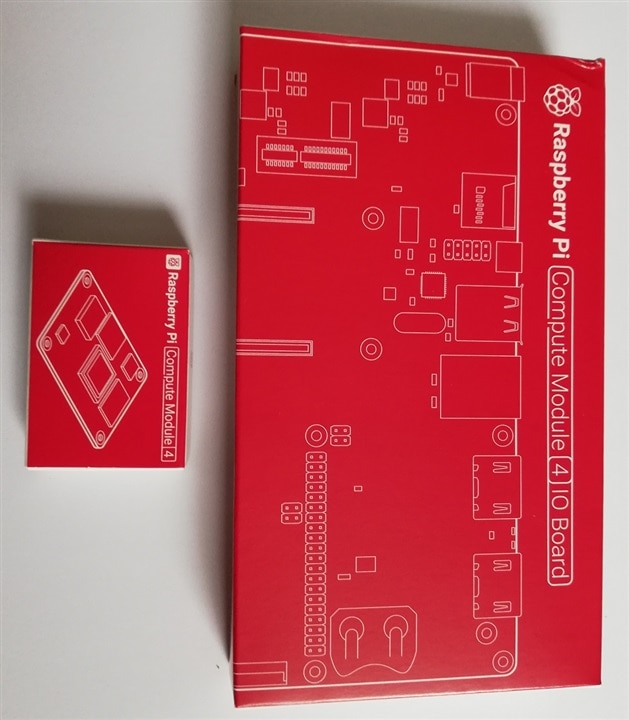
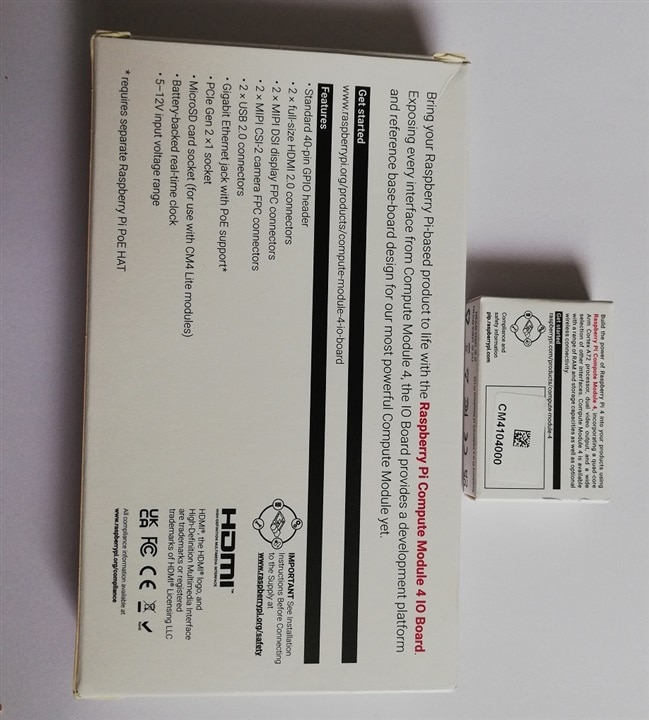
They have arrived (with other components consisting of design kit) well packaged and (in the case of Raspberry PI boards) inside colorful retail carton boxes. Below are some photos of these components:
| {gallery}Raspberry PI unboxing |
|---|
|
|
|
|
|
|
|
|
|
|
|
|
|
|
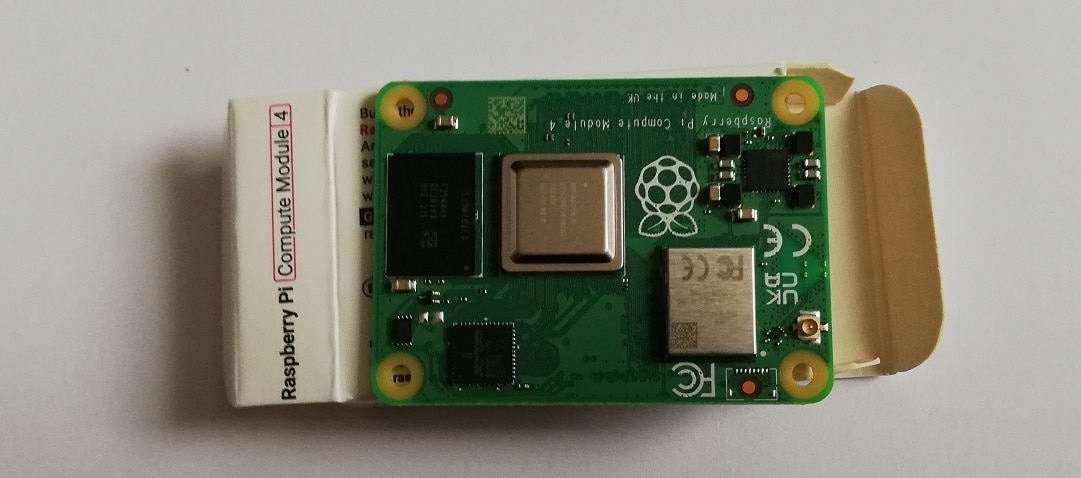
What is interesting is the fact that the compute module has arrived without any sort of anti-static bag, but despite this fact is working correctly - maybe some additional ESD protections are builtin?
Raspberry PI Compute Module 4 (CM4) can be treated as a Rasberry PI 4B but in format suitable for installation inside other products. In the package of 55x40mm it includes:
- 4 core, 1.5GHz Broadcom BCM2711 ARM Cortex-A72 SoC,
- 1,2,4 or 8GB of RAM,
- 0 - 32GB eMMC,
- optional 2.4GHz/5GHz WiFi, Bluetooth 5.0, BLE interface,
- Gigabit Ethernet PHY,
- PCIe x1 interface,
- 1x USB 2.0 interface,
- 28 GPIO pins,
- SD card interface (for variants without installed eMMC memory),
- dual HDMI,
- two display (DSI) and camera (CSI) interfaces,
and is designed to work in -20°C - +85°C temperature range.
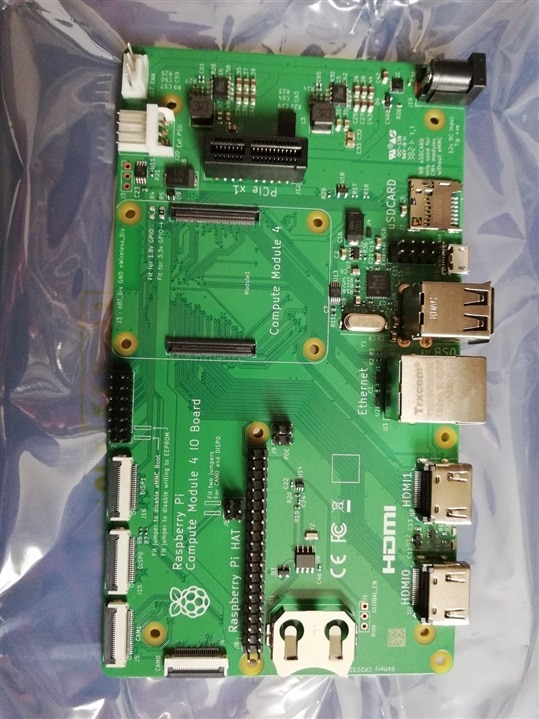
As CM4 is not meant for standalone deployment, CM4 IO Board was also provided. It is working as breakout board for compute module, with some additional hardware:
- power supply (specified for input 12V, but only when powering with 12V PCIe connector, external 12V output or a fan strict 12V is needed - in other cases, wider range of input voltage can be used: 7.5V - 26V),
- 4-port USB 2.0 HUB (with two ports accessible on the header) - disabled to conserve power by default,
- MicroSD socket - only for compute modules without eMMC builtin,
- fan connector,
- Real Time Clock with battery backup and the possibility to wake up powered down CM
Compute Module provided is an CM4104000, which means
- radio module installed (CM4104000),
- 4GB RAM (CM4104000),
- no eMMC builtin (CM4104000),
Module installed on IO board looks as below:
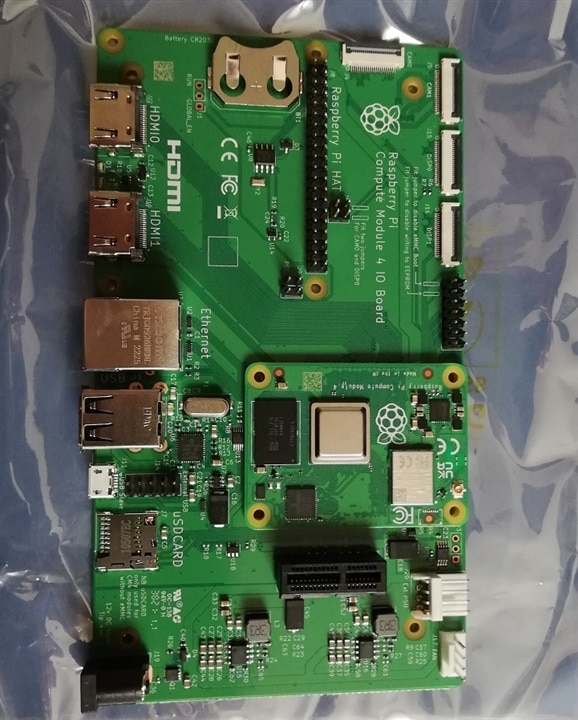
and the question that's need to be addressed is - does it require a heat-sink (especially given many models of heat-sinks offered for CM4 and the popular opinion that Raspeberry PI's generally need them)? We will try to discover...
Raspberry PI installation
Raspberry PI installation is pretty straightforward - it is using customized Debian GNU/Linux version called Raspberry PI OS (previously called Raspbian), which is generally widely compatible with different hardware boards - one should only know if 32bit or 64bit version is needed and if full GUI will be used, or more compact Lite version suffices.
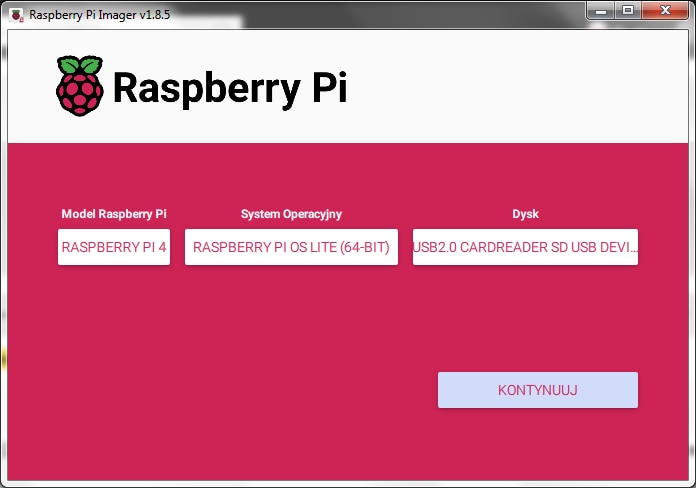
I have decided to install newest, 64bit release (codenamed Bookworm - probably to be consistent with current Debian 12 release) Lite version.
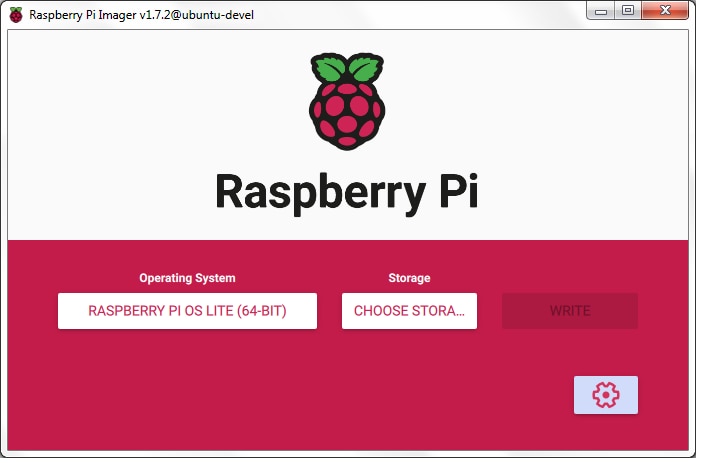
OS installation can be achieved as in the case of other MicroSD bootable SBC by writing an image into a SD card using any suitable tool, but in the case of Raspberry Pi it can be even easier. As I am somewhat wary of every company providing their own tool for doing simple things (be it download manager or SD card writer), I have initially written the OS using existing tool, only to learn that Raspberry PI Imager really has some value added.
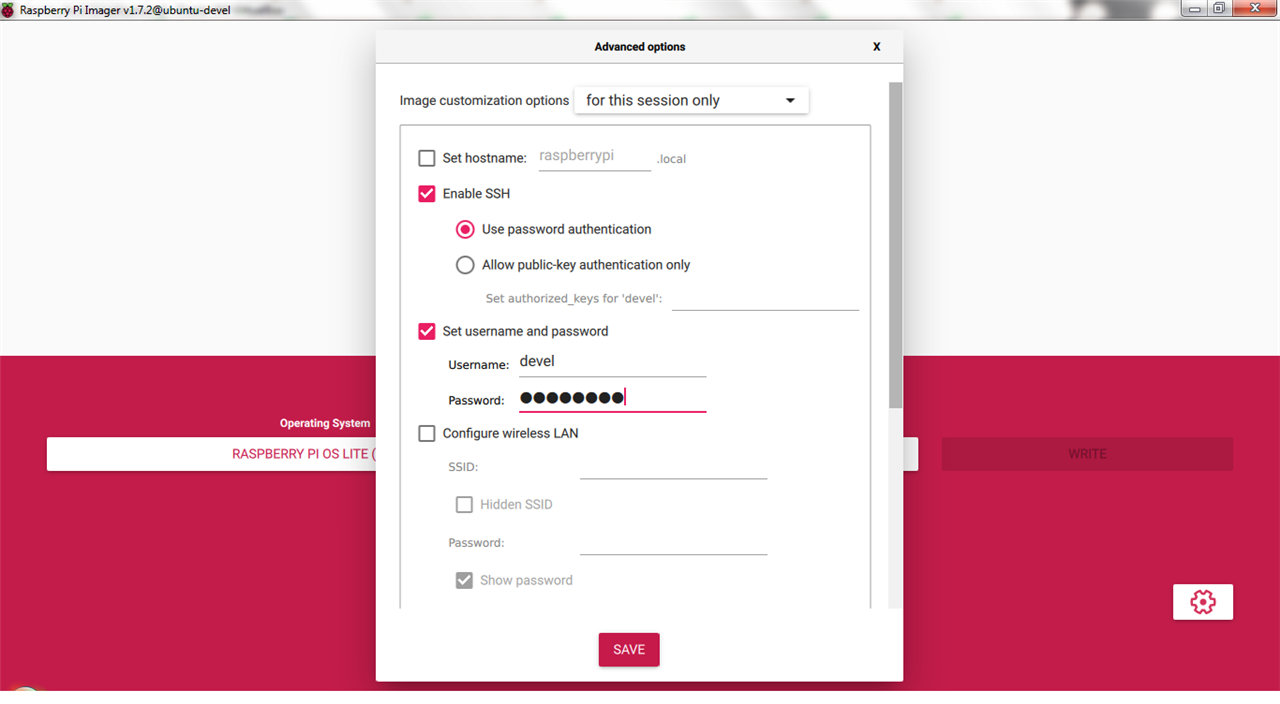
As software security is increasing, usually there is no remote access configured by default and initial configuration needs to be done using typical keyboard and monitor setup - it turns out not in the case of Raspberry PI Imager.
It can customize image written by creating user account, set the password, enable SSH or even enable and configure WiFi (in some cases using data gathered from the workstation it is running it seems - because it can pre-fill SSID and password fields):
| {gallery}Raspberry PI Imager |
|---|
|
|
|
Raspberry PI customization
After installation, we can enable RTC (and install it's battery backup). To enable it, one should modify config.txt file residing on MicroSD card by adding two lines:
dtparam=i2c_vc=on
dtoverlay=i2c-rtc,pcf85063a,i2c_csi_dsi,addr=0x51
more information can be found on the forum, for example
https://forums.raspberrypi.com/viewtopic.php?t=293632
now, RTC can be detected on I2C bus no. 10 at 0x51:i2cdetect -y 10 0 1 2 3 4 5 6 7 8 9 a b c d e f00: -- -- -- -- 0c -- -- --10: -- -- -- -- -- -- -- -- -- -- -- -- -- -- -- --20: -- -- -- -- -- -- -- -- -- -- -- -- -- -- -- 2f30: -- -- -- -- -- -- -- -- -- -- -- -- -- -- -- --40: -- -- -- -- -- -- -- -- -- -- -- -- -- -- -- --50: -- UU -- -- -- -- -- -- -- -- -- -- -- -- -- --60: -- -- -- -- -- -- -- -- -- -- -- -- -- -- -- --70: -- -- -- -- -- -- -- --
detected by the OS
# dmesg | grep rtc[ 2.698273] rtc-pcf85063 10-0051: registered as rtc0[ 2.700733] rtc-pcf85063 10-0051: setting system clock to 2024-04-25T11:26:47 UTC (1714044407)
and queried from the shell#hwclock -v[...]Waiting in loop for time from /dev/rtc0 to change...got clock tickTime read from Hardware Clock: 2024/04/25 14:00:06Hw clock time : 2024/04/25 14:00:06 = 1714053606 seconds since 1969Time since last adjustment is 103966 secondsCalculated Hardware Clock drift is 0.000000 seconds
then, we can enable I2C on GPIO header using CLI tool raspi-config (Interface Options -> I2C -> Enable)
Raspberry PI thermal tests
To test the possibility of operating Raspberry PI CM4 inside closed enclosure at elevated external temperatures (or - at least - if it can be operated without heatsink), stress tests were conducted.
Knowing that the hardware has CPU clock throttling capability designed to minimize probability of thermal failure in case of overheating, four parameters were monitored:
- CPU temperature,
- external temperature (using I2C connected spare AHT20 sensor),
- CPUfrequency,
- and CPU frequency throttling flag,
External temperature sensor was installed on prototyping board, connected with GPIO header of Raspberry PI IO Board
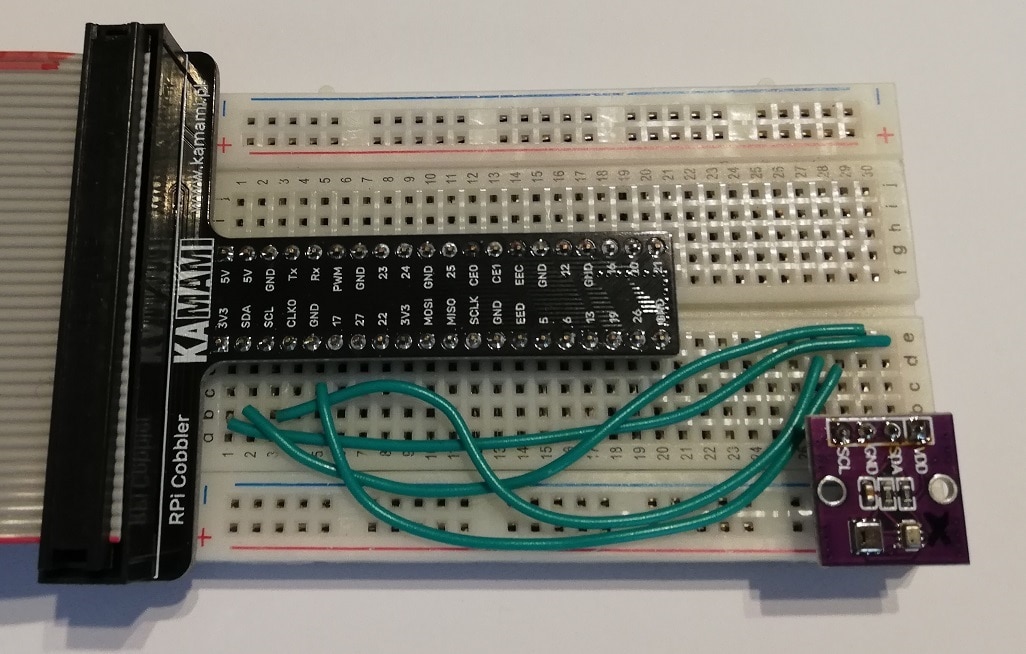
and a trap was encountered - before sensor installation, supply voltages on breakout board were measured and turned negative (-5V at 5V rail and -3.3.V at 3.3V rail) - after some checking it was made evident that connector cable was faulty (red line was on opposite side than first pin indicator, which have reversed all the pinout). Final config has included faulty cable indication as below: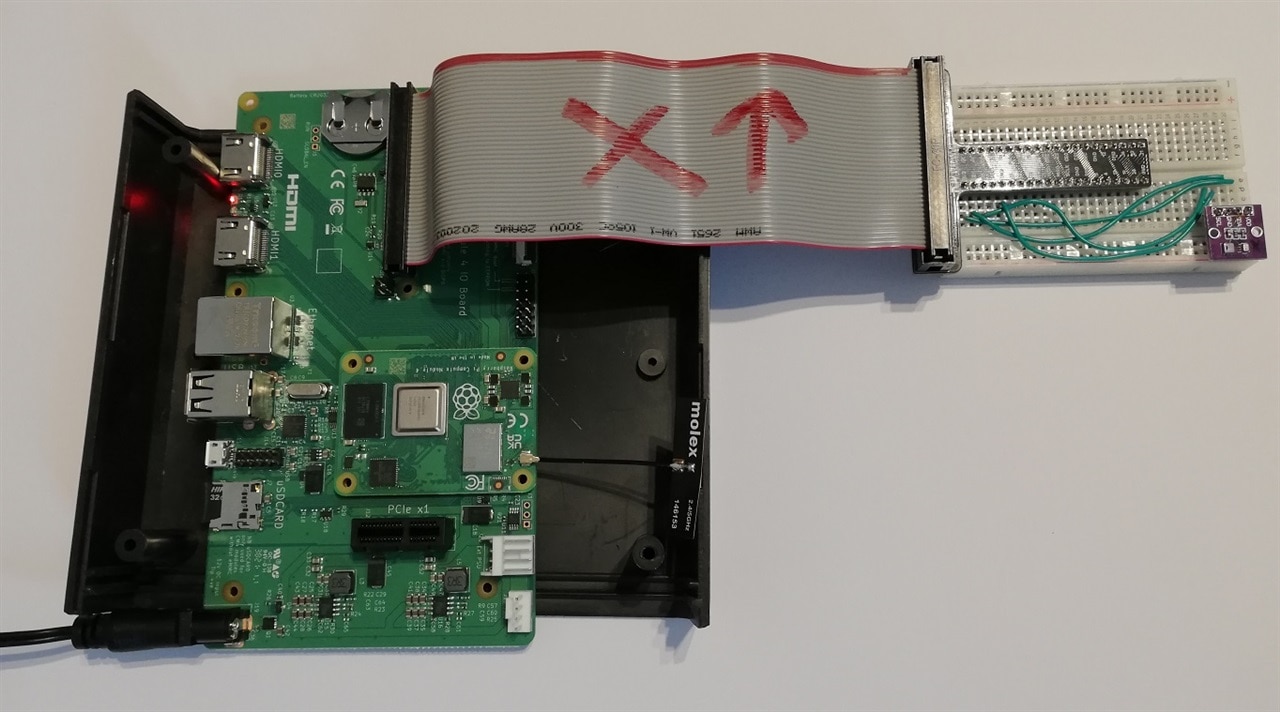
Next, temperature reading script was prepared. In the case of AHT20, there is a ready Python library that can be installed as below (in virtual environment the Python insisting on using):#apt-get install python3-pip
service@extremeenv:~ $ python3 -m venv extremeenv
service@extremeenv:~ $ extremeenv/bin/python3 -m pip install Adafruit_Blinka adafruit-circuitpython-ahtx0
Script code was some simplification of code used in example below:
https://medium.com/@makvoid/easy-climate-monitoring-using-a-raspberry-pi-b43fc55b579c
and is as simple as this:
#!/home/service/extremeenv/bin/python3
import adafruit_ahtx0
import board
sensor = adafruit_ahtx0.AHTx0(board.I2C())
def round_num(input):
    return '{:.2f}'.format(input)
print('ext_temp=',round_num(sensor.temperature),',humidity=', round_num(sensor.relative_humidity))
CPU temperature, clock frequency and throttling flags are obtained using vcgencmd utility:$vcgencmd measure_temp$vcgencmd measure_clock arm $vcgencmd get_throttled
then all this data is stored in InfluxDB database for easy visualizing using Grafana
Open case test
To get some baseline and verify if heatsink needs to be acquired, initial tests were conducted in open case configuration, when board was only protected by the top and bottom parts of enclosure, with free airflow through the sides.
Test was conducted by running stress load tester on all four cores for 30 minutes, using following command:$stress -c 4 -t 1800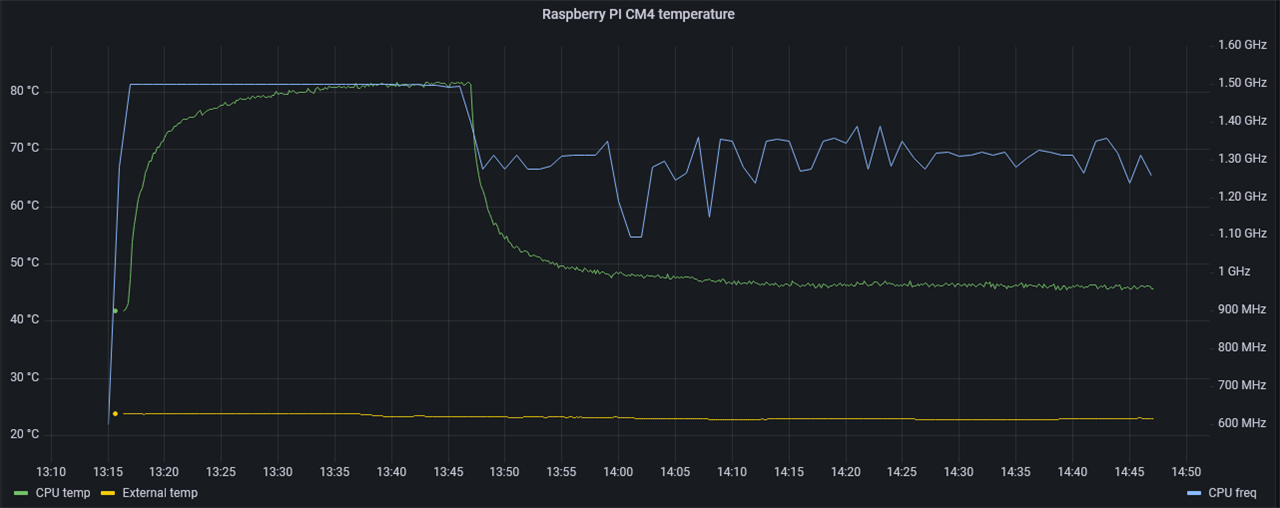
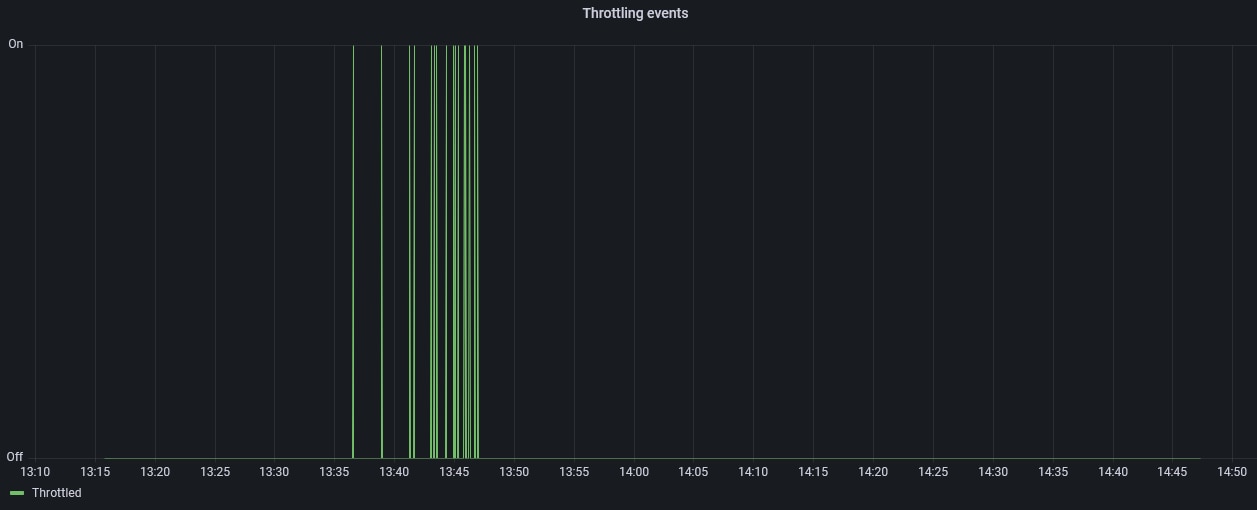
as can be seen, throttling threshold is set at about 80°C, throttling events are rare and short, CPU temperature stabilizes at 80°C without the need of visible clock frequency reduction, so it seems that CM4 can be run in open case without heatsinks and it's performance isn't affected by excessive temperature.
Conclussions
When researching thermal requirements of Raspberry PI I have encountered interesting article about power consumption reduction on RPI4, which includes some interesting thermal data:
https://www.raspberrypi.com/news/thermal-testing-raspberry-pi-4/
The whole article is about improvements of power consumption of Raspberry Pi 4 introduced with newer versions of firmware. but temperature graphs are quite interesting.
Beginning with RPI3 baseline:
then the most advanced version of RPI4 firmware:
It seems that thermal throttling in RPI3 doesn't prevent temperature increase during the test, and RPI4 throttling is far more aggressive than observed in our CM4 (CPU clock frequency is far more reduced than observed in my tests).
This fact can be attributed to the different load profile - they are putting load not only on CPU but also on graphics cores during the test, probably generating more heat, but anyway, CM4 retains more performance (as function of CPU frequency) during the test.
