


Intro
In the previous blog we have checked the possibility of running Raspberry PI CM4 without an heat-sink inside of open enclosure and have learned that SoC temperature is limited to about 80°C by clock frequency throttling, which is preventing overheating.
It seems in line with the official documentation, which states (https://www.raspberrypi.com/documentation/computers/raspberry-pi.html):
Thanks to built-in throttling, heatsinks are not necessary to prevent overheating damage to the SoC. However, a heatsink or small fan can reduce thermal throttling and improve performance. Mount the Raspberry Pi vertically for the best airflow and thus slightly improved heat dissipation.
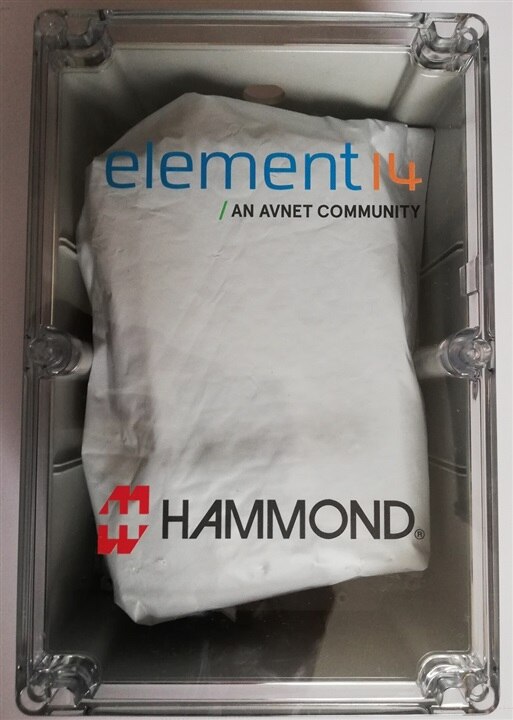
Next, we will check what would be the effect of moving CM4 into closed, hermetic enclosure - but first, some information of our primary test subject, Hammond 1554VA2GYCL enclosure
Enclosure and connector set unboxing
Enclosure
Mayor part of our challenger's kit is an Hammond 1554 series plastic enclosure.
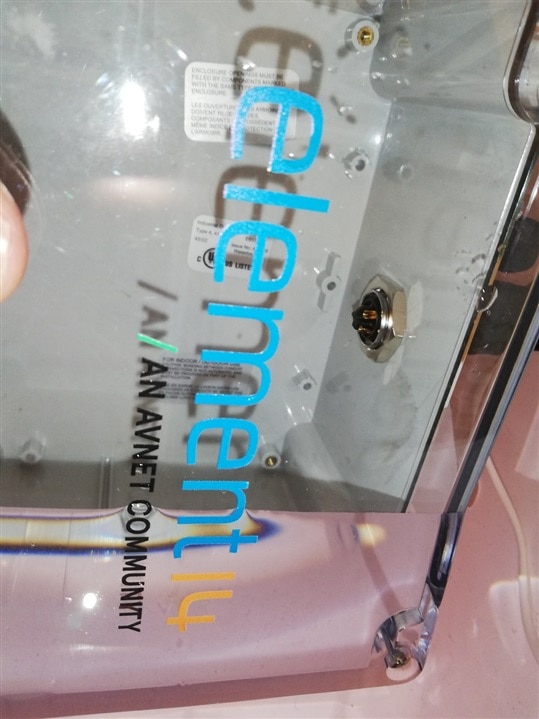
As can be seen, this IP68 rated enclosure was delivered with project-related customization: top lid branding and dedicated opening for the socket we were also provided (Amphenol ICC MRD series connector). This customization was probably done by Hammond Modification Services - where, according to the manufacturer, customer can order varying changes to the enclosures, even for small batches. In our case, socket opening was prepared in the shape hard to replicate in limited time using non-specialized tools.

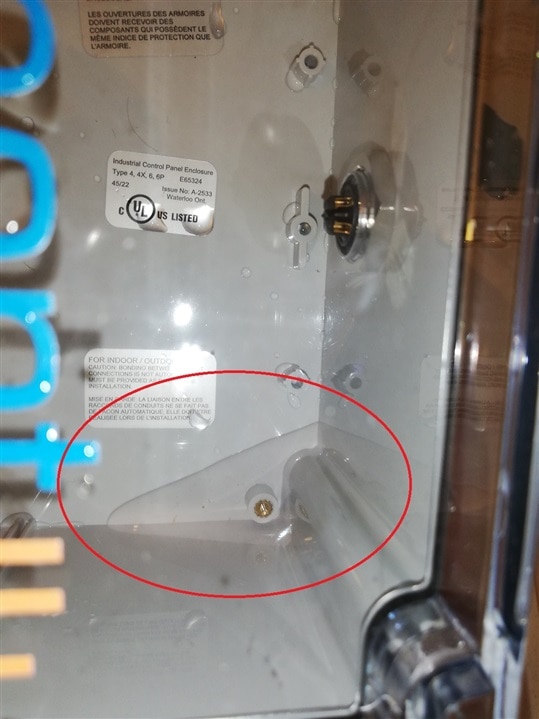
Enclosure internals are shown in the next photo
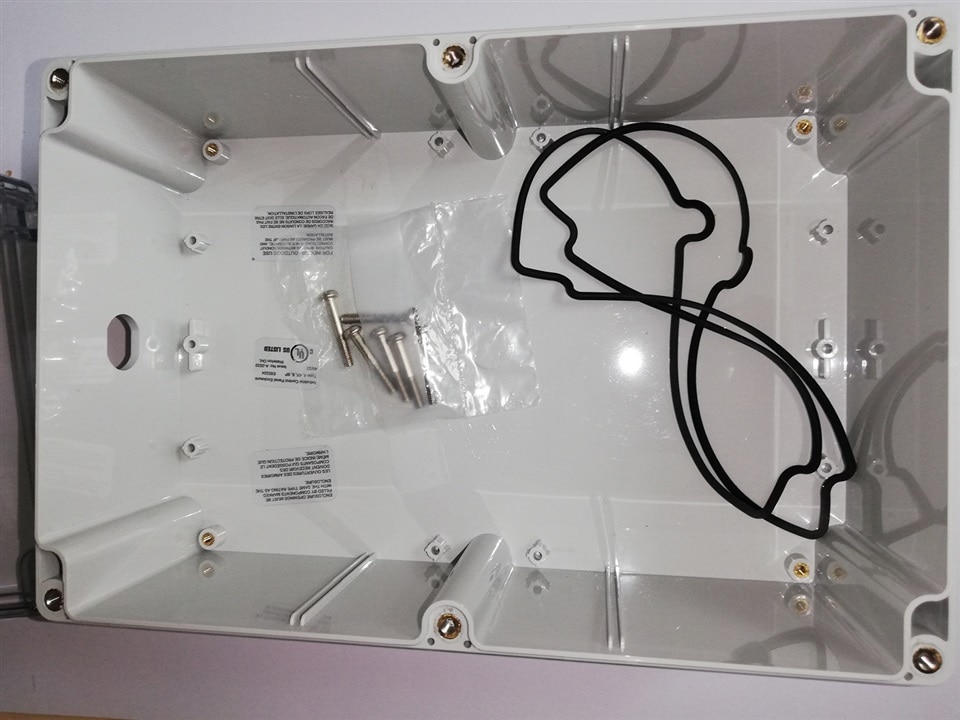
and sport features like:
- self captivating screws (you will never lose screws again by putting removed lid upside down),
- threaded bushings not only for the lid, but also for the components inside (which enables frequent opening without the fear of damaging the enclosure by re-threading plastic parts that is possible in some budget enclosures where screws are inserted directly into holes in plastic walls),
- profiled gasket for installation in "tongue & groove" type construction for additional protection,
- vertical PCB guides for alternative component mounting options,
Our version is made of polycarbonate (there is also ABS variant for indoor use) and is UV stabilized for outdoor use. It is also IP68 rated - there are similar enclosures (but with four screws), which are NEMA 4/4X only - there was a long discussion about this last year, but the manufacturer's support finally clarified that "Except 1554/55 V size which is 4,4X only" is about only 4-screw variants.
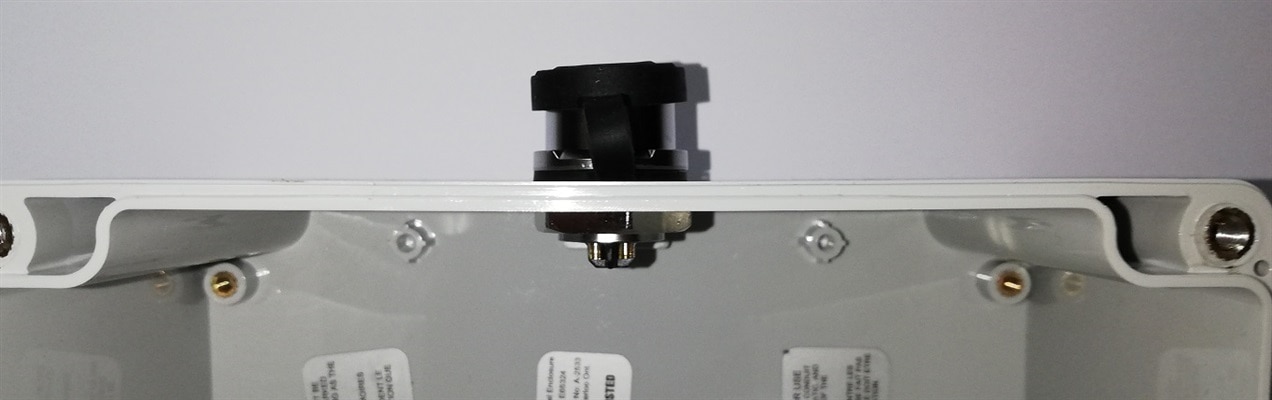
Self-captivating feature can be better seen on the photo following:
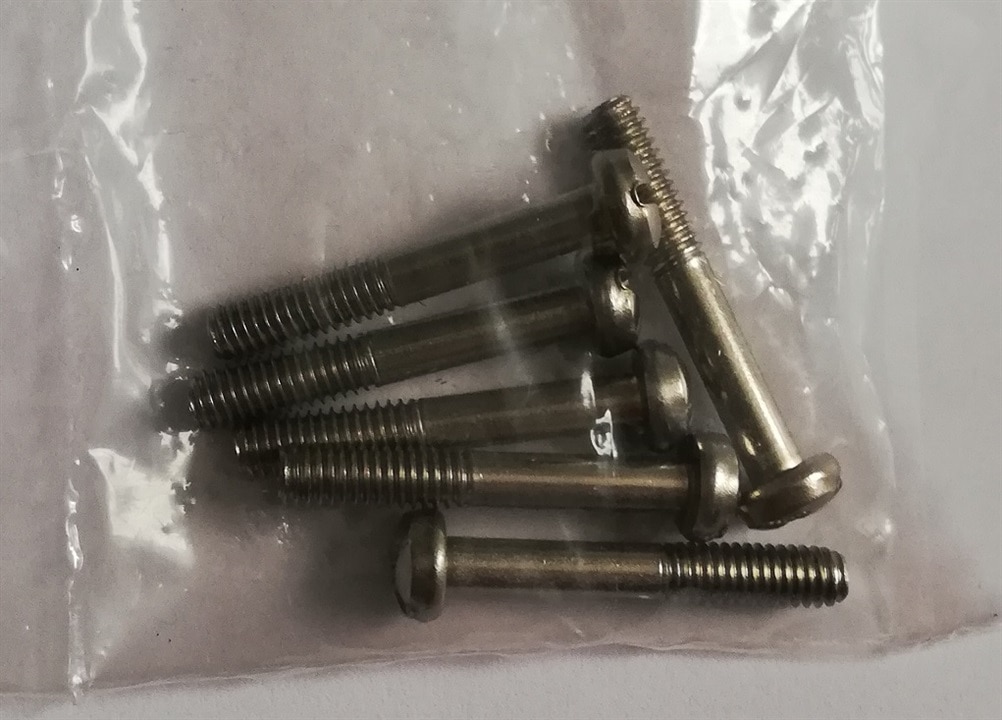
as can be seen, threaded part is thicker than the next section, so - during the initial installation - lid openings get threaded and then screws stay in place even when the lid is turned upside down.
Connector set
Next part of our challenger's kit is an connector set, consisting of 4-contact socket and the matched plug.
| {gallery}connector set |
|---|
|
|
|
|
|
|

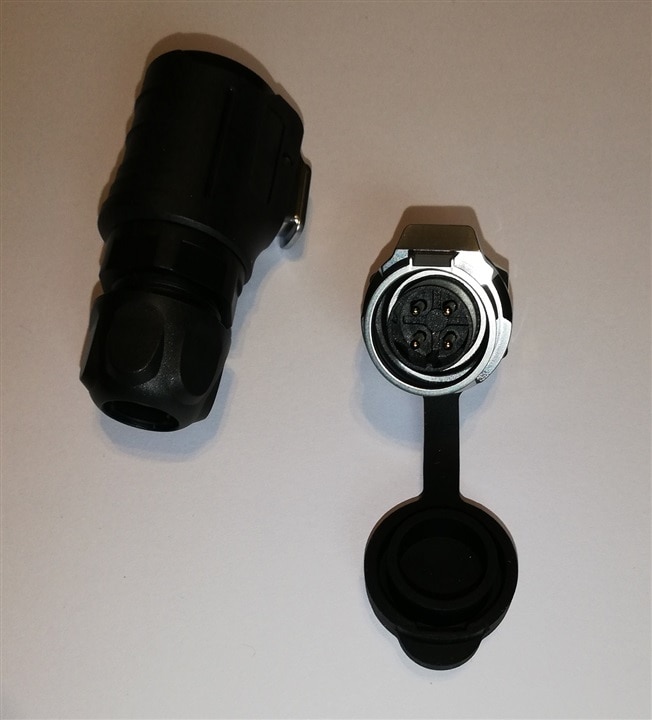

This connector belongs to the IP67 rated MRD Rugged Circular Locking Connector series by Amphenol ICC and features four contacts and metal latch lock.
One thing worth mentioning is the condition of IP67 rating - it is usually specified for "unmated condition unless otherwise stated", and here such statement is present: "IP67 in the mated conditions water/dust proof" - hence the rubber protection cap for the socket to protect it from water ingress. We will test it shortly.
Enclosure/connector set water immersion tests
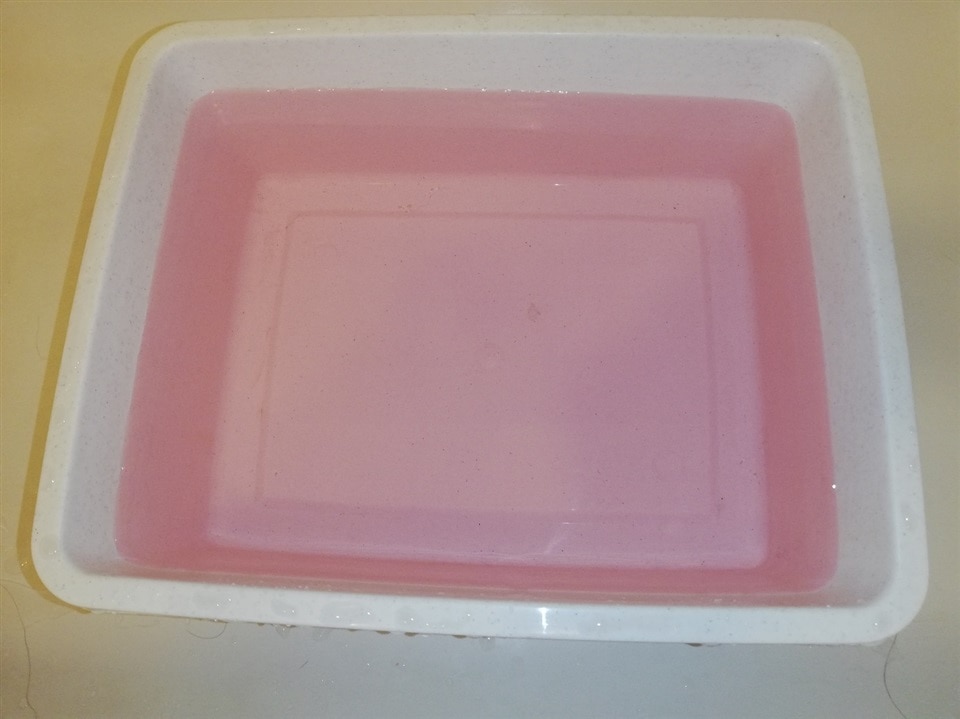
As our enclosure and connector is rated to at least IP67, our next test will be water immersion. First, container with dyed (to make eventual leaks more visible) water was prepared
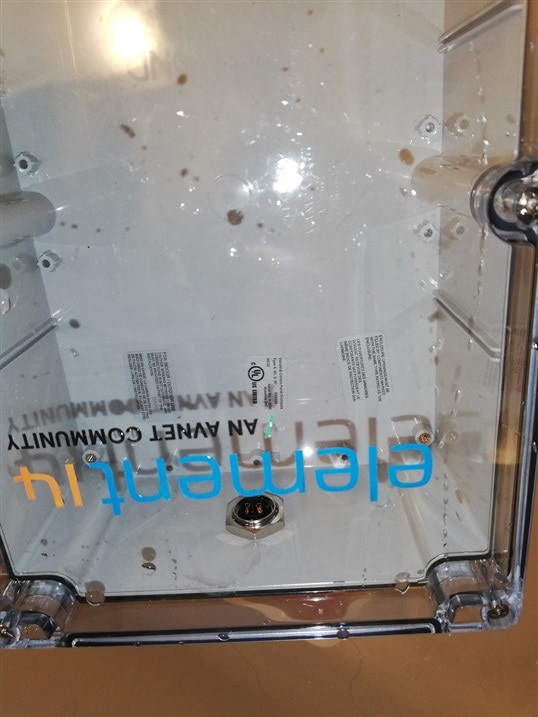
then connector was installed in the enclosure:
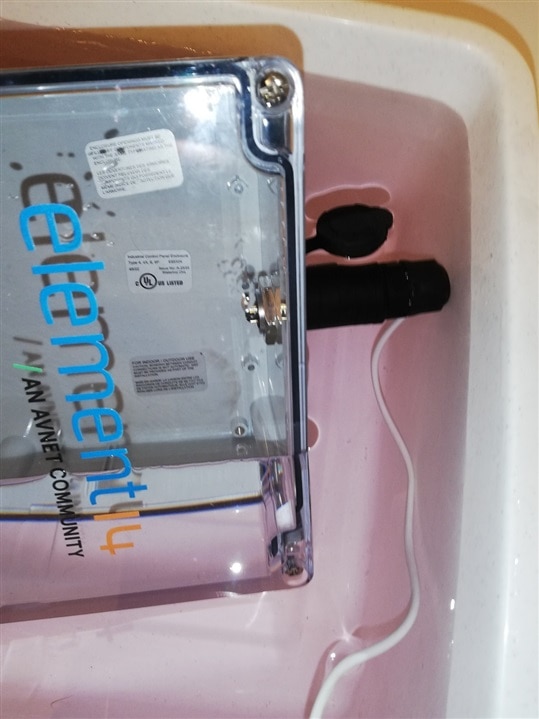
and the first test - water immersion of enclosure without a plug attached and with protection cap installed. As can be seen, no air bubbles after initial immersion are visible (which would indicate water leak) and the enclosure interior is dry after the test.
Then some tests with the plug installed but using the cable of improper diameter (giving opportunity for water to enter the plug at the cable entry point) which proven indecisive:
| {gallery}Indecisive test results - plug but no sealed |
|---|

|
|
|
and finally immersion test with protective cap removed and without the plug. This one is negative as expected and proves than cable installation should be done in adequate conditions because during it enclosure assembly is not guaranteed to be waterproof
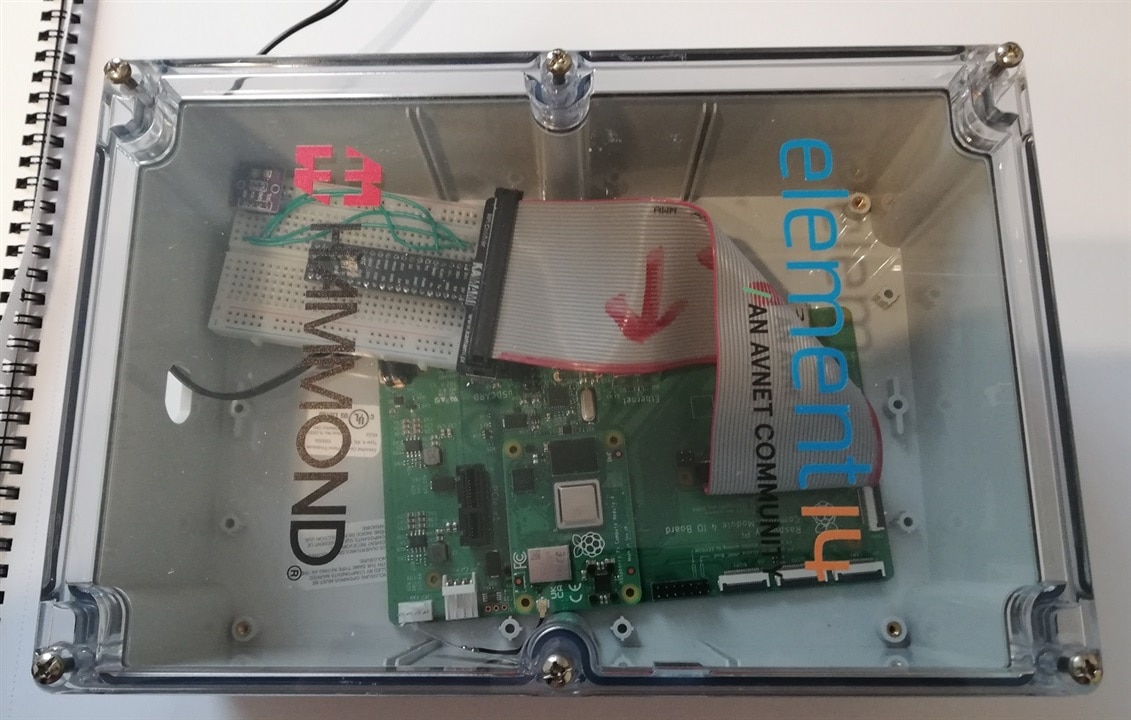
Raspberry PI self-heating test inside of enclosure (aka dispatch the hogs!)
To asses how the installation inside of waterproof enclosure is worsening thermal operation of the Raspberry PI, stress test were repeated.
Raspberry PI board was put into enclosure operated indoors at room temperature and stress tests were repeated (in some stages as the test procedure was adapted after analyzing intermittent results - for example, enclosure sealing was examined to prevent stray air exchange).
Load test was executed - as in previous case, using four (the number of CPU cores of installed SoC) workers, aka hogs for half an hour
$stress -c 4 -t 1800

stress: info: [60241] dispatching hogs: 4 cpu, 0 io, 0 vm, 0 hdd
stress: info: [60241] successful run completed in 30s

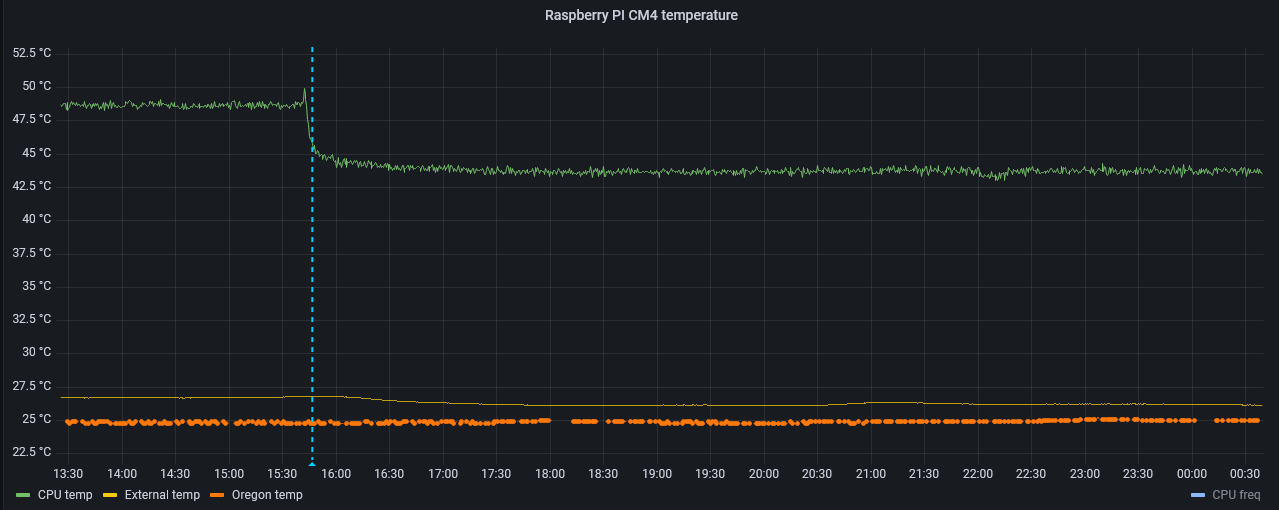
First results indicated something like slow but constant temperature grow inside of enclosure (and proportional idle CPU temperature increase) - not good

as temperature increase seemed constant but slow, some stress tests were executed first (to asses if it is going to cool itself between tests), then external temperature monitoring was added to take into consideration slow changes of ambient temperature
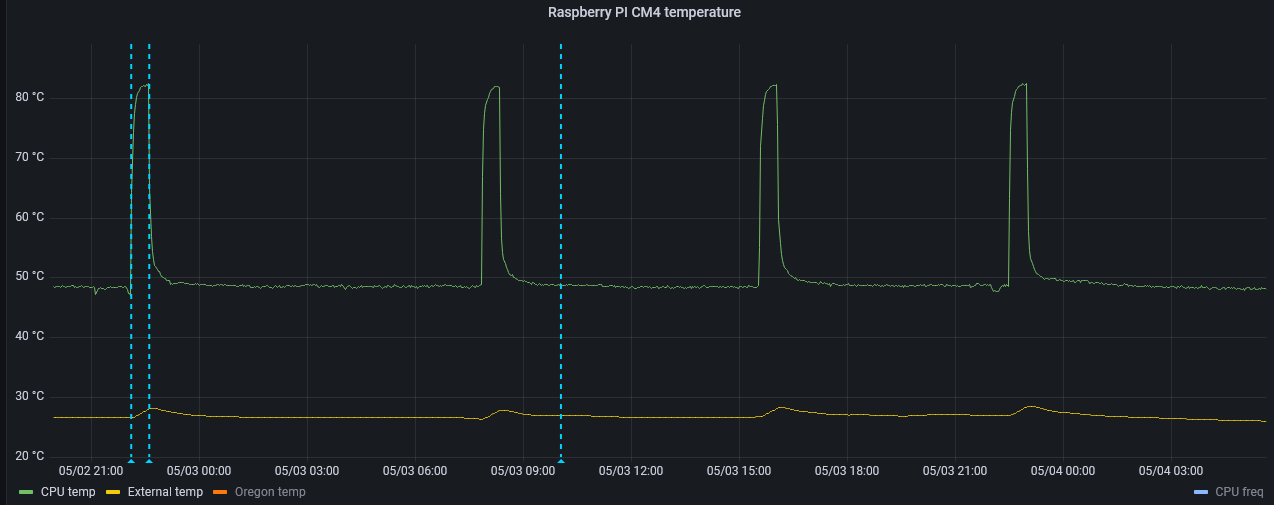
after adding external temperature sensor (orange line below), it has been made evident that the enclosure (during low CPU load) is operating at about +1.8°C above ambient and it relatively quickly cools down after brief high CPU usage period

Results as above were obtained using default OS settings. Previously linked documentation (https://www.raspberrypi.com/documentation/computers/raspberry-pi.html) also lists two means of reducing power consumption (and heat dissipation). First one is to set Dynamic Voltage and Frequency Scaling (DVFS) mechanism into the mode allowing for undervoltage - not recommended and discontinued in Raspberry PI 5 because of adverse effect undervoltage can bring for some accessories (like PCIe interface).
Second one is the change of CPU frequency governor inside GNU/Linux from "ondemand" to "powersave" using cpufreq utils.
$sudo apt install cpufrequtils
$sudo cpufreq-set -g powersave
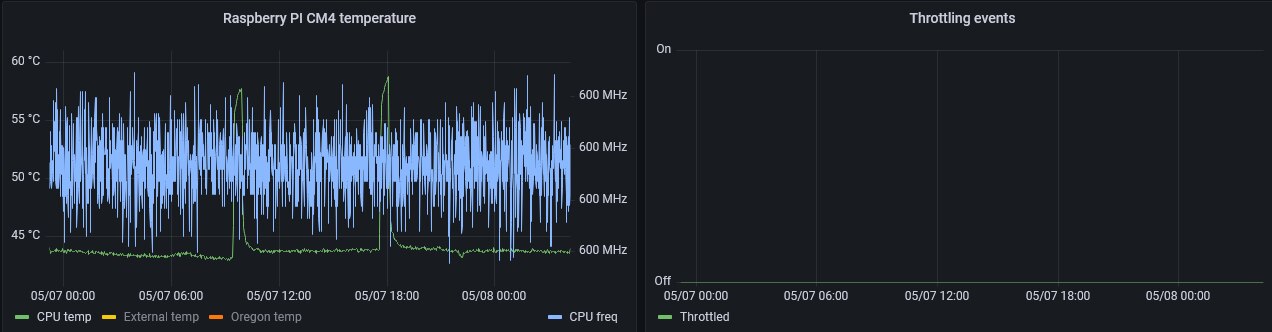
After than change, temperature reduction was observed. Not only enclosure temperature in regard to external temperature have dropped to about +1.2°C, but mean idle CPU temperature decreased about 5°C
This change can be attributed to CPU frequency change: not only during idle operation it was reduced from about 1.3GHz to 600MHz, but also during stress tests it have stayed the same, limiting heating and eliminating throttling events.
Conclussions
During the testing to date, some facts were established:
- Enclosure is indeed waterproof, if only connector is not being left unconnected and without protective cap (that could be a problem in some remote installations without supervision),
- Raspberry PI can be installed inside without much thermal problems caused by the lack of free airflow,
- Observed additional heating can be reduced by running the board in powersave mode,
