In the previous blog, I have tested the sensor working using Multimeter. In this blog, I have created a small project using The thermostat switch.
Thermostat Switch Based Glue gun Temperature Control and alerting Through Notification.
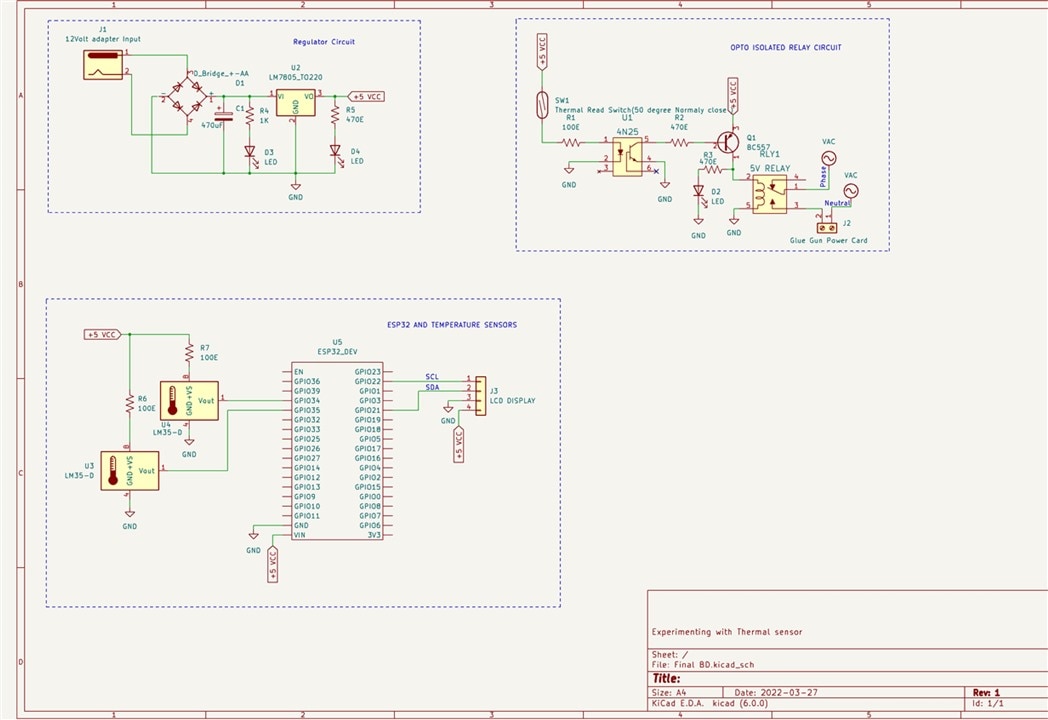
in this project, I am using two temperature sensors to monitor the temperature of the glue gun melted plastic and another temperature sensor to monitor the ambient temperature. The two temperature sensor is based on LM35D. 50 Degree Normally open thermostat switch is used to Monitor the Temperature of the glue gun. When the melted plastic temperature reaches more than 50 Degree Celcius the Thermostat switch goes to the open condition and the relay will be turned off using an optoisolator. When the temperature goes below 50 Degree Celcius the relay will be On Hence the Glue gun is On. The temperature details are displayed on the LCD display and as well as on the Blynk App. When the temperature is more than the threshold the notification is displayed on the app saying that the temperature reached its max level.
Block Diagram
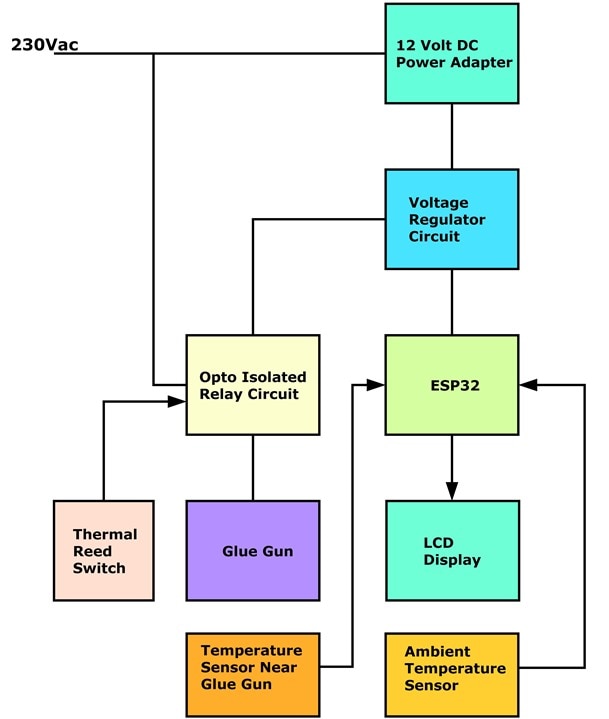
12 volt Dc power supply is used here to power up the microcontroller, Display, and Optoisolator circuit. The Temperature control mechanism is Standalone Circuitry, Microcontroller is not used to control the relay. The thermostat can be replaced Based on the required temperature Rating.

Fig. Project Full assembled View

Fig . Temperature sensor and Thermostat is placed To sense The melted plastic Temperature.
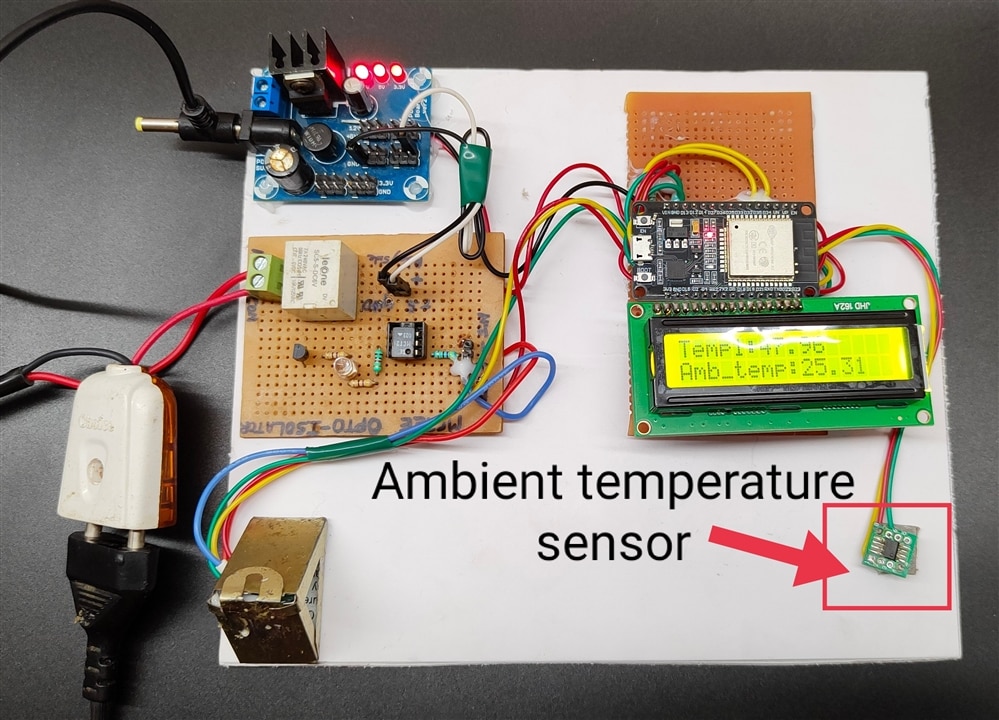
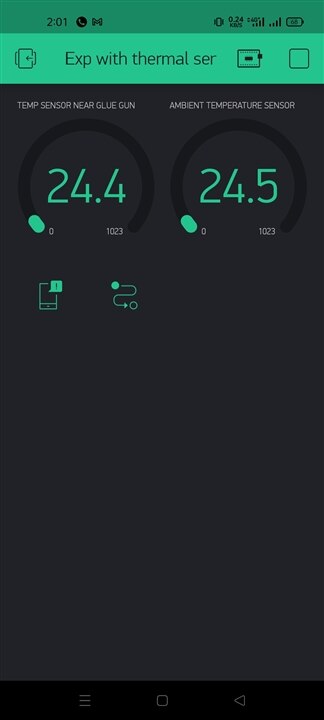
Fig. Temperature Details on the app
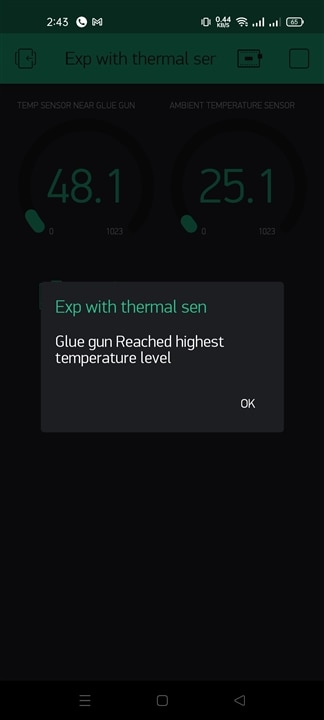
Fig. Warning Notification About the temperature displayed on the app.
Schematic Diagram
Code
#define BLYNK_PRINT Serial
#include <WiFi.h>
#include <WiFiClient.h>
#include <BlynkSimpleEsp32.h>
#include <Wire.h>
#include <LiquidCrystal_I2C.h>
LiquidCrystal_I2C lcd(0x27, 16, 2);

const int Temp_sensor_1= 34;
const int Temp_sensor_2= 35;
int Temp1_ADC_VALUE = 0;
int Temp2_ADC_VALUE = 0;
float Temp1_voltage_value = 0;
float Temp2_voltage_value = 0;
char auth[] = "Your Auth token";
char ssid[] = "Your wifi name";
char pass[] = "password";
BlynkTimer timer;
void sendSensor()
{
  Blynk.virtualWrite(V1, Temp1_voltage_value);
  Blynk.virtualWrite(V2, Temp2_voltage_value);
}
void setup()
{
Wire.begin();//i2c begin
lcd.begin();
Serial.begin(9600);  /* Define baud rate for serial communication */
Blynk.begin(auth, ssid, pass);
timer.setInterval(1000L, sendSensor);
lcd.clear();
}
void loop()
{
lcd.backlight();
Temp1_ADC_VALUE = analogRead(Temp_sensor_1);
Temp2_ADC_VALUE = analogRead(Temp_sensor_2);
Temp1_voltage_value = (((Temp1_ADC_VALUE * 3.3 ) / (4095)+0.10)*100);
Temp2_voltage_value = (((Temp2_ADC_VALUE * 3.3 ) / (4095)+0.10)*100);
lcd.setCursor(0,0);
  lcd.print("Temp1:");
  lcd.print(Temp1_voltage_value);
  lcd.setCursor(0,1);
  lcd.print("Amb_temp:");
  lcd.print(Temp2_voltage_value);
Serial.print("Temperature_sensor_1 : ");
Serial.print(Temp1_voltage_value);
Serial.println();
Serial.print("Temperature_sensor_2 : ");
Serial.print(Temp2_voltage_value);
Serial.println();
Blynk.run();
timer.run();
delay(1000);
}
Results Video
