


I'm Keeping It Simple Today.
There is a lot of complex math and science that goes into the manufacturing of and using of thermistors, but as a humble hobbyist end-user that can get overwhelming very quickly!
So my experiment today is going to be very simple: can I just hook up a thermistor and get reasonable results, without getting into all of the technical details?
Thankfully, a quick online search reveals a nice tutorial by a nice company: Adafruit - one of the element14 store’s suppliers.
They make it look easy, like something a young experimenter or a not-so-young weekend hobbyist might be able to handle.
Even the URL looks approachable: https://learn.adafruit.com/thermistor/using-a-thermistor
They are, of course, not the only ones out there with thermistor tutorials, but I like how they explained and simplified it down to exactly what I need to get a quick start with a thermistor.
And since I'm not looking to re-invent a wheel that's been built and optimized many times before, by minds much more brilliant than mine, using a tutorial like this seems to be the best approach to kick off my experimenting.
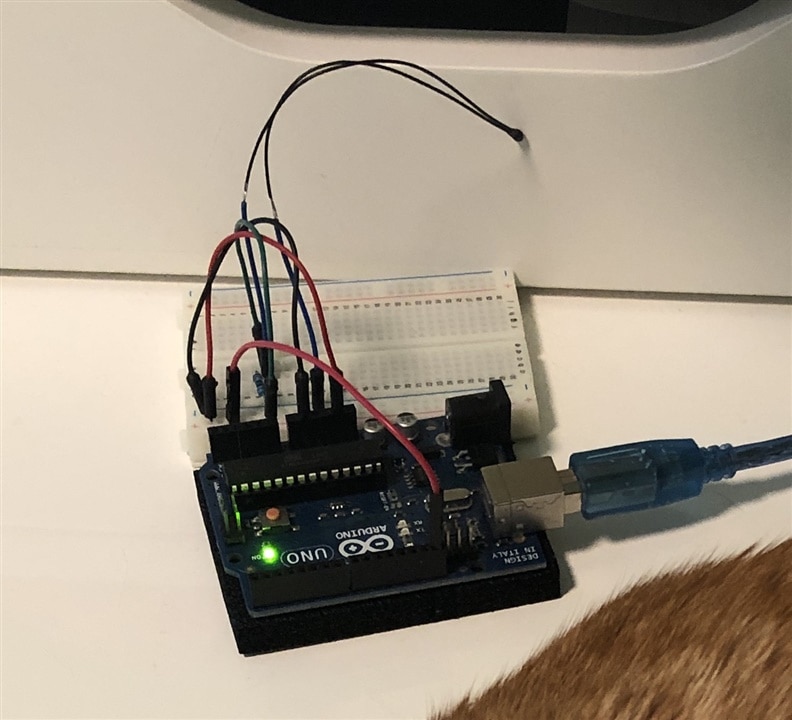
The Hardware:
One thermistor, one resistor, and a few wires. And a microcontroller of course.
The wiring is quite straight-forward. The tutorial also includes a wiring diagram which makes it even easier.
It can be a bit tricky working around my co-workers here.
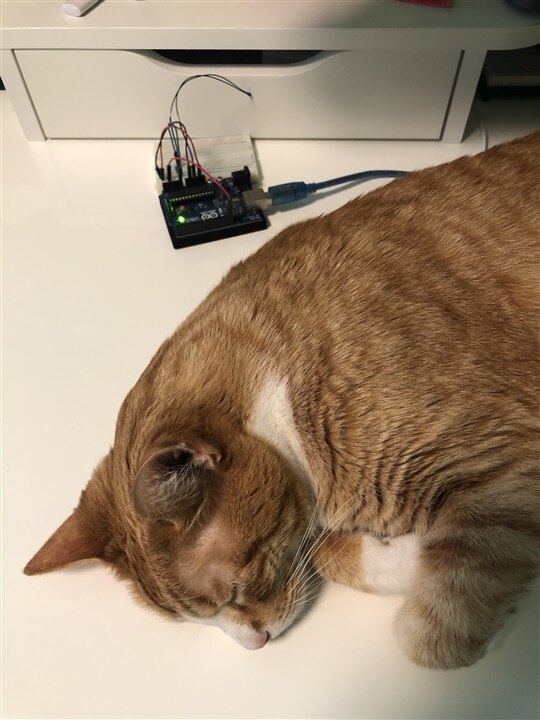
He left before I could poke the thermistor into his fur 
The Software
Their tutorial steps through and explains how it all works, and how to go about getting the best results, so I won’t repeat all of that here.
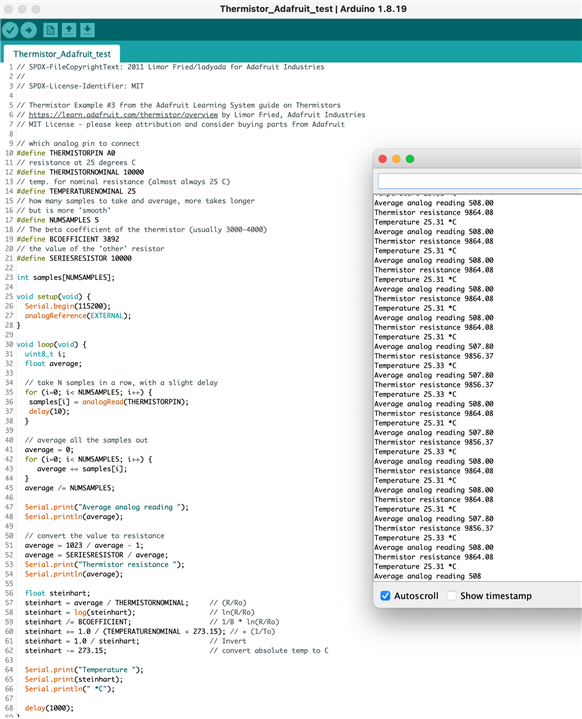
Ultimately, the part I’m interested in is towards the bottom of the article where they pull everything together into a neat little sketch that gives us the temperature readings we are after.
The math can get complicated, but they've already done the hard part of turning it all into a few lines of code.
No Charts, just 2 numbers!
One thing that’s really nice about the final summary sketch is that we only need to know 2 bits of information about the thermistor: the Beta coefficient, and the resistance at room temperature - both are on the data sheet, and probably even on the store listing. We don’t have to worry about typing out long tables of figures, and the typos that come with it.
For their tutorial they suggest a 10k resistor on the other side of the voltage divider. They are using a thermistor rated 10k at 25 °C, so I’ll just go along with that too, choosing my Molex 10k thermistor from the kit element14 so kindly provided, and using a 10k resistor for the voltage divider. I know that the fixed resistor can be tuned for my target temperature range, but that’s one of those technical details that I’m trying to avoid (for now), and such tuning is not necessary to get our first results.
Plugging it all in, here are my results…
Conclusion?
That was surprisingly easy! And the temperature looks to be right on target (compared to what my thermostat says).
Thermistors are not that complicated to use!
Seriously the part that took me the longest was when I soldered breadboard-friendly ends onto all of the thermistors in the kit!
Hooking up the wiring was straightforward, and the sketch was already built by Adafruit (MIT licence, so it's free to use, just be kind to give credit where credit is due). All I had to do was copy and paste the code into a new sketch, and update the Beta Coefficient to match my thermistor.
If we don’t require scientific-level accuracy, we can get a pretty good results by just picking a thermistor, hooking it up with a resistor, and using a basic microcontroller to read the temperatures.
Notes on increasing accuracy:
The Adafruit tutorial does a little bit of math and suggests that for our setup we can assume accuracy of maybe +/- 0.5 °C, and at best maybe +/- 0.1 °C.
That’s good enough for my intended use of monitoring my hummingbird feeder in winter, so I could just leave it at that.
However, there are a few ways we can tweak the accuracy, which I will be exploring in my next experiments:
- Use a DMM to measure the actual resistance of the fixed “10k” resistor, and use that value in the code.
- Calibrate the thermistor by measuring the resistance in an ice bath and adjusting the code with any offset found.
- Avoid self-heating of the thermistor by using a digital pin to only supply power when taking a reading.
- More complicated: do the math to see if a better value of fixed resistor will give a better resolution from the analog input for my desired temperature range. ie, tune it so that temperatures under -20 °C or over +40 °C will be out of range, and all analogRead values from 1 to 1022 map to my desired -20 °C to +40 °C range.
- Use a microcontroller with better ADC resolution. For example, use an Arduino MKR board or ESP32-based board.
Ultimately I'd be thrilled to hit a predictable +/- 0.2 °C level of accuracy, but I have to say I'm pretty happy with the current situation.
The other thing I will do for in an upcoming experiment is to, of course, verify that the reported temperatures are indeed correct. I'll likely have to use the ice-water and boiling-water methods, as I don't know how accurate any of my existing thermometers are.
Happy Experimenting! 
-Nico
ps, The wiring diagram and all of the code is available as part of the aforementioned tutorial, so I won't duplicate it here.
