element14 Community
element14 Community
    Register Log In
  • Site
  • Search
  • Log In Register
  • Community Hub
    Community Hub
    • What's New on element14
    • Feedback and Support
    • Benefits of Membership
    • Personal Blogs
    • Members Area
    • Achievement Levels
  • Learn
    Learn
    • Ask an Expert
    • eBooks
    • element14 presents
    • Learning Center
    • Tech Spotlight
    • STEM Academy
    • Webinars, Training and Events
    • Learning Groups
  • Technologies
    Technologies
    • 3D Printing
    • FPGA
    • Industrial Automation
    • Internet of Things
    • Power & Energy
    • Sensors
    • Technology Groups
  • Challenges & Projects
    Challenges & Projects
    • Design Challenges
    • element14 presents Projects
    • Project14
    • Arduino Projects
    • Raspberry Pi Projects
    • Project Groups
  • Products
    Products
    • Arduino
    • Avnet Boards Community
    • Dev Tools
    • Manufacturers
    • Multicomp Pro
    • Product Groups
    • Raspberry Pi
    • RoadTests & Reviews
  • About Us
  • Store
    Store
    • Visit Your Store
    • Choose another store...
      • Europe
      •  Austria (German)
      •  Belgium (Dutch, French)
      •  Bulgaria (Bulgarian)
      •  Czech Republic (Czech)
      •  Denmark (Danish)
      •  Estonia (Estonian)
      •  Finland (Finnish)
      •  France (French)
      •  Germany (German)
      •  Hungary (Hungarian)
      •  Ireland
      •  Israel
      •  Italy (Italian)
      •  Latvia (Latvian)
      •  
      •  Lithuania (Lithuanian)
      •  Netherlands (Dutch)
      •  Norway (Norwegian)
      •  Poland (Polish)
      •  Portugal (Portuguese)
      •  Romania (Romanian)
      •  Russia (Russian)
      •  Slovakia (Slovak)
      •  Slovenia (Slovenian)
      •  Spain (Spanish)
      •  Sweden (Swedish)
      •  Switzerland(German, French)
      •  Turkey (Turkish)
      •  United Kingdom
      • Asia Pacific
      •  Australia
      •  China
      •  Hong Kong
      •  India
      •  Korea (Korean)
      •  Malaysia
      •  New Zealand
      •  Philippines
      •  Singapore
      •  Taiwan
      •  Thailand (Thai)
      • Americas
      •  Brazil (Portuguese)
      •  Canada
      •  Mexico (Spanish)
      •  United States
      Can't find the country/region you're looking for? Visit our export site or find a local distributor.
  • Translate
  • Profile
  • Settings
Experimenting with Waterproof Connectors
  • Challenges & Projects
  • Design Challenges
  • Experimenting with Waterproof Connectors
  • More
  • Cancel
Experimenting with Waterproof Connectors
Blog Panda Enclosure - Extra Credit Blog #1 - Setting up the lattePanda
  • Blog
  • Forum
  • Documents
  • Files
  • Members
  • Mentions
  • Sub-Groups
  • Tags
  • More
  • Cancel
  • New
Join Experimenting with Waterproof Connectors to participate - click to join for free!
  • Share
  • More
  • Cancel
Group Actions
  • Group RSS
  • More
  • Cancel
Engagement
  • Author Author: ralphjy
  • Date Created: 18 Apr 2023 6:30 PM Date Created
  • Views 601 views
  • Likes 5 likes
  • Comments 0 comments
  • bme680
  • experimenting with Waterproof Connectors
  • lattePanda V1
Related
Recommended

Panda Enclosure - Extra Credit Blog #1 - Setting up the lattePanda

ralphjy
ralphjy
18 Apr 2023

Unboxing

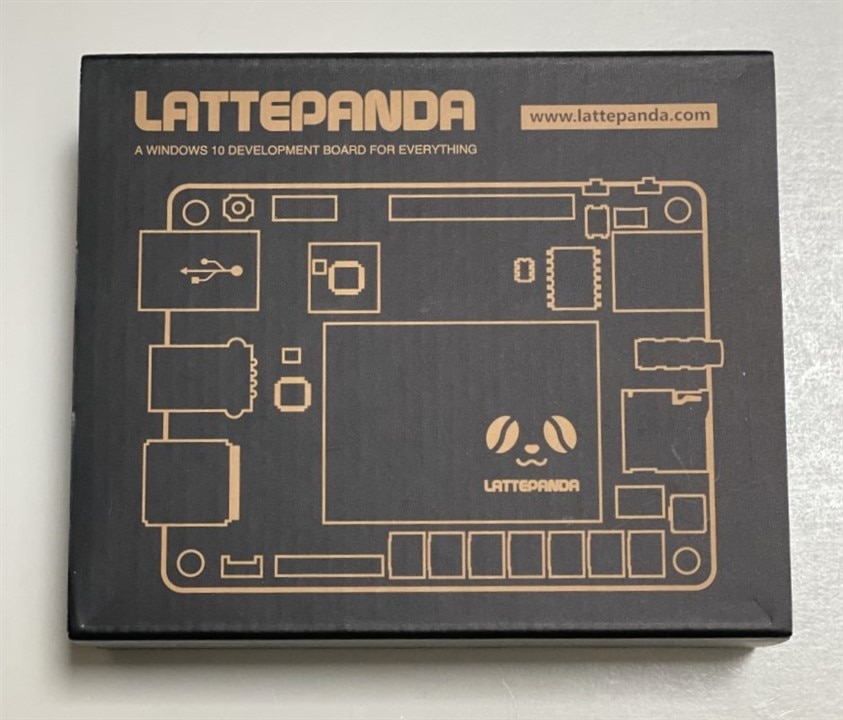
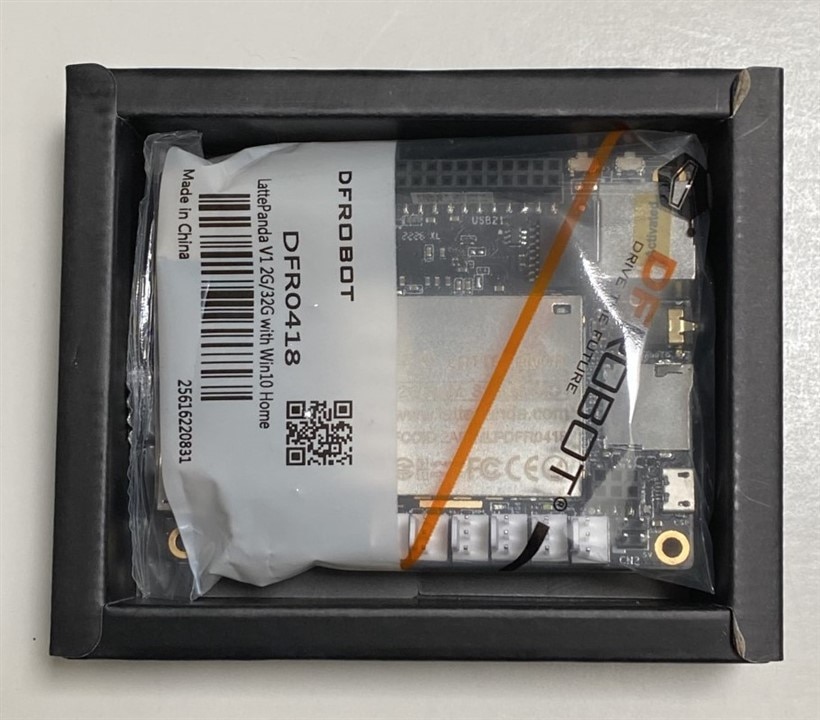
The lattePanda was included in the shipping box with the enclosure and the various connectors of the challenge kit.  It was packaged in a small sturdy box (4.5"x3.75"x1.25") covered by a sleeve.  Just 3 items snugly fitted in the box - the lattePanda board, a small WiFi antenna and a user manual.

{gallery}Panda Unboxing

image

Panda Box Top

image

Panda Box Bottom

image

Panda Box Inside

image

latte Panda v1 2G/32G Windows 10 Home + WiFi Antenna

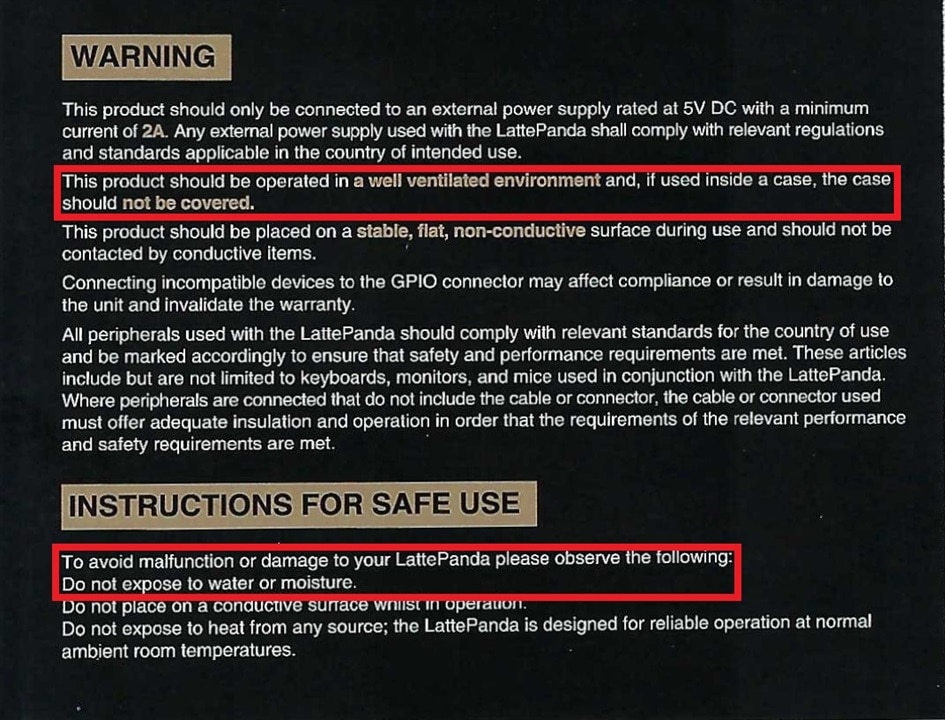
It is interesting in the context of this challenge to read the warnings in the User Manual.

  1. Do not use in a covered case (will this be an issue?)
  2. Do not expose to water or moisture (obviously the reason for a waterprrof enclosure)
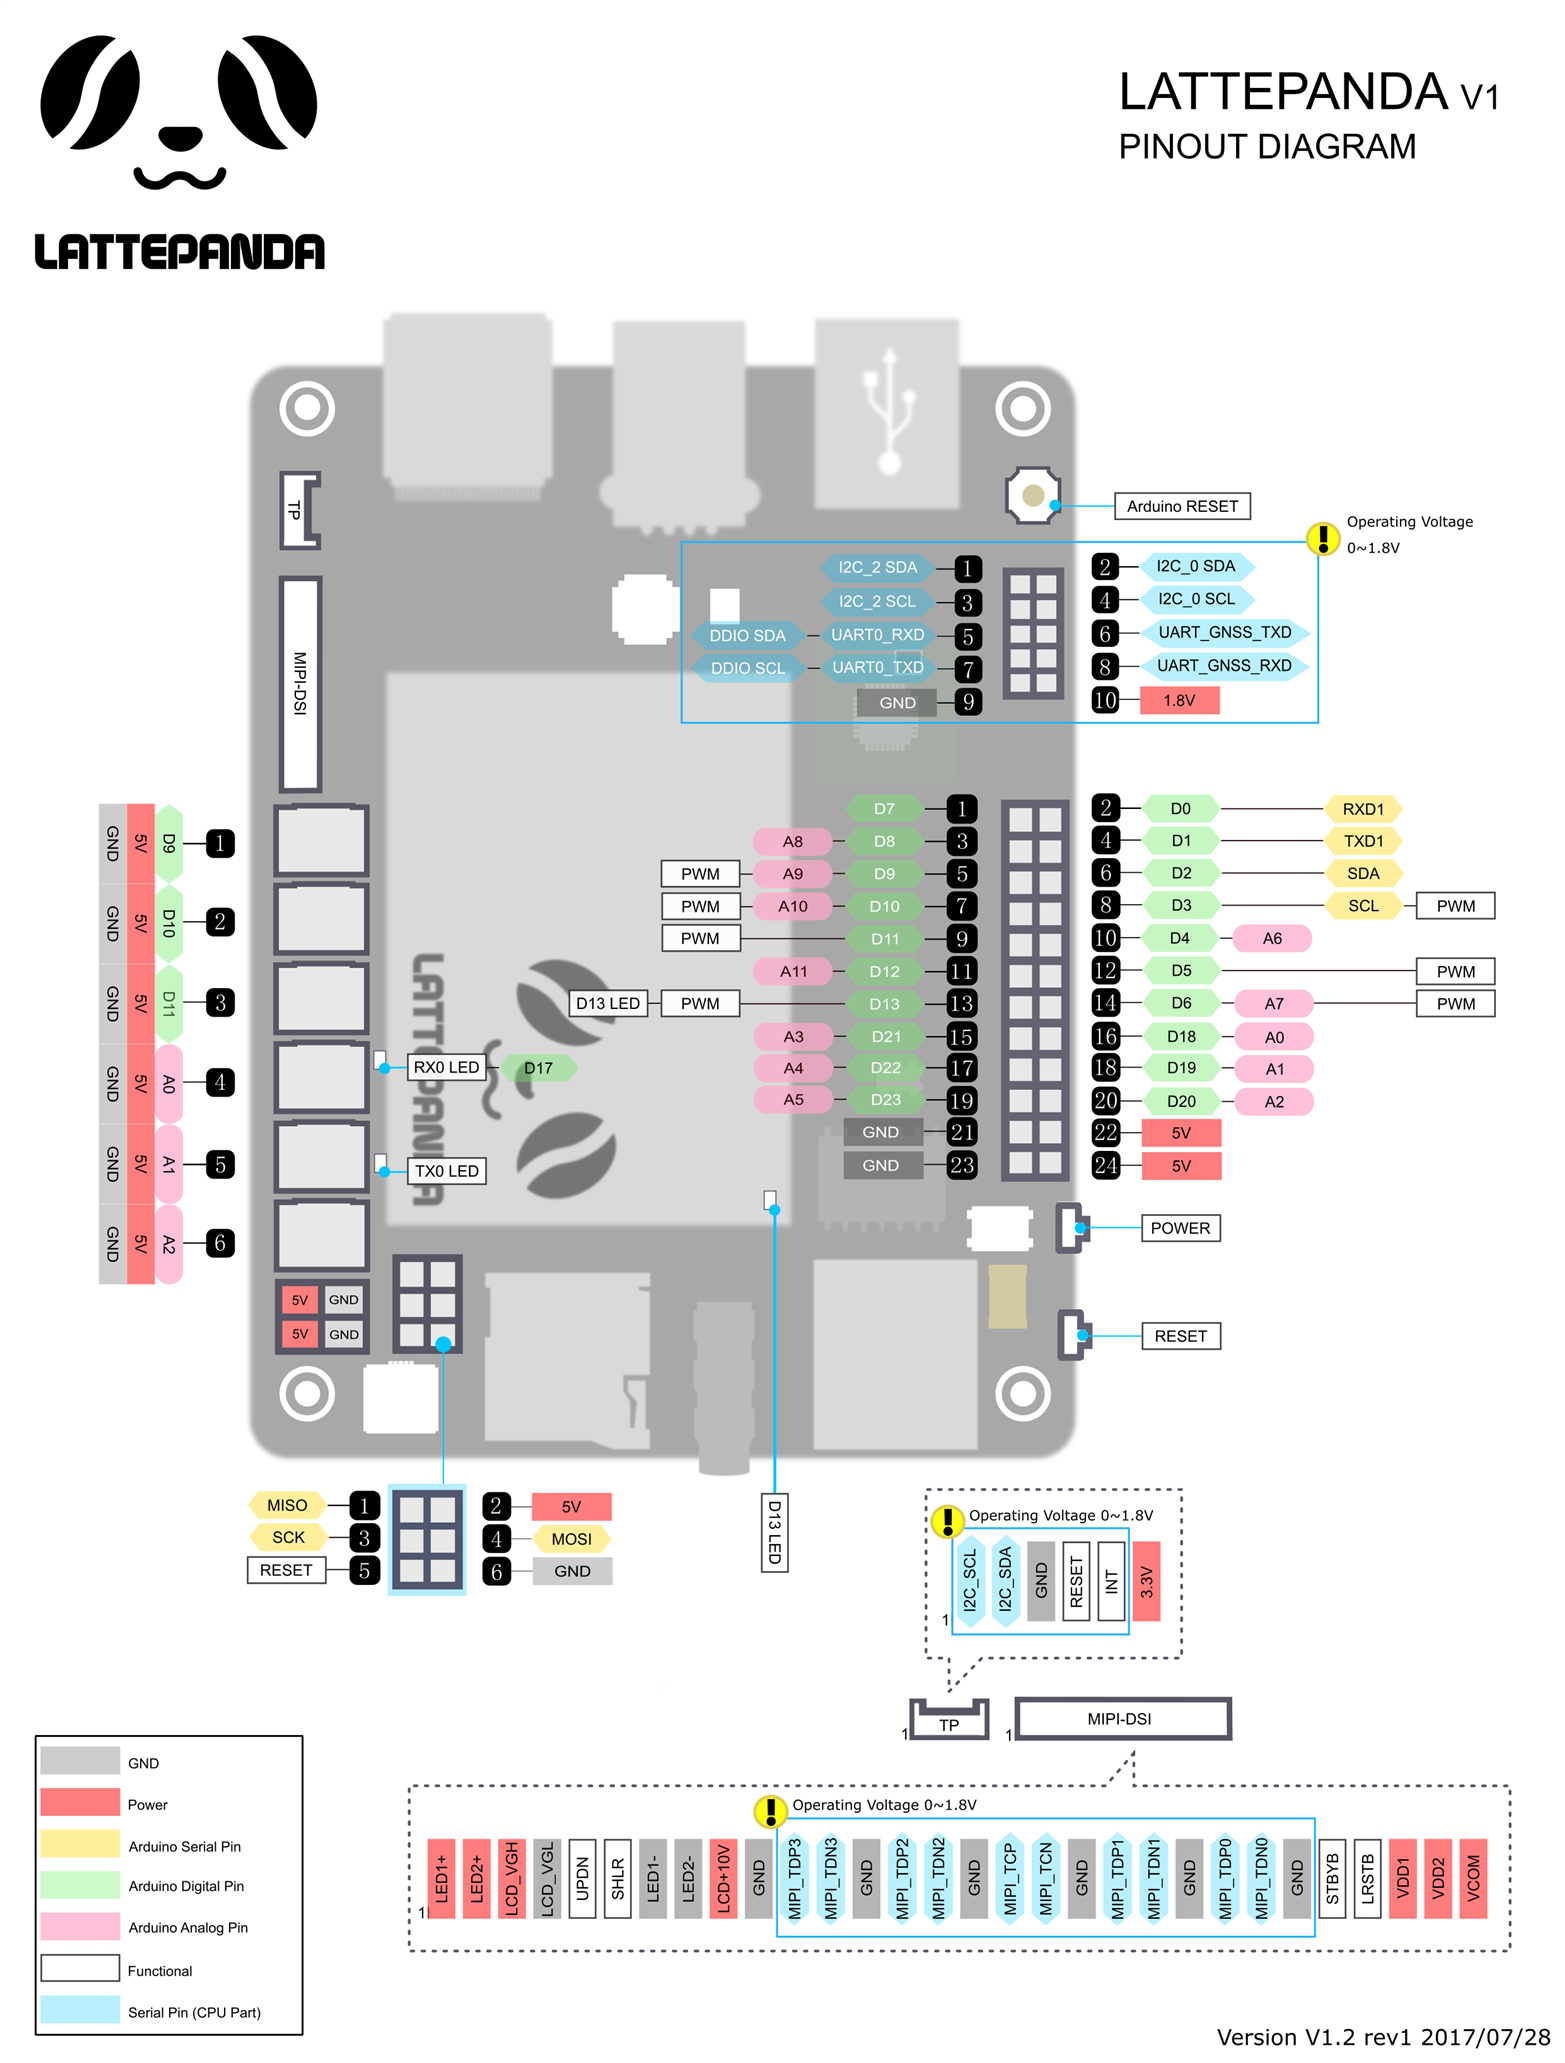
imageimage

Pinout

A look at the lattePanda pinout shows the Arduino compatible interface.

  1. The IO is compatible with the Arduino Leonardo
  2. IO is 5V compatible 
  3. 3.3V is not available on the Arduino Interface (it is only on the TP connector)

Luckily, the Adafruit BME680 that I want to use has its own 3.3V regulator.  My plan is to use the Arduino I2C interface.

image

Initial Power Up

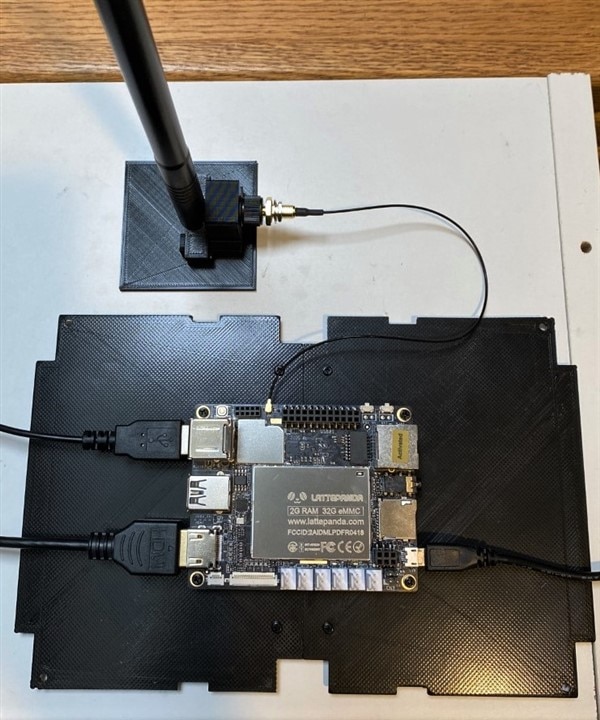
My test setup for getting started is shown below.  

  1. Raspberry Pi  5V, 2.5A microUSB power adapter
  2. SMA WiFi antenna (connected using the SMA adapter in the kit)
  3. HDMI cable to USB 3.0 Video Capture device
  4. USB Keyboard/touch pad 
  5. lattePanda mounted on enclosure adapter plate

image

Windows is already activated, so boot up was straightforward.  

  1. Apply power and wait for the red LED on the underside of the board to turn off
  2. Push the power button for 1 second
  3. Initial boot to stable desktop took just under 2 minutes (see video)
  4. Connected to WiFi router
  5. Verified WiFi connection using ipconfig and ping
  6. Started Edge Browser (it connected but crashed during configuration) - I am going to switch to Chrome

The video below shows the first boot.  The mouse is a little jumpy, but that might be due to the interface settings for the touchpad (I am going to switch to a remote desktop).  The WiFi verification is at the end if you want to skip the prolonged Edge browser crash...  You'll note the incorrect system time until WiFi connects.

You don't have permission to edit metadata of this video.
Edit media
x
image
Upload Preview
image

Remote Access

In the challenge configuration with the lattePanda in the sealed enclosure, I plan to run it headless, i.e. without monitor or keyboard/mouse.  That will require the use of a remote desktop or other monitor/control program.

VNC

The lattePanda documentation https://docs.lattepanda.com/content/1st_edition/tools/ recommends using tightVNC for a remote desktop.

Download and run Installer for Windows (64-bit) from https://www.tightvnc.com/download.php 

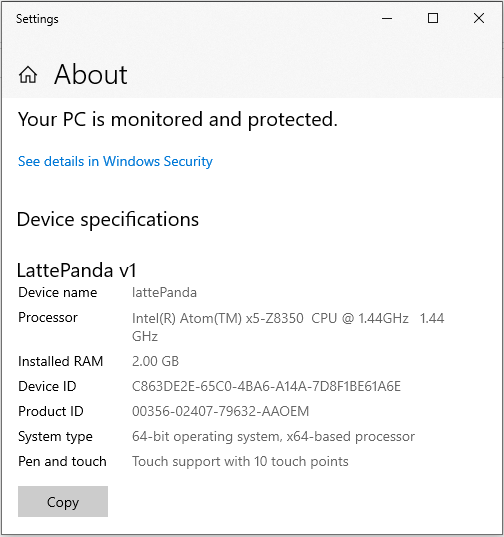
I changed the computer name on my board to lattePanda, so that I could find and access it by name rather than needing to use an ipaddr.

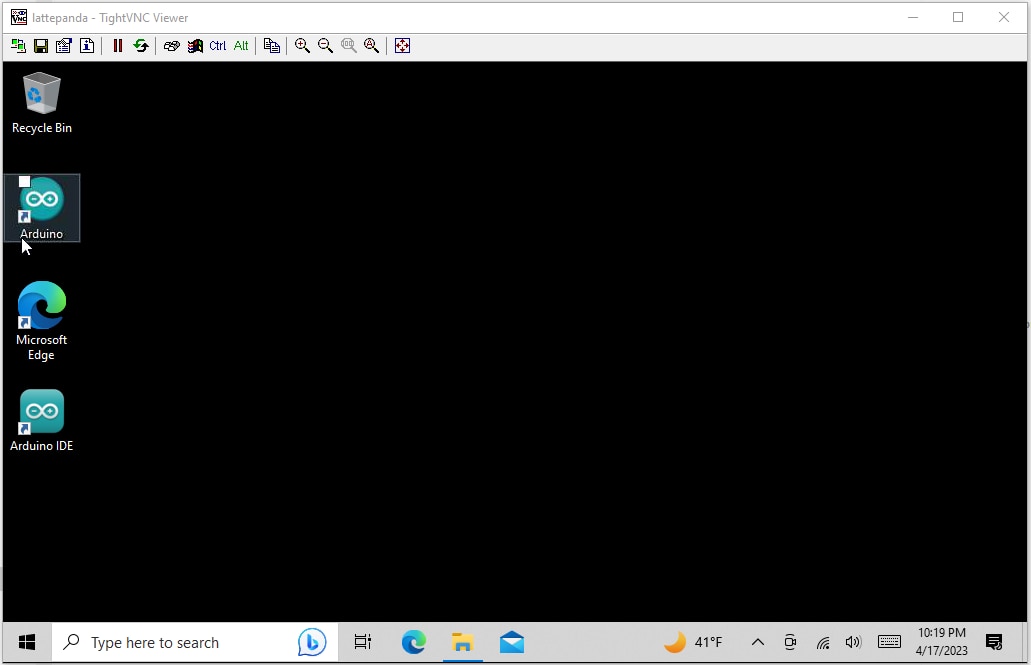
You also need to install tightVNC viewer on the computer that you are using to access the lattePanda (same install process).

Here is the viewer window on the client:
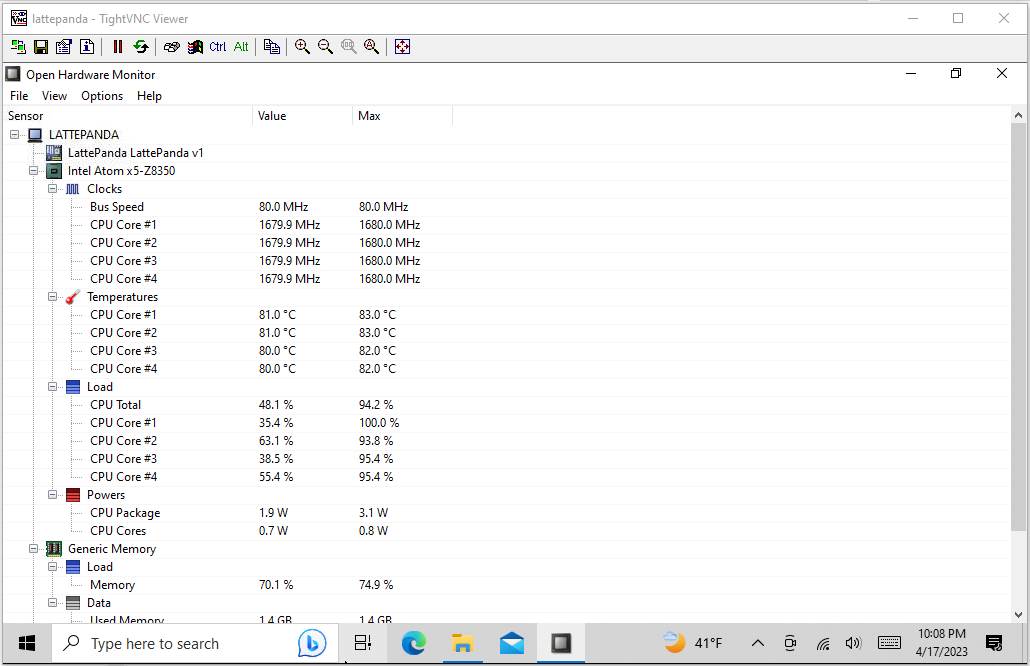
image

CPU Monitoring

Since I am concerned with the CPU overheating while operating in the sealed enclosure, I downloaded the Open Hardware Monitor program so that I could monitor CPU operation.

Here is a capture what it looks like running in my setup with a 20C ambient temperature.  

image

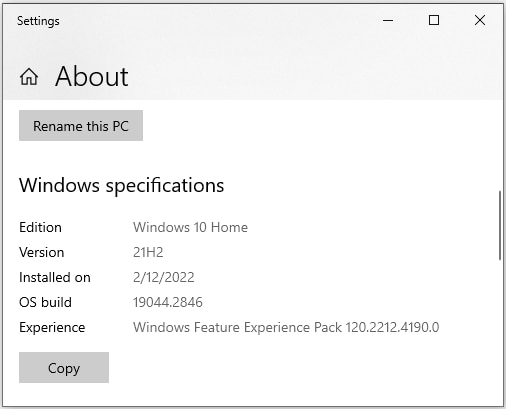
Computer Configuration

image

image

  • Sign in to reply
element14 Community

element14 is the first online community specifically for engineers. Connect with your peers and get expert answers to your questions.

  • Members
  • Learn
  • Technologies
  • Challenges & Projects
  • Products
  • Store
  • About Us
  • Feedback & Support
  • FAQs
  • Terms of Use
  • Privacy Policy
  • Legal and Copyright Notices
  • Sitemap
  • Cookies

An Avnet Company © 2025 Premier Farnell Limited. All Rights Reserved.

Premier Farnell Ltd, registered in England and Wales (no 00876412), registered office: Farnell House, Forge Lane, Leeds LS12 2NE.

ICP 备案号 10220084.

Follow element14

  • X
  • Facebook
  • linkedin
  • YouTube