There is just over 2 weeks left for this challenge and I'm somewhat behind schedule. I had hoped to be doing immersion (submersion) leakage tests this past weekend, but I've been helping my son work on his house and I've also been waiting for the RJ45 backshell which I just received.
This is a good point to review tasks that need to complete before I try the submersion test.
- Plug unused connector holes (TNC and N connectors)
- Remove ribbing material from inside the enclosure around the SMA connector
- Add threaded inserts to enclosure for mounting the RJ45 backshell
- Add water leak detector
- Build submersion frame to hold enclosure under water
- Finish wiring and testing all external cables
Plug unused connector holes
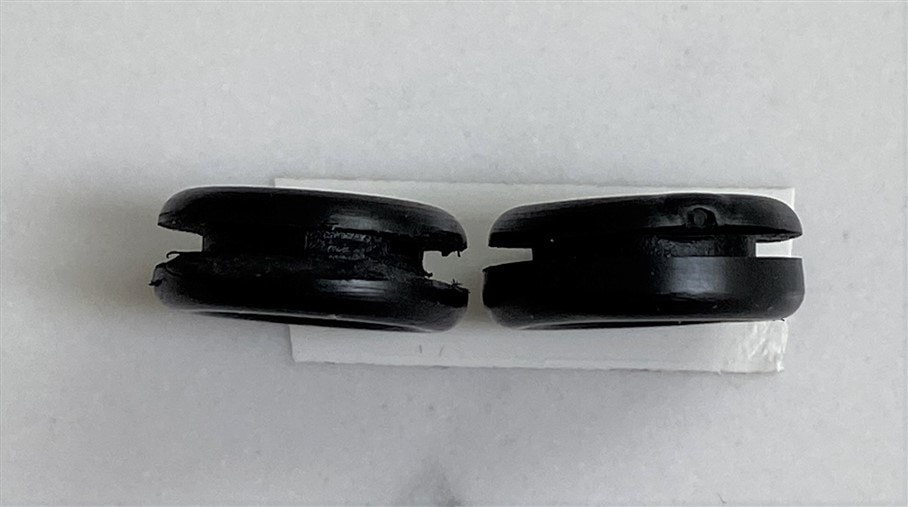
The larger two holes below are for connectors that I am not using. The largest one is for the N to TNC adapter and the other one is for a TNC connector. I had difficulty finding suitable plugs for the holes and I considered just mounting the unused connectors, but I don't have mating connectors or caps for them. The difficulty in finding plugs was caused by two things - the connector mounting holes are orientation keyed (not round) and the enclosure thickness is 3.3mm which is too thick for common grommets. I finally settled on 15 mm and 12 mm closed rubber cable grommets that I surgically modified with a Xacto knife. The fit is pretty good, but only testing will tell...


Remove ribbing material from inside the enclosure around the SMA connector
The hole for the SMA connector that I am using for a WiFi antenna was drilled through internal ribbing that I would guess is used to insert partitions into the enclosure. I had concerns about whether the external gasket would seat properly with uneven pressure from the internal nut, so I cut the ribbing out around the connector using a Dremel tool. The gasket now seats well. I am not going to submerge the antenna, but will use a plastic dust cap that I hope will protect the SMA contact.


Add threaded inserts to enclosure for mounting the RJ45 backshell
I just received the RJ45 backshell. I still need to complete the cable assembly (add an RJ45 plug), but the cable pigtail that I am using fits snugly. My major issue is making sure that I get the threaded inserts for the backshell screws mounted correctly in the enclosure (I am going to have to freehand drill the holes for the inserts and I've got one shot at getting the spacing correct). If I mess this up, my fallback is to use the RJ45 unmated (the assembly is watertight, but the connector pins will be exposed). Fingers crossed that all goes well and I can test with the interface operational.


Add water leak detector
To detect water leaking into the enclosure I have a simple detector that uses interdigitated PCB traces that will sense a change in conductance when water gets between the traces, I already have the analog input and the software set up - just need to mount the sensor under my printed baseplate.

Build submersion frame to hold enclosure under water
The enclosure has 4 mounting holes near the bottom corners that are accessed through openings that are outside of the waterproof cover gasket. I will use these holes to mount the enclosure on a PVC frame that will keep it submerged.


The base section of the frame with the holes drilled to mount the enclosure.

With the enclosure attached.

I had originally planned to attach weight on the bottom of the frame to hold the enclosure submerged, but decided that it would be easier to clamp the frame into the test basin. To finish off the frame I just need to adjust the height for the clamps that I will be using.
Finish wiring and testing all external cables
The internal cables are completed and tested. The 4 pin external cable is assembled and tested. I still need to terminate the external ethernet and USB cables.
Lots to do...
Unfortunately, we are having extremely hot weather all this week which makes working in my normal work area very difficult and I am away next weekend so it looks like everything will get compressed into the final week of the challenge. Guess that's why it's a challenge .
