


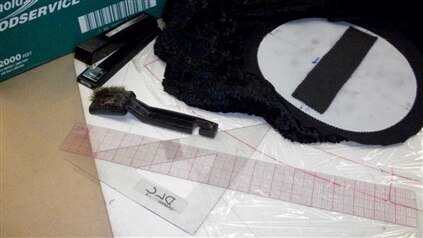
Today I worked on swirling the velvet sections that will cover the tip and sideband of my top hat. Swirling the velvet gives a top hat that slick like a vinyl record look. Usually a silk panné velvet with a long pile is used. This is very expensive and I had already purchased a textured velvet with a synthetic fiber, but since it had a long pile I decided to try and swirl it. It is easiest to use a piece of Homasote - Wikipedia, the free encyclopedia to pin the velvet out on. I put down some plastic wrap first to keep the board from getting too wet. It is important to stretch the fabric on grain very tightly. I used a brass wire brush to move the pile into a counter clockwise circular pattern. Steam and a dry iron help set the direction of the pile.
Here is a video of the process (no sound)
Also, I figured out some of the problems I had been having with my electric set up. I must have had a short with all the alligator clips I was using to connect all the components together with. I soldered hookup wire to all connections and put them directly into the breadboard. My setup looked much neater, and when I plugged in Gemma it worked.

The 16 NeoPixel ring represents the pixels around the brim, the bar of 8 and the 8 wired pixels represent the ring of 16 to be used in the cockade, and on the breadboard are two thru hole NeoPixels that represent the two in the fiber optic feather decoration. Those two pixels have been giving me the most trouble. They seem to be very fussy. Of the three I have left from the pack of five, they only work if a specific one is first in the chain. They will all power on at start up, but go dark after unless they are plugged in a certain order. Even then I get a flicker flashing on the first thru hole. (these are located 33 and 34 in the chain) I tried putting a resistor at the beginning of the data in line to reduce ringing, (I read this somewhere on the Adafruit site) but it had no effect. The only thing that reduced the flickering was when I changed to my other battery. They are both the 1200 mAh, but maybe one had a stronger charge? I plugged the actual fiber optic feather decoration into the breadboard and it lit up, but showed a little flicker. I actually think it looks nice like that so I am not going to worry too much about it.
Now that my circuit is working it's back to the code. I made some corrections to some of the numbers and found a way to light up the cockade and feather a bit more dynamically. I don't have room for anything new, but I can use the values of variables already in play. I used the variable heading for the red value and multiplied the variable d with the variable i for the blue value. This shifts the coloration of the cockade as you turn around. Also, since the NeoPixels in the cockade are wired for GRB and the thru hole version are RGB I can achieve a different look for each part automatically.
Here is my new code. Also found at https://codebender.cc/sketch:52691
//using calibration data
//trying to light up each component differently
//using code from  https://learn.adafruit.com/steam-punk-goggles?view=all
//idea for pointer pixel from http://www.element14.com/community/groups/arduino/blog/2013/08/27/get-closer-challenge--navigation-glove
//idea for library modification from http://www.slickstreamer.info/2014/02/led-bracelet-accelerometer-3dprinting.html
#include <TinyWireM.h>
#include "TinyLSM303_mag.h"
#include <Adafruit_NeoPixel.h>

#define pin 1
#define numPixels 34

Adafruit_NeoPixel ring = Adafruit_NeoPixel(numPixels, pin, NEO_GRB + NEO_KHZ800);

TinyLSM303_mag lsm;

// Pi for calculations - not the raspberry type
const float Pi = 3.14159;

void setup()
{
  ring.begin();
  ring.show();// Initialize all pixels to 'off'
  lsm.begin();// Initialize the sensors
}

void loop()
{
  // Read the magnetometer and determine the compass heading:
  lsm.read();
  int16_t x = map(lsm.magData.x, -202, 224, -1000, 1000);
  int16_t y = map(lsm.magData.y, -397, -3, -1000, 1000);

  // Calculate the angle of the vector y,x from magnetic North
  float heading = (atan2(y,x) * 180) / Pi;

  // Normalize to 0-360 for a compass heading
  if (heading < 0)
  {
    heading = 360 + heading;
  }

  uint8_t d = map(heading, 0, 360, 0, 16);//map the heading to the size of the ring around the brim

  //set all the brim pixels to a color
  for(uint8_t i = 0; i < 16; i++)
  {
    ring.setPixelColor(i,ring.Color(0, 20, 50));
   }

     //set all the cockade and feather pixels to a color
  for(uint8_t i = 16; i < 34; i++)
  {
    ring.setPixelColor(i,ring.Color(heading, 0, d * i));
   }

     /* //set all the feather pixels to a color
  for(uint8_t i = 32; i < 34; i++)
  {
    ring.setPixelColor(i,ring.Color(100, 100, 100));
   }*/

  //set the closest pixel in the ring to the heading
  ring.setPixelColor(d, ring.Color(255, 0, 0));

  ring.show();
}
Here is a video of the effect in action. I am holding the rig and the camera together while turning around.
Coming up next...
Sewing the NeoPixels onto the brim.
Top Comments