


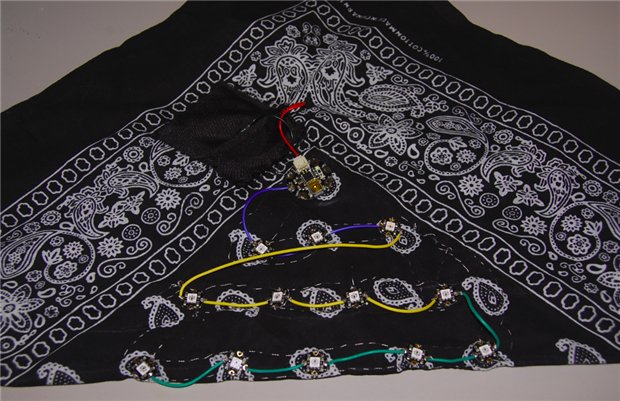
Flush from the excitement of measuring good conductance where desired, and no conductance where not desired, I decided to cheat and solder the remaining connections. Partly, this was due to the fact that I didn’t want to try and add a third line of uncovered wire which would add to the likelihood of shorts occurring, partly it was due to the difficulty of tying off the stainless thread when starting and stopping (the remaining connections were serial communications, which could not be sewn as a bus as they are passed along from LED to LED), but mostly it was due to wanting to be able to wear the hat that night, which meant finishing it quickly. I knew it would take me about 15 minutes to measure, cut, tin, and solder 12 wires, but it would probably take over an hour to sew them.
I used the colored Silicone Cover Stranded-Core Wire - 2m 26AWG White ID: 1882 - $0.95 : Adafruit Industries, Unique & fun DIY electronics … from Adafruit. I’d ordered a couple different colors, so I used a different color for each row of LEDs, just to make it look more interesting.
It's almost done! Now to address the issue of power.
In order to avoid having to plug/unplug the battery each time I wanted to turn the hat on/off, I soldered a pushbutton switch to the battery so that I could leave it connected and turn it on or off as desired (with heat shrink tubing over the solder joints to avoid short circuits).
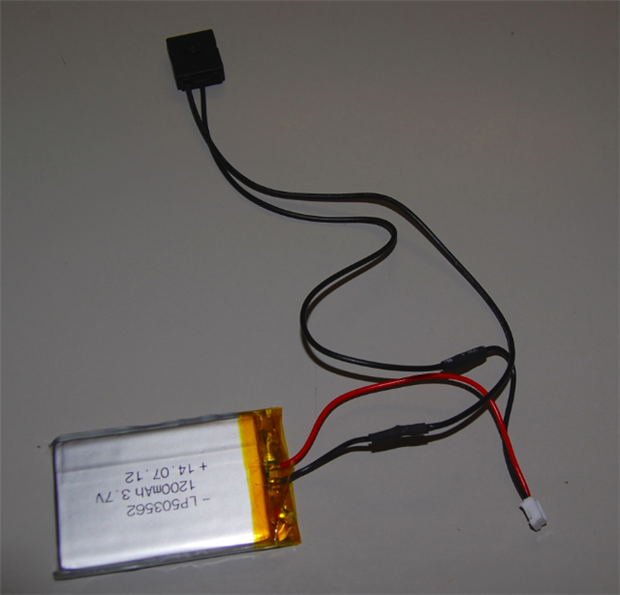
Note that this will require me to turn on the switch every time I plug in the battery, but it was the easiest way I could think of to incorporate the switch into the hat design.
The sewing and soldering is complete! It's time to power it up and test it.
The moment of truth! Programming the Gemma: Oops. I hadn’t been thinking ahead, and just thought that sewing would be the hard part, and I’d be mostly finished when that was done. I’d been worried about finishing the hat in time to wear to the Halloween event at The Henry Ford. Our tickets were for 7pm, it was 4 pm now, so I had three hours to cook & eat dinner, program the hat, and drive the kids to the event. Oh oh.
Fortunately, a quick Google search found the NeoPixel Tiara https://learn.adafruit.com/neopixel-tiara/overview, which was close enough in hardware design that I was able to steal the code and quickly change it to accommodate a larger number of LEDs. I programmed the Gemma and voila! I had blinky lights on the bandanna! I had hoped to slightly change the colors the LEDs were displaying, and maybe slow the rate of blinking, but I had trouble getting the Gemma to reconnect. After 10 tries, I gave up and stuck with the colors and blink rate I already had working. It was good enough, I'd be able to wear the hat that evening!
Next -- first public wearing!