In this post let's explore the final hardware setup of the project.
Required Hardware
| TDK USSM Demo Kit | Ultrasonic sensing module for precise distance measurement and object proximity detection. |
| KR260 Robotics Starter Kit | Primary computing platform featuring AMD Xilinx Kria K26 SoM for real time ML inference, sensor data processing, and ROS2 middleware integration. |
| Wireless USB Adapter | Enables WiFi connectivity for remote monitoring, data transmission, and network based control. |
| USB Camera Module | Captures real-time video for vision processing, object detection, and environmental perception. |
| Mounting Spacers | Hardware fasteners for secure component installation and proper PCB elevation. |
| Adjustable Tripod Stand | Provides stable support with adjustable height and positioning for optimal sensor placement. |
| Acrylic Mounting Sheets | Rigid, transparent platform for organized hardware assembly and improved cable management. |
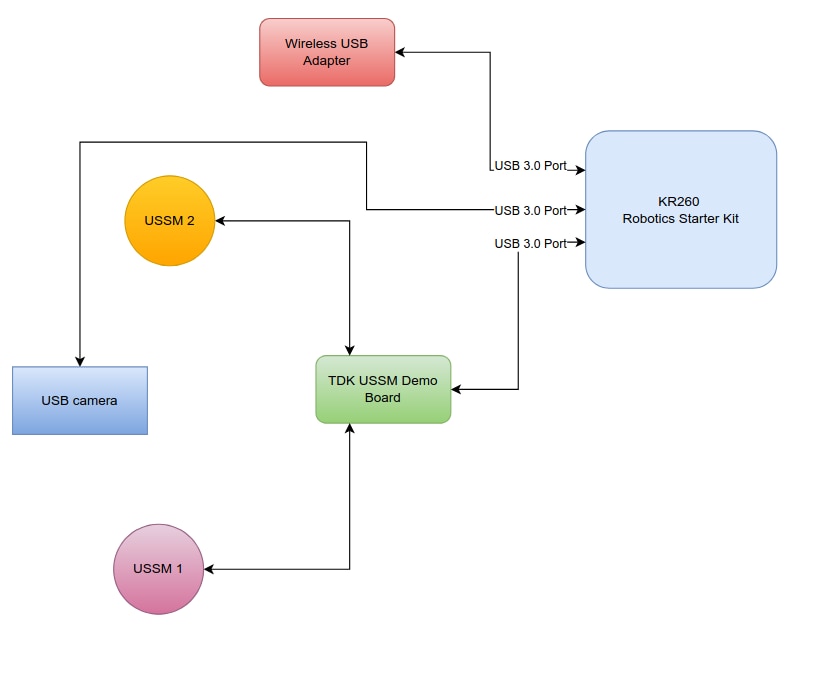
Block Diagram
Here's the block diagram showing how the hardware is connected to the KR260
Setting up...
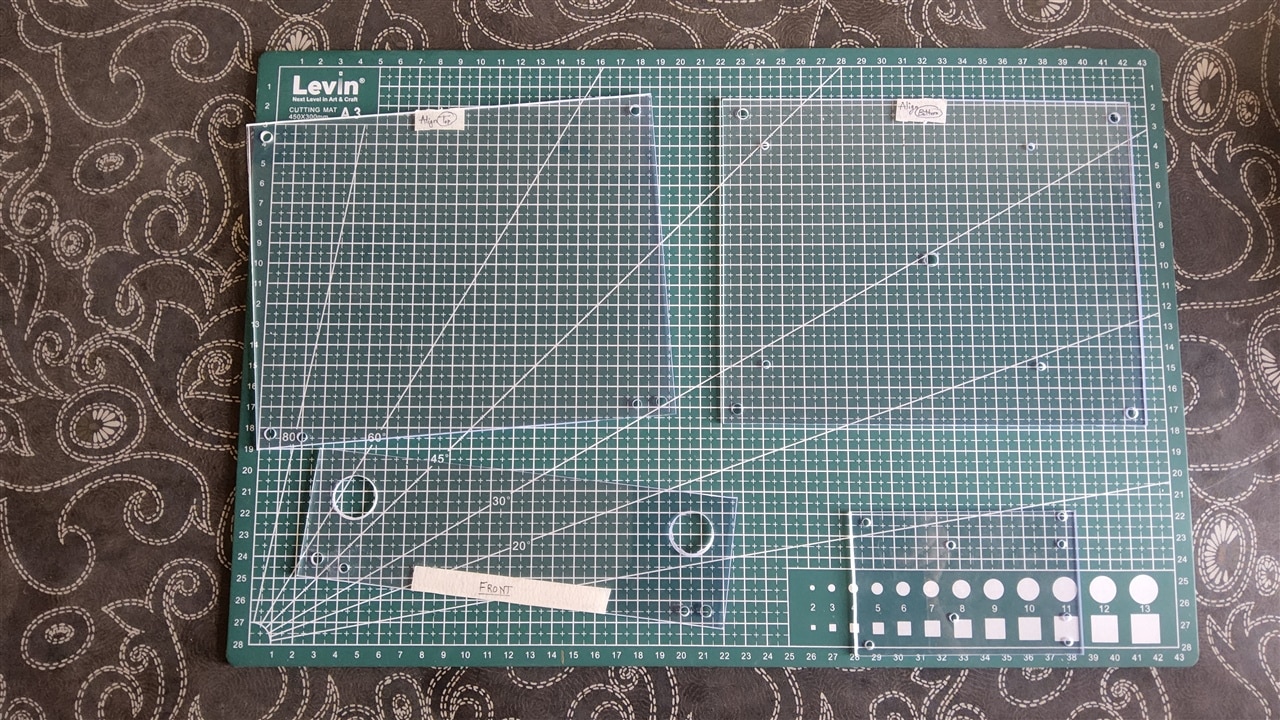
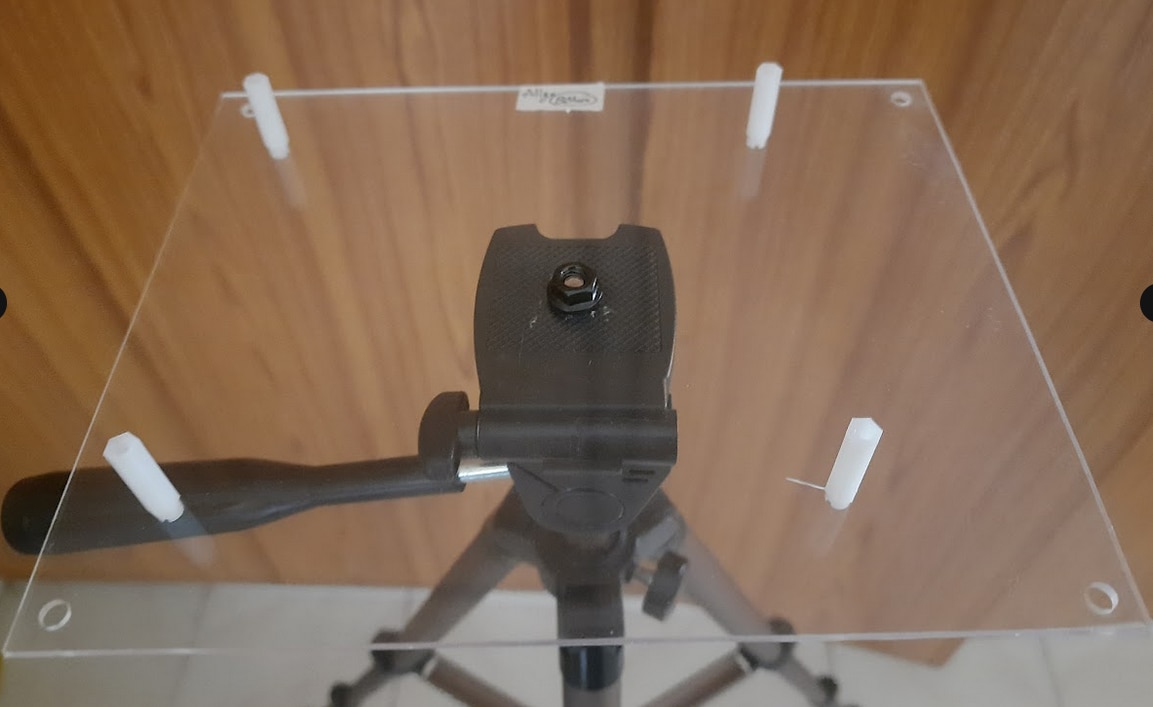
The setup starts with preparing the acrylic sheets, cutting them to the required size for the tripod mounting and drilling the mounting holes to mount the hardware.
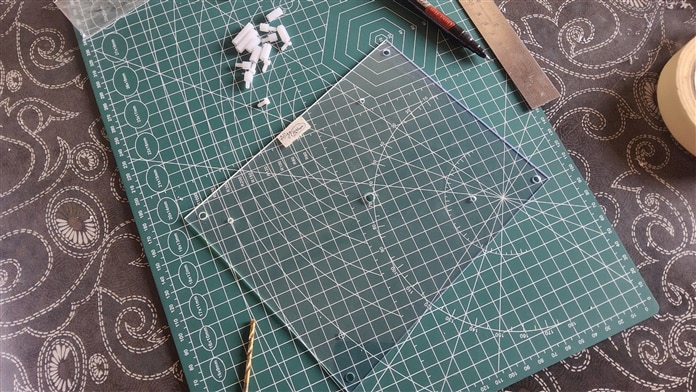
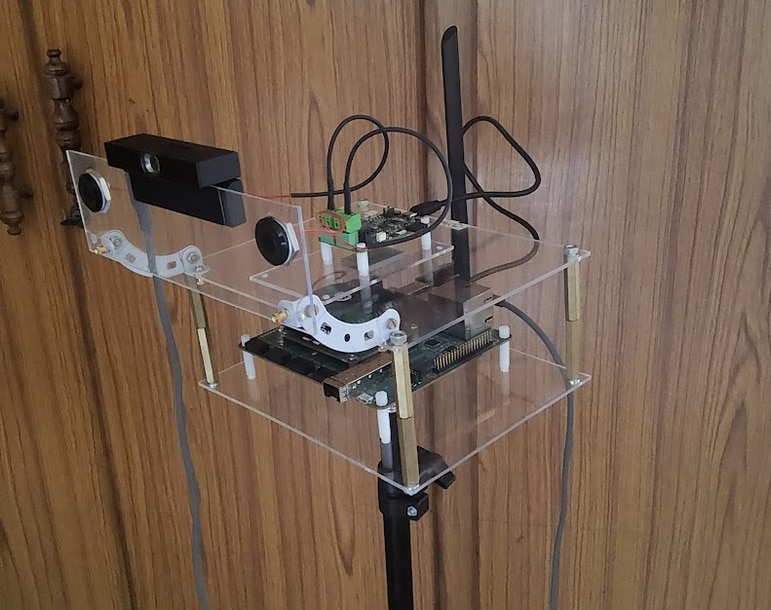
The main support structure has a two-layer design with upper and lower platforms. An additional medium-sized sheet is used for mounting the camera and TDK USSM modules. A smaller sheet is specifically reserved for the TDK Demo Kit.
Assembly begins with securely attaching the bottom acrylic layer to the tripod stand. This creates a stable foundation for the entire system.
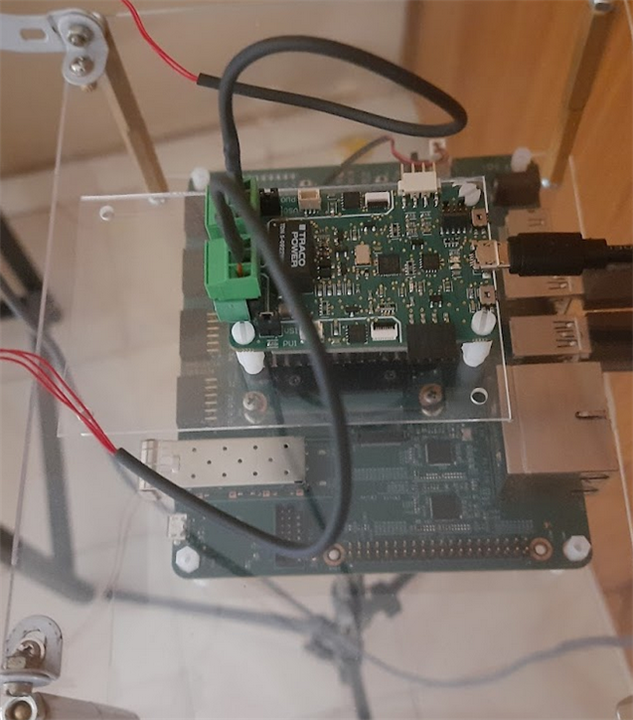
Once the base is properly positioned and leveled, the KR260 Robotics Starter Kit is installed on this bottom layer with the help of plastic spacers. These spacers serve two purposes: they provide electrical isolation for the board and ensure there is enough space for ventilation, which helps with thermal management.

With the controller in place, the next step is to create the upper structure. Metal spacers establish standoffs between the bottom and top layers, ensuring both strong structural support and effective heat dissipation. The TDK Demo Kit is securely positioned on this top acrylic platform.
The final phase of setup focuses on installing the sensor module. The USB camera is attached to its designated mounting sheet using a magnetic mount that allows for quick adjustments and repositioning. The TDK USSM modules are installed next to the camera on the same sheet.This complete camera + USSM sensor unit is then secured to the main structure using metal angle brackets. These brackets allow for tilting and adjusting the sensor orientation to achieve the best field of view and detection range.
Here's the final setup after assembly....