


![]()
Hi all.
Hope everyone is well and safe.
While the Kit doesn't arrive, and since part of the monitoring process is sending data to Arduino IoT Cloud, let's create something and get ahead start exploring that world.
I never tried Arduino IoT Cloud it, so this will be an exploratory adventure.
For this project, I'm going to use a DS18B20 waterproof temperature sensor that I have here with an Arduino Nano 33 IOT that I also have laying around here.
Hardware
- Arduino Nano 33 IoT (one of the ones supported by Arduino IoT Cloud)
- 4.7K resistor
- DS18B20 waterproof temperature sensor
Here's the schematics

NOTE: My temperature probe only has 3 wires. Here's the correspondence
| Probe Wire Color | Signal | Arduino Pin |
| Yellow | GND | GND |
| Red | VCC | 3.3v |
| Green | Signal | D4 |
A photo of the contraption

Code
I'm using a piece of code from the Arduino Project HUB that shows how to use this sensors.
How To Use DS18B20 Water Proof Temperature Sensor
I've uploaded the code and it's working fine:
I'm sure many of you already know how to work with Arduino Cloud, but if not, Arduino Getting started with the Arduino IoT Cloud is a good introductory guide.
I find this one, Environmental data in the Arduino IoT Cloud to be better - it explains in a different way.
Some problems
I had troubles getting the board to be recognized using MacOS Monterey . Had to install Arduino Create Plugin twice. Only after my second install, it did recognized the board. Although, using the online IDE editor always worked fine.
Adding a device
For this to work, you must have Arduino Create Agent running (Here I'm showing in Windows 11 and MacOS Monterey):

First, let's add a device:
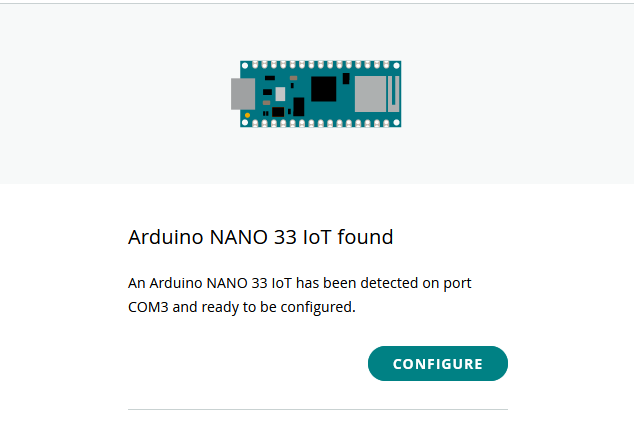
Give it a name

It will begin configuring the device (had to reconnect the device twice)

And if everything goes smootly,

Now, it should be displayed on devices:

Creating a thing
If you press the link directly on the devices TAB, it will lead you straight to a new thing (already had renamed from untitled to Temperature):
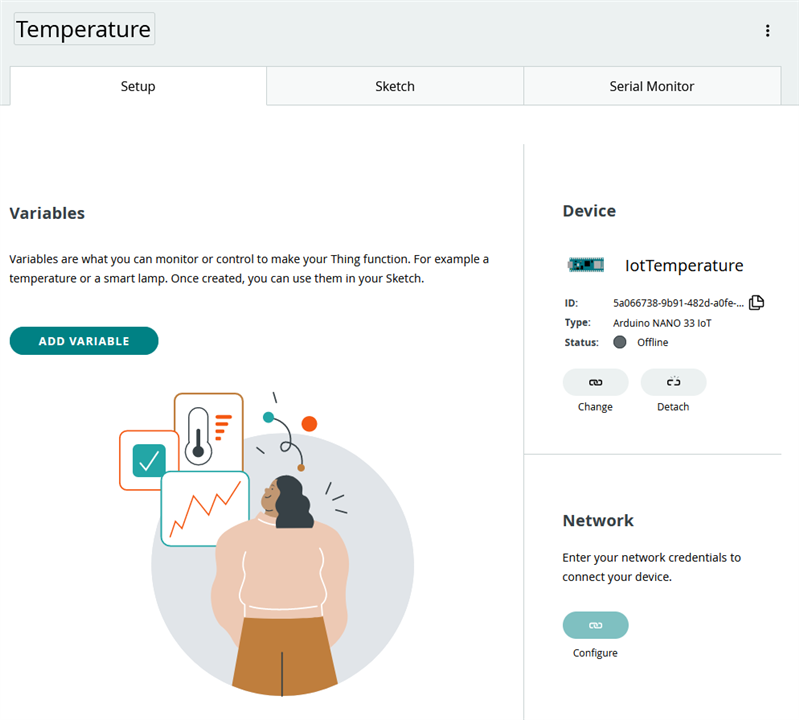
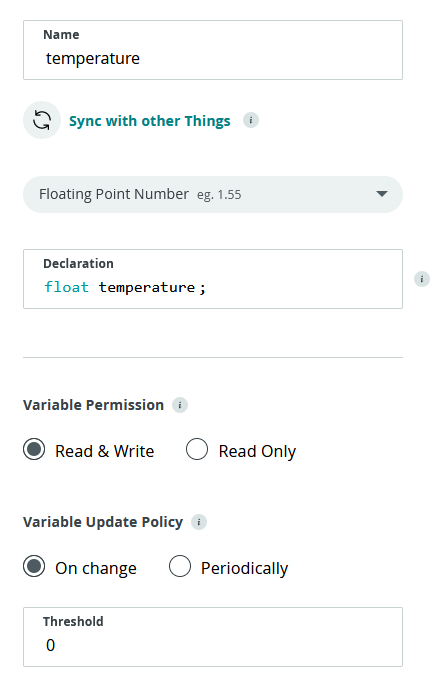
Now, let's add a variable to hold the temperature values
Here it is: read-write, floating point.
Don't forget to configure your network, or it won't be able to send data to the Cloud

Sketch
The sketch is very similar to the Arduino IDE - just write your code here.
You will see that a lot of code is already here - what is necessary to send data to the IoT Cloud.
Here's the code to get the temperature from the sensor
/*
  Sketch generated by the Arduino IoT Cloud Thing "Temperature"
  https://create.arduino.cc/cloud/things/c1551af0-54de-4c2d-b127-ea4b27ba6ef0

  Arduino IoT Cloud Variables description

  The following variables are automatically generated and updated when changes are made to the Thing

  float temperature;

  Variables which are marked as READ/WRITE in the Cloud Thing will also have functions
  which are called when their values are changed from the Dashboard.
  These functions are generated with the Thing and added at the end of this sketch.
*/

#include <OneWire.h>
#include <DallasTemperature.h>

#include "thingProperties.h"

#define ONE_WIRE_BUS 4

OneWire oneWire(ONE_WIRE_BUS);

DallasTemperature sensors (&oneWire);

void setup() {
  // Initialize serial and wait for port to open:
  Serial.begin(9600);
  // This delay gives the chance to wait for a Serial Monitor without blocking if none is found
  delay(1500);

  // Defined in thingProperties.h
  initProperties();

  // Connect to Arduino IoT Cloud
  ArduinoCloud.begin(ArduinoIoTPreferredConnection);

  /*
     The following function allows you to obtain more information
     related to the state of network and IoT Cloud connection and errors
     the higher number the more granular information you’ll get.
     The default is 0 (only errors).
     Maximum is 4
  */
  setDebugMessageLevel(4);
  ArduinoCloud.printDebugInfo();
  //temperature
  sensors.begin();
}

void loop() {
  ArduinoCloud.update();
  // Your code here
  //getting temperature
  sensors.requestTemperatures();  //send command for readings

  temperature = sensors.getTempCByIndex(0);  //we put the valus into the variable defined on the setup
  Serial.println(temperature);

  //delay(300000); //5 minutes - now for testing
}

/*
  Since Temperature is READ_WRITE variable, onTemperatureChange() is
  executed every time a new value is received from IoT Cloud.
*/
void onTemperatureChange()  {
  // Add your code here to act upon Temperature change
}
Almost at the end of the loop function, we have the following line:
temperature = sensors.getTempCByIndex(0); //we put the valus into the variable defined on the setup
This will put the temperature reading into the variable temperature created in the setup.
In the top of the editor, your Arduino should be recognized:

Now, let's upload it to the Arduino.
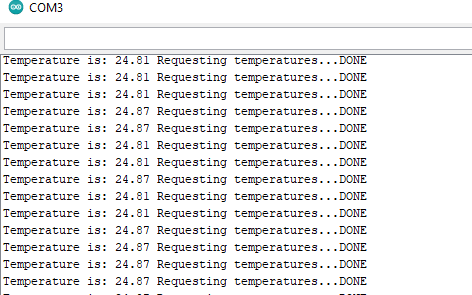
In the serial monitor, I'm getting this info and it's not connecting to the IoT Cloud

But, after arriving home, finally it connected without any problem

What I still don't realize is, if it's necessary to add some print for it to show on the serial console and only then it gets uploaded to IoT Cloud (but it does not makes sense) or was just a coincidence.
Dashboard
To visualize the temperature in a nice way, let's create a dashboard with a widget
Just click on "Build a Dashboard", add a Widget and link a variable.
I'm going to add a Gauge to display the temperature.

Setup the widget

And here it is, updating every time the code updates

And here it is, my first experience with Arduino IoT Cloud.
This wasn't without contacting the Arduino team because of the problems recognizing the Arduino Nano 33 IoT . I've received an email from one of their technicians, saying that the Apple M1 isn't supported by the Arduino Create Agent. But it's working now, but not without some issues - now the Arduino is recognized, in a few seconds it is not.. Now it is.. Now it's not... 