


1 Getting start with CAN
For test CAN in the other end, XMC4200 platform2go is used
CAN (Controller Area Network) is for industrial and automotive embedded communication. It’s a robust, multi-master serial protocol designed for reliable real-time data exchange between microcontrollers, sensors, and actuators—even in electrically noisy environments. Infineon XMC4200 Platform2GO with the Arduino IDE can give a quick glance.
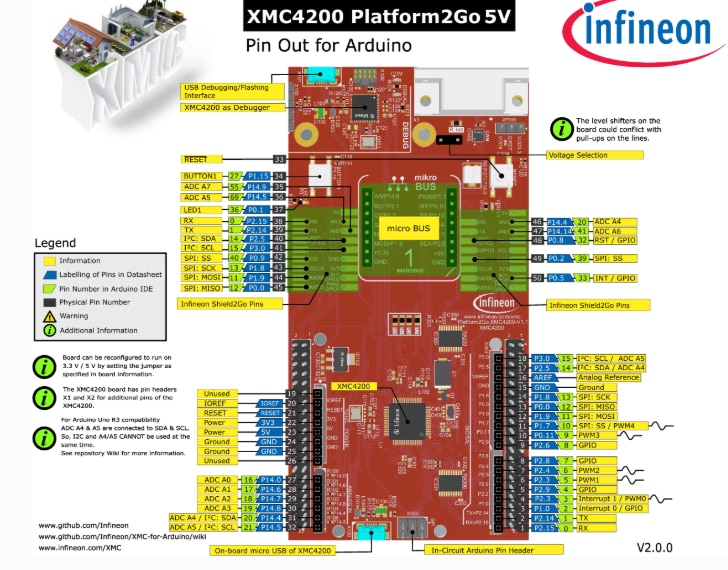
2 CAN in a glance
CAN was developed by Bosch in the 1980s for automotive applications, but it’s now used widely in industrial automation, robotics, and aerospace. Key features,
No single “master” device; any node can send data when the bus is free.
Error resilience: Built-in error checking, arbitration, and retransmission to ensure data integrity.
Two message formats: Standard CAN (11-bit ID): Shorter, faster identifiers for simple systems and Extended CAN (29-bit ID): Longer identifiers for complex networks with many nodes.
Flexible data length: Classic CAN supports up to 8 bytes of data per packet; newer CAN FD extends this to 64 bytes.
For the XMC4200, the on-chip CAN peripheral is fully supported by Infineon’s Arduino core, making it easy to prototype CAN applications without low-level register programming.
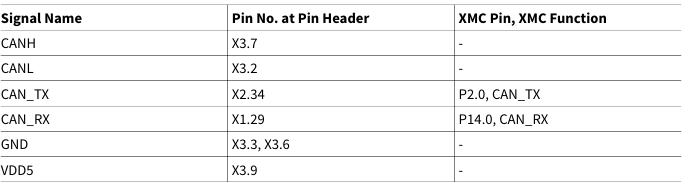
CANH and CANL are two wires for communication on 12V or 24V bus.
3 USING ARDUINO IDE
Using Arduino is quick start for can
#include <CAN.h>
void setup() {
  Serial.begin(9600);
  while (!Serial);

  Serial.println("CAN Sender");

  // start the CAN bus at 500 kbps
  if (!CAN.begin(500E3)) {
    Serial.println("Starting CAN failed!");
    while (1);
  }
}

void loop() {
  // send packet: id is 11 bits, packet can contain up to 8 bytes of data
  Serial.print("Sending packet ... ");

  CAN.beginPacket(0x12);
  CAN.write('h');
  CAN.write('e');
  CAN.write('l');
  CAN.write('l');
  CAN.write('o');
  CAN.endPacket();
  Serial.println("done");
  delay(1000);
  CAN.beginExtendedPacket(0xFFF);
  CAN.write('w');
  CAN.write('o');
  CAN.write('r');
  CAN.write('l');
  CAN.write('d');
  CAN.endPacket();

  Serial.println("done");

  delay(1000);
}
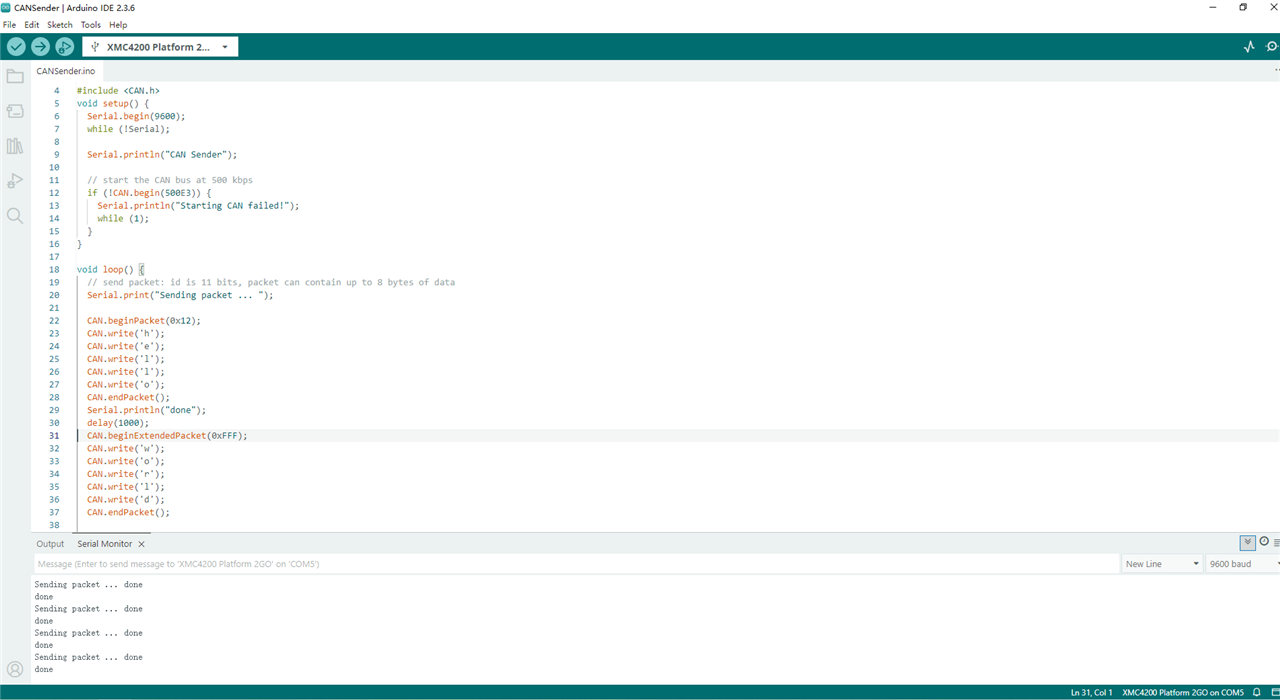
The code is simple , put loop code in the the CAN bus
serial.begin(9600): Initializes the UART serial port at 9600 baud for debug messages.CAN.begin(500E3): Initializes the CAN bus at 500 kbps, one of the most common baud rates for automotive and industrial applications. If initialization fails (e.g., hardware issue), the code prints an error and stops.
Then in loop
CAN.beginPacket(0x12): Starts a new standard CAN packet with the 11-bit identifier0x12.CAN.write(): Adds data bytes to the packet. Here, we’re sending the ASCII characters'h','e','l','l','o'(5 bytes total, well within the 8-byte limit).CAN.endPacket(): Finalizes and sends the packet over the CAN bus.
Then in extend
CAN.beginExtendedPacket(0xFFFFF): Starts an extended CAN packet with the 29-bit identifier0xFFFFF. This is useful when you need more unique IDs for a large network of devices.- The rest works the same way: we send the characters
'w','o','r','l','d'as data bytes.
4 Test for CAN on XMC4200
Baud Rate Matching: All devices on the CAN bus must use the same baud rate. 500 kbps is standard for automotive, 125 kbps is common for industrial applications.
Termination Resistors: Always add 120Ω resistors at the two ends of the CAN bus to eliminate signal reflections. This resistor is soldered in this board.
Common Ground: All devices on the bus must share a common ground reference for reliable communication. Although only two line is enough for communication.
The test result is output in serial terminal
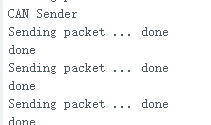
Now it is ready for the CAN bus run as expected.
