


Lab 8: SDK Project Management
Continuing along with the training, Lab 8 walked through archiving the various elements of an SDK project, including the project source files, run/debug configurations, breakpoints, and workspace settings. Most of it is as easy as File -> Export, but the workspace settings require a little more manual effort. This is all done to allow projects to be easily shareable, since zipping the project and sharing it is likely to not work. Once the archives were created, the lab walked through importing the archive into a new workspace and verifying settings were correct.
Lab 9: Interrupts
This lab went through creating an application with interrupts. The first example application did not include interrupts, so they were added in the second experiment to make the application a bit more efficient. The first version of the application serviced the interrupt directly in the ISR callback function. This can be acceptable for very small tasks, however, for larger, more time consuming tasks, it's better to set a flag in the ISR callback and respond to the flag in the main program loop. This was done in the "Exploring Further" section.
This was a good educational exercise on configuring interrupts for the MPSoC+, but this particular implementation seemed a bit superfluous. As mentioned in the lab instruction, software could have been used to limit the PWM value before sending to the PWM hardware IP. As an alternative, the PWM hardware IP could do the limiting to prevent an invalid PWM value from being set. An interrupt was not really needed for this application.
This lab required the Click Mezzanine Kit, which I did not initially have when doing this lab. Instead I simply plugged in an LED to the low speed header on the Ultra96-V2 board. I was initially unsure which pin to use for this. I worked backwards from the LCD Mini Click schematic (https://download.mikroe.com/documents/add-on-boards/click/lcd-mini/lcd-mini-click-schematic-v101.pdf) and the Click Mezzanine schematic (https://www.avnet.com/opasdata/d120001/medias/docus/197/HW_Click%20Mezzanine_v103_Output%20Files_PDF_Click%20Mezzanine_v103_Schematic.PDF) to determine the PWM signal was pin 29:
| LCD Mini Click (PWM) | Click Mezzanine |
|---|---|
 | 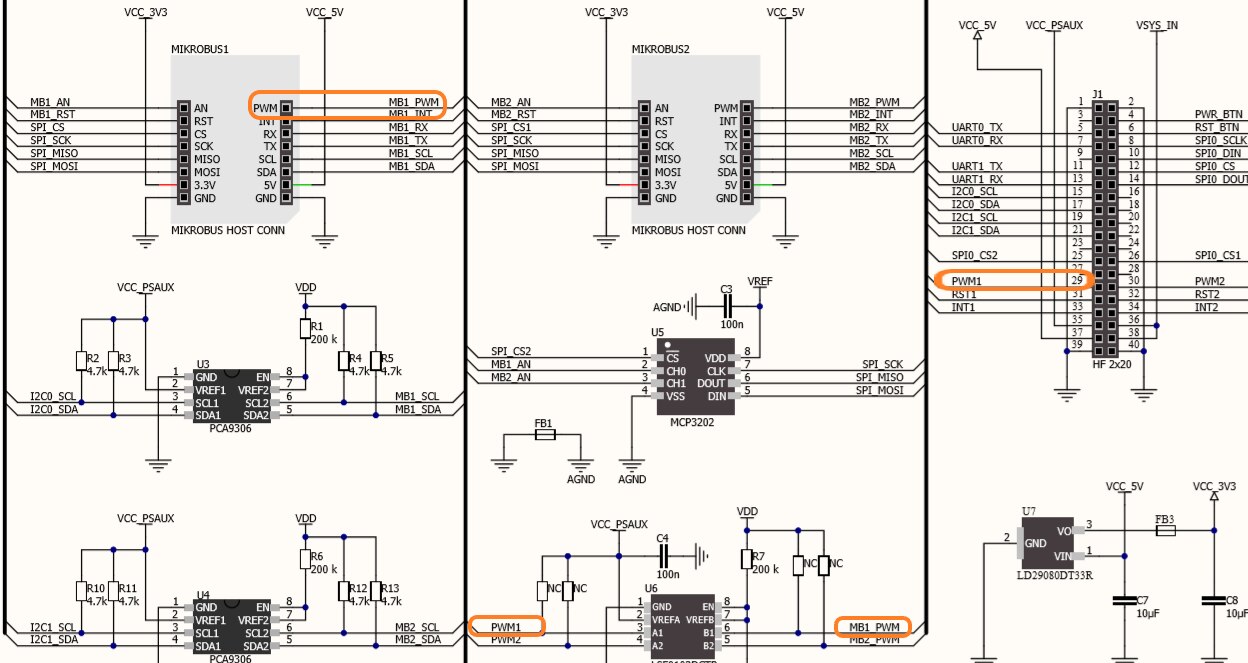 |
Here's a low-res video of the LED fade:
We were sent kits about a week later, so I revisited this exercise (Actually it was during the HW labs. The same lab was done, but looking at it from the hardware perspective instead of the software):
My mezzanine board was a little worse for wear when it arrived. I had to bend several pins back into place in order for it to be usable. I haven't had any issues with it, though. Good thing for that QC tag (Lol!):
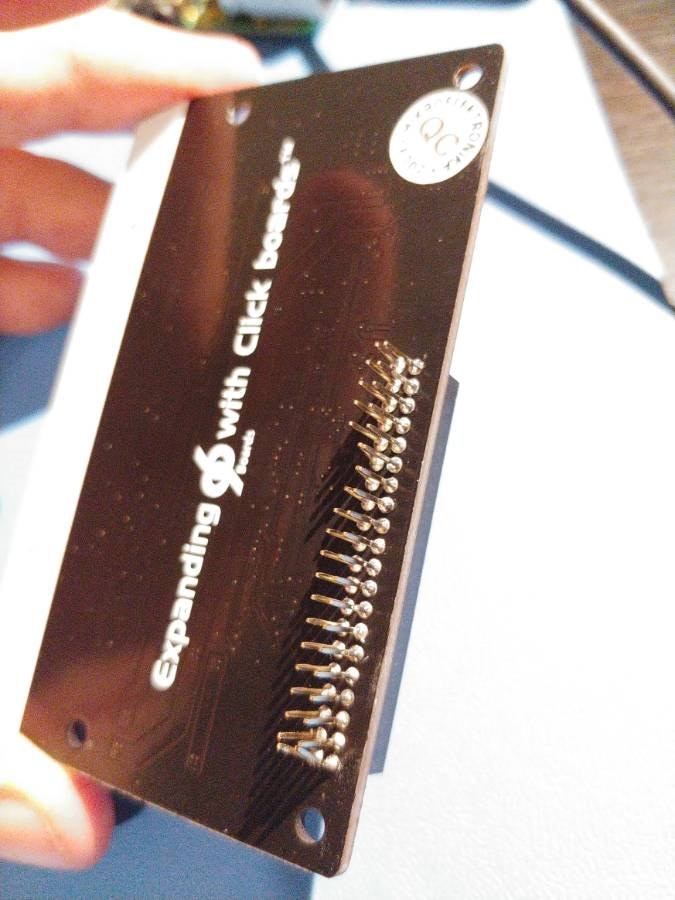 |
Lab 10: Xilinx Libraries
I somehow missed this lab as I was going through, and thankfully I realized before it was too late. This lab utilized a Xilinx Fat File System library (xilffs) in order to write temperature sensor data to the MicroSD card. Xilinx libraries are added in the same place as peripheral drivers: in the board support package. The provided application measured temperature data from the system monitor located on the Zynq MPSoC+, wrote the results to the terminal and saved the data to a CSV file on the MicroSD card. The xilffs library provides several functions useful for file I/O, including f_mount (mounts filesystem), f_open (open/create file), f_lseek (gets position in file), f_write (write to selected file) and f_read (read selected file). Once the application finished running, the MIcroSD card could be loaded on a PC to view the temperature log file.
Lab 11: Click Mezzanine
This was probably the best lab of the series, as it walked through interfacing to a IMU sensor via the Click Mezzanine board using one of the MPSoC+ SPI peripherals and the spips driver. The application was set up to use the LSM6DSL 6-axis inertial sensor click board. The application simply checked that the LSM6DSL was connected by reading the WHO_AM_I ID register. The application then proceeded to read the temperature sensor on this chip at a 1 Hz rate.
I wanted to do a bit more, so I extracted data from all the inertial measurement registers and printed them over serial. The inertial data registers are shown below. Setup for the angular rate and linear acceleration sensor is done via the "CTRL1_XL" and "CTRL2_G" registers (not listed):
 |
The short videos below show the data as I move the board around. The first video shows angular movement of the board. Angular rate sensor data is shown in the 3 left-most columns of the serial terminal (although it's a little hard to see):
This next video shows linear acceleration movement of the board. This data is shown in the 3 right-most columns. Each column goes to ~1g as each axis aligns with Earth's gravitational field:
Lab 7: Revisited
In my last blog, I wrote about an issue in SW Lab 7. Thanks to a good post by cmelement14 found here (Do Not Hide the Problem - A Correct SW Lab 7 Solution), I was able to understand what was going on.
The short of it is that an application can break during build of the release version due to compiler optimizations. The optimizer may see a variable appearing to only be assigned once, even though it may be modified externally (via ISR, hardware peripheral register, multithreading, etc). In Lab 7, build optimization created a dead loop causing the program to hang up (this was not mentioned in the material, and the solution lab even commented out the particular test causing the hang up so it would run). The variable that appears to only be assigned once gets its assignment before the loop, then enters the loop. This is shown in x86 assembler from https://barrgroup.com/Embedded-Systems/How-To/C-Volatile-Keyword. The condition for the bz instruction will never be met, since the mov happened before the loop, and the value was not 0 during the initial mov:
 |
When the volatile keyword is used, this tells the optimizer not to optimize the variable, as it may be modified asynchronously from other sources. That creates the following x86 assembler which performs the mov inside the loop, allowing the value to continuously be checked:
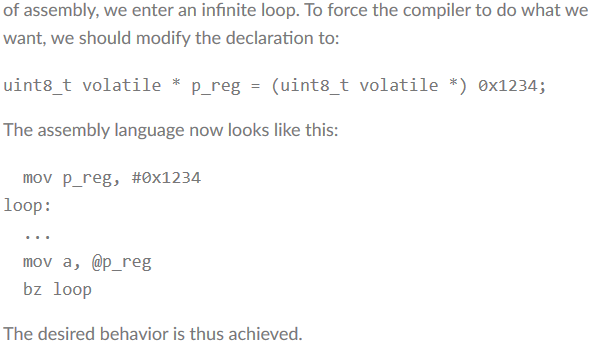 |
So that's it for software! I've gotten a bit behind. I have 1 or 2 more blogs in the pipe for the hardware series and I'm working through the final PetaLinux series this weekend.
Top Comments