I've completed the hardware & software courses, so now it is time for the last bit - using Petalinux to build Linux for Zynq & accessing hardware from an application.

Petalinux Chapter 1 video: Overview, Review of Ultra96 Kit, PetaLinux Overview
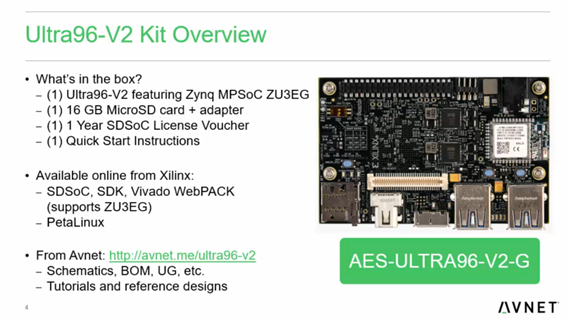
- An overview of what's bundled with the Ultra96.
- What else we need: power supply, debugger, mezzanine board etc.
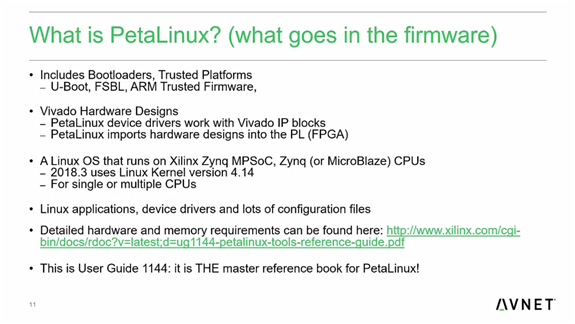
- An Introduction to Petalinux - a collection of tools for building Linux for Zynq on x86.
- How Petalinux works with other Xilinx tools (Vivado, SDSoC & SDK).
- Petalinux on Zynq MPSoC - how it works with the bootloader, programs the PL etc.
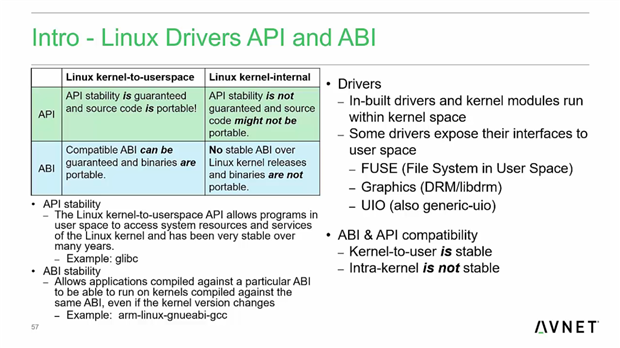
- Petalinux hardware drivers - GPIO, SPI, I2C etc.
- Petalinux has multitasking capabilities & can run on the 4x A53s. For real-time applications, use FreeRTOS on the R5s and communicate with the A53s using OpenAMP.


PetaLinux Lab 1 - Minimal Ultra96 PetaLinux
- The PetaLinux environment was setup in a pre-lab - this was a pretty lengthy process & involved entering quite a few commands in the terminal.
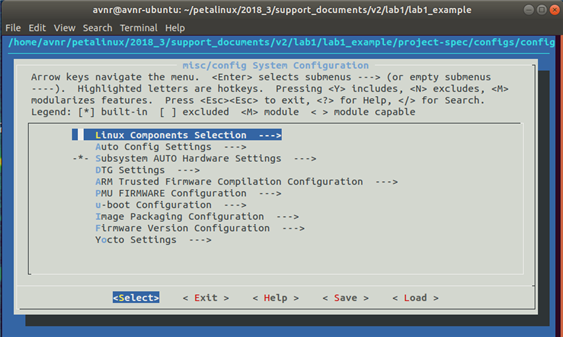
- Lab 1 was to create, configure & build a minimal PetaLinux - this used 2 commands which were entered into the Linux terminal, where the PetaLinux configuration also gets displayed. The configuration used the defaults, except for the primary stdin/stdout which was changed to ps_uart_1 due to how things are connected on the Ultra96.
- According to the lab document, the kernel configuration takes around 10 minutes, and the PetaLinux build takes another 40. There was an option to use the bundled pre-built files, so I went with that.
- The generated files need to be copied over to the SD card. Boot & rootfs partitions need to be created on the SD card, which need to be formatted as FAT32 & EXT4 respectively.


Petalinux Chapter 2 video: All about Yocto & Device Tree fundamentals
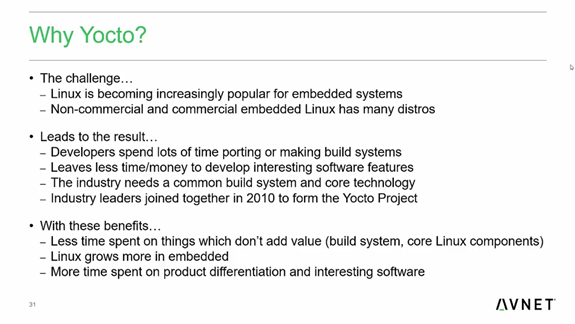
- An intro to the Yocto project - how the build system reduces complexity & makes building Linux easier.
- A Yocto crash course - how things are structured, how files are fetched.
- How Petalinux & Yocto work together.
- How the Petalinux tools are structured & project taxonomy - deciphering which files go where!
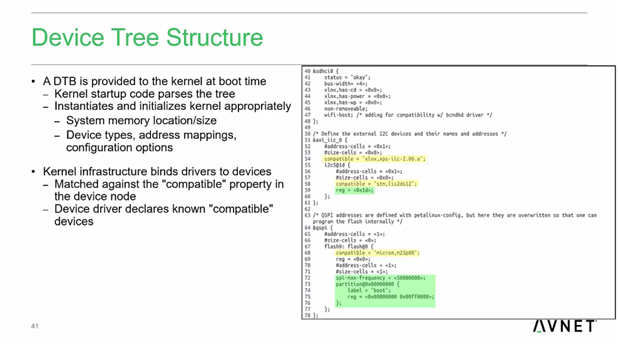
- Petalinux platform configuration using the Linux device tree. How the device tree structure is compiled to a binary
PetaLinux Lab 2 - Updating Fully Featured PetaLinux
- Enabled 'User mode SPI device driver support' in the kernel configuration wizard and updated the .dtsi file
- Customized the Petalinux root file system - different tools like python & i2ctools can be selected
Petalinux Chapter 3 video: Ultra96 Communications
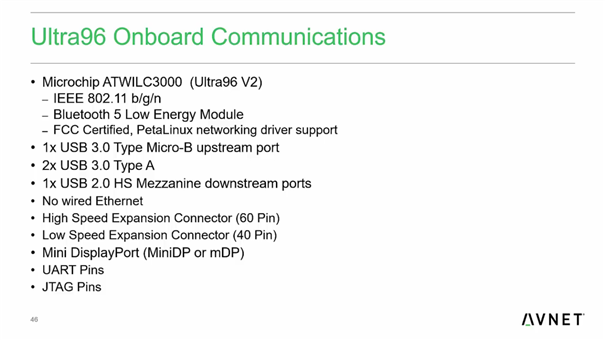
- A recap of the communication interfaces on the Ultra96v2
PetaLinux Lab 3 - Connect with Ultra96 Using Wi-Fi
- Connected to the hotspot of the Ultra96, and used the webpage to login to Wi-Fi network - this is something that I had already done, so I skipped this experiment.
- SSH'ed into the Ultra96 from the VM.
- Use FileZilla to transfer files.
- Ping internet servers
- Use 'wget' to fetch files from servers on the internet
Petalinux Chapter 4 video: Petalinux User Application Development
- The importance of the memory management unit when it comes to running user applications & how addressing is handled.
- Advantages & disadvantages of using the MMU to isolate/abstract hardware/memory from the user application.
- Trade-offs between user & kernel application code - performance, learning curve, portability, stability, security & ease of debugging.
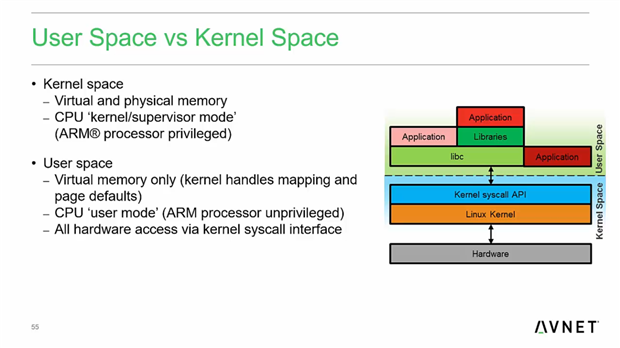
- User space vs kernel space.
- Linux Device Driver model - an introduction.
- The part I've been looking forward to: accessing hardware from the user space. Different methods include /dev/mem, the UIO framework, sysfs etc.

PetaLinux Lab 4 - Creating PetaLinux Applications using Xilinx SDK
- Created a new Xilinx SDK project. The process was the same was the same as previous projects, except that this time, 'linux' was selected as the 'OS Platform', and 'psu_cortexa53' was the 'Processor Type'.
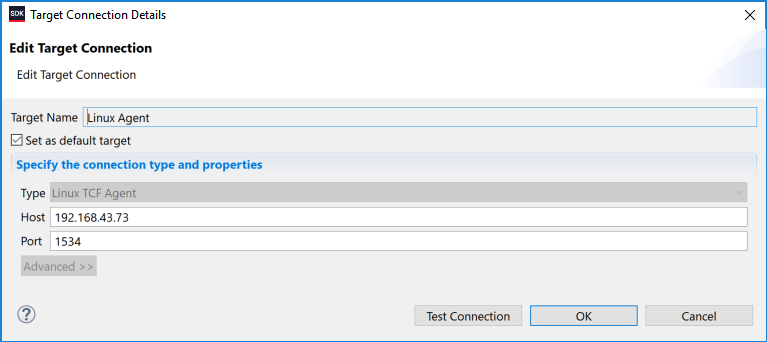
- The Linux TCF agent is used to debug the application - setting this up required entering the IP address of the Ultra96v2.
- The debug session was launched as usual, but ending a debug session requires selecting the 'Terminate & Remove' as an extra step.