


I have now finished all the training content for Path II Programmable!
In this series, we are provided an Ultra96 board and a series of training modules focused around three areas - Hardware (the FPGA side), Software (the microprocessor side), and Petalinux (the OS side).
Updates
There are six lessons for the PetaLinux modules in this training program. They center around running a special blend of Linux directly on the Ultra96 board. We are taught how to get files on and off, build custom kernels, and we also create a custom IoT application using one of the provided Clickboards. I'd like to send out another "Thanks" to the entire E14 team for facilitating this. I am looking forward for the next section.
Workflow differences
In the lectures, we learned about the modified development workflow with a PetaLinux system; versus just Vivado + SDK.
See these two examples:

With the PetaLinux; we can take the direct Vivado export and deploy it to the Zynq. As we develop software in SDK, we have to bake it into the kernel and re-deploy.

With just Vivado + SDK, the flow is a little simpler; at least we aren't recompiling images and copying over via SD. (Note: we do learn in lab 4 about remote debugging which can shortcut some of that during the development cycle).
Lab 01 - Minimal Petalinux
This lab was just an introduction to PetaLinux. We use FDisk to format the provided Delkin 16gb card into two partitions - a 1gb for the boot partition and one for everything else (the OS). We are introduced to some of the command line options like petalinux-create to create our project from a valid BSP, and petalinux-build to build the final output files (this can take 20-40 minutes, or over an hour in some cases). We are also shown the PetaLinux Configuration Editor which is a command line GUI accessed via "petalinux-config --get-hw-description=../"

The nice thing about the compiler is that it actually uses all four cores that I allocated to the VM.

Vivado struggled with that and so some things took longer than they should have.
Finally, we copy our files over to the SD card, change the boot selector switch to "SD" on the Ultra96 and power everything up. Petalinx boots up pretty quickly and you can see it via GKTerm from the VM (outputting via the JTAG/UART adapter board).
Lab 02 - A full PetaLinux image
In this lab, we follow a lot of the same steps as lab 01, but we enabled more features of the OS.
The conclusion at the end of the lesson provides a pretty good summary of the process:
Steps to creating your own customized PetaLinux:
1. Start with either the minimal or advanced BSP file. These are located in lab1/bsp and lab2/bsp folders. Expand the .bsp file into a project, change directory into the expanded bsp location.
2. If you want to import your own hardware design use the petalinux-config --get-hw-description command as we did in Lab 1. This will bring up the hw configuration menus as well, save your configuration changes.
3. Use petalinux-config -c rootfs and petalinux-config -c kernel to further customize the system.
4. Use petalinux-build to generate the various bootloader, kernel and filesystem files.
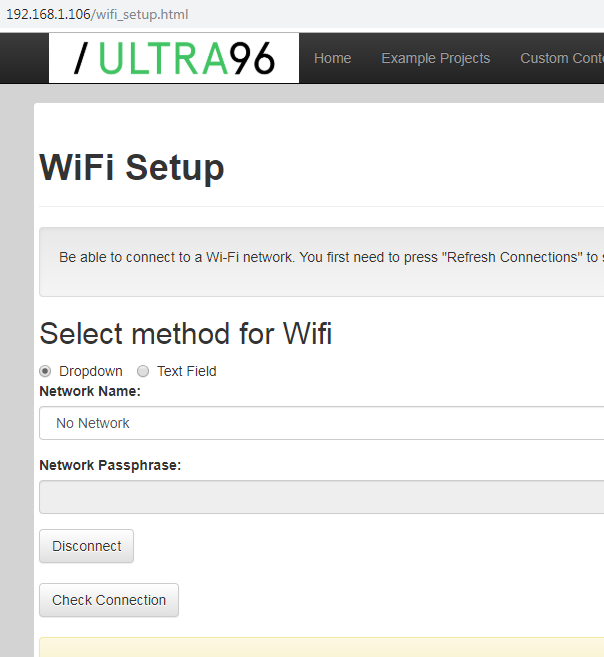
Lab 03 - Connecting using WiFi
This was a pretty quick lab - We picked up from the end of lab 2. From my phone, I found a Wifi Hotspot called "Ultra96_[...]" and I was able to join. There is a section on the web site to join a different hotspot and enter a password. After a few moments, the Ultra96 board jumps over to my (secure) wifi and stops broadcasting its own (unsecure) signal. This was good because the default username and password on the device is root/root and with an insecure hotspot, all bets are off if you live in a populated metro area or office building. The Ultra96 only has Wifi built in, so if you want wired Ethernet, you could use a USB adapter like others have done .
We then are shown how we can use SSH from the terminal to connect and also how to use FileZilla for remote file transfer once connected on the same network. There are also some basic tests like pinging google.com from SSH on the device to verify it can connect to the outside world.
Also in Lab 04, we did some "remote debugging" from SDK over to the Ultra96 once it was available over Ethernet. From within SDK, we are able to choose the device and with a few clicks, upload new software and have the full features of the SDK's debugging utility. This would be great when a device is deeply embedded and we can't physically plug in easily, but we can access over the network. In the lab, we access the LSM6DSL ClickBoard to read out the temperature.
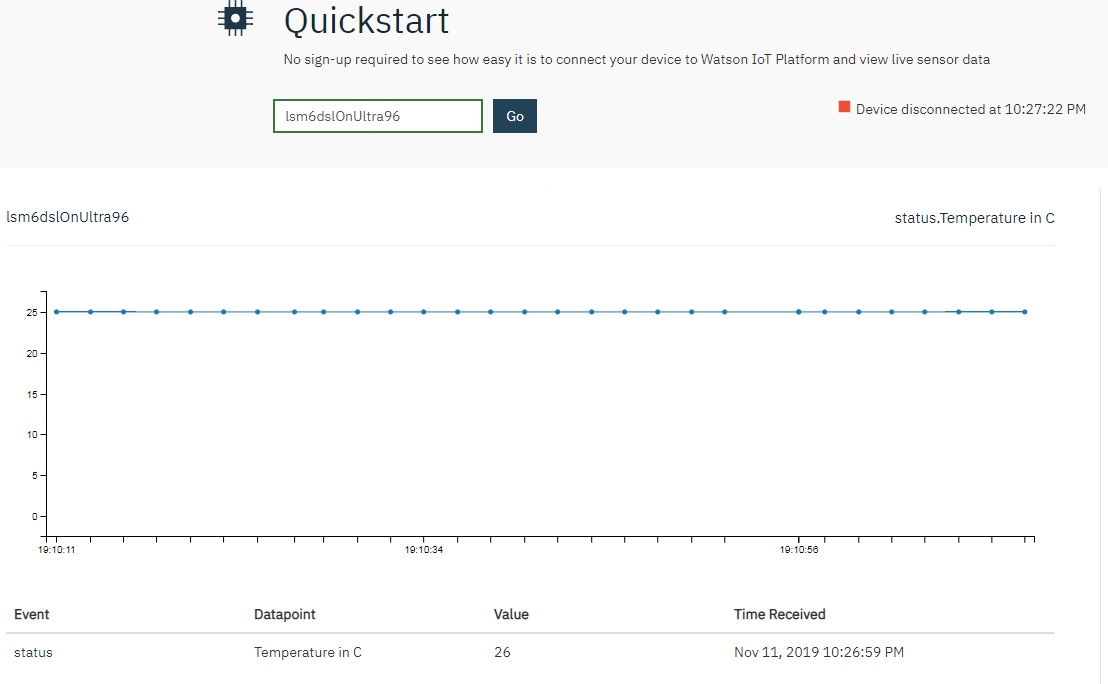
Lab 05 - integrating the sensor to the internet
This lab uses IBM Bluemix as a publicly available MQTT broker to test some IoT connectivity. We recreate a kernel with the LSM6DSL sensor which generates a JSON packet and sends it off to the cloud. A nice feature of Bluemix is that no accounts are required. A lot of people last year (myself included) didn't like using the Amazon AWS service as it was only free on a trial basis with user account and credit card required.
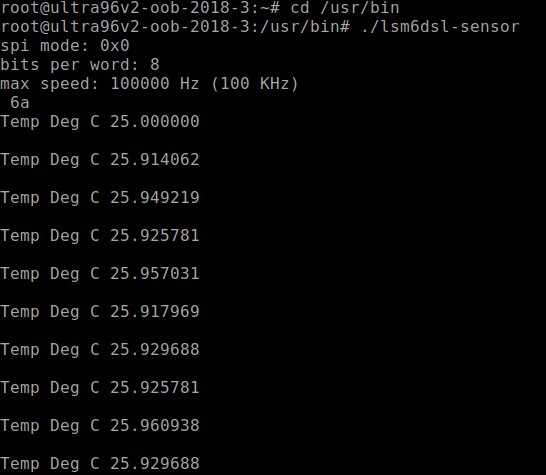
Lab 06 - Baking custom software into the kernel
This lab was very similar to Lab 05, but instead of running from Ram, we bake the program right into the kernel of the Ultra96. This will make it retain across power cycles.
There was a lot of manual editing in multiple file locations to get this set up. It seemed a lot more complicated to me than what we learned in the SDK lessons. Portions of the setup are spread across various textual config files and setup utilities.
Once the image is loaded, we can launch the application via command line with "./lsm6dsl-sensor" and the values are read out onto the console.
Part 1 is now complete!
So we're on to the next part - building a project! I'll have more posts and videos as that part progresses. I'm very much a beginner with FPGAs and embedded programming, so this was all new to me. I was able to follow the lessons and videos and complete everything without too much issues. The other trainees had some good posts and some were ahead of me and they caught some potential pitfalls for me to look out for, and that made it a little easier for me as well.
- James O'Gorman
Top Comments