element14 Community
element14 Community
    Register Log In
  • Site
  • Search
  • Log In Register
  • About Us
  • Community Hub
    Community Hub
    • What's New on element14
    • Feedback and Support
    • Benefits of Membership
    • Personal Blogs
    • Members Area
    • Achievement Levels
  • Learn
    Learn
    • Ask an Expert
    • eBooks
    • element14 presents
    • Learning Center
    • Tech Spotlight
    • STEM Academy
    • Webinars, Training and Events
    • Learning Groups
  • Technologies
    Technologies
    • 3D Printing
    • FPGA
    • Industrial Automation
    • Internet of Things
    • Power & Energy
    • Sensors
    • Technology Groups
  • Challenges & Projects
    Challenges & Projects
    • Design Challenges
    • element14 presents Projects
    • Project14
    • Arduino Projects
    • Raspberry Pi Projects
    • Project Groups
  • Products
    Products
    • Arduino
    • Avnet Boards Community
    • Dev Tools
    • Manufacturers
    • Multicomp Pro
    • Product Groups
    • Raspberry Pi
    • RoadTests & Reviews
  • Store
    Store
    • Visit Your Store
    • Choose another store...
      • Europe
      •  Austria (German)
      •  Belgium (Dutch, French)
      •  Bulgaria (Bulgarian)
      •  Czech Republic (Czech)
      •  Denmark (Danish)
      •  Estonia (Estonian)
      •  Finland (Finnish)
      •  France (French)
      •  Germany (German)
      •  Hungary (Hungarian)
      •  Ireland
      •  Israel
      •  Italy (Italian)
      •  Latvia (Latvian)
      •  
      •  Lithuania (Lithuanian)
      •  Netherlands (Dutch)
      •  Norway (Norwegian)
      •  Poland (Polish)
      •  Portugal (Portuguese)
      •  Romania (Romanian)
      •  Russia (Russian)
      •  Slovakia (Slovak)
      •  Slovenia (Slovenian)
      •  Spain (Spanish)
      •  Sweden (Swedish)
      •  Switzerland(German, French)
      •  Turkey (Turkish)
      •  United Kingdom
      • Asia Pacific
      •  Australia
      •  China
      •  Hong Kong
      •  India
      •  Korea (Korean)
      •  Malaysia
      •  New Zealand
      •  Philippines
      •  Singapore
      •  Taiwan
      •  Thailand (Thai)
      • Americas
      •  Brazil (Portuguese)
      •  Canada
      •  Mexico (Spanish)
      •  United States
      Can't find the country/region you're looking for? Visit our export site or find a local distributor.
  • Translate
  • Profile
  • Settings
Path to Programmable 3
  • Challenges & Projects
  • Design Challenges
  • Path to Programmable 3
  • More
  • Cancel
Path to Programmable 3
Blog Path to Programmable III Training Blog #02: Getting Started with MiniZed and Vivado
  • Blog
  • Forum
  • Documents
  • Leaderboard
  • Files
  • Members
  • Mentions
  • Sub-Groups
  • Tags
  • More
  • Cancel
  • New
Join Path to Programmable 3 to participate - click to join for free!
  • Share
  • More
  • Cancel
Group Actions
  • Group RSS
  • More
  • Cancel
Engagement
  • Author Author: taifur
  • Date Created: 16 Jul 2023 3:05 AM Date Created
  • Views 1774 views
  • Likes 7 likes
  • Comments 2 comments
  • AMD XILINX
  • xilinx
  • fpga
  • vivado
  • Path to Programmable 3
  • minized
Related
Recommended

Path to Programmable III Training Blog #02: Getting Started with MiniZed and Vivado

taifur
taifur
16 Jul 2023
Path to Programmable III Training Blog #02: Getting Started with MiniZed and Vivado

In my previous blog, I showed how I installed Vivado & Vitis 2023.1 on my Ubuntu 22.04 LTS PC. This will be my first hands-on experiment using the MiniZed board and Vivado. I will turn ON/OFF an LED using a switch that is pre-built into the MiniZed Board. There are two parts of a design using any Xilinx SOC development. Hardware design is performed in Vivado and software design is completed in either Vitis or PetaLinux. As controlling an LED with a switch is a pure hardware design using Vivado is very logical.

The first step in this process is to create a hardware project in Vivado. For this project, I am going to create a new Vivado RTL Project targeting the MiniZed board. So, for creating a Vivado project first I run the Vivado using the following command from the Ubuntu terminal:

source /tools/Xilinx/Vivado/2023.1/settings64.sh
vivado

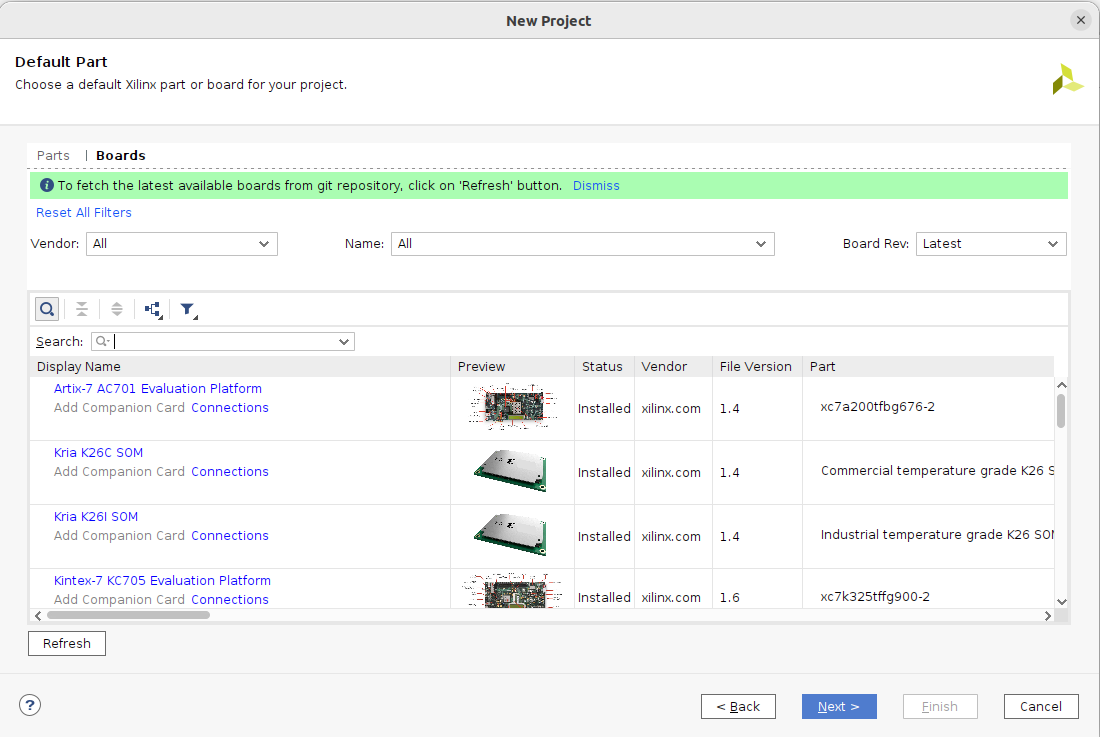
Then I intended to create a new RTL project and a step of project creation is to select the target hardware part or board. As I am using the MiniZed development board directly choosing the board is an easier option. But I did not find the MiniZed Board in the board list. So, I was looking at how I can add the MiniZed board to the board list. 

image

From a little googling, I realized that I need to download the specific board file for a particular board. So, I downloaded the MiniZed board file from this GitHub Link by Avnet.

image

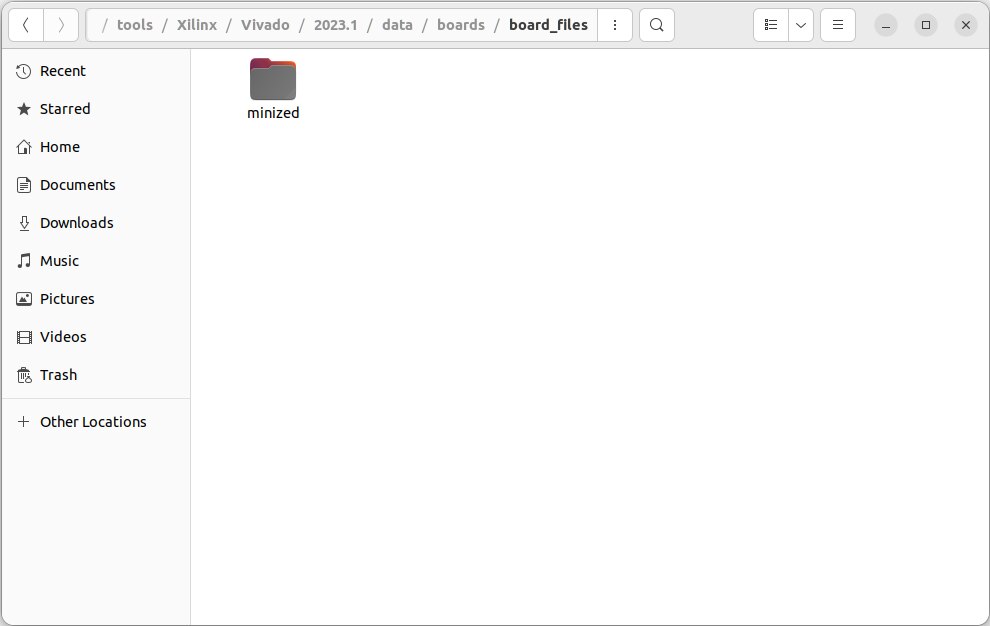
The next step is to add the downloaded board file to the board_files directory of the location: /tools/Xilinx/Vivado/2023.1/data/boards of my Ubuntu PC. I did not find any directory named board_files in that location. So, I created the same directory in that specific location using the following command:

mkdir /tools/Xilinx/Vivado/2023.1/data/board/board_files

Then I gave all the permission to that directory so that I can copy other contents in that directory.

sudo chmod -R 777 /tools/Xilinx/Vivado/2023.1/data/board/board_files

Finally, I copied the minized directory that I downloaded previously from Avnet GitHub and paste it to the newly created board_files directory.

image

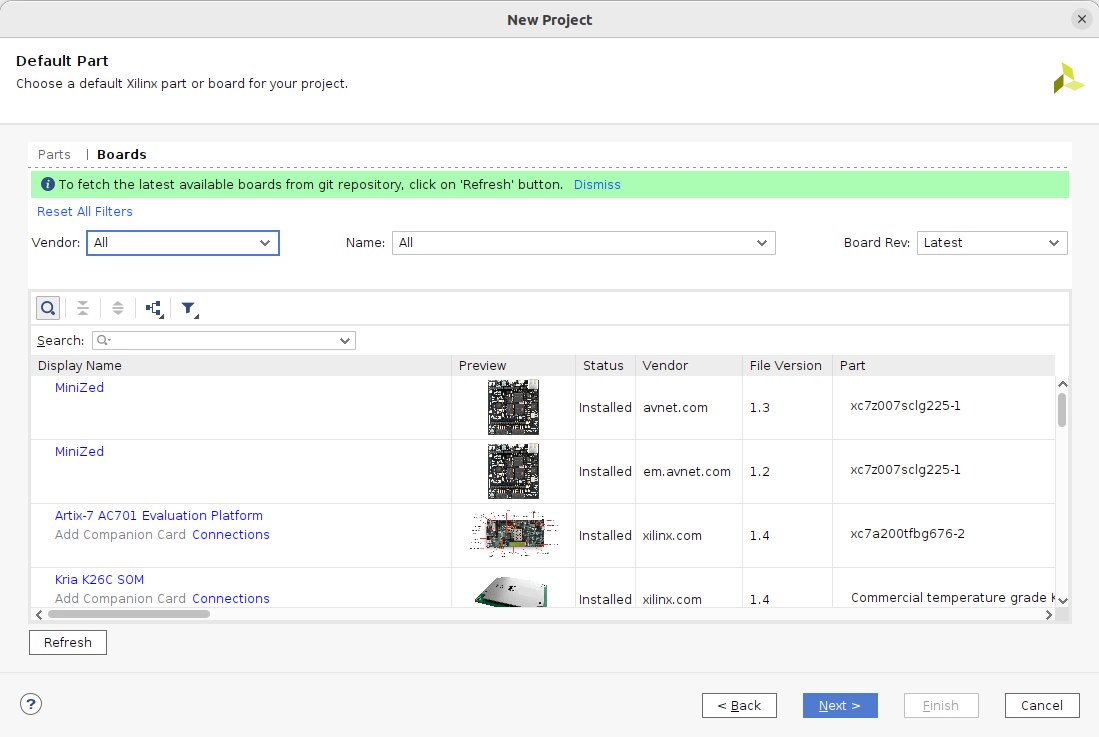
After following all the steps I was able to see the MiniZed board in the board list (see the screenshot below).

image

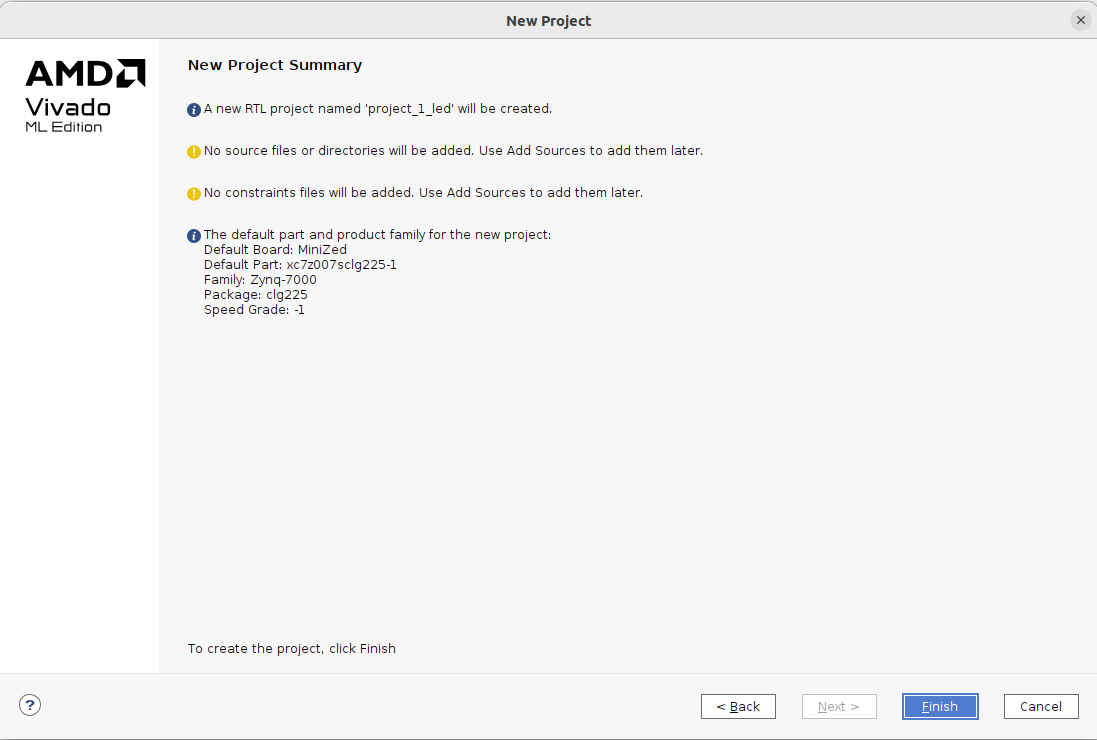
Finally, I created the project for the MiniZed board and the project summary is as follows. At this moment I did not add or create any source file. I will do so after opening the project.

image

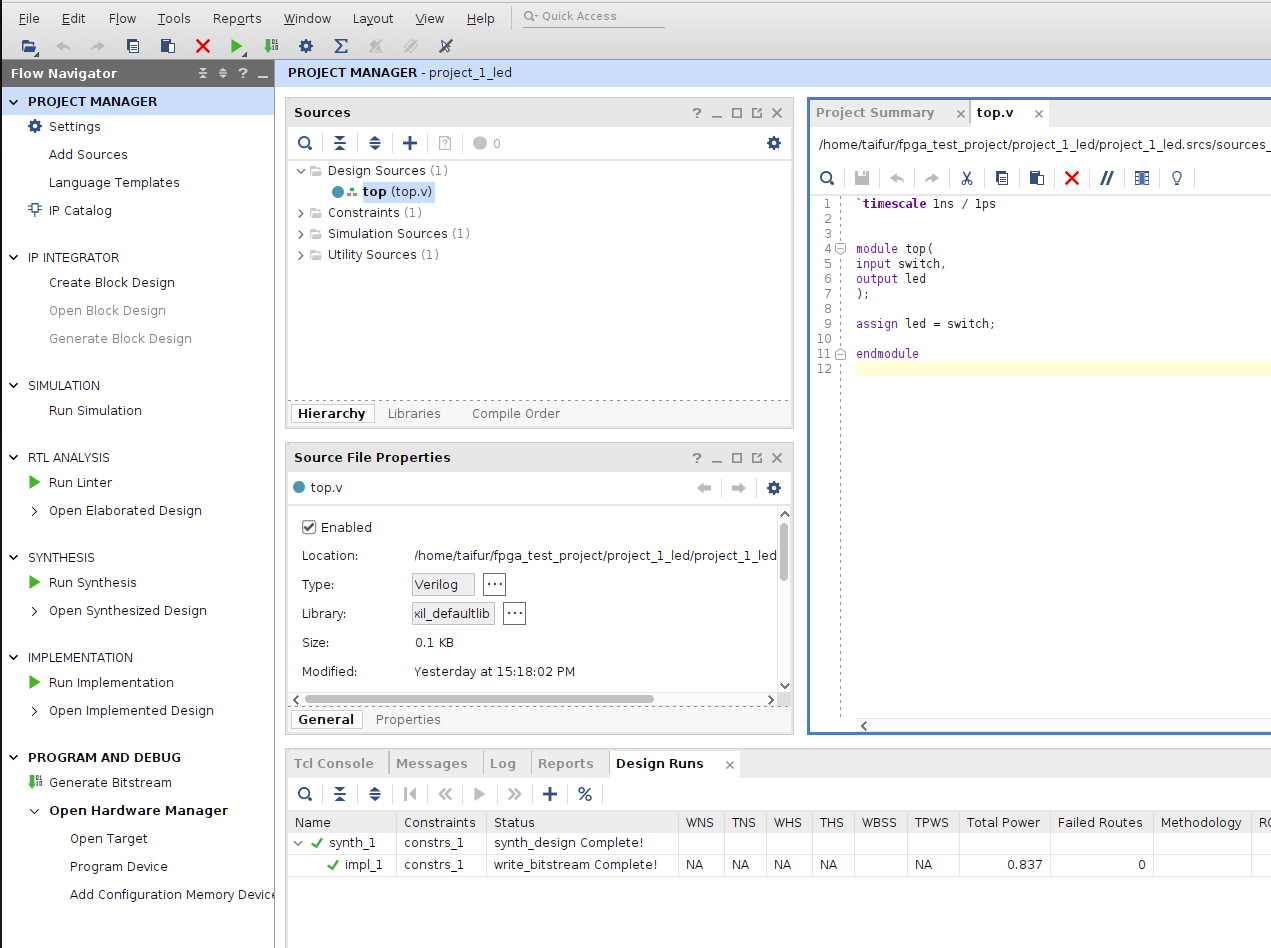
The project is automatically open and I created a Verilog source file from the project manager. The code for my project is very simple and as follows:

'timescale lns / lps

module top(
input switch,
output led
);

assign led = switch;

endmodule

image

Then I created a constraint file and add the following lines to the file:

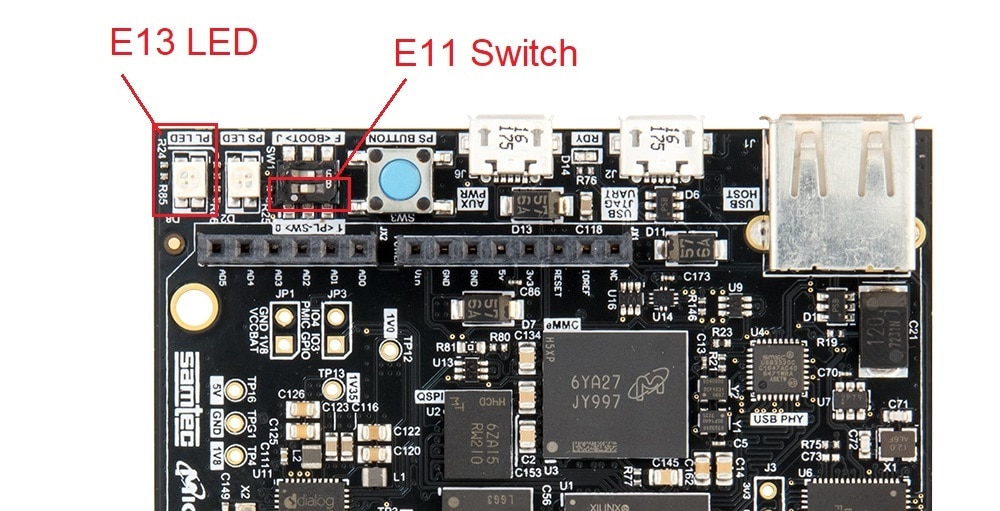
set_property PACKAGE_PIN E13 [get_ports led]
set_property IOSTANDARD LVCMOS33 [get_ports led]

set_property PACKAGE_PIN E11 [get_ports switch]
set_property IOSTANDARD LVCMOS33 [get_ports switch]

image

For the selected LED and Switch see the following image.

image

After making the Verilog source and the constraint file the next steps are to synthesis and implementation. The final step after running synthesis and implementation is to generate Bitstream. If there is no error in the Verilog source and constraint file the bitstream will be generated successfully. After successful Bitstream generation, we need to upload the Bitstream file to the target MiniZed board. For doing so we need to connect the target board to the Ubuntu PC.

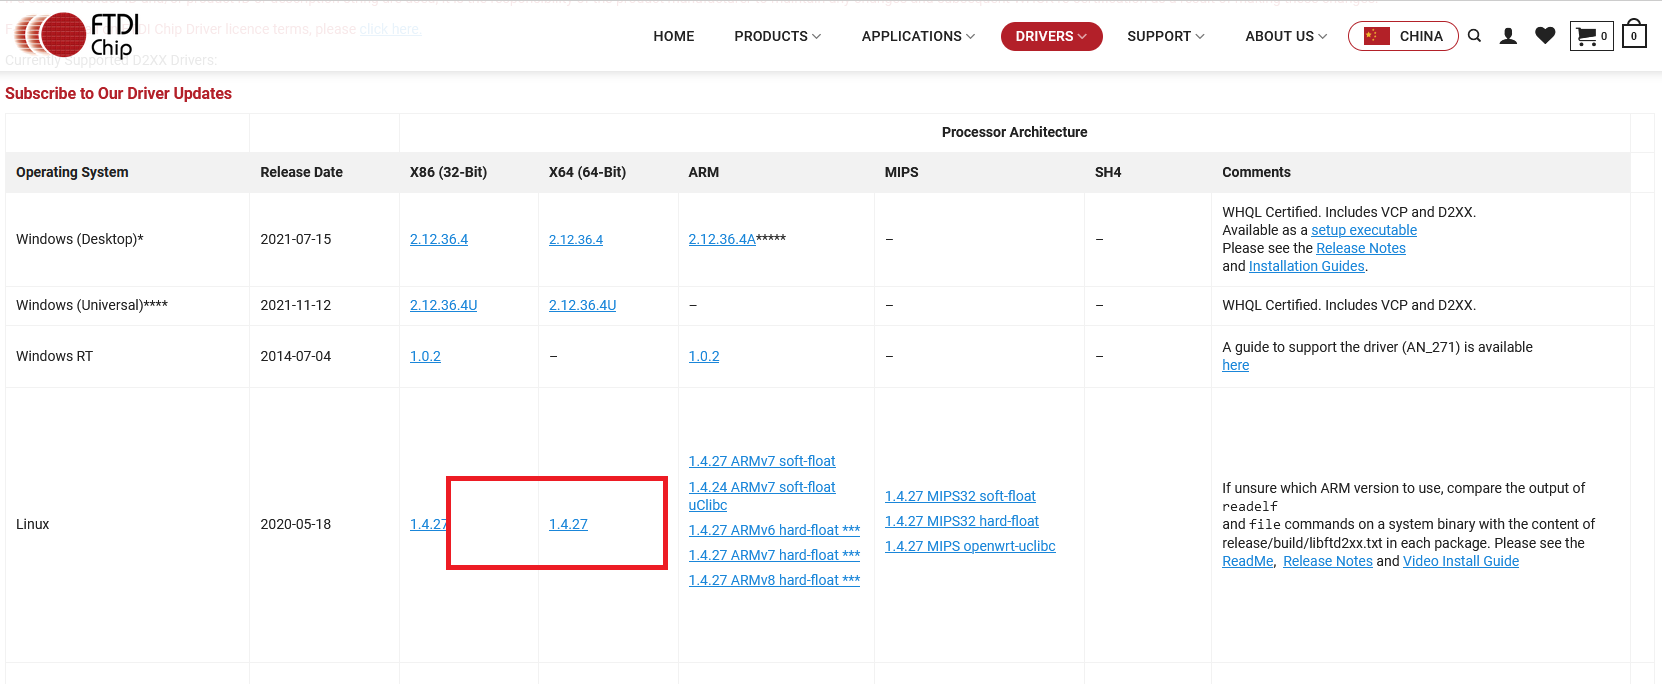
I connected the MiniZed board to my Ubunty PC but the target board was not detected by the Vivado Hardware Manager. I suspected that can happen for the missing or wrong driver. From the MiniZed getting started guide I confirmed that the FTDI FT2232H device driver must be installed successfully.

image

So, for downloading the driver I opened the link https://ftdichip.com/drivers/d2xx-drivers/ and downloaded the driver for Linux 64-Bit distribution.

image

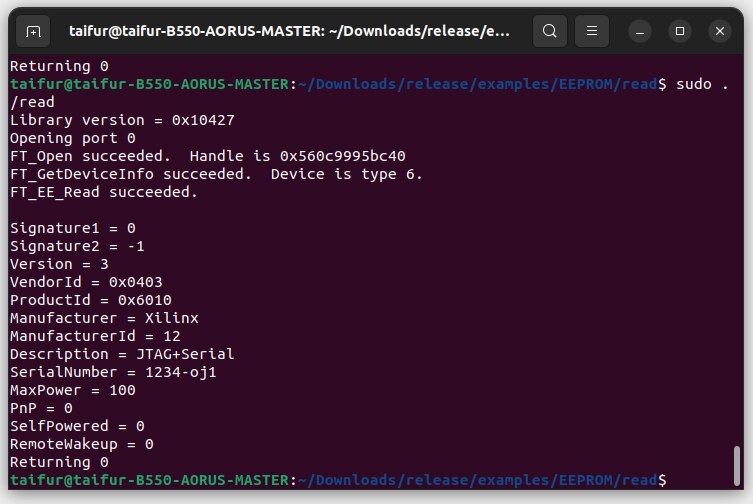
I was able to successfully install the driver with the help of the following video.

You don't have permission to edit metadata of this video.
Edit media
x
image
Upload Preview
image

Though after installing the driver the Xilinx board was visible in the terminal, still I the Hardware Manager of the Vivado did not recognize the connected board.

image

Again I started googling the solution and I found a hint about installing the cable driver from a Xilinx-specific folder. I went to that location and installed all drivers provided by Xilinx using the following command:

sudo ./install_drivers

The following image shows the installation of the drivers.

image

I was in luck and the Hardware Manager found the board immediately after running the above command for driver installation.

image

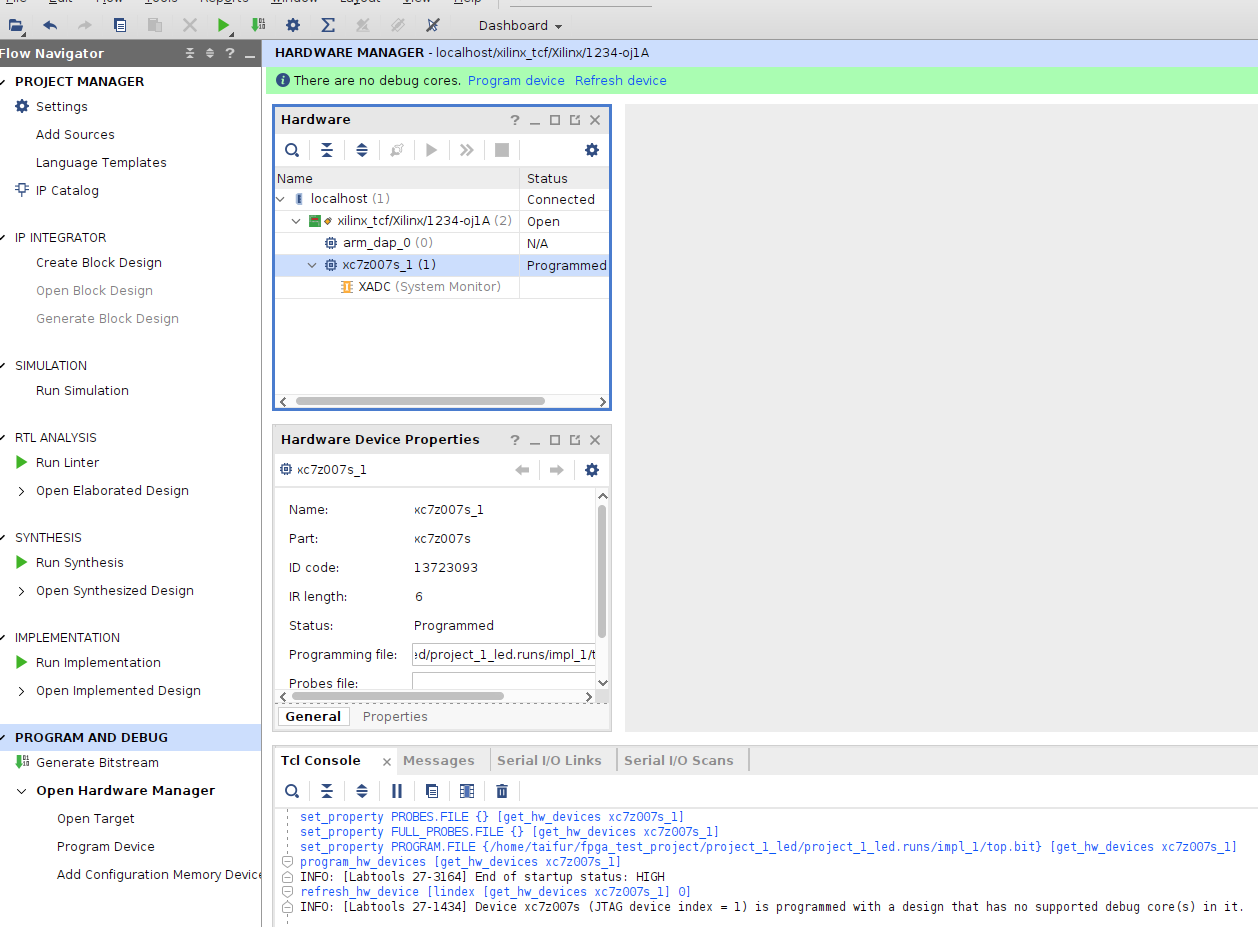
Then I programed the MiniZed board with the generated Bitstream and I got the expected response from the MiniZed board.

This is a short demo of the output:

You don't have permission to edit metadata of this video.
Edit media
x
image
Upload Preview
image

  • Sign in to reply
  • taifur
    taifur over 2 years ago in reply to Murulidharlm

    I mentioned it in the blog. I make the board_files directory using the following command:

    mkdir /tools/Xilinx/Vivado/2023.1/data/board/board_files

    Then I added all permission using the following command:

    sudo chmod -R 777 /tools/Xilinx/Vivado/2023.1/data/board/board_files

    • Cancel
    • Vote Up 0 Vote Down
    • Sign in to reply
    • More
    • Cancel
  • Murulidharlm
    Murulidharlm over 2 years ago

    Hi taifur ,

    May i know how you created the Board_files Folder in an unauthorized folder, How you changed the permission  Thinking.....?

    • Cancel
    • Vote Up 0 Vote Down
    • Sign in to reply
    • More
    • Cancel
element14 Community

element14 is the first online community specifically for engineers. Connect with your peers and get expert answers to your questions.

  • Members
  • Learn
  • Technologies
  • Challenges & Projects
  • Products
  • Store
  • About Us
  • Feedback & Support
  • FAQs
  • Terms of Use
  • Privacy Policy
  • Legal and Copyright Notices
  • Sitemap
  • Cookies

An Avnet Company © 2025 Premier Farnell Limited. All Rights Reserved.

Premier Farnell Ltd, registered in England and Wales (no 00876412), registered office: Farnell House, Forge Lane, Leeds LS12 2NE.

ICP 备案号 10220084.

Follow element14

  • X
  • Facebook
  • linkedin
  • YouTube