What is Zynq
The Zynq architecture, as the latest generation of Xilix’s all-programmable System-on-Chip (SoC) families, combines a dual-core or single-core ARM Cortex-A9 with a traditional (FPGA). The interface between the different elements within the Zynq architecture is based on the Advanced eXtensible Interface (AXI) standard, which provides for high bandwidth and low latency connections.
Before implementing the ARM processor inside the Zynq device, users were using a soft core processor such as Xilinx’s Microblaze. The main advantage of using Microblaze was, and remains, the flexibility of the processor instances within a design. On the other hand, the inclusion of hard processor in Zynq delivers significant performance improvements. Also, by simplifying the system to a single chip, the overall cost and physical size of the device are reduced.
Xilinx Zynq SoC's are know to provide maximum performance per watt along with maximum reconfiguration flexibility. Zynq family features Dual-Core ARM Cortex A9 processors tightly coupled with the 7-series FPGA to enable faster communication interfaces development with ARM Design flow and hardware acceleration. Zynq devices are available in two categories viz. Zynq-7000s family FPGA for the cost-effective application such as IoT related applications while Zynq 7000 family FPGA are best for high-performance applications such as Embedded Vision etc. The Zynq 7000s comes with Single core ARM while Zynq 7000 comes with Dual-Core ARM.
The following image shows the basic Zynq architecture. The image is taken from the Zynq book.
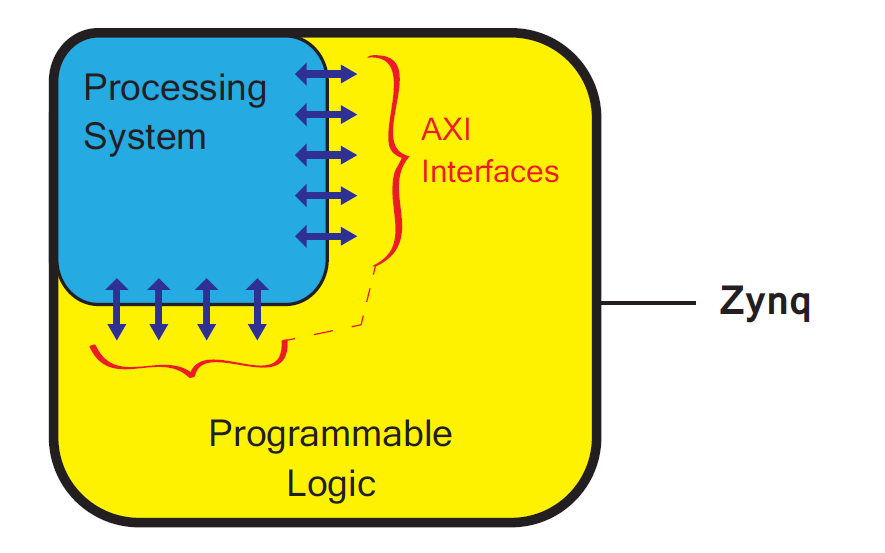
The design flow for the Zynq architecture has some steps in common with a regular FPGA. The first stage is to define the specifications and requirements of the system. Next, during the system design stage, the different tasks (functions) are assigned to implementation in either Programmable Logic (PL) or Processing System (PS) which is called task partitioning. This stage is important because the performance of the overall system will depend on tasks/functions being assigned for implementation in the most appropriate technology: hardware or software.
Steps for designing hardware for Zynq:
Determine the system’s requirements: The requirements must be clear before any hardware design can start. This includes elements like performance, power use, and I/O specifications.
Select the right Zynq device: Xilinx provides a variety of Zynq devices with varying processing capabilities and levels of integration. Choose the device that best fulfills the system specifications.
Create the processing system: Zynq’s system may use Xilinx’s Vivado software. Configuring the ARM processors, memory interfaces, and other system-level components falls under this category.
Create the programmable logic fabric: The programmable logic fabric may also result from Xilinx’s Vivado software. This entails creating the digital circuits that will be helpful in the FPGA.
Link the processing system and the programmable logic fabric: After the processing system and the programmable logic fabric are ready, they must be linked. The AXI bus interface is commonly essential for this.
Test and debug the design: It is critical to properly test and debug the design before deploying it in a real system. We can accomplish this with Xilinx’s Vivado software and external test equipment.
The following image shows a basic design flow of Zynq SoC. The image is taken from the Zynq design book.
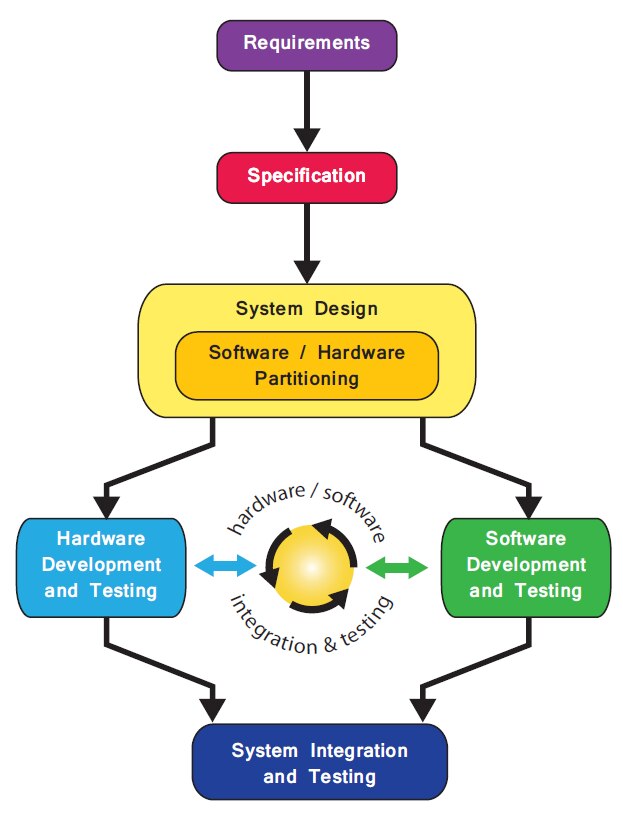
Ultimately, creating hardware for Zynq necessitates a thorough knowledge of hardware and software design concepts. In addition, it is critical to properly prepare and test the design at each stage to verify that it fits the system requirements.
My first Design with Zynq
Hardware design in Vivado
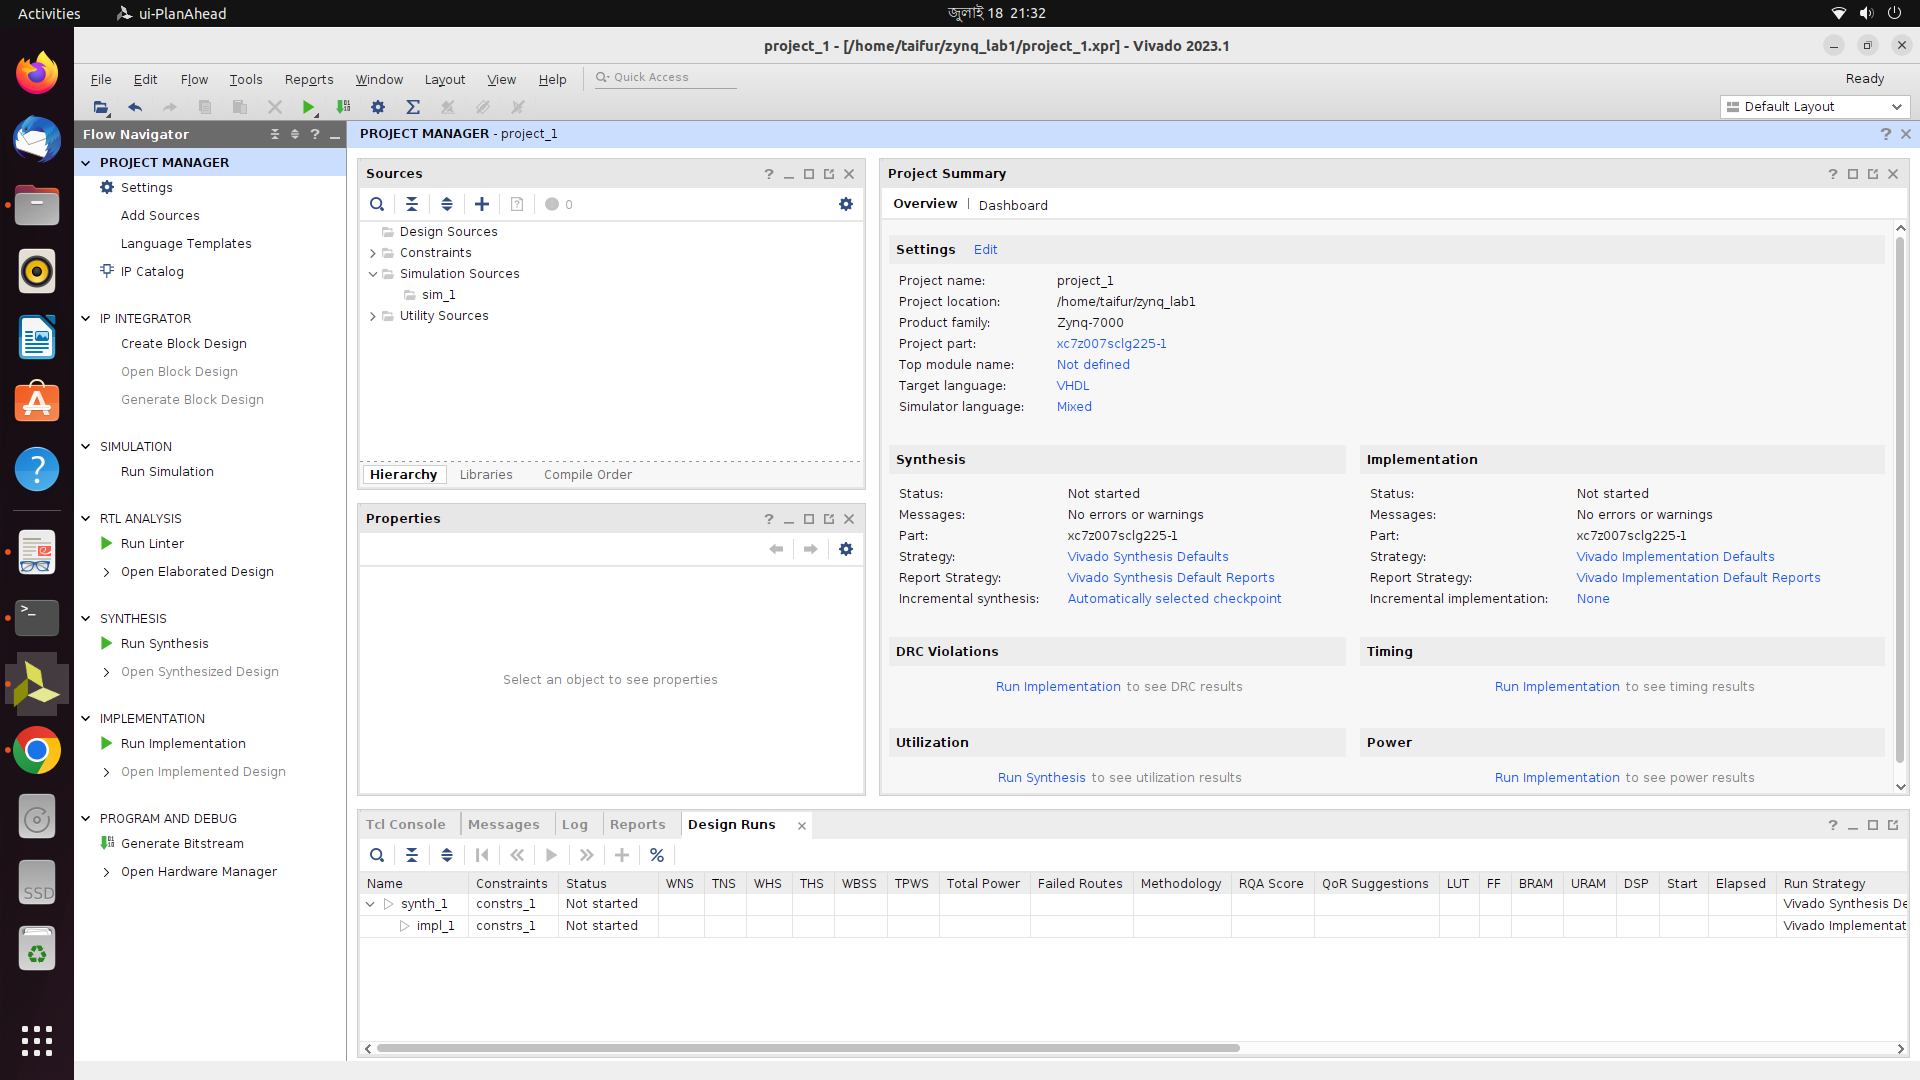
This is my hello world project using Zynq. I completed this by following hardware lab 1 and 2. The first part of the project is the hardware design in Vivado. I have created a new Vivado project for Zynq-7000 SoC.
Then I added the Zynq processing system IP block. Vivado will detect that the Zynq PS block has been added and a green banner will appear across the top of the block design window with the option to run Block Automation. Block Automation will apply the MiniZed specific board presets to the Zynq IP block such as enabling the utilized peripherals such as UART, SPI, etc.
A block design needs an HDL wrapper to instantiate it in the logic of the FPGA. It can be created manually or can be auto-generated. I used the auto-managed HDL wrapper for my project as per the recommendation of the lab manual.
After making all the configurations as per the instruction in the lab manual I run the synthesis, followed by run implementation, and then generate a bitstream. The implemented design looks like below.

Once the bitstream is successfully generated, it needs to be exported as Xilinx's special archive file type (XSA) for the software IDE (Vitis) to read and pull in the hardware design.
To export the hardware, select File > Export > Export Hardware.
Software design in Vitis
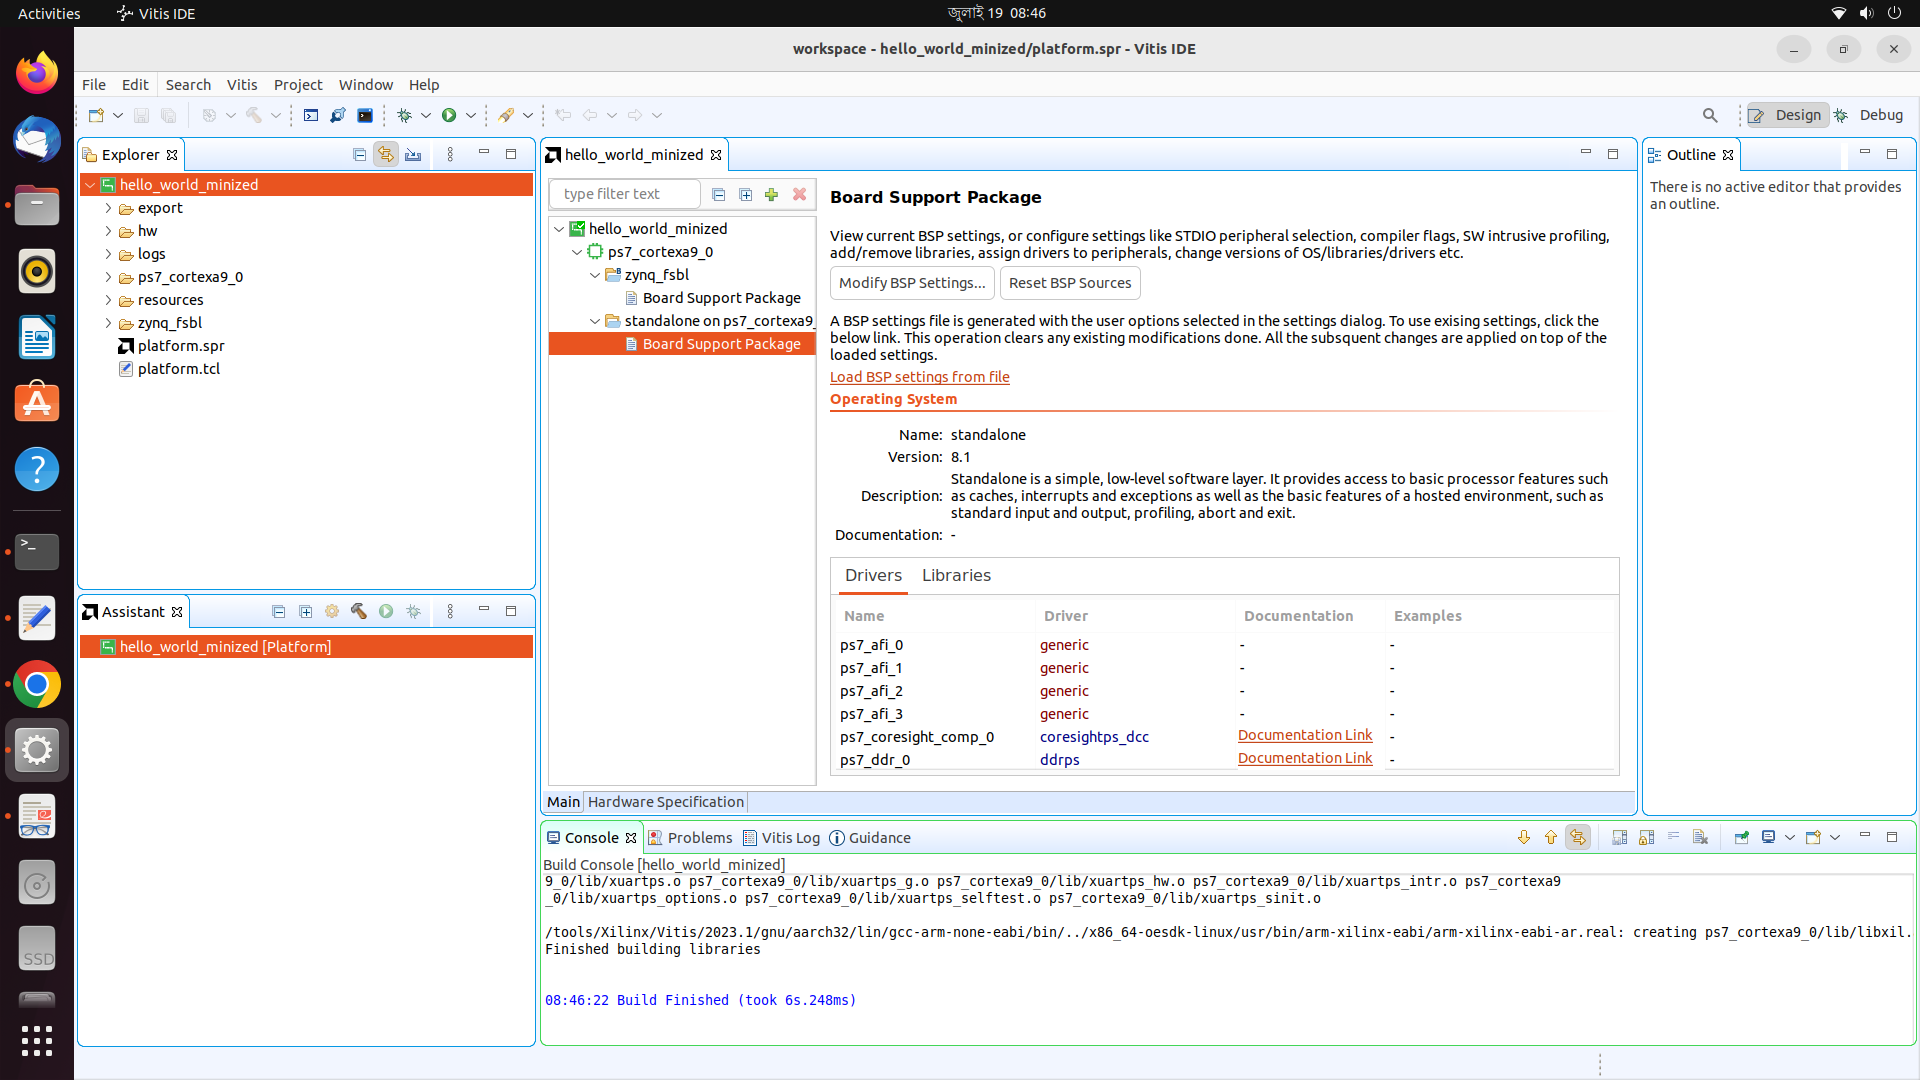
After completing the hardware design the next step is the software design in Vitis. Vitis can be launched directly from Vivado, the option is located in the Tools menu under 'Launch Vitis'. But when I opened it directly from Vivado both were closed automatically in my case. So, I run the Vitis independently from the terminal and it works.
In a new Vitis project, the first thing that needs to be created is the base platform project. The platform project is what pulls in the hardware design and creates the corresponding board support project (BSP) for the software to run on.
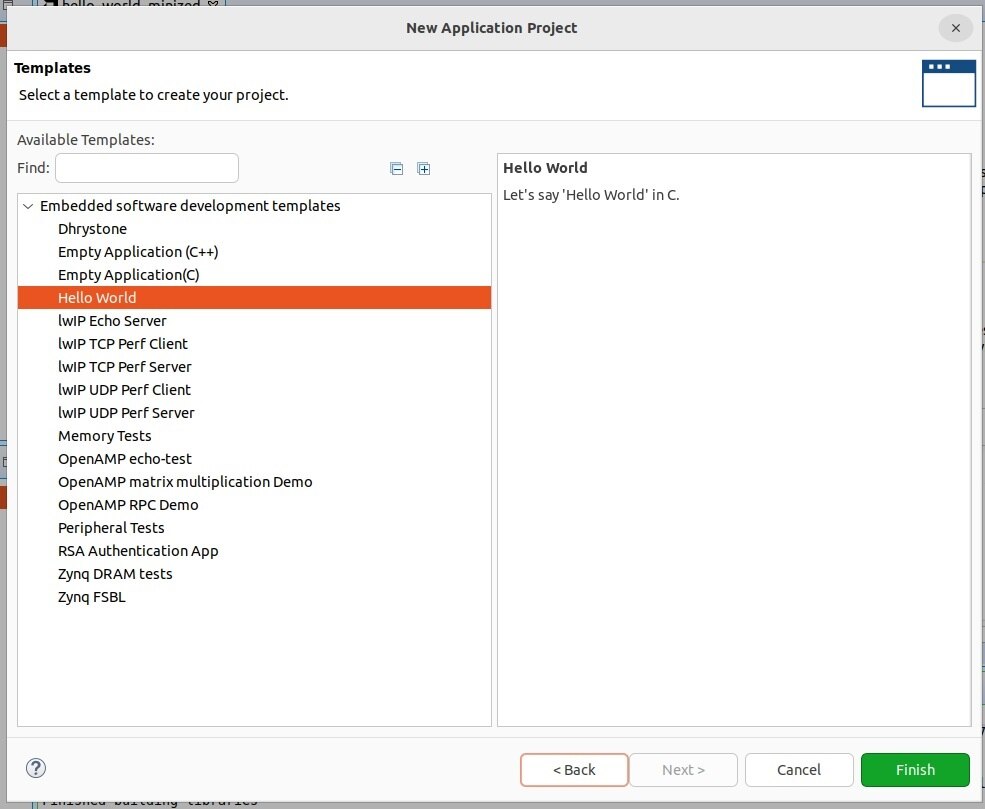
After opening the platform project in Vitis:
For this project, I selected the Hello World application:
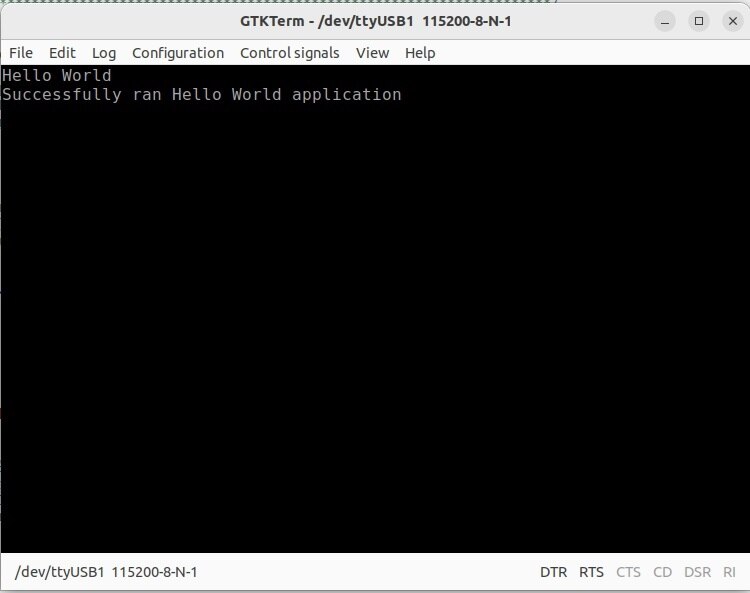
For observing the output in my Ubuntu machine I installed GTKterm. After attaching the MiniZed board with the PC I checked the attached device using the ls /dev/ttyUSB* command. I got the following response. I add the read/write permission to the port using the chmod command.

After launching the debug run I got the following output on the GTKterm terminal. That indicates I did perform all the steps perfectly and the program run successfully.