element14 Community
element14 Community
    Register Log In
  • Site
  • Search
  • Log In Register
  • Community Hub
    Community Hub
    • What's New on element14
    • Feedback and Support
    • Benefits of Membership
    • Personal Blogs
    • Members Area
    • Achievement Levels
  • Learn
    Learn
    • Ask an Expert
    • eBooks
    • element14 presents
    • Learning Center
    • Tech Spotlight
    • STEM Academy
    • Webinars, Training and Events
    • Learning Groups
  • Technologies
    Technologies
    • 3D Printing
    • FPGA
    • Industrial Automation
    • Internet of Things
    • Power & Energy
    • Sensors
    • Technology Groups
  • Challenges & Projects
    Challenges & Projects
    • Design Challenges
    • element14 presents Projects
    • Project14
    • Arduino Projects
    • Raspberry Pi Projects
    • Project Groups
  • Products
    Products
    • Arduino
    • Avnet & Tria Boards Community
    • Dev Tools
    • Manufacturers
    • Multicomp Pro
    • Product Groups
    • Raspberry Pi
    • RoadTests & Reviews
  • About Us
  • Store
    Store
    • Visit Your Store
    • Choose another store...
      • Europe
      •  Austria (German)
      •  Belgium (Dutch, French)
      •  Bulgaria (Bulgarian)
      •  Czech Republic (Czech)
      •  Denmark (Danish)
      •  Estonia (Estonian)
      •  Finland (Finnish)
      •  France (French)
      •  Germany (German)
      •  Hungary (Hungarian)
      •  Ireland
      •  Israel
      •  Italy (Italian)
      •  Latvia (Latvian)
      •  
      •  Lithuania (Lithuanian)
      •  Netherlands (Dutch)
      •  Norway (Norwegian)
      •  Poland (Polish)
      •  Portugal (Portuguese)
      •  Romania (Romanian)
      •  Russia (Russian)
      •  Slovakia (Slovak)
      •  Slovenia (Slovenian)
      •  Spain (Spanish)
      •  Sweden (Swedish)
      •  Switzerland(German, French)
      •  Turkey (Turkish)
      •  United Kingdom
      • Asia Pacific
      •  Australia
      •  China
      •  Hong Kong
      •  India
      • Japan
      •  Korea (Korean)
      •  Malaysia
      •  New Zealand
      •  Philippines
      •  Singapore
      •  Taiwan
      •  Thailand (Thai)
      • Vietnam
      • Americas
      •  Brazil (Portuguese)
      •  Canada
      •  Mexico (Spanish)
      •  United States
      Can't find the country/region you're looking for? Visit our export site or find a local distributor.
  • Translate
  • Profile
  • Settings
Path to Programmable 3
  • Challenges & Projects
  • Design Challenges
  • Path to Programmable 3
  • More
  • Cancel
Path to Programmable 3
Blog Path to Programmable III Training Blog #4 Software Application Development with Vitis
  • Blog
  • Forum
  • Documents
  • Leaderboard
  • Files
  • Members
  • Mentions
  • Sub-Groups
  • Tags
  • More
  • Cancel
  • New
Join Path to Programmable 3 to participate - click to join for free!
  • Share
  • More
  • Cancel
Group Actions
  • Group RSS
  • More
  • Cancel
Engagement
  • Author Author: fyaocn
  • Date Created: 19 Jul 2023 3:43 AM Date Created
  • Views 814 views
  • Likes 6 likes
  • Comments 0 comments
Related
Recommended

Path to Programmable III Training Blog #4 Software Application Development with Vitis

fyaocn
fyaocn
19 Jul 2023

Software Application Development with Vitis

Table of Contents

  • 1 Software Application Development
  • 2 Import hardware design file
  • 3 Update the BSP
  • 4 Create application
  • 5 Program the hardware

1 Software Application Development

After design hardware and generate bitstream with Vivado, the hardware design shall be output as xsa file format to be used for software development.

During software development, Vitis shall be used. The AMD VitisTm unified software platform is a development environment for heterogeneous applications. Vitis unified software platform is strong tools for software design, in a sense, it can be regarded as bridge between AMD Xilinx Hardware design and imaginary application design.

Here are two Vitis design flow

image

This blog follows the left part as traditional design, And Beyond this lab session, my final  design shall use Vitis AI integrated XRT library to make machine learning acceleration design as right part of the design flow. That part shall be covered in final blog.

2 Import hardware design file

Find hardware design file in xsa format in Archive Manager, and double click the file to open it as extract file to see files inside this bundle.

image

Open VItis IDE

image

create the new platform project

image

import the hardware , select the xsa file,

image

Click Finish. Now the vitis project is created and ready for software design.

image

3 Update the BSP

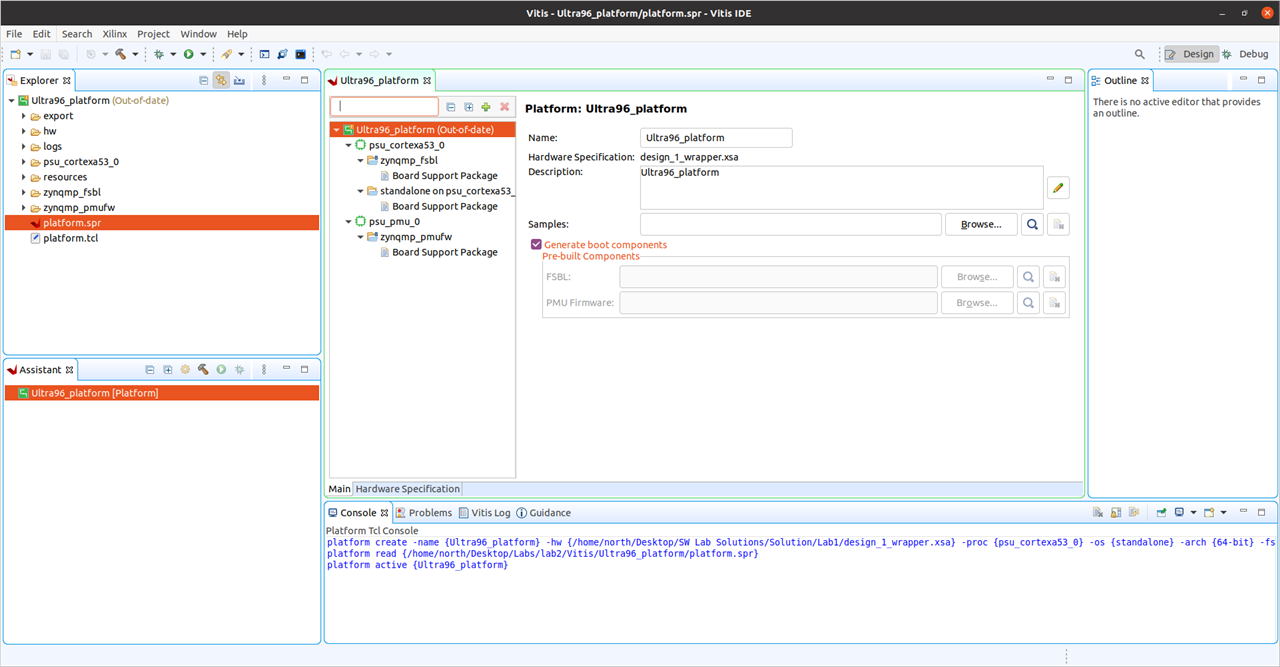
The hardware platform is now visible under the Project Explorer.image

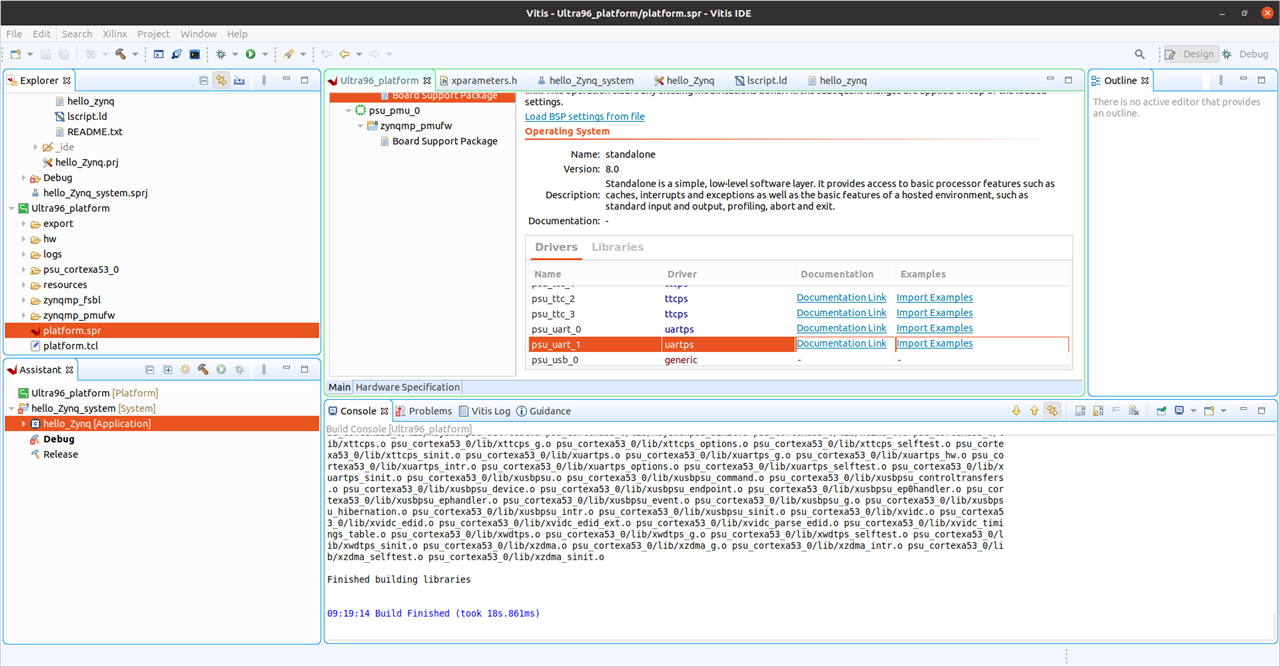
double-click on platform.spr in Project Explorer under Ultra_96_Platform to view Hardware Platform Specification as is open in the working window

image

select the standalone BSP and press the Modify BSP Settings.

image

to see BSP settings

image

the libraries and settings within the BSP

image

press OK , and then pressing CTRL-B or pressing the hammer icon to build the application,

image

build the bsp

image

browse the file structure to understand what is in it and to modify as you wish,

image

most of the hardware definition can be seen in this xparameters.h file

image

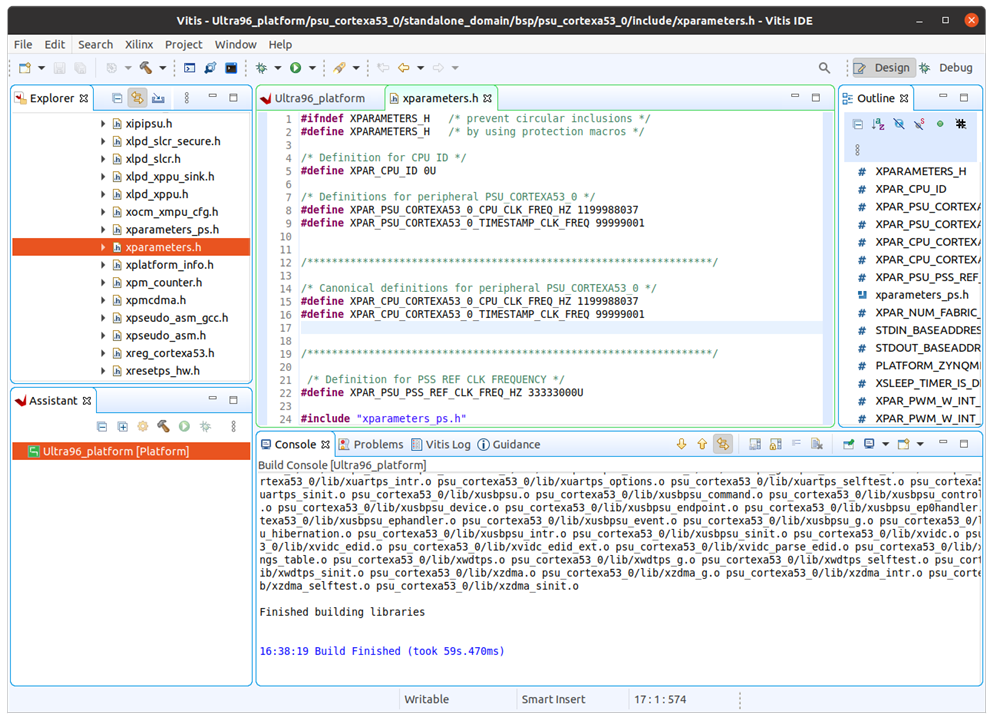
go further with /lib and /include

image

the UART port can be changed to UART1 in standalone BSP

image

Press OK to see the BSP sources to be updated.

image

4 Create application

Now, create new projects

image

type project name

image

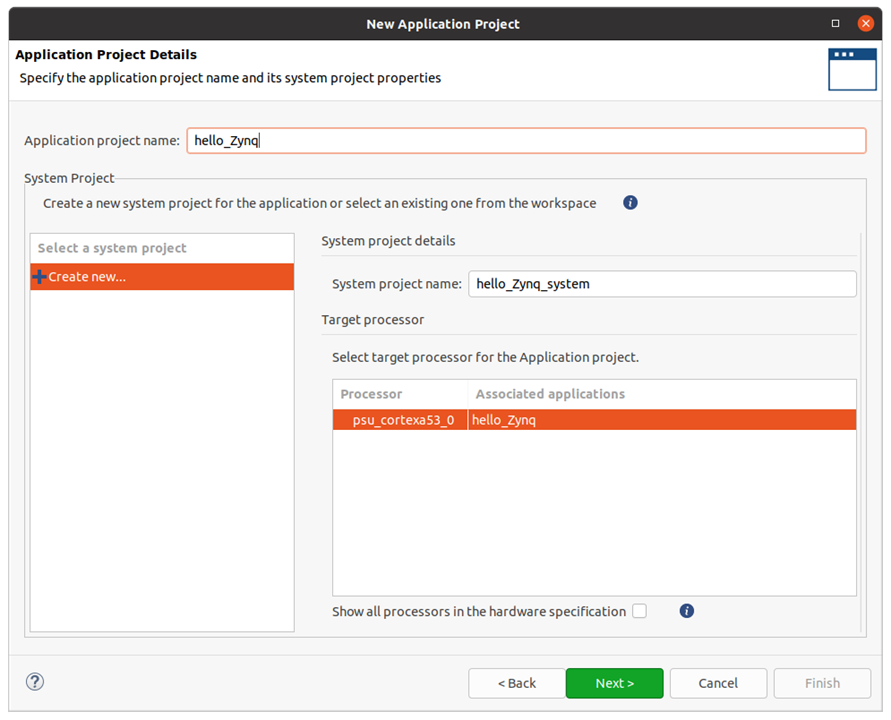
select bsp and wait for template to be loaded,

image

import empty template for now, there are FSBL template as well for fast booting bin file generation for SD card,

image

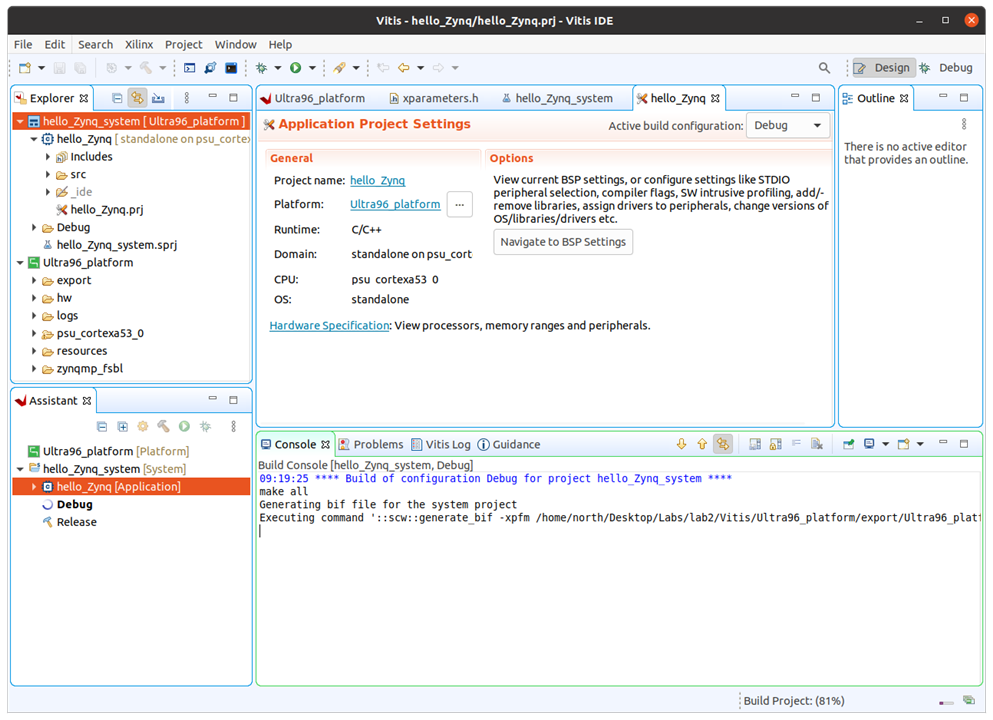
Press finish and the new application is created.

image

Build finish with errors since no elf file is generated.

image

create main code, new file name hello_zynq.c

image

 import from psu_uart_1 template

image

the file can be open in new window, copy all the code

image

and paste into the hello_zynq.c, build without errors and elf files is created,

image

image

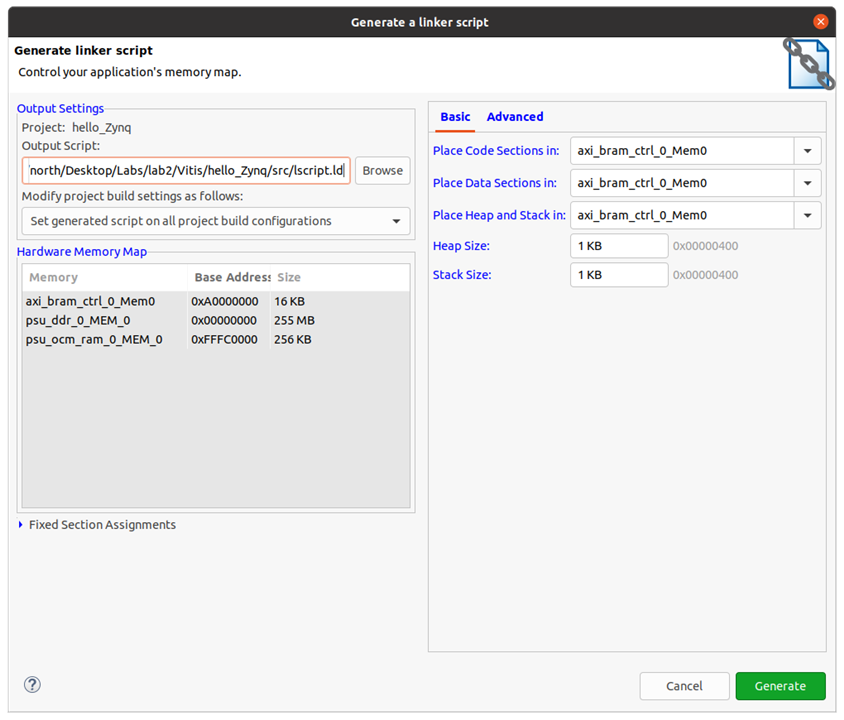
the link script can be modified in GUI

image

or source format,

image

the link script can be re-generated after revise.

image

5 Program the hardware

connect the debug port and usb cable

image

the usb device can be found as FTDI devices,

image

then program the device with the project

image

This is how the software can be designed and programmed. The lab session provide full instruction and source code in each lab.
This is really impressive that anyone can learn as fast as expected or skip some part and go deep into another part. 

  • Sign in to reply
element14 Community

element14 is the first online community specifically for engineers. Connect with your peers and get expert answers to your questions.

  • Members
  • Learn
  • Technologies
  • Challenges & Projects
  • Products
  • Store
  • About Us
  • Feedback & Support
  • FAQs
  • Terms of Use
  • Privacy Policy
  • Legal and Copyright Notices
  • Sitemap
  • Cookies

An Avnet Company © 2025 Premier Farnell Limited. All Rights Reserved.

Premier Farnell Ltd, registered in England and Wales (no 00876412), registered office: Farnell House, Forge Lane, Leeds LS12 2NE.

ICP 备案号 10220084.

Follow element14

  • X
  • Facebook
  • linkedin
  • YouTube