


 BLOG# 1 - My Idea -- Pi Fest - Music/Audio Project
This blog is part of a blog series for the Pi-Fest Design Challenge.
As a challenger, I along with 49 other element14 members, have received a Raspberry Pi Pico. to use to build and blog their project. the goal for the Challengers, is to use the Raspberry Pi Pico and any other Raspberry Pi products of our choice, to create a music or audio project..
This blog will describe the idea I have for designing and implementing a project, using the Pi Pico supplied to me for this challenge. I will describe my Idea, state my goals for the project, describe some important capabilities of the Pi Pico, listing my blogs in the series , doing some Research on the software environment of the Pi Pico and finally some References to some links that I found helpful.
BLOG Series INDEX
- Blog# 1 My Idea (This Blog)
- contains an introduction to my Idea.
- Blog#2 Design
- This blog will include the Design of my Idea.
- Blog#3 Testing
- This blog will describe the testing I did on connecting each individual component to the PICO. The blog will describe the code used to test each individual component
- Blog#4 Implementation
- This blog will include the implementation of my design. It will demonstrate my metronome in action. All the individual components willl be connected.
- Blot #5 Completion - Running the finished Project.
- This is the final blog in the series. I give some conclusions as to what I have gained from this Design Challenge and list some possible enhancements that can be added to make the system more useful.
My Idea
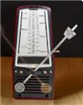 My idea for this Design Challenge will be to Research, Design and implement a Metronome. A metronome is used to help musicians play songs with the proper time signature and the right pace Traditionally, a metronome is a small device that is designed to keep a beat at a certain timing (Beats Per Minute ) indefinitely. Originally created in the 19th century, for decades implemented a pendulum that swings back and forth to click the beats. My metronome will be electronic, and will resemble a modern day metronome. I've been using metronome apps on my devices for my timing during music rehearsals and practices. This gave me the idea to design one using the Pico.
![]() You can buy an electronic metronome like the Korg MA-2 or the BOSS DB-90 Dr. from a music store or on amazon.com. the prices range from $15 to $150 These device have a lot of feature that allow you to select more than the BPM's, like pitch of the click, drum patterns, accents, timers and the ability to change the fraction of the beat (quarter, eight or sixteenth notes.). used. I will model my design on a much simpler feature set.
You can buy an electronic metronome like the Korg MA-2 or the BOSS DB-90 Dr. from a music store or on amazon.com. the prices range from $15 to $150 These device have a lot of feature that allow you to select more than the BPM's, like pitch of the click, drum patterns, accents, timers and the ability to change the fraction of the beat (quarter, eight or sixteenth notes.). used. I will model my design on a much simpler feature set.
My idea will calculate the BPM's in firmware on the Pico. The firmware will take a BPM value as input and calculate the Beats Per Minute. An auditable click will be used to designate the Beats. An LED will also be used to flash the beats. . A Potentiometer will be used to set the BPM value. An OLED display will be used to display the BPM' value that has been set. That's it for a beginning. Simple, but I wanted to keep it easy for me to implement my idea. Once I get the basics implemented, I can always add features later on.
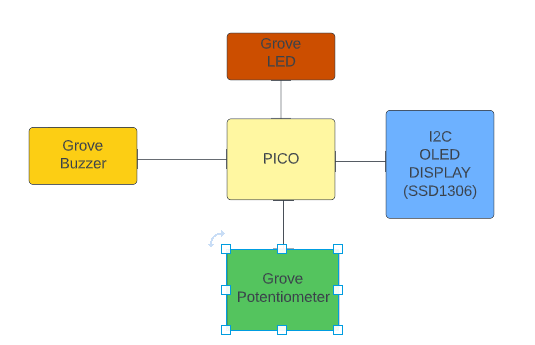
The Picture above, is a basic diagram describing the components attached to the PICO. I will be building the circuit and describing the Firmware design in the next blog on design.
My Goals for this Design Challenge
My main goal for this challenge will be to be able to implement my design idea, but in order to accomplish this task, I plan to also attain the following goals
- I'll have to get to know the capabilities of the Pico in order for me to design something that will be simple for me to implement.
- Pin Layout
- GPIO capabilities.
- I'll need to experiment with the Development environment in order to understand implement the Firmware to the Pico.
- Micro-Python,
- SDK's
- Tools
- Thonny
The Challenge Kit
the package came on May 31, 2022 via UPS
The contents of the Package contained a bare-bones (No PIN Headers) Raspberry Pi Pico
Other Products used in my project.
- I2C OLED Display
-
SSD1306 I2C OLED Display 128x64 Yellow Blue
-

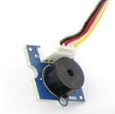
- Grove Buzzer
-
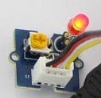
- Grove LED
- Grove Potentiometer

Research
Since the Raspberry Pi Pico is new to me, I will need to do some initial upfront research on how to get my development environment up and running. This section will list the steps I took to get to a point where I was able to get setup and able to understand the full capabilities of the Pi Pico
- To get started, I referred to a page on raspberrypi.org to get an understanding of the PI Pico
- The Page, Projects | Computer coding for kids and teens | Raspberry Pi, is a good introduction to getting the Pico development environment setup.
- You will Install the editor used to code, Thorny
- Add the MicroPython firmware
- Code and run a version of Blinky and several other examples using digital Input & outputs, Using PWM, Control an LED with analogue input,
- I did not want to solder headers onto the board, so I came up with a breadboard solution. It involved using some header rails that I had in my lab and attaching the Pico to the breadboard as follows. I'll use jumper wires to compete the circuits.
- Some of the examples from the above mention tutorial did not work. That being the example with a button and a potentiometer.
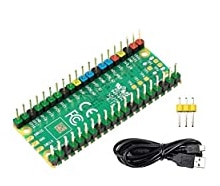
- I decided .to order a PICO with Headers from Amazon. I purchased the . Bicool Raspberry Pi Pico with Pre-Soldered Colorful Pin Header Microcontroller Mini Development Board
- I received my PICO and will be using it instead of the headless one supplied with the challenge.
- The page at Introduction to the Raspberry Pi Pico helped me learn how to connect and control LEDs, buttons, switches, buzzers and potentiometers


References
This section includes some links that I found helpful.