element14 Community
element14 Community
    Register Log In
  • Site
  • Search
  • Log In Register
  • Community Hub
    Community Hub
    • What's New on element14
    • Feedback and Support
    • Benefits of Membership
    • Personal Blogs
    • Members Area
    • Achievement Levels
  • Learn
    Learn
    • Ask an Expert
    • eBooks
    • element14 presents
    • Learning Center
    • Tech Spotlight
    • STEM Academy
    • Webinars, Training and Events
    • Learning Groups
  • Technologies
    Technologies
    • 3D Printing
    • FPGA
    • Industrial Automation
    • Internet of Things
    • Power & Energy
    • Sensors
    • Technology Groups
  • Challenges & Projects
    Challenges & Projects
    • Design Challenges
    • element14 presents Projects
    • Project14
    • Arduino Projects
    • Raspberry Pi Projects
    • Project Groups
  • Products
    Products
    • Arduino
    • Avnet & Tria Boards Community
    • Dev Tools
    • Manufacturers
    • Multicomp Pro
    • Product Groups
    • Raspberry Pi
    • RoadTests & Reviews
  • About Us
  • Store
    Store
    • Visit Your Store
    • Choose another store...
      • Europe
      •  Austria (German)
      •  Belgium (Dutch, French)
      •  Bulgaria (Bulgarian)
      •  Czech Republic (Czech)
      •  Denmark (Danish)
      •  Estonia (Estonian)
      •  Finland (Finnish)
      •  France (French)
      •  Germany (German)
      •  Hungary (Hungarian)
      •  Ireland
      •  Israel
      •  Italy (Italian)
      •  Latvia (Latvian)
      •  
      •  Lithuania (Lithuanian)
      •  Netherlands (Dutch)
      •  Norway (Norwegian)
      •  Poland (Polish)
      •  Portugal (Portuguese)
      •  Romania (Romanian)
      •  Russia (Russian)
      •  Slovakia (Slovak)
      •  Slovenia (Slovenian)
      •  Spain (Spanish)
      •  Sweden (Swedish)
      •  Switzerland(German, French)
      •  Turkey (Turkish)
      •  United Kingdom
      • Asia Pacific
      •  Australia
      •  China
      •  Hong Kong
      •  India
      • Japan
      •  Korea (Korean)
      •  Malaysia
      •  New Zealand
      •  Philippines
      •  Singapore
      •  Taiwan
      •  Thailand (Thai)
      • Vietnam
      • Americas
      •  Brazil (Portuguese)
      •  Canada
      •  Mexico (Spanish)
      •  United States
      Can't find the country/region you're looking for? Visit our export site or find a local distributor.
  • Translate
  • Profile
  • Settings
Pi-Fest
  • Challenges & Projects
  • Design Challenges
  • Pi-Fest
  • More
  • Cancel
Pi-Fest
Blog Blog #4 Pi-Fest. Different ways to Code Pico. Part 2 With Arduino IDE.
  • Blog
  • Forum
  • Documents
  • Polls
  • Files
  • Leaderboard
  • Mentions
  • Sub-Groups
  • Tags
  • More
  • Cancel
  • New
  • Share
  • More
  • Cancel
Group Actions
  • Group RSS
  • More
  • Cancel
Engagement
  • Author Author: abhi1408
  • Date Created: 23 Jul 2022 4:04 PM Date Created
  • Views 657 views
  • Likes 5 likes
  • Comments 1 comment
  • Abhi
  • pico
  • pi-fest
  • arduino
  • Abhi1408
Related
Recommended

Blog #4 Pi-Fest. Different ways to Code Pico. Part 2 With Arduino IDE.

abhi1408
abhi1408
23 Jul 2022

Hi all, it's been a while since my last blog.

Here are some steps for developing your pico with the Arduino IDE, As said there are some ways to code your pico with the Arduino IDE.

you will need:

  • A Raspberry Pi Pico
  • A USB A to Micro B connector(Where cable should be capable to share data.)
  • A computer with Arduino IDE

Steps to code your Pico in Arduino IDE.

Step1: Install the Arduino IDE. (Software Link https://www.arduino.cc/en/software).

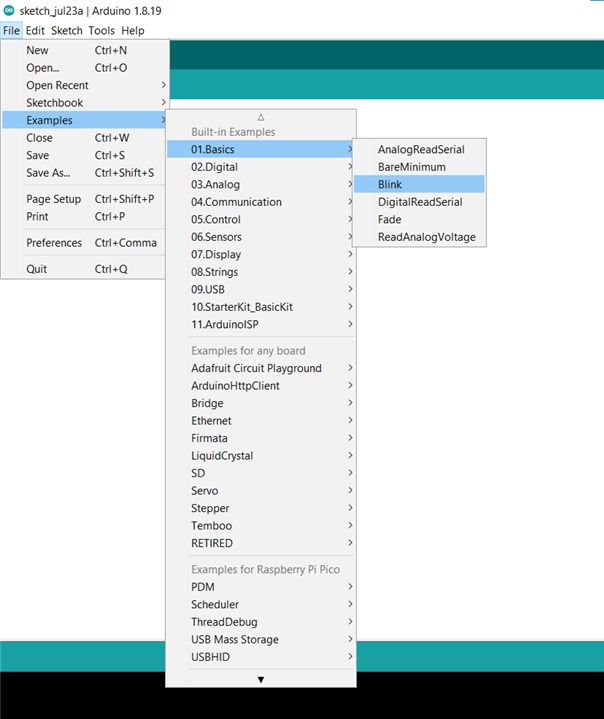
Step 2: After installing the IDE. Try to open the blink-led program. (if code does not open on startup Goto File>Examples>01.Basics>Blink).

image

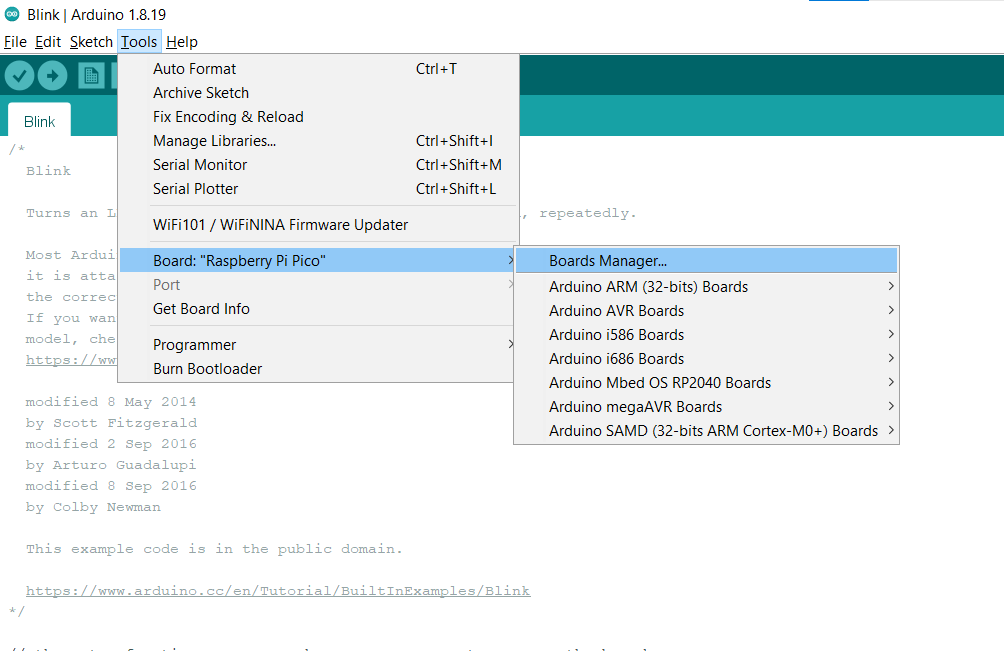
Step3: After Opening the code. We must set up the Arduino IDE with PICO Board. (Goto Tools> Board>Board Manager...) Don't worry; already pico is configured in my IDE so you can see the Board details as pi pico.

image

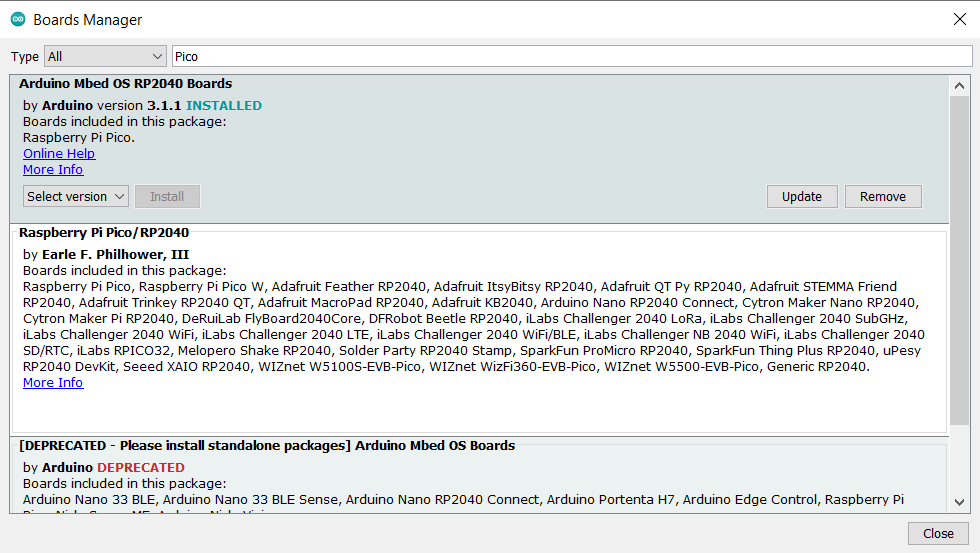
Then Search for PICO in the Search Bar And select the First Option(Arduino Mbed OS RP2040 Boards). I installed this package As this is maintained by Arduino.

image

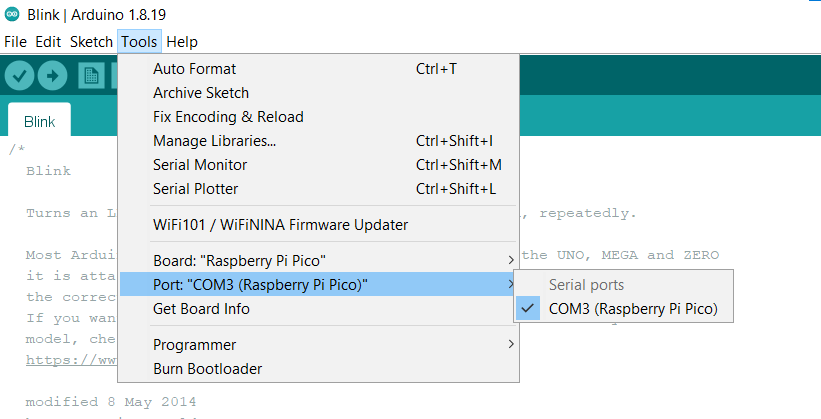
Step 4: Now connect the Pico To the PC. After Connecting you can see the Board is visible in the List and select the Board.

image

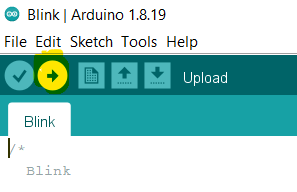
Step 5: Upload the Blink Code to the Pico by Selecting the Upload button. (The Button which is highlighted in yellow color in the below picture)

image

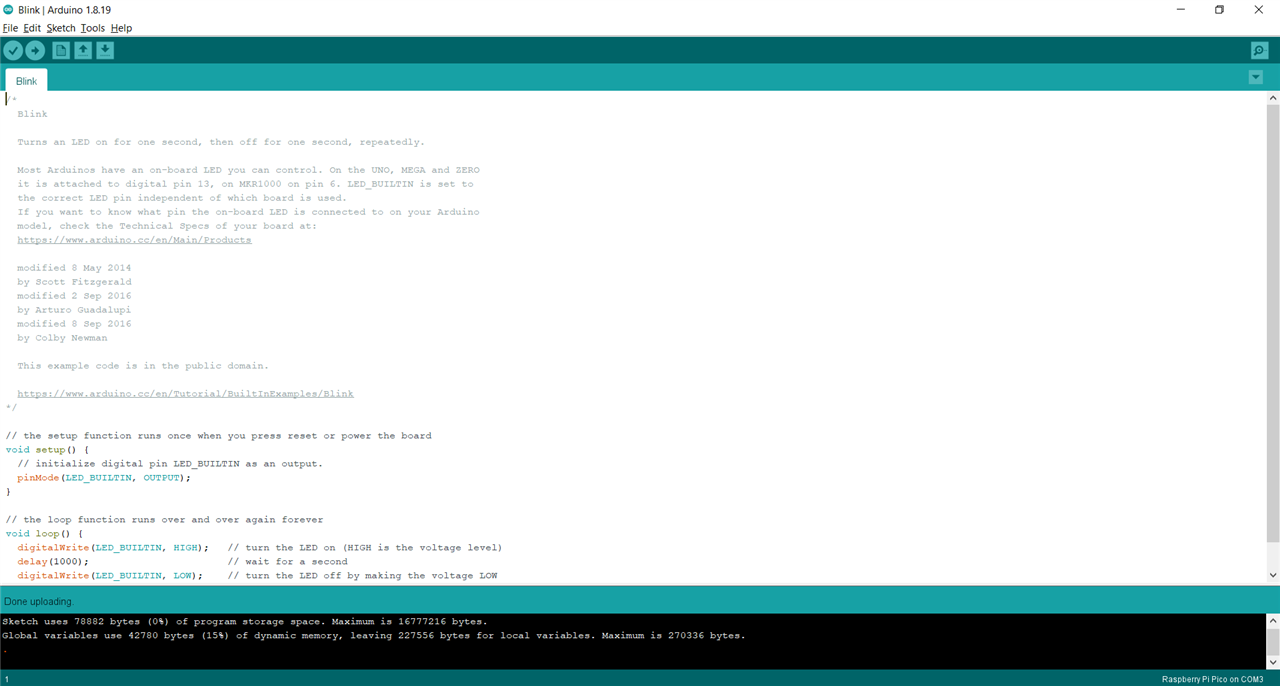
After Uploading your Ide might look like the below Picture. And the LED on the Pico Will Start Blinking Within 2 second period and a 50% Duty cycle.

image

Hurrey, We were able to connect the PI-Pico to IDE and were able to Upload the Code. (It's much handier and also code will not be erased if we reconnect to the PC until we upload with different codes.)

You can now use your Pico like an Arduino microcontroller and program it with the Arduino IDE. There must be a lot of project ideas going in your mind, so get your supplies and start coding. 

All the best!

For Now sayonara.

My Next Blog will be a schematic of my Project.

  • Sign in to reply

Top Comments

  • DAB
    DAB over 3 years ago +1
    Very good idea.
  • DAB
    DAB over 3 years ago

    Very good idea.

    • Cancel
    • Vote Up +1 Vote Down
    • Sign in to reply
    • More
    • Cancel
element14 Community

element14 is the first online community specifically for engineers. Connect with your peers and get expert answers to your questions.

  • Members
  • Learn
  • Technologies
  • Challenges & Projects
  • Products
  • Store
  • About Us
  • Feedback & Support
  • FAQs
  • Terms of Use
  • Privacy Policy
  • Legal and Copyright Notices
  • Sitemap
  • Cookies

An Avnet Company © 2025 Premier Farnell Limited. All Rights Reserved.

Premier Farnell Ltd, registered in England and Wales (no 00876412), registered office: Farnell House, Forge Lane, Leeds LS12 2NE.

ICP 备案号 10220084.

Follow element14

  • X
  • Facebook
  • linkedin
  • YouTube