element14 Community
element14 Community
    Register Log In
  • Site
  • Search
  • Log In Register
  • About Us
  • Community Hub
    Community Hub
    • What's New on element14
    • Feedback and Support
    • Benefits of Membership
    • Personal Blogs
    • Members Area
    • Achievement Levels
  • Learn
    Learn
    • Ask an Expert
    • eBooks
    • element14 presents
    • Learning Center
    • Tech Spotlight
    • STEM Academy
    • Webinars, Training and Events
    • Learning Groups
  • Technologies
    Technologies
    • 3D Printing
    • FPGA
    • Industrial Automation
    • Internet of Things
    • Power & Energy
    • Sensors
    • Technology Groups
  • Challenges & Projects
    Challenges & Projects
    • Design Challenges
    • element14 presents Projects
    • Project14
    • Arduino Projects
    • Raspberry Pi Projects
    • Project Groups
  • Products
    Products
    • Arduino
    • Avnet Boards Community
    • Dev Tools
    • Manufacturers
    • Multicomp Pro
    • Product Groups
    • Raspberry Pi
    • RoadTests & Reviews
  • Store
    Store
    • Visit Your Store
    • Choose another store...
      • Europe
      •  Austria (German)
      •  Belgium (Dutch, French)
      •  Bulgaria (Bulgarian)
      •  Czech Republic (Czech)
      •  Denmark (Danish)
      •  Estonia (Estonian)
      •  Finland (Finnish)
      •  France (French)
      •  Germany (German)
      •  Hungary (Hungarian)
      •  Ireland
      •  Israel
      •  Italy (Italian)
      •  Latvia (Latvian)
      •  
      •  Lithuania (Lithuanian)
      •  Netherlands (Dutch)
      •  Norway (Norwegian)
      •  Poland (Polish)
      •  Portugal (Portuguese)
      •  Romania (Romanian)
      •  Russia (Russian)
      •  Slovakia (Slovak)
      •  Slovenia (Slovenian)
      •  Spain (Spanish)
      •  Sweden (Swedish)
      •  Switzerland(German, French)
      •  Turkey (Turkish)
      •  United Kingdom
      • Asia Pacific
      •  Australia
      •  China
      •  Hong Kong
      •  India
      •  Korea (Korean)
      •  Malaysia
      •  New Zealand
      •  Philippines
      •  Singapore
      •  Taiwan
      •  Thailand (Thai)
      • Americas
      •  Brazil (Portuguese)
      •  Canada
      •  Mexico (Spanish)
      •  United States
      Can't find the country/region you're looking for? Visit our export site or find a local distributor.
  • Translate
  • Profile
  • Settings
Pi-Fest
  • Challenges & Projects
  • Design Challenges
  • Pi-Fest
  • More
  • Cancel
Pi-Fest
Blog Raspberry Pi Pico MIDI Box: Blog#2 The Hardware
  • Blog
  • Forum
  • Documents
  • Polls
  • Files
  • Leaderboard
  • Mentions
  • Sub-Groups
  • Tags
  • More
  • Cancel
  • New
  • Share
  • More
  • Cancel
Group Actions
  • Group RSS
  • More
  • Cancel
Engagement
  • Author Author: meera_hussien
  • Date Created: 3 Aug 2022 1:14 AM Date Created
  • Views 1039 views
  • Likes 5 likes
  • Comments 0 comments
  • Pi-Fest Design Challenge
  • midi
  • pi-fest
  • Raspbery Pi PICO
  • tinkercad
Related
Recommended

Raspberry Pi Pico MIDI Box: Blog#2 The Hardware

meera_hussien
meera_hussien
3 Aug 2022

Raspberry Pi Pico MIDI Box: Blog#2 The Hardware 

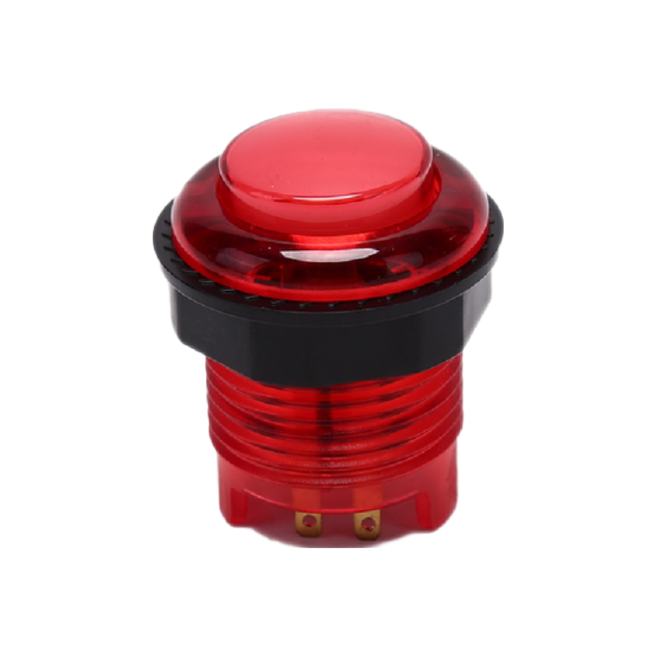
In the first part of the blog, we have seen the idea behind this project. In the second part, we would like to see the hardware required. Of course, the heart of the MIDI is the Raspberry Pi Pico and apart from that, we would need a push button as an input and wires to connect the push button to the raspberry pi pico. For push button, I have decided to use the arcade push button for two reasons. The first is because of its size and the second reason due to its robust use. You know how we press the push button when we are playing the arcade game console (at least true for me Sunglasses ). So that are two reasons. Below is the picture of the switch that I have used in this project.

image

The pinout of this switch is as shown in the image below

image

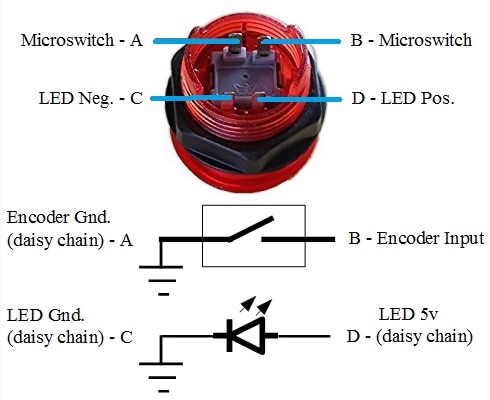
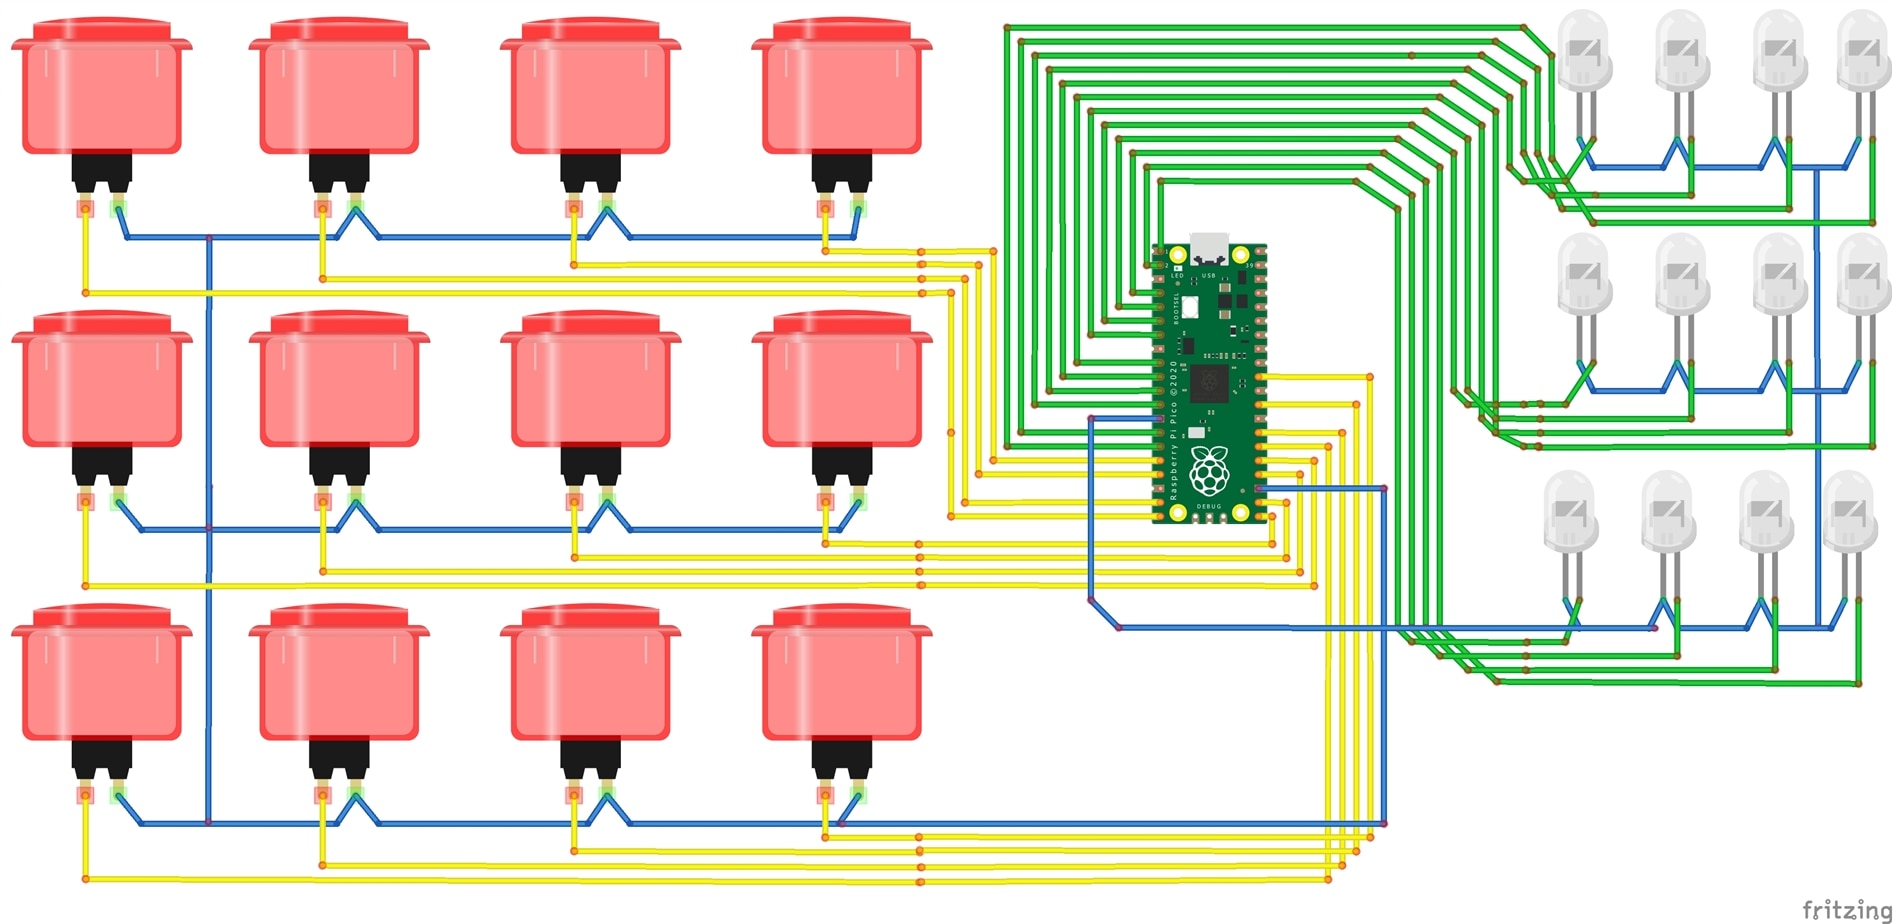
Now we have known the function of each pin of the push button, we can start to construct the circuit which is pretty much straightforward since we only have to connect the switch to the Raspberry Pi Pico. The connection between the Raspberry Pi Pico and the push button is done as shown in the diagram below.

image

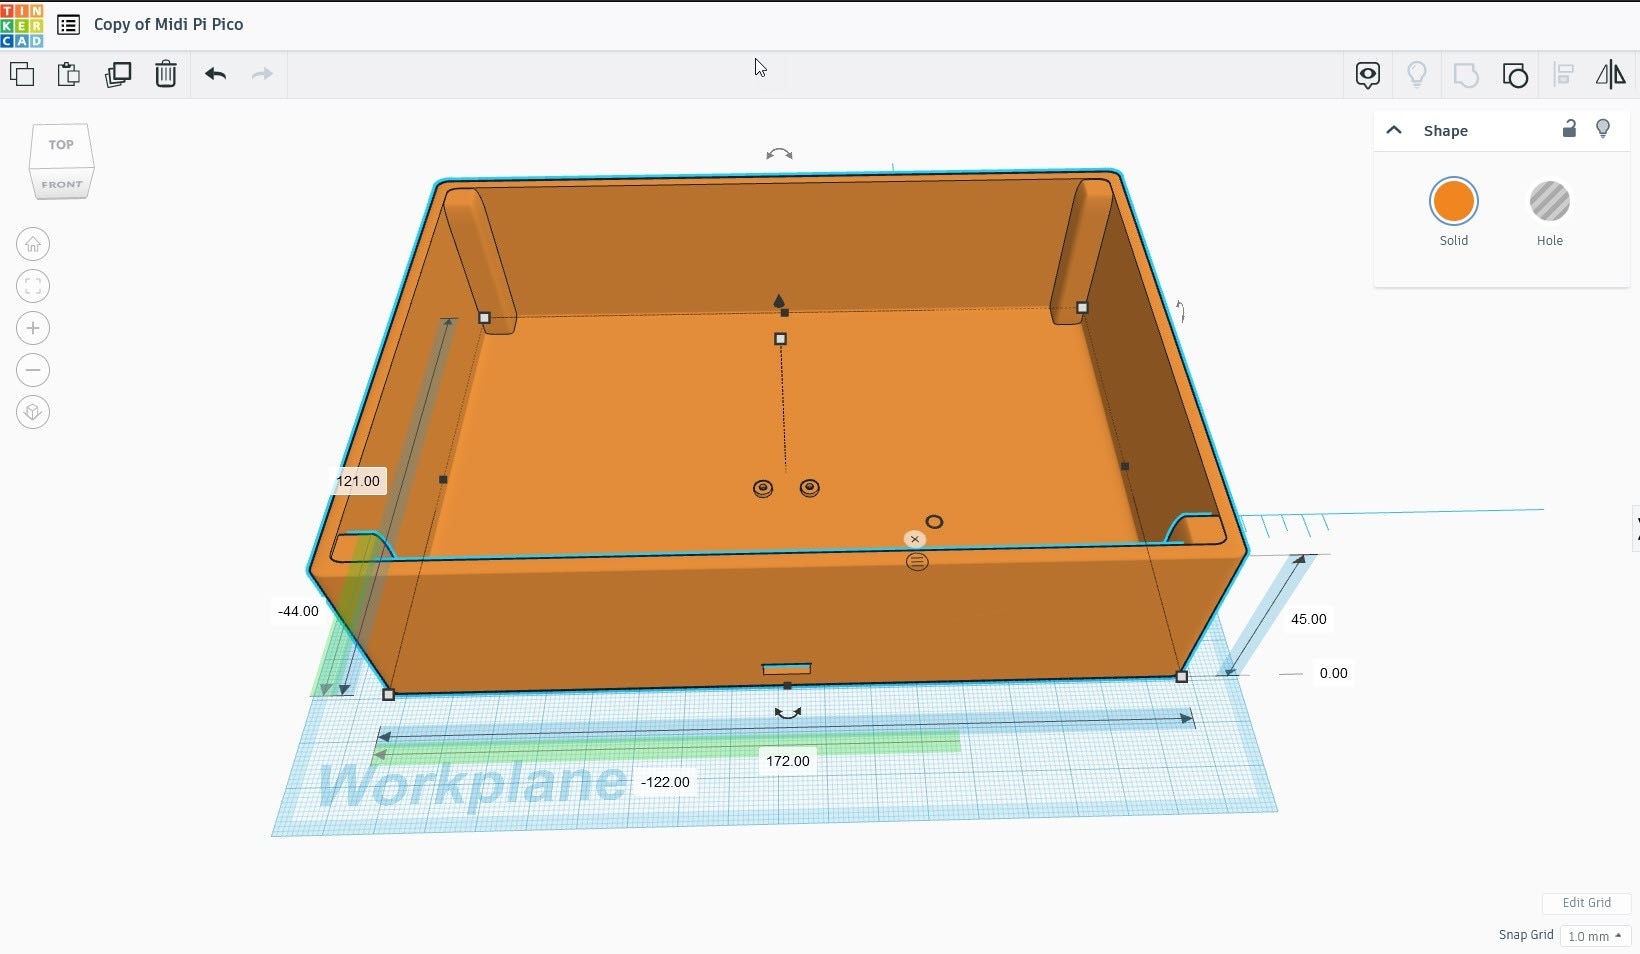
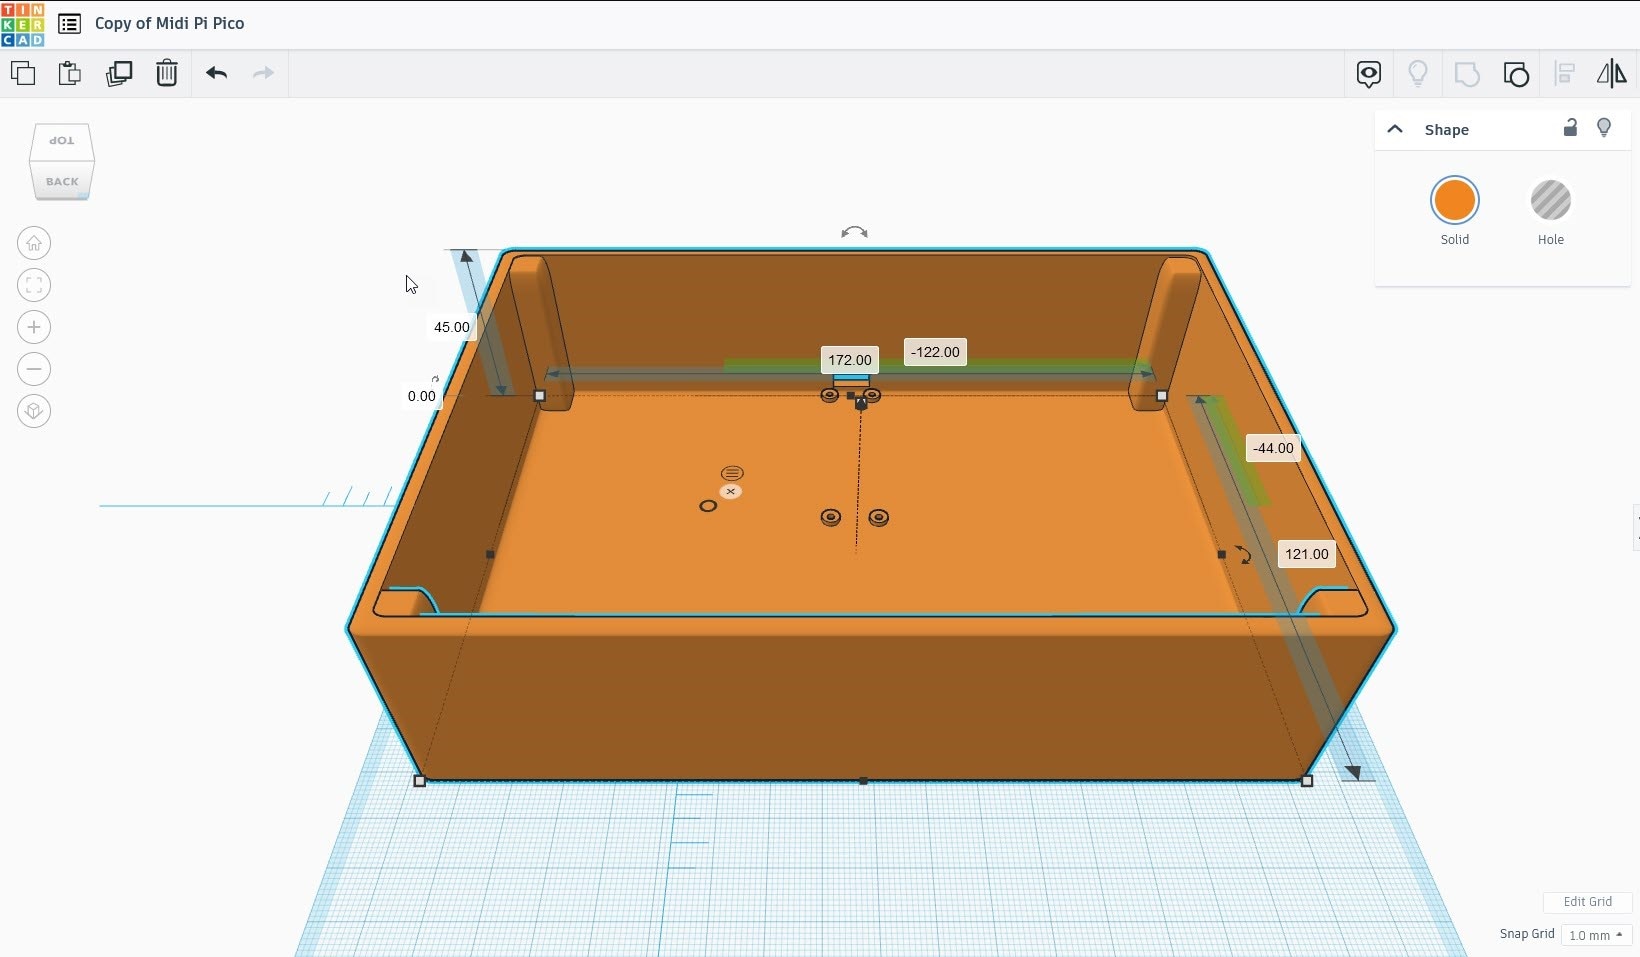
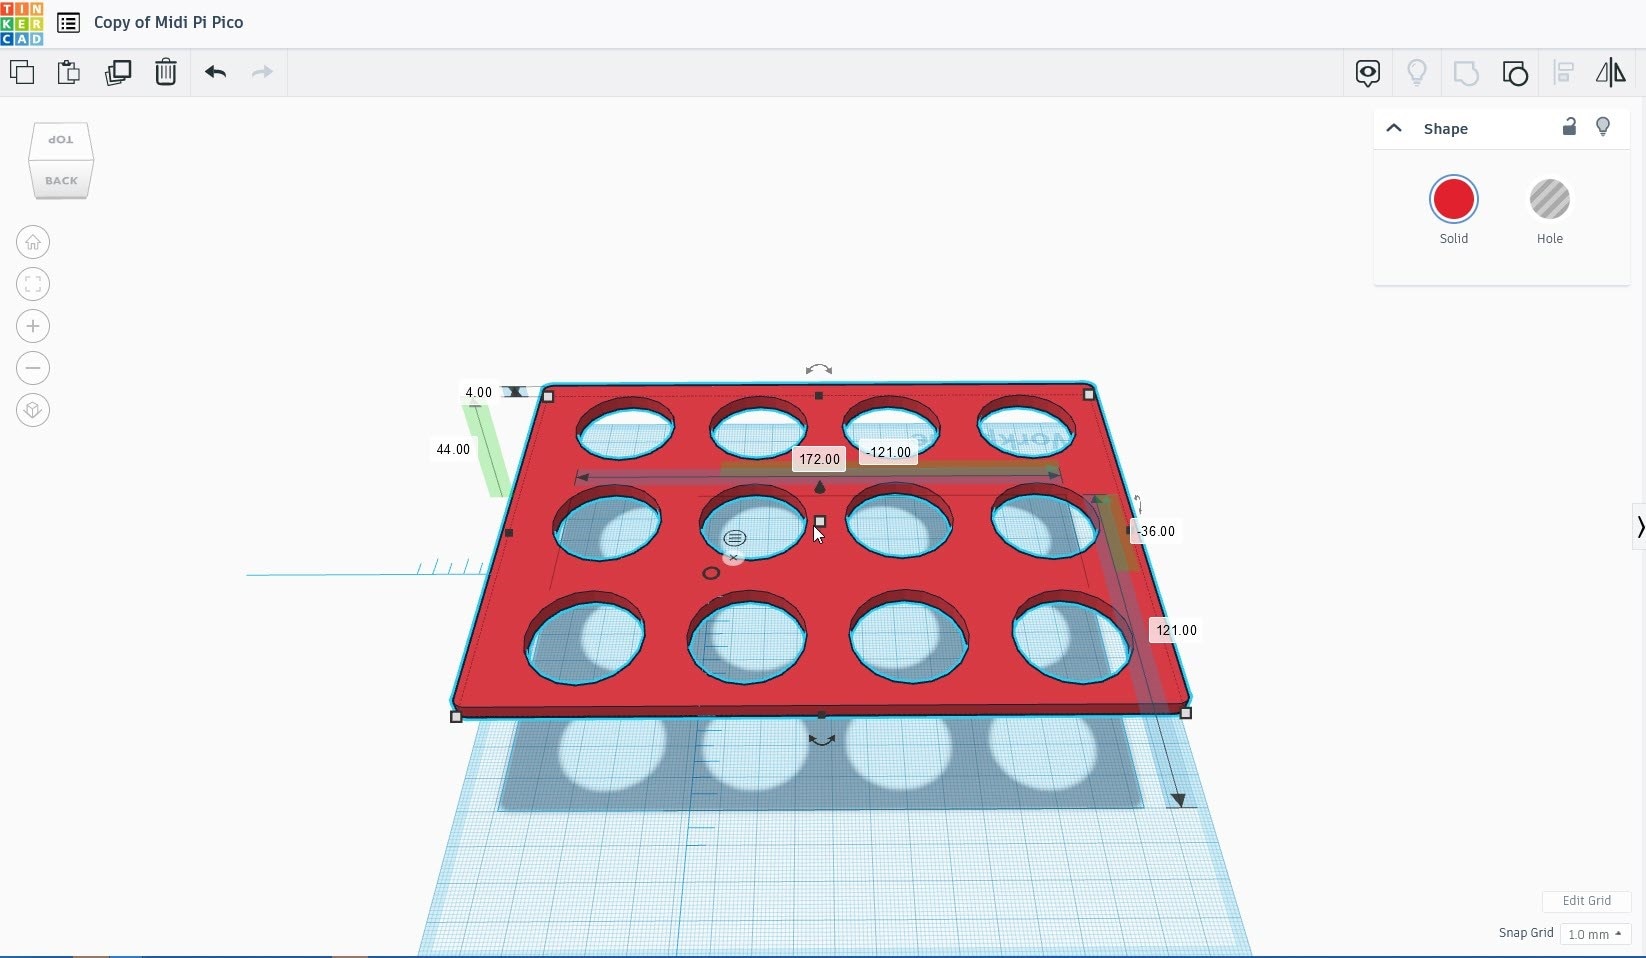
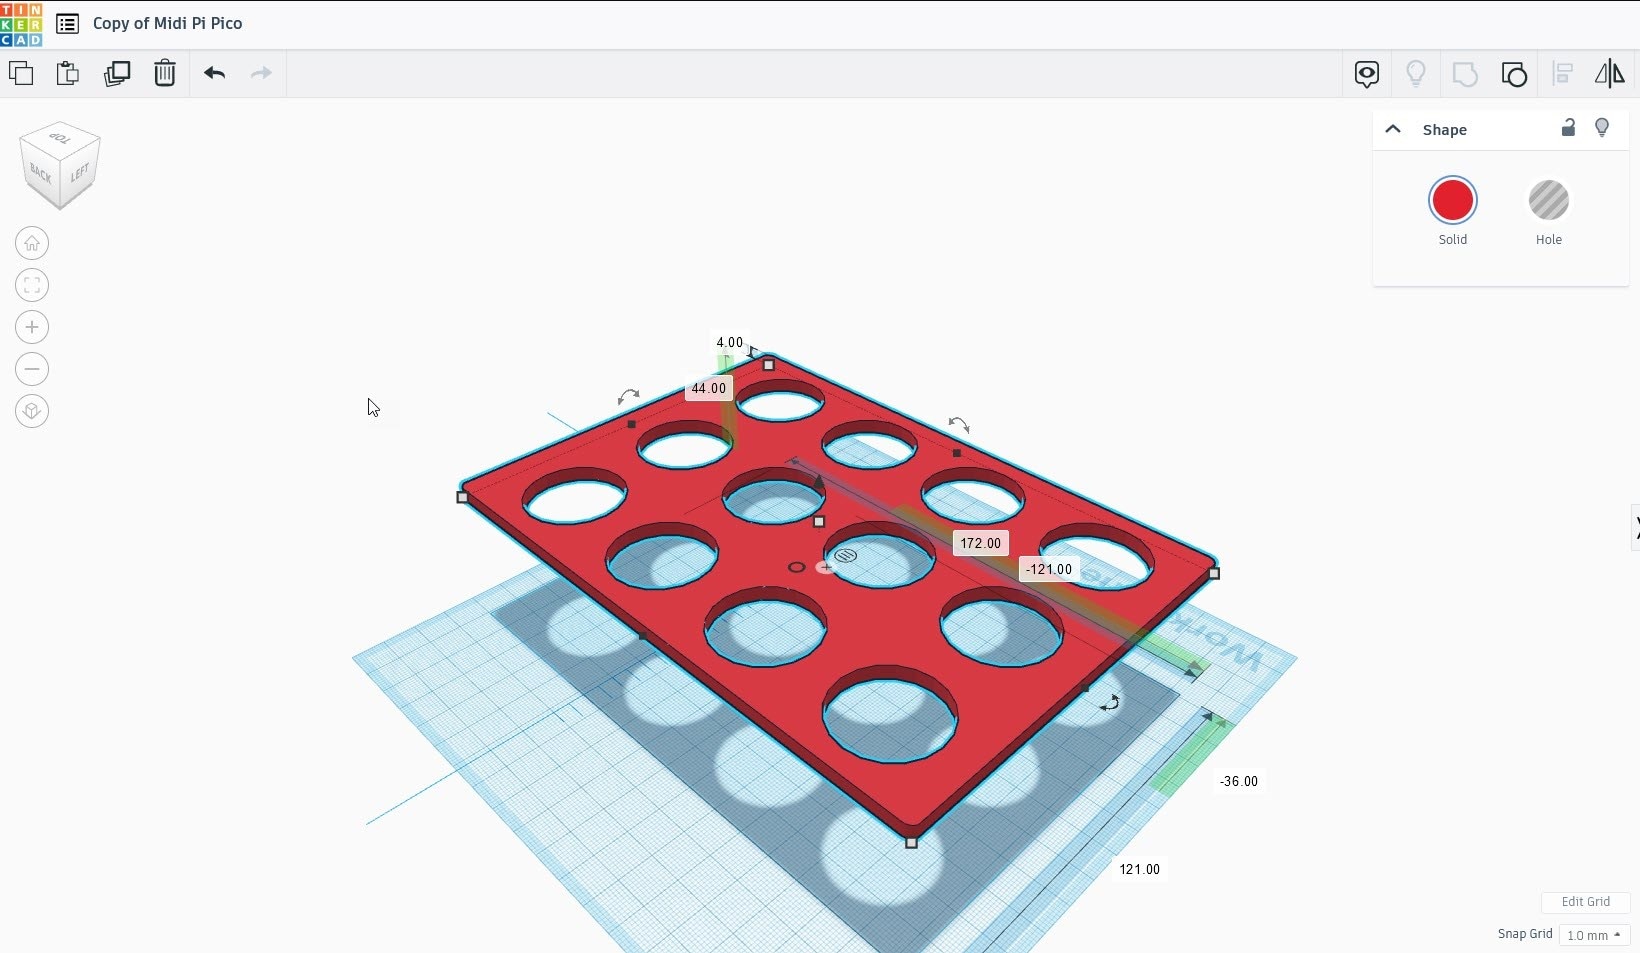
You may be thinking about how we want to get this done. Definitely, you are right. We can't just solder them barely like that. We need to design the enclosure as well as the place to fix the push button. For this, I have decided to design a simple enclosure to place the push button as well as to put all the wiring inside it. I used the Tinkercad to design the enclosure. Below is the design of the enclosure.

imageimage

image

You don't have permission to edit metadata of this video.
Edit media
x
image
Upload Preview
image

image

image

You don't have permission to edit metadata of this video.
Edit media
x
image
Upload Preview
image
 

Once the designing part is done, I printed the model. In the next blog, we shall assemble the components and complete the hardware part.

  • Sign in to reply
element14 Community

element14 is the first online community specifically for engineers. Connect with your peers and get expert answers to your questions.

  • Members
  • Learn
  • Technologies
  • Challenges & Projects
  • Products
  • Store
  • About Us
  • Feedback & Support
  • FAQs
  • Terms of Use
  • Privacy Policy
  • Legal and Copyright Notices
  • Sitemap
  • Cookies

An Avnet Company © 2025 Premier Farnell Limited. All Rights Reserved.

Premier Farnell Ltd, registered in England and Wales (no 00876412), registered office: Farnell House, Forge Lane, Leeds LS12 2NE.

ICP 备案号 10220084.

Follow element14

  • X
  • Facebook
  • linkedin
  • YouTube