Raspberry Pi Pico MIDI Box: Blog#3 Putting It Together
In this third blog, we would like to put together what we have constructed so far. In the previous blog, we have seen how the idea came about and in the second blog, we have seen the hardware that we have decided on as well as the enclosure for the MIDI. Now in this blog, we shall see how to connect the push button together and connect it to the Raspberry Pi Pico and fix all this inside the small enclosure.
In the first part, let's see how to fix the push button to the enclosure cover.
And below is the finished picture of fixing the push button to the enclosure cover.


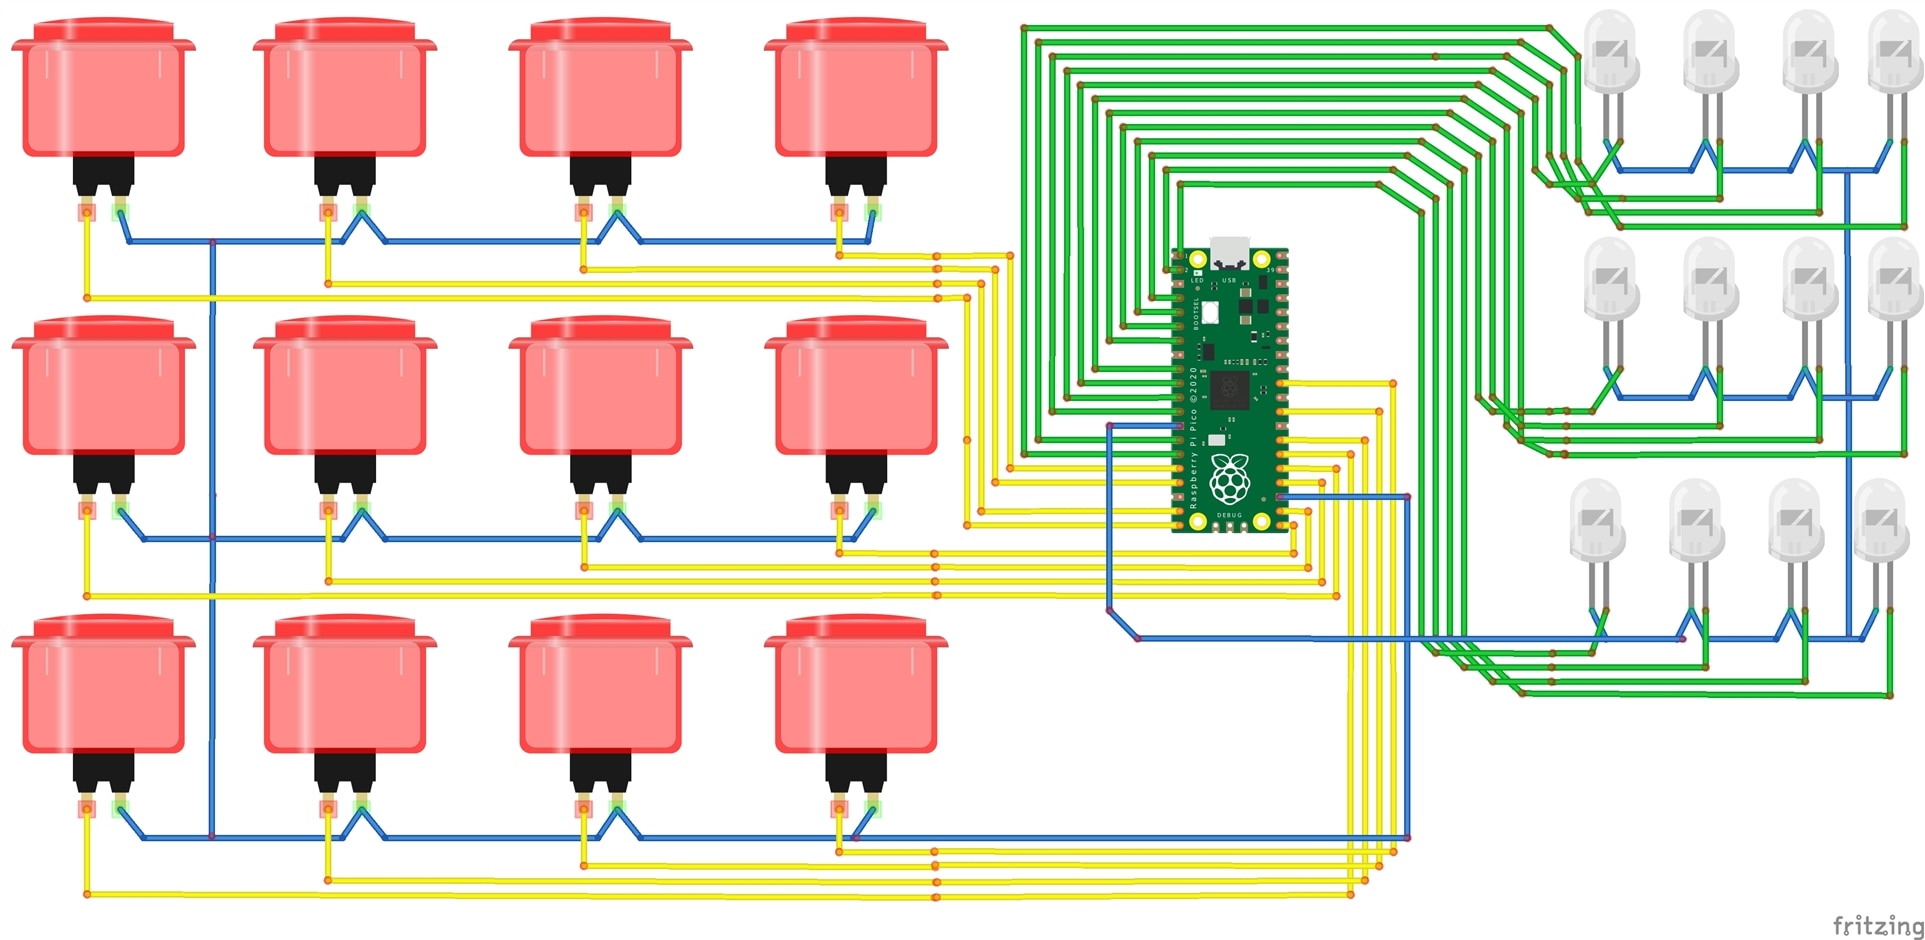
Once this is done the next step is to do the wiring. For the wiring, I refer to the wiring diagram as shown below. For your information, the arcade switch that we are using is an illuminated switch, hence we need to do the wiring for them separately.

Below is the video starting from fixing the push button up to connecting it to the Raspberry Pi Pico.
