element14 Community
element14 Community
    Register Log In
  • Site
  • Search
  • Log In Register
  • Community Hub
    Community Hub
    • What's New on element14
    • Feedback and Support
    • Benefits of Membership
    • Personal Blogs
    • Members Area
    • Achievement Levels
  • Learn
    Learn
    • Ask an Expert
    • eBooks
    • element14 presents
    • Learning Center
    • Tech Spotlight
    • STEM Academy
    • Webinars, Training and Events
    • Learning Groups
  • Technologies
    Technologies
    • 3D Printing
    • FPGA
    • Industrial Automation
    • Internet of Things
    • Power & Energy
    • Sensors
    • Technology Groups
  • Challenges & Projects
    Challenges & Projects
    • Design Challenges
    • element14 presents Projects
    • Project14
    • Arduino Projects
    • Raspberry Pi Projects
    • Project Groups
  • Products
    Products
    • Arduino
    • Avnet & Tria Boards Community
    • Dev Tools
    • Manufacturers
    • Multicomp Pro
    • Product Groups
    • Raspberry Pi
    • RoadTests & Reviews
  • About Us
  • Store
    Store
    • Visit Your Store
    • Choose another store...
      • Europe
      •  Austria (German)
      •  Belgium (Dutch, French)
      •  Bulgaria (Bulgarian)
      •  Czech Republic (Czech)
      •  Denmark (Danish)
      •  Estonia (Estonian)
      •  Finland (Finnish)
      •  France (French)
      •  Germany (German)
      •  Hungary (Hungarian)
      •  Ireland
      •  Israel
      •  Italy (Italian)
      •  Latvia (Latvian)
      •  
      •  Lithuania (Lithuanian)
      •  Netherlands (Dutch)
      •  Norway (Norwegian)
      •  Poland (Polish)
      •  Portugal (Portuguese)
      •  Romania (Romanian)
      •  Russia (Russian)
      •  Slovakia (Slovak)
      •  Slovenia (Slovenian)
      •  Spain (Spanish)
      •  Sweden (Swedish)
      •  Switzerland(German, French)
      •  Turkey (Turkish)
      •  United Kingdom
      • Asia Pacific
      •  Australia
      •  China
      •  Hong Kong
      •  India
      • Japan
      •  Korea (Korean)
      •  Malaysia
      •  New Zealand
      •  Philippines
      •  Singapore
      •  Taiwan
      •  Thailand (Thai)
      • Vietnam
      • Americas
      •  Brazil (Portuguese)
      •  Canada
      •  Mexico (Spanish)
      •  United States
      Can't find the country/region you're looking for? Visit our export site or find a local distributor.
  • Translate
  • Profile
  • Settings
Pi IoT
  • Challenges & Projects
  • Design Challenges
  • Pi IoT
  • More
  • Cancel
Pi IoT
Blog IoT Farm: Blog 7 - Caging the Rascally Rabbit
  • Blog
  • Forum
  • Documents
  • Polls
  • Files
  • Events
  • Mentions
  • Sub-Groups
  • Tags
  • More
  • Cancel
  • New
  • Share
  • More
  • Cancel
Group Actions
  • Group RSS
  • More
  • Cancel
Engagement
  • Author Author: jkutzsch
  • Date Created: 8 Aug 2016 4:06 AM Date Created
  • Views 309 views
  • Likes 2 likes
  • Comments 0 comments
  • pi-iot
  • farm
  • piiot challenge
  • farm_technology
Related
Recommended

IoT Farm: Blog 7 - Caging the Rascally Rabbit

jkutzsch
jkutzsch
8 Aug 2016

Having separate caging options for the Rabbits has became a priority due to the potential of 1 or more being pregnant.  My end goal is a large colony approach but having a nice sized setup for keeping some apart from the main group is also a good idea.


As such I thought I would share a few things in the process of making a 10 foot by 18 inches by 18 inches caging setup.


I have some 10 foot 2x4s from pallet break down that were perfect for using as the bones of the operation.  After speaking with my wife and her explaining that her arms are a better measurement of the depth of a cage then what my materials are I quickly changed my plans to keep the depth of the cage to 18 inches.  Seems too much deeper and it would be hard for her or our kids to actually be able to reach all the way in and clean/gather.


So now I have a depth that works for the main human consumer.  Staying with an 18 inch height also worked for her.  Taking my cage and the 10 foot boards I have I saw that I could easily make 4 cages of 30 inch width each framed all together.  So this became the plan for having new cages for the Rabbits.


image


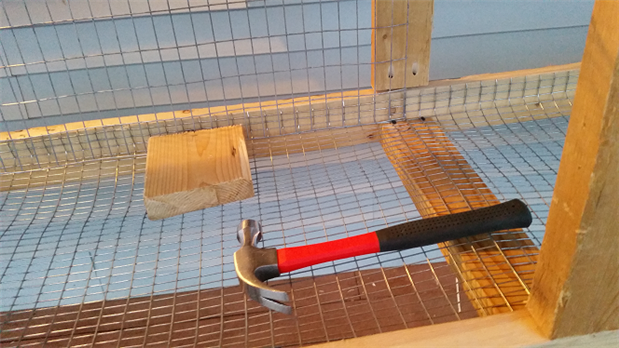
Here you can see the 2 different types of caging materials being used.  The smaller 1/2 inch by 1 inch wire material is for the bottom and ensures that babies do not fall through while allowing fecal matter to drop below where it can be diverted over to a removal location.  This came in a 30 inch wide roll which also tied into my 30 inch wide cage plan.  The larger 1 inch by 2 inch wire material is being used for the sides and top.  This came in a 36 inch wide roll, which allowed for splitting and having my 18 inch sections for the height and depth..  The block helps for "assisting" the material at times.  :-)


image


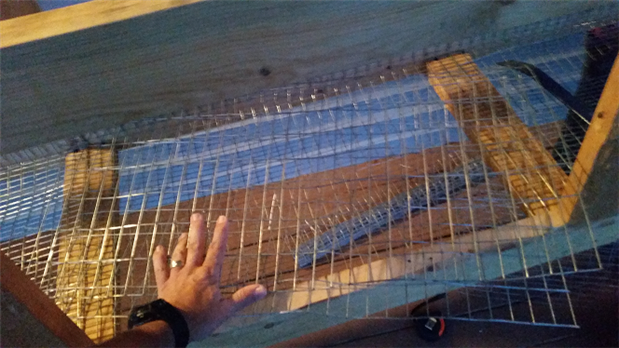
My first section of the cage I tried winging it and using pliers to bend at what I was eyeballing as a correct size for the side walls and the piece that is the top and back wall combined.  After a little thought the rest were actually based off taking the frame and the material and sizing right on the frame and then moving it to the edge and using the edge to make solid/even bends where they actually were needed.


image


This made things much easier and cleaner in the installation.


image


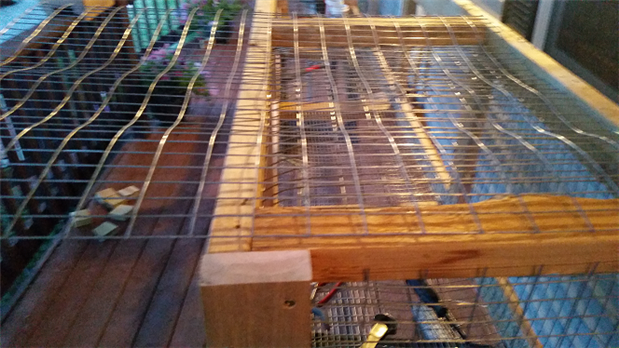
Continuing the bend into a taco shape allowed me to slip the back/top sheet into the cage and the rotate and line up very nicely.


image


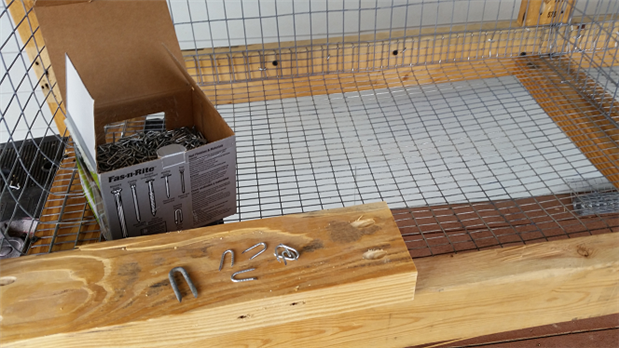
Some items that helped me adapt as I progressed were using chickenwire staples and using my pocketjig to make pocket holes so I could slide in some boards where I needed additional supports.  As you can see the left hand staple is your more common fencing staple.  That is a monster to try and use in the small spaces of the interior of the cage.  The chickenwire staple is much easier, but I found using some needle nose pliers to hold it in place while first setting it was safer/easier then my fingers.  :-)  I had been working with screws with the bottom wiring but they tended to go in so tight as to bend/break the wiring and if the wiring shifted at all while working with the screw the whole thing slipped off.  Staples were much better!  I like screws over nails/staples but in this implementation staples won out.


image


My pocketjig broken down to it's portable size and ready for me to put a couple of holes into this board that will become a frame piece for the doors.


image


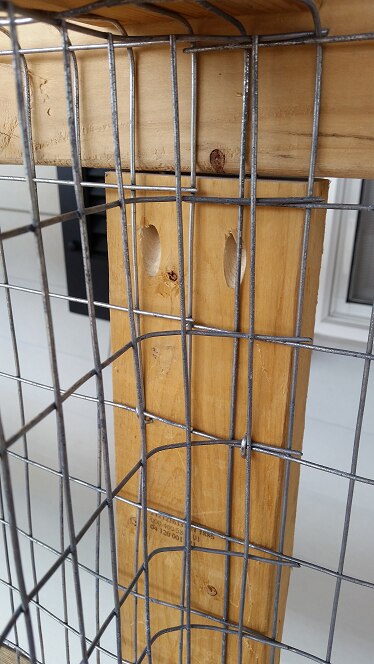
This shows one of the supports with the pocketholes allowing for a good fit between the 10 foot 2x4s and the staples tieing in the back/top wires with the sidewall wires.  More staples are being added to be sure each Rascally Rabbit stays on their appropriate side.


Tomorrow I work on actually putting in the doors and rechecking everything to be sure it is appropriate for the rabbits that will be in there.  As soon as it is all in place I will include some pictures showing implementation.

  • Sign in to reply
element14 Community

element14 is the first online community specifically for engineers. Connect with your peers and get expert answers to your questions.

  • Members
  • Learn
  • Technologies
  • Challenges & Projects
  • Products
  • Store
  • About Us
  • Feedback & Support
  • FAQs
  • Terms of Use
  • Privacy Policy
  • Legal and Copyright Notices
  • Sitemap
  • Cookies

An Avnet Company © 2026 Premier Farnell Limited. All Rights Reserved.

Premier Farnell Ltd, registered in England and Wales (no 00876412), registered office: Farnell House, Forge Lane, Leeds LS12 2NE.

ICP 备案号 10220084.

Follow element14

  • X
  • Facebook
  • linkedin
  • YouTube