element14 Community
element14 Community
    Register Log In
  • Site
  • Search
  • Log In Register
  • About Us
  • Community Hub
    Community Hub
    • What's New on element14
    • Feedback and Support
    • Benefits of Membership
    • Personal Blogs
    • Members Area
    • Achievement Levels
  • Learn
    Learn
    • Ask an Expert
    • eBooks
    • element14 presents
    • Learning Center
    • Tech Spotlight
    • STEM Academy
    • Webinars, Training and Events
    • Learning Groups
  • Technologies
    Technologies
    • 3D Printing
    • FPGA
    • Industrial Automation
    • Internet of Things
    • Power & Energy
    • Sensors
    • Technology Groups
  • Challenges & Projects
    Challenges & Projects
    • Design Challenges
    • element14 presents Projects
    • Project14
    • Arduino Projects
    • Raspberry Pi Projects
    • Project Groups
  • Products
    Products
    • Arduino
    • Avnet Boards Community
    • Dev Tools
    • Manufacturers
    • Multicomp Pro
    • Product Groups
    • Raspberry Pi
    • RoadTests & Reviews
  • Store
    Store
    • Visit Your Store
    • Choose another store...
      • Europe
      •  Austria (German)
      •  Belgium (Dutch, French)
      •  Bulgaria (Bulgarian)
      •  Czech Republic (Czech)
      •  Denmark (Danish)
      •  Estonia (Estonian)
      •  Finland (Finnish)
      •  France (French)
      •  Germany (German)
      •  Hungary (Hungarian)
      •  Ireland
      •  Israel
      •  Italy (Italian)
      •  Latvia (Latvian)
      •  
      •  Lithuania (Lithuanian)
      •  Netherlands (Dutch)
      •  Norway (Norwegian)
      •  Poland (Polish)
      •  Portugal (Portuguese)
      •  Romania (Romanian)
      •  Russia (Russian)
      •  Slovakia (Slovak)
      •  Slovenia (Slovenian)
      •  Spain (Spanish)
      •  Sweden (Swedish)
      •  Switzerland(German, French)
      •  Turkey (Turkish)
      •  United Kingdom
      • Asia Pacific
      •  Australia
      •  China
      •  Hong Kong
      •  India
      •  Korea (Korean)
      •  Malaysia
      •  New Zealand
      •  Philippines
      •  Singapore
      •  Taiwan
      •  Thailand (Thai)
      • Americas
      •  Brazil (Portuguese)
      •  Canada
      •  Mexico (Spanish)
      •  United States
      Can't find the country/region you're looking for? Visit our export site or find a local distributor.
  • Translate
  • Profile
  • Settings
Pi IoT
  • Challenges & Projects
  • Design Challenges
  • Pi IoT
  • More
  • Cancel
Pi IoT
Blog Pi Control Hub:Spoke3: Key-less Door entry-testing the Servo
  • Blog
  • Forum
  • Documents
  • Polls
  • Files
  • Events
  • Mentions
  • Sub-Groups
  • Tags
  • More
  • Cancel
  • New
  • Share
  • More
  • Cancel
Group Actions
  • Group RSS
  • More
  • Cancel
Engagement
  • Author Author: carmelito
  • Date Created: 15 Aug 2016 5:43 AM Date Created
  • Views 595 views
  • Likes 1 like
  • Comments 0 comments
  • picontrolhub
  • piiot
  • servo
  • raspberry pi
  • piiot challenge
Related
Recommended

Pi Control Hub:Spoke3: Key-less Door entry-testing the Servo

carmelito
carmelito
15 Aug 2016

As part of this blog post we are going to setup a Key-less Door entry system using a Servo motor and a Raspberry Pi A+, basically we are going to use the servo motor to open and close the door lock bolt, when you are at the front door of your house and enter the password  in the browser as shown in the video below.This is kind off two step authentication image , where you will be able to open the door, if you mobile device is connected to your home WiFi network + you know the secret password which you need to enter in the browser.


You don't have permission to edit metadata of this video.
Edit media
x
image
Upload Preview
image


We are going to setup a simple web app using flask which is a micro web development framework for Python, and then connect the servo to a PWM pin of the Raspberry Pi A+.


Here are the steps you will need to complete to setup flask, and the code to drive the servo.

#1 Installing Flask on the Pi

      once you have ssh'ed into you Pi use the following commands

         sudo apt-get update

         sudo apt-get upgrade

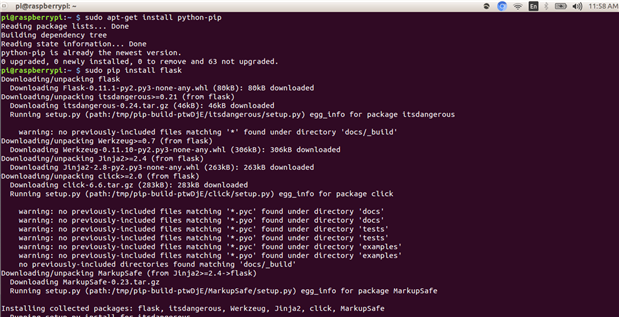
     install pip , a python package management system using

         sudo apt-get install python-pip 

      install flask , which we are going to use to build a simple web app

           sudo pip install flask

image

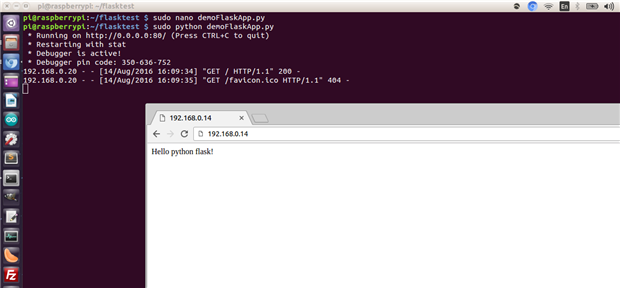
#2 Test the flask install

     Setup a simple flask web app to check if the installation was successful, open the nano editor and copy paste the code below

          sudo nano demoFlaskApp.py

     And then to run the web app

          sudo python demoFlaskApp.py


from flask import Flask
app = Flask(__name__)


@app.route('/')
def doorlock():
    return 'Hello python flask!'


if __name__ == '__main__':
    app.run(host='0.0.0.0', port=80, debug=True)


     To open the app in your browser type: http://ipaddressOfPi:80

image


#3 Connect the Servo to the Raspberry Pi A+

      As part of the circuit

  •        Connect the servo to GPIO pin number 18 on the Pi, which is a PWM pin
  •        To power up the servo I am using 4 AA batteries (this is a temporary setup, but in the final setup we are going to cut a USB cable to power up the servo)
  •        Connect the GND pin of the Pi to GND pin of battery pack and the servo.
  •         I am also using a 1K ohms resistor to protect the GPIO pin from unexpected high current .

     image

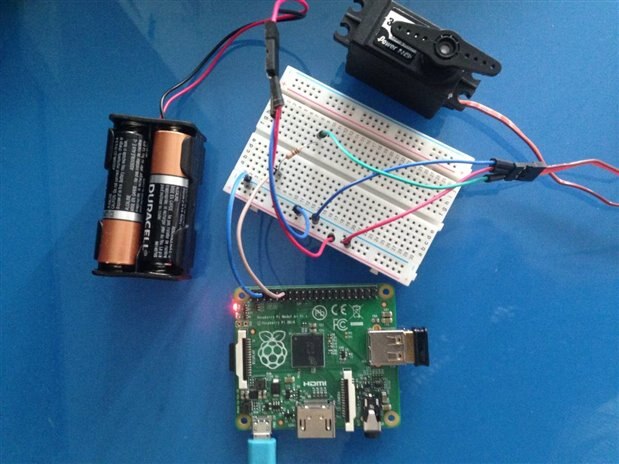
     Note : In my case, I am using  a Raspberry Pi A+ , but you can use any version of the Pi for this setup.


#4  Testing the Servo

      Now lets write a small program to test the servo motor. Copy paste the code below into  the nano editor

          sudo nano servo.py

mport RPi.GPIO as GPIO
import time
import sys


argVal = sys.argv[1]
print argVal


GPIO.setmode(GPIO.BCM)
GPIO.setup(18, GPIO.OUT)
pwm = GPIO.PWM(18, 50)
pwm.start(7.5)


try:
        #Reading the servo state value from the file to check if is Open/Closed
        fRead = open('servoState.txt')
        stateVal = fRead.read()
        print 'State value in file:'+ stateVal
        fRead.close()


        if argVal == 'open' and stateVal == 'close': #Open the door
                print 'opening the servo lock'
                pwm.ChangeDutyCycle(7.5)  # turn towards 90 degree #Open 
                fWrite = open('servoState.txt','w')
                fWrite.write('open')
                fWrite.close()
                time.sleep(1)
        elif argVal == 'close' and  stateVal == 'open': #Close the door
                pwm.ChangeDutyCycle(2.5)  # turn towards 0 degree
                time.sleep(1) # sleep 1 second
                print 'closing the servo lock'
                #pwm.ChangeDutyCycle(12.5) # turn towards 180 degree
                fWrite = open('servoState.txt','w')
                fWrite.write('close')
                fWrite.close()
                time.sleep(1)
        else:
                print 'do nothing'


#except KeyboardInterrupt:
        pwm.stop()
        GPIO.cleanup()


except IOError as e:
    print "I/O error({0}): {1}".format(e.errno, e.strerror)


    you will also have to create a file,  servoState.txt to store the state of the servo, basically to check the position of servo, that is if the door is open or closed

          sudo nano servoState.txt

        and type in open

    Now to test type in, this will move the servo to one end

          sudo python servo.py close

     And to move the servo to the other end type in

          sudo python  servo.py open


#5 Once you have your servo's moving download  zip which contains the flask web app and FTP it to your Pi

   In the webApp folder run the following command to run the web-app

     sudo python dooropen.py

image

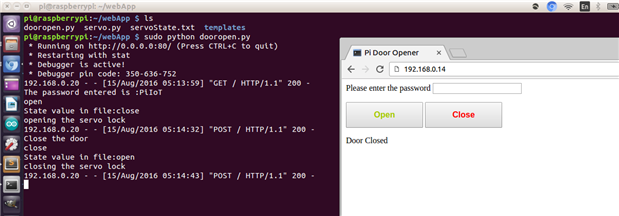
Note: if you are using the same code in the zip file, the password is PiIoT image to open the door  ..

Attachments:
webApp.zip
  • Sign in to reply
element14 Community

element14 is the first online community specifically for engineers. Connect with your peers and get expert answers to your questions.

  • Members
  • Learn
  • Technologies
  • Challenges & Projects
  • Products
  • Store
  • About Us
  • Feedback & Support
  • FAQs
  • Terms of Use
  • Privacy Policy
  • Legal and Copyright Notices
  • Sitemap
  • Cookies

An Avnet Company © 2025 Premier Farnell Limited. All Rights Reserved.

Premier Farnell Ltd, registered in England and Wales (no 00876412), registered office: Farnell House, Forge Lane, Leeds LS12 2NE.

ICP 备案号 10220084.

Follow element14

  • X
  • Facebook
  • linkedin
  • YouTube