


The kit has arrived!
There are a lot of parts in this kit, so I want to take the time to write a little bit about every part and and some thoughts and ideas I have on how to use these during the challenge.
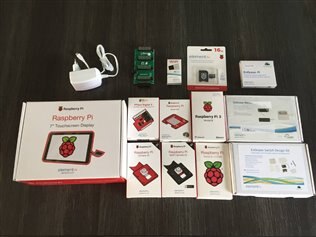
Kit
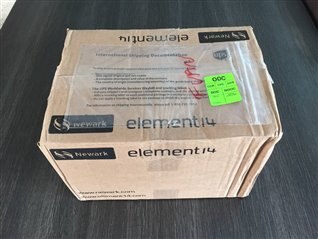
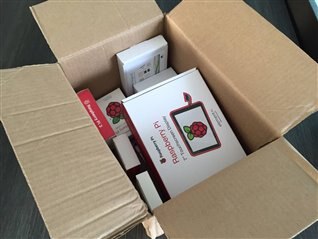
The kit arrived last week via UPS. At first, the box didn't seem that big for the parts I was expecting. Once opened and laid out on the table though, all was accounted for!
I'd like to use this opportunity to thank element14 and the sponsors again for putting together such a great kit. Special thank to element14Dave for taking care of the logistics side of things. Sending kits like this all over the world is not an easy task!
Let's go over every part now 
Parts
Raspberry Pi 3 & B+
Not much to explain here, as this is what the challenge is all about: leveraging the power of the Raspberry Pi 3 for the creation of an IoT Command Center.
In my opinion, the coolest feature of the Pi 3 is the onboard wifi. And with the latest Jessie release automatically copying the wpa_supplicant file from the boot partition upon first boot, the Pi 3 can be set up headlessly, wirelessly.
For my project, I'll be using a combination of Pi 3 and Pi Zeros. The Pi B+ will be given to a friend looking to take his first steps with Raspberry Pi
Touch Screen
The biggest box in the kit, is that of the touch screen. The official Raspberry Pi Touch Screen was released beginning of September last year.
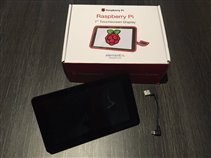
Here are some specs:
- 7" diagonal size
- 800x480 resolution
- 10-point capacitive touch
- 70° viewing angle
The display connects to a provided control board, which in turn is then connected to the Raspberry Pi using the DSI (= Display Serial Interface), connector. In the box, are dupont wires to power the Pi via the GPIO pins, but I prefer to use a short, 90° angle USB cable to keep the GPIO free for HATs.
I plan to use the display to visualise data from OpenHAB and allow control via the touch functionality. Rather than using a stand, I'll be embedding the screen in a custom project enclosure.
Sense HAT
Fun Fact: Did you know that two Raspberry Pis with Sense HAT are currently in space on the ISS? If you didn't, you may want to have a look at Astro Pi!
Anyway, the Sense HAT is, as the name implies, a HAT packed with sensors. ("HAT" stands for "Hardware Attached on Top")
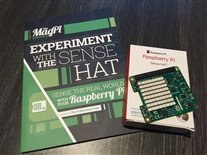
The following sensors are available on the Sense HAT:
- temperature sensor
- humidity sensor
- gyroscope
- accelerometer
- magnetometer
- barometric pressure sensor
It also has a 8x8 RGB LED matrix, capable of visualising data, and a 5 button joystick.
I didn't plan on using it originally, but seeing the features, and the board up close has given me some ideas. The MagPi Sense HAT experiments book is a great starting point! 
Camera Module (Regular + NoIR)
The camera module has recently received an upgrade (and at the same time, so did our challenge kit) when version 2 was announced earlier this year. The camera's sensor has been upgraded from a 5MP to 8Mp version, and remains compatible with all models Raspberry Pi. Others improvements include: better image quality, color fidelity and low-light performance.
I plan to combine a camera with the new Pi Zero v1.3, using an accessory I recently purchased, the ZeroView. The camera's feed will be made available on the command center for remote monitoring purposes. I'll probably have it facing the garden or perhaps even inside the chicken coop.
Depending on the application, I will use either the regular or NoIR version. Or I could use both, we'll see.
PiFace Digital 2
The PiFace Digital 2 is a HAT meant to make interfacing with inputs/outputs easier by providing:
- 2 relays (
 Max. 20V/5A)
 - 4 switches
- 8 LED indicators
- 8 digital inputs
- 8 open-collector outputs

There is a graphical emulator and simulator available, allowing you to test in software before actually using the hardware. The quick start guide covers hardware, software and some example applications.
The PiFace Digital 2 will not be used in my project, as I rely on other technologies to wirelessly control lights and sockets. Other input/output can be covered using the standard Python GPIO functions.
PiRack
The PiRack enables you to connect up to four HATs on the Pi's GPIO header.
This is a version for the 26 pin header, not the 40 pin header introduced since the Raspberry Pi B+. The PiRack is useful for prototyping, but is a little bit impractical when it comes to embedding multiple HATs in a compact solution. Rather than mounting boards vertically in a 1 by 4 configuration, my suggestion for an alternative version would be to put the HATs in the same horizontal plane, in a 2 by 2 configuration? And while we're at it, update it to the 40 pin header.
EnOceanPi & EnOcean Kits
I've been using EnOcean sensors ever since the Forget Me Not Design Challenge . After almost two years, the sensors (contact and temperature) I had installed are still operational and did not require any maintenance. So when I found out about the new Switch Kit, I was very excited.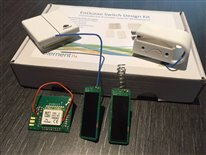
The Switch Design Kit is new, but I love the look and feel of the 3D printed clicker. The parts fit inside nicely and the switch itself has a really nice click. It seems to be printed on a powder based 3D printer, and I wonder if I'll be able to get similar results using my FDM 3D printer. Something to try out at some point during the challenge.
Unfortunately, there is a small hiccup. The sensor kit which was received works with a frequency of 902MHz, which is meant for the US. As the EnOceanPi which was received works on the EU frequency, 868MHz, they are incompatible and unusable.  Hopefully element14Dave can assist with this issue, and nobody else ended up with an incompatible kit.
Accessories
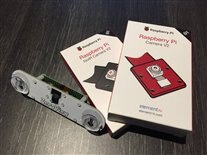
Finally, some accessories were provided, such as a 16Gb microSD card, a wifi dongle and the official 5V/2A microUSB power supply. You can never have too many of those!
 |
Navigate to the next or previous post using the arrows. |  |
Top Comments