


Managing Hangars Via the Web
There are many different individuals that will need access to the HangarControl system. Pilots may be at home, at their office, or on the road. With that in mind, I wanted to create a single web interface that would accommodate a variety of browsers, including desktop, tablets, and smartphones. To ease the pain of coding HTML for all of the different platforms, I chose to use jQuery Mobile (http://demos.jquerymobile.com/1.1.2/) for the front-end toolset. Don't let anyone fool you -- There is still quite a learning curve when using "the easiest way to build sites and apps that are accessible on all popular smartphone, tablet and desktop devices!" That quote is from the jQuery mobile website. I referred to it often, the quote that is, when I needed to convince myself that front-end coding could be even more difficult. Enough of that, let's move on to the structure.
Initializing a New Hangar
There are many hangars and aircraft that we need to be able to preheat. Once the system is installed, I did not want to have to return each time there was a change to the configuration. The "auto discovery" capabilities in xPL provide for this.
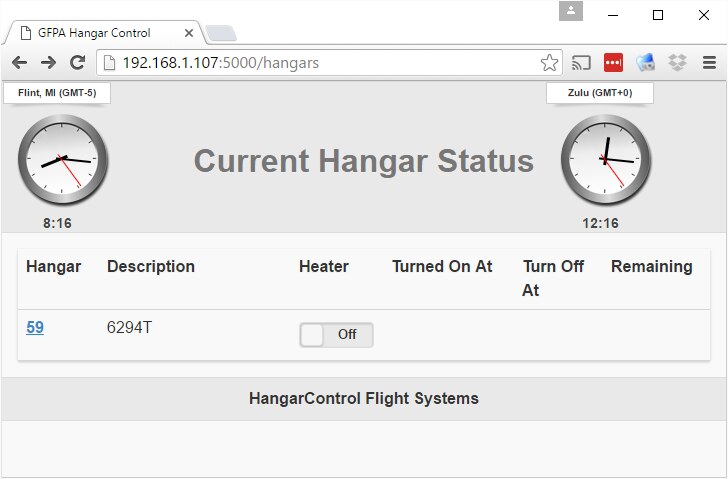
New Node Turns On
Each node (Raspberry Pi + Heater Relay) is flashed with the same image. A node broadcasts it presence and then waits for messages. The web interface of HangarControl provides an Administrator a link to configure each node. Note the "Unconfigured Hangar" below.

Configure a Hangar
Clicking on the "49568296" link brings us to a page where the Administrator can name the hangar and airplane. Here is where we can specify how long the heater runs as well as the Raspberry Pi GPIO pin for controlling the heater relay.

Backend Coding in Python
In Episode #6 ([Pi IoT] Hangar Central #6, Minimal Web Application), I introduced the web application framework, Flask (Welcome | Flask (A Python Microframework) ), which I am using to provide the application environment for HangarControl.
Logging in and User Authentication

Flask provides a number of optional modules that you may use to supplement your project. One of these is Flask-Login, which I am using to aid in session management. Take a look at Episode #8 ([Pi IoT] HangarControl #8.1 -- What's a database? The Movie or [Pi IoT] HangarControl #8, Database? What's a Database?) for a behind the scenes look at integrating with Flask-Login.
Since authentication is such an important component of any public facing application, I will show you what you need to write if you plan on using Flask-Login yourself.
Flask Application
The main module is named hangarcontrol.py, a boilerplate can be found in Episode #6, ([Pi IoT] Hangar Central #6, Minimal Web Application). To that minimal file, Flask-Login needs to be included.
The initialization or "stuff at the top"
# Include the Flask-Login, session & user management module
from flask_login import LoginManager, login_required, login_user, logout_user

# The User class with necessary Flask-Login & search methods
from lib.user import User

# Instantiate flask-login, send our application context, a register a login page
login_manager = LoginManager()
login_manager.init_app(app)
login_manager.login_view = 'login'
Present the login page until successfully validated
# The URL for logging in. A user gets directed here automatically
# when they select their first page which has been tagged with @login_required
@app.route('/login', methods=['GET', 'POST'])
def login():
    error = None
    next = request.args.get('next')
    if request.method == 'POST':
        user = User.find_by_username(request.form['username'])
        log.info("login: user=%s", user)
        if user == None:
            error = 'Invalid username'
        elif request.form['password'] != getattr(user,'password'):
            error = 'Invalid password got=%s, expected=%s' % (request.form['password'], getattr(user,'password'))
        else:
            login_user(user,remember=True)
            flash('You were logged in')
            # next_is_valid should check if the user has valid
            # permission to access the `next` url
            if not next_is_valid(next):
                return abort(400)

            return redirect(next or url_for('hangars'))
        return render_template('login.html', form=form)

    return render_template('login.html', error=error)
Helper methods provided by you, the programmer
# When redirected for login, the URL has a parameter ('next') which
# indicates the page to navigate to after a successful login.
def next_is_valid(next):
    return True

# Flask-Login needs a method to do user lookups. The user_id is passed from
# the login page and we use our "finder" class methods to do a lookup
# on our User class.
@login_manager.user_loader
def load_user(user_id):
  return User.find_by_username(user_id)
Secure or require logins on a page
# http://hangarcontrol.com/hangars
# Produce a list of hangars. Require a valid login before presenting the page.
@app.route('/hangars')
@login_required
def hangars():
  hangars = server.getHangarList()
  return render_template('hangars.html', hangars=hangars)
Online and Available
At this point we have a completely function system and pilots are able to request (automated) preheating service.
- A Raspberry Pi 3 is the primary workhorse. It acts as our xPL communication hub handling messages between hangars and administrative applications.
- This same RPi3 is running the Flask application server and provides our HangarControl web interface. Use of smartphones, tablets, and desktop devices has been made seamless with jQuery mobile front end library.
- The RPi3 also services the heater in a single hangar.
- Additional hangars can be included by adding another networked RPi. When HangarControl "hears" the new hangar it is added to the list of hangars and the Administrator simply clicks the configure link to specify duration and the GPIO pin.
Next up, I'd like to include the SMS and telephone interfaces. Let's see if I have enough time to write it up!
Rick
Top Comments