


I will say this right from the start here. I had an Idea in my head and ran with it what happens well you will see and so will I as I have never attempted a project of this size or nature so lets get started!
First thing first.
What Is PiMassive?
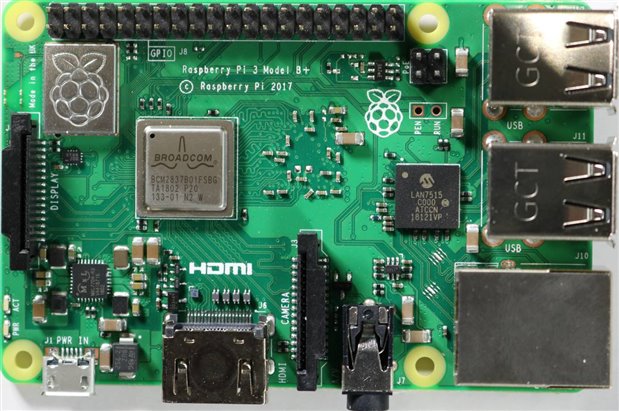
Short answer is a 20x32 inch Raspberry Pi 3 B+ . Originally I wanted to do 2ft by 3ft but after considering the sizes of components and the size of my 3d printer even 4 inches bigger would cause me to use more then my bed size on a lot of the components keeping it a 20x30 allows me to keep 90% of the things printed to be single prints currently only a few need to be done in section GPIO and Camera and LCD connector.
OK so what does it do?
Well for starters Its going to look pretty on my wall. I wanted it as a coffee table at the start but after factoring in a few things I decide it would make a better art piece on the wall so that's the route that I will be taking on this adventure.
Did I mention I will be attempting to get all the components working as much as possible? Sure they will be piggy backing off the Raspberry Pi 3B+ but that's OK
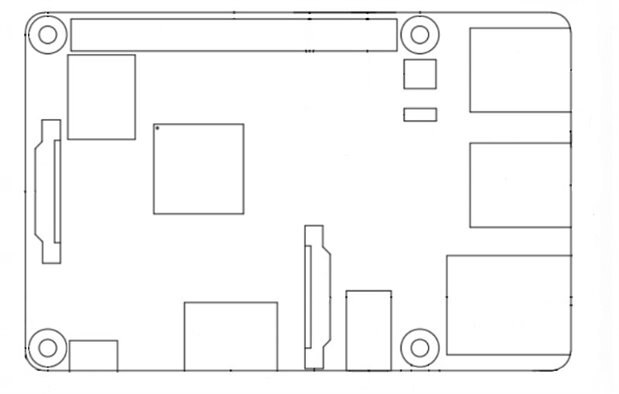
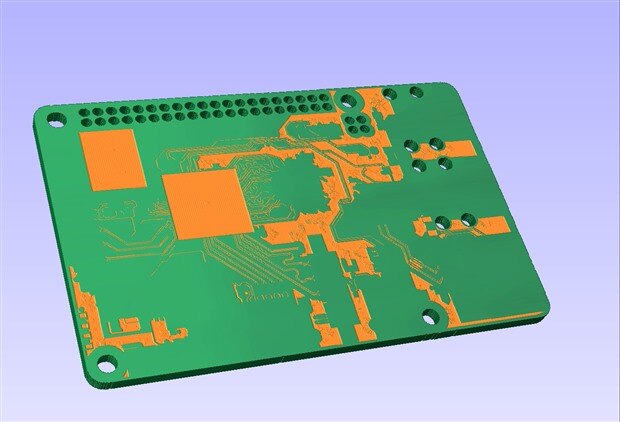
I would have posted sooner but seems I had some issues acquiring a blank pi 3b+ so I had to draw everything by hand for my carving program. Lets just say that took me many days and multiple attempts and even program changes was too many layers for my one program to run.
So after taking tons of top down photos of the Pi it was on to tracing it. I don't recommend it.
Attempted to acquire from both Raspberry Pi Foundation. They said to ask Newark. Newark said its not open sourced hardware so was unable to help. Tossed my hands in the air and onto plan B.
Here is some of the photos from the design process. Remember taking a 2x3 inch board and making it 20x32 inches.

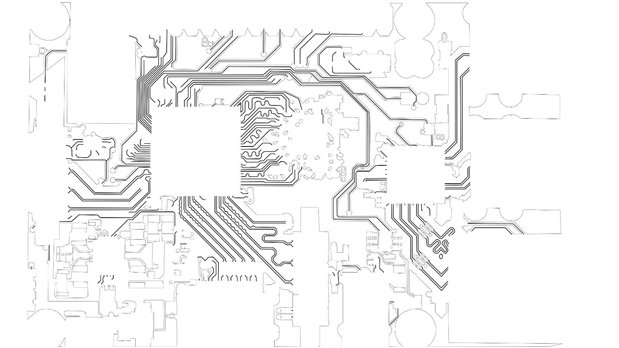
Enter it all into vcarve pro to see how my lines are and edit each node that might need it.
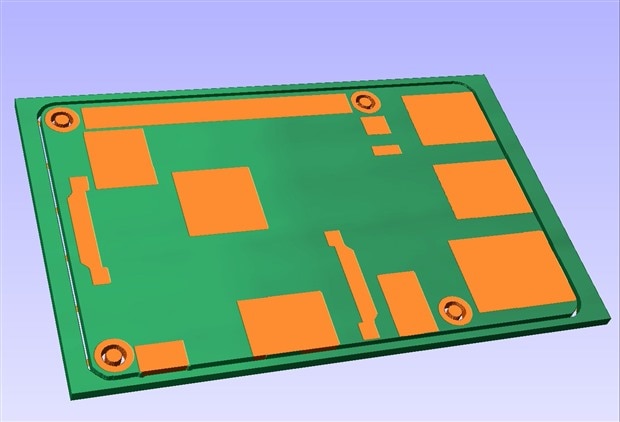
And the final all adjusted lets hope the carving process goes well.....
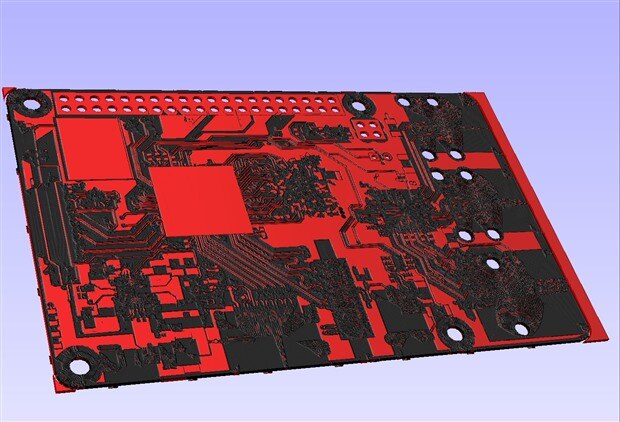
So after all the designing on this one and figuring out the best method to get my lines and sections correct I ended up with the above as what it should look like when I carve it. I found a sheet of 6mm plywood that I decided would be a great fit so stay tuned for blog #2 when we see the results of our work so far.
Top Comments