element14 Community
element14 Community
    Register Log In
  • Site
  • Search
  • Log In Register
  • Members
    Members
    • Benefits of Membership
    • Achievement Levels
    • Members Area
    • Personal Blogs
    • Feedback and Support
    • What's New on element14
  • Learn
    Learn
    • Learning Center
    • eBooks
    • STEM Academy
    • Webinars, Training and Events
    • Learning Groups
  • Technologies
    Technologies
    • 3D Printing
    • FPGA
    • Industrial Automation
    • Internet of Things
    • Power & Energy
    • Sensors
    • Technology Groups
  • Challenges & Projects
    Challenges & Projects
    • Design Challenges
    • element14 presents
    • Project14
    • Arduino Projects
    • Raspberry Pi Projects
    • Project Groups
  • Products
    Products
    • Arduino
    • Dev Tools
    • Manufacturers
    • Raspberry Pi
    • RoadTests & Reviews
    • Avnet Boards Community
    • Product Groups
  • Store
    Store
    • Visit Your Store
    • Choose Another Store
      • Europe
      •  Austria (German)
      •  Belgium (Dutch, French)
      •  Bulgaria (Bulgarian)
      •  Czech Republic (Czech)
      •  Denmark (Danish)
      •  Estonia (Estonian)
      •  Finland (Finnish)
      •  France (French)
      •  Germany (German)
      •  Hungary (Hungarian)
      •  Ireland
      •  Israel
      •  Italy (Italian)
      •  Latvia (Latvian)
      •  
      •  Lithuania (Lithuanian)
      •  Netherlands (Dutch)
      •  Norway (Norwegian)
      •  Poland (Polish)
      •  Portugal (Portuguese)
      •  Romania (Romanian)
      •  Russia (Russian)
      •  Slovakia (Slovak)
      •  Slovenia (Slovenian)
      •  Spain (Spanish)
      •  Sweden (Swedish)
      •  Switzerland(German, French)
      •  Turkey (Turkish)
      •  United Kingdom
      • Asia Pacific
      •  Australia
      •  China
      •  Hong Kong
      •  India
      •  Korea (Korean)
      •  Malaysia
      •  New Zealand
      •  Philippines
      •  Singapore
      •  Taiwan
      •  Thailand (Thai)
      • Americas
      •  Brazil (Portuguese)
      •  Canada
      •  Mexico (Spanish)
      •  United States
      Can't find the country/region you're looking for? Visit our export site or find a local distributor.
  • Translate
  • Profile
PiCasso Design Challenge
  • Challenges & Projects
  • Design Challenges
  • PiCasso Design Challenge
  • More
  • Cancel
PiCasso Design Challenge
Blog PiCasso Design Challenge - PiMassive - Blog #5 - 3D Printing the Parts pt2
  • Blog
  • Forum
  • Documents
  • Events
  • Mentions
  • Sub-Groups
  • Tags
  • More
  • Cancel
  • New
Blog Post Actions
  • Subscribe by email
  • More
  • Cancel
  • Share
  • Subscribe by email
  • More
  • Cancel
Group Actions
  • Group RSS
  • More
  • Cancel
Engagement
  • Author Author: gam3t3ch
  • Date Created: 31 May 2019 5:49 AM Date Created
  • Views 213 views
  • Likes 3 likes
  • Comments 0 comments
  • picasso design challenge
  • raspberry pi 3 b+
Related
Recommended

PiCasso Design Challenge - PiMassive - Blog #5 - 3D Printing the Parts pt2

gam3t3ch
gam3t3ch
31 May 2019

3D Printing is completed!


image


So I thought.....


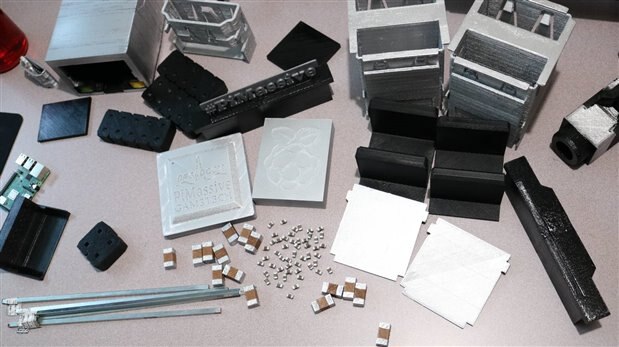
Once I had everything printed I laid it all out and thought I had everything printed.  Somewhere along the road I should have printed out a lot more parts so once I started finally assembling the unit and noticed this I had to get them printed.


So the grand totals for the printed parts are as follows.


Total Print time:  404hrs 34min 

Total amount of Filament used:  1,041,084mm

Total Prints Completed:  43


image


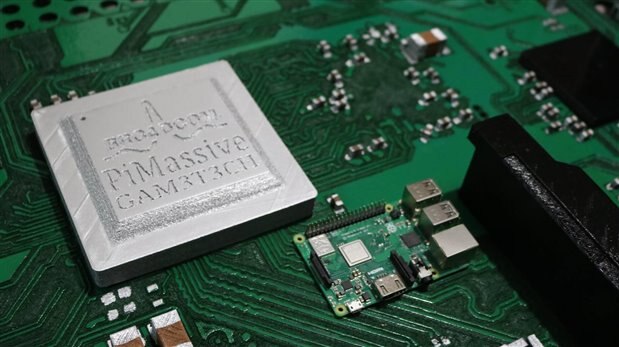
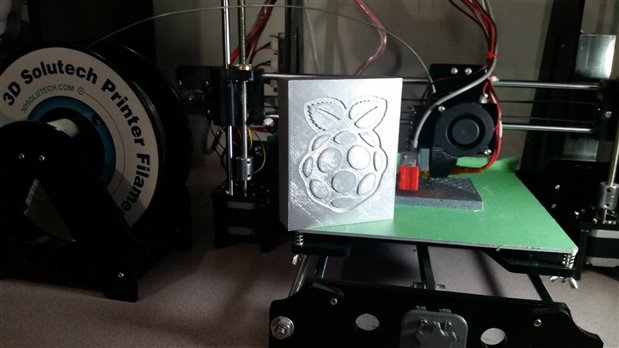
On this one I Wasn't really happy with the result of CPU on the unit will probably print out another later on.  First time using a .8mm nozzle on my printer.

I managed to get a hole in the nozzle of my .4mm and had to finish up the last of my prints was lucky and had a friend that I gave my old printer too same model I replaced it with and I knew he had some extra nozzles but no .4mm so I decided to give the .8mm a go.


image

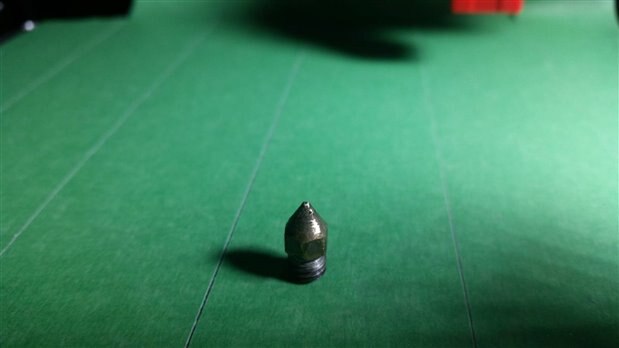
Above is the .4mm with the mystery hole in it just down on the right a few mm.  Not sure how it happened I sanded it to make it more visible to see.  It was never damaged by my printer leveling or hit at random so maybe just a dud.


I certainly need to tweak my settings a bit I did however get a few things to print silky smooth with the .8mm but think that was just a fluke


image


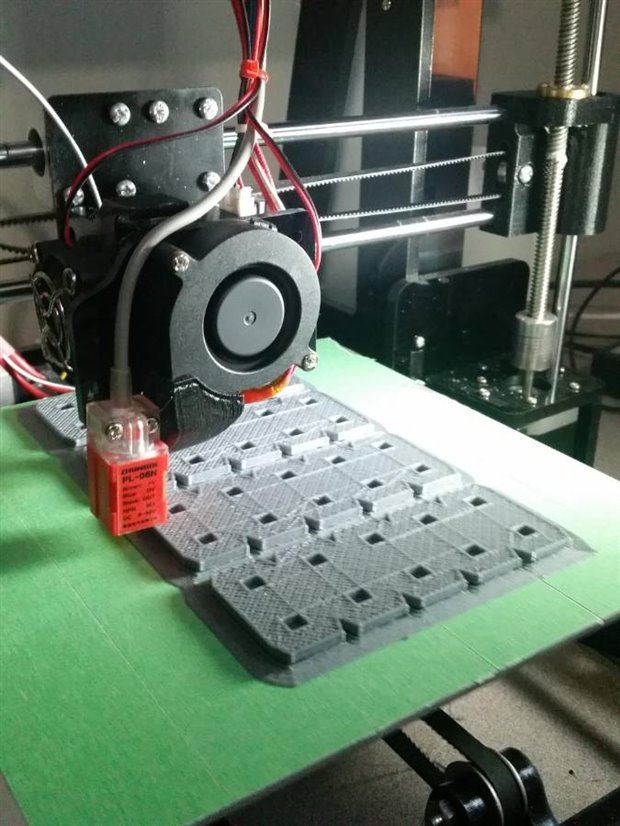
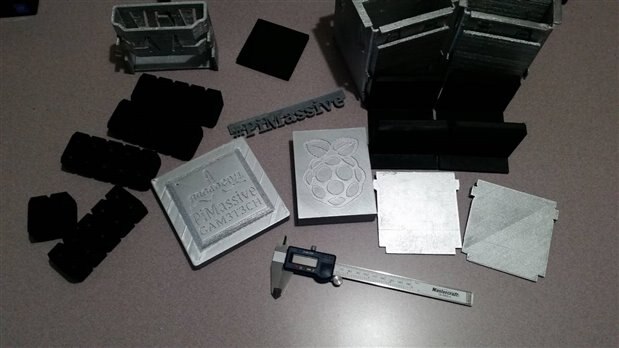
I had to print the GPIO Into 4 parts and after a failed attempt finally managed to get them printed.  Mind you when this was taken I was 100% unsure of how I was going to get the GPIO to actually work but I knew I wanted minimum the GPIO to be working by the time I completed the project and working great.  Will discuss that more in the next post while putting it together.


Here is a few more photos of the printed parts and hope your enjoying my adventure so far.


image

image


See you in the next Blog post.

  • Sign in to reply
element14 Community

element14 is the first online community specifically for engineers. Connect with your peers and get expert answers to your questions.

  • Members
  • Learn
  • Technologies
  • Challenges & Projects
  • Products
  • Store
  • About Us
  • Feedback & Support
  • FAQs
  • Terms of Use
  • Privacy Policy
  • Legal and Copyright Notices
  • Sitemap
  • Cookies

An Avnet Company © 2023 Premier Farnell Limited. All Rights Reserved.

Premier Farnell Ltd, registered in England and Wales (no 00876412), registered office: Farnell House, Forge Lane, Leeds LS12 2NE.

ICP 备案号 10220084.

Follow element14

  • Facebook
  • Twitter
  • linkedin
  • YouTube