The Save the Bees challenge has provided the development kit to the selected participant with two development boards. They are Arduino Nicla vision and Arduino MKR WAN 1310. These development platforms are quite useful in the project ideas that one may have to help save the bees. The Nicla vision is capable for running ML models at the edge as it has quite fast and efficient dual core STM32 MCU running at it’s core along with sensors such as microphone, camera, distance sensor and IMU in such a tiny form factor. It is also fully supported by edge-impulse machine learning platform to train and upload ML model fast onto the device. On top of all these features, it has wireless connectivity such as BLE and WiFi. The MKR 1310 on the other hand has LoRa communication. It has LoRa module along with MKR form factor so that more MKR form factor boards can be stacked together. The board can be used to send small amount of data to LoRaWAN network server such as the TTN.
To get started with Arduino MKR 1310 I followed the official Arduino guide which has mentioned all the required steps of how to connect to The Things Network. The Things Network is LoRaWAN network server which handles the traffic to and from LoRaWAN connected devices.
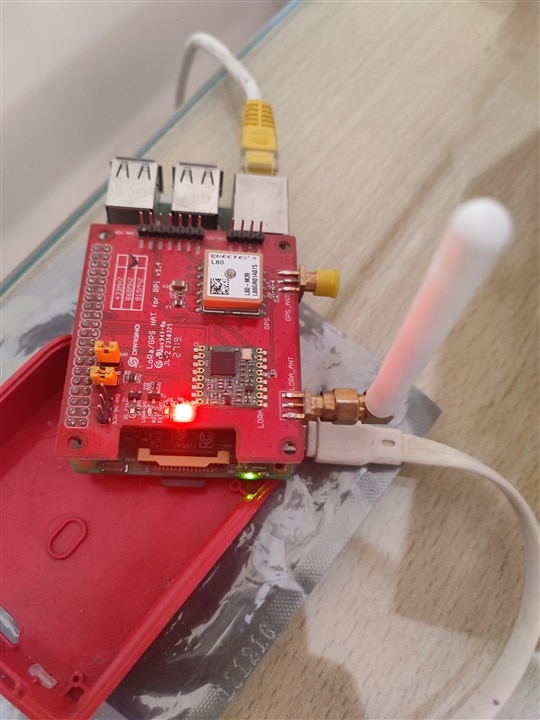
So for Arduino MKR 1310 to be connected to the TTN I will first need to have a LoRaWAN gateway nearby so that all the data from LoRa devices can be routed to the TTN network. For this, I have decided to have a single channel gateway HaT for Raspberry Pi which has SX137x module communicating to the Raspberry Pi over SPI interface and the Raspberry Pi runs an open-source program such as packet forwarder to route data received for LoRa node to the TTN. It is recommended though that one uses a LoRa gateway with eight channels for better communication and no data loss. Also to note here is that LoRaWAN network has some limitation. For example, to send data upstream to the network via eight channel LoRa Gateway it can receive data from up to eight different nodes at the same time. While receiving data from the network it cannot transmit data upstream at the same time. If the network is transmitting data for the 10% of the time, then it can not receive the data from upstream.

The above image shows that the HaT is installed on Raspberry Pi model 3b. The next part is to configure the raspberry pi and install the required software to start communicating with TTN network. For this we will first create an account on the TTN and register a gateway. The TTN has community edition which is free for use. One can register upto 10 gateways and 10 nodes via this plan. Gateway registration requires some work on both the sides. ie. TTN cloud and Raspberry Pi. The following is the list of required hardware to setup Gateway for communication.
1> RaspberryPi with internet connection & Dragino LoRa HaT
2> TTN community account
On the TTN side first register the gateway via console. While doing so save the global address of the TTN network server. In most cases it will be a line with thethings.network ending. This address is required to send data from Raspberrypi gateway to the TTN server. TTN will also ask for gateway ID number, which we can get from raspberrypi by executing some commands. The next section lists all the commands for getting required details from the raspberrypi.
On the raspberryPi installation of packaet forwarder software is required to configure and start our gateway.
$ git clone https://github.com/dragino/dual_chan_pkt_fwd
$ cd dual_chan_pkt_fwd
Before doing anything it is required to set the global configuration parameters in global_conf.json file. The things which are needed be specified correctly is frequncy 1 and frequency 2. These are the parameters dependent on the region one is located. For India it is between ~865-867 MhZ.
So “freq” will be 865000000 and “freq_2” will be 867000000.
The sprad_factor should be set to 7
The address is the one we copied from the TTN network before which needs to be copied in this file.
The port is a number which specify the interface on which communication happens. I have set it to default that is 1700.
Finally, we need to save and close the file.
After that executing following command will start the gateway and communication will happen to the TTN.
$make
$sudo ./dual_chan_pkt_fwd
The last command will list the gateway ID for us to register online on TTN network.

If the above steps are followed correctly data will show up on the TTN network every few seconds. Which means our gateway is connected to the TTN and we now can add more nodes to communicate with the server.

