


In this blog post I will show how to connect a camera module to Raspberry Pi, configure it and take image using a Python program. Before getting started let see what type of camera module available for Raspberry Pi and which should work better for our project. The Raspberry Pi Foundation officially released its first add-on board: the Raspberry Pi camera module but it is of course possible to access a camera feed on the Raspberry Pi using a suitable webcam. In this project instead of using a webcam I will use a camera module because it is compact an will take less space compare to webcam.
Available Camera Modules
There are now several official Raspberry Pi camera modules. The original 5-megapixel model was released in 2013, it was followed by an 8-megapixel Camera Module 2 which was released in 2016. The latest camera model is the 12-megapixel Camera Module 3 which was released in 2023. The original 5MP device is no longer available from Raspberry Pi.
All of these cameras come in visible light and infrared versions, while the Camera Module 3 also comes as a standard or wide FoV model for a total of four different variants.
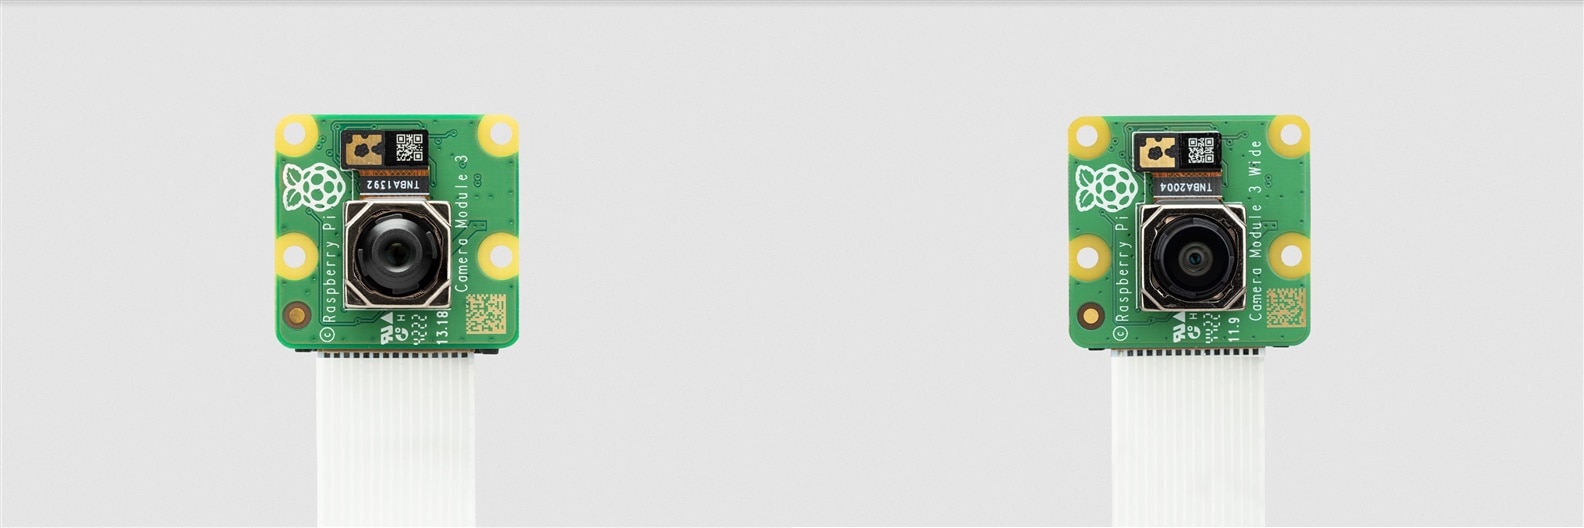
Camera Module 3 (left) and Camera Module 3 Wide (right)
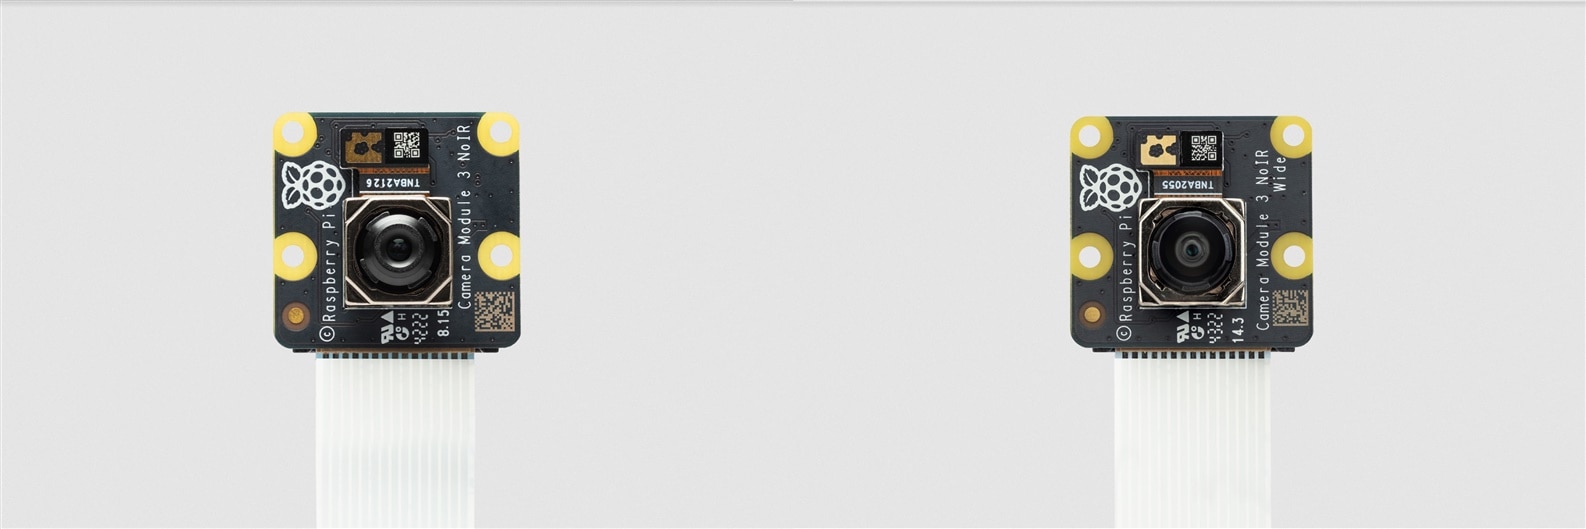
Camera Module 3 NoIR (left) and Camera Module 3 NoIR Wide (right)
Without these official version cheaper version is also available. All the pi Camera module is a camera that can be used to take pictures and high definition video.
Installing a Raspberry Pi Camera
Warning: Cameras are sensitive to static. Earth yourself prior to handling the PCB. A sink tap or similar should suffice if you don’t have an earthing strap.
Raspberry Pi Board has CSI (Camera Serial Interface) interface to which we can attach the PiCamera module directly. Regardless of the chosen camera, the setup process always works similarly, as long as the camera is supported by the Raspberry Pi.
To attach the camera module to the Raspberry Pi, first make sure your Raspberry Pi is completely disconnected from any power source. Before removing the camera module from its grey anti-static bag, make sure you touch a radiator, a tap, or any other grounded metal object to get rid of any static that you might have built up.
The camera board CSI connector is located between the Ethernet and HDMI ports on the Model B Raspberry Pi. The Ethernet port does not exist on a Model A board, but the camera connector is in the same place.
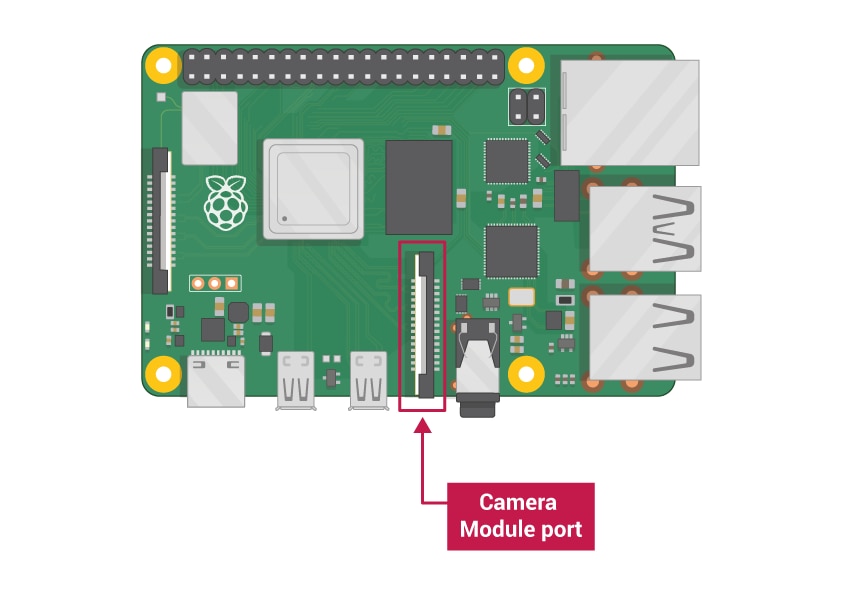
Open the connector by pulling the tabs on either side of the connector upwards and towards the Ethernet port. You should then be able to insert the ribbon cable on the camera module (with silver connectors facing towards the HDMI port) into the connector. Hold the cable firmly in place, and close the CSI connector by pushing the top part towards the HDMI port and down. It should click into place nicely and hold the camera ribbon cable securely.

Raspberry Pi will look like following after installing the camera.

Raspberry Pi has created a video to illustrate the process of connecting the camera. Although the video shows the original camera on the original Raspberry Pi 1, the principle is the same for all camera boards:
Setting Up the Camera
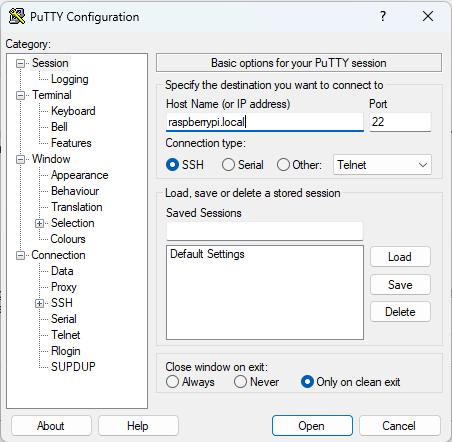
I hope you already installed the camera. The next step is to configure the Raspberry Pi to enable the camera and test the camera. As I am using the Raspberry Pi without any monitor I will configure the camera from the terminal. By default camera is disabled in Raspberry Pi. We need to enable it using the following sudo raspi-config from the terminal. For accessing raspberry pi remotely I am using PuTTY like before.
Then I run the following command from the terminal after login in to the terminal.
$ sudo raspi-config
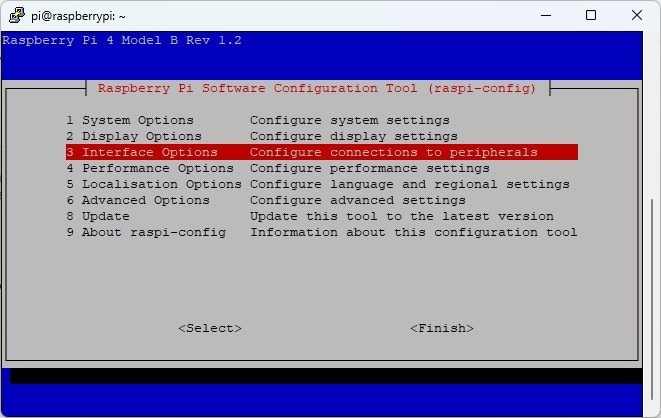
A new configuration window will open. I choose Interface Options by pressing down arrow from the keyboard and go inside the option by pressing Enter.
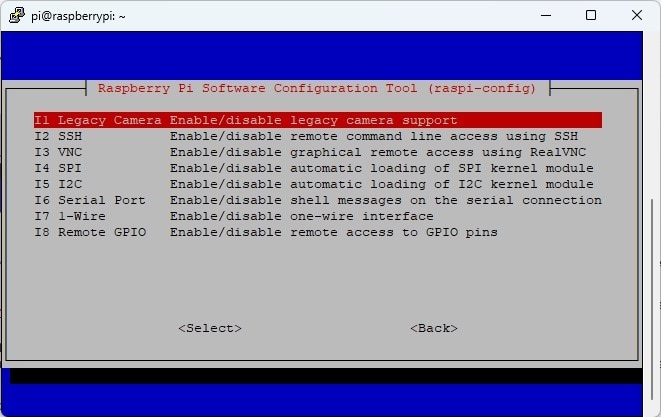
Then I selected Legacy Camera option and hit enter.
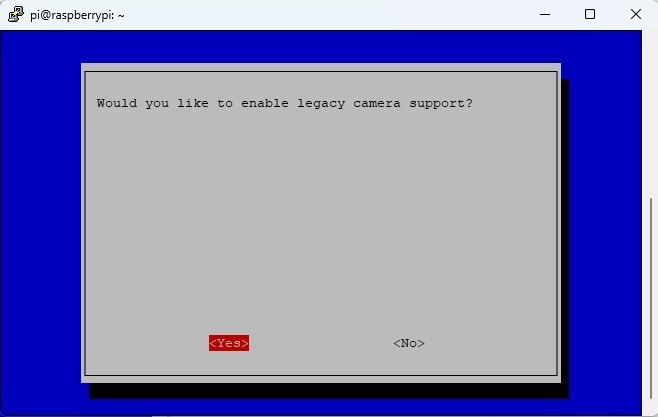
I selected Yes and hit enter again.
Finally, I completed the setup by entering the Finish option.
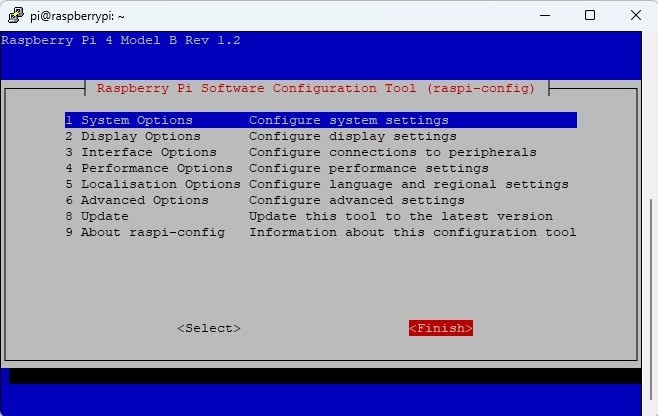
By finishing the configuration it is better to reboot the Pi. Once you reboot, the camera module will be enabled and ready to start snapping pictures!
The basic commands are raspivid and raspistill, which (as the names suggest) are for capturing video and still images, respectively. Each of these commands can accept a number of parameters after them. Several parameters are available, but the most basic are:
-oor-output, for setting the output filename-tor-timeout, for setting the time in milliseconds for which a preview will display (the default is 5 seconds, and when usingraspistill, it will capture the last frame of the preview and save it to the specified filename. When usingraspivid, the-tparameter defines the capture time.)
Therefore, to display a 5 second preview and then save a jpeg picture called test.jpeg, the command would be:
$ raspistill -o test.jpeg
To take a 30-second video and save it in h264 format, use the command:
$ raspivid -o test.h264 -t 30000
By adding different options, you can set the size and look of the image the raspistill command takes.
- For example, add
-hand-wto change the height and width of the image:
$ raspistill -o Desktop/image-small.jpg -w 640 -h 480
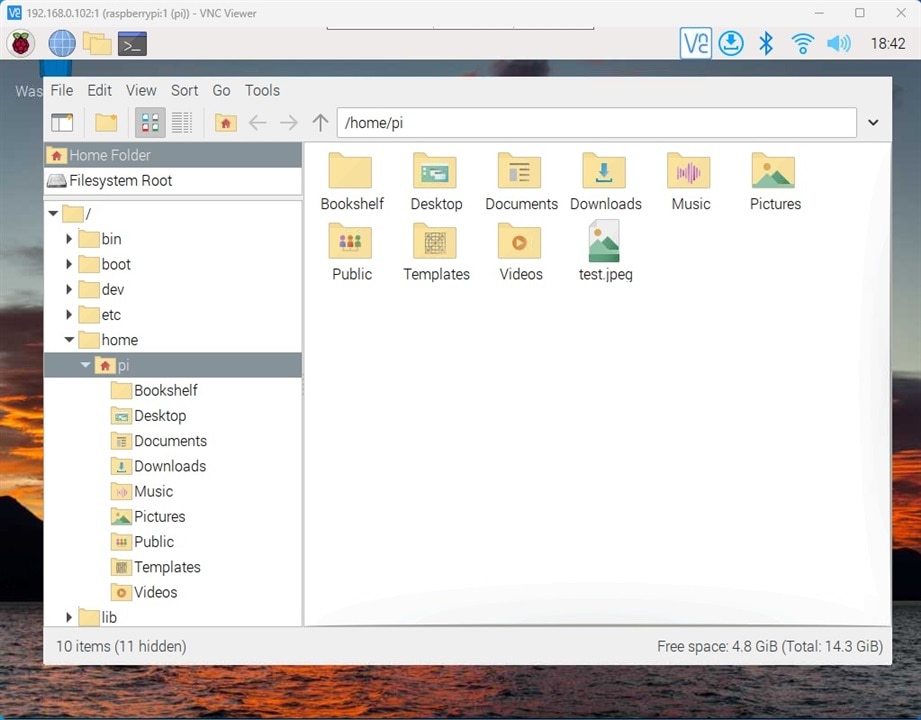
Any of the above command will take a picture and store it in /home/pi directory. It is the default file location folder. I got the test.jpeg as shown in the image below.
Using Python to take Picture
We can control Raspberry Pi Camera using Python. That will give us more flexibility and we can create amazing project using camera and python program. We need to use picamera to access the camera using python. This library is preinstalled with the OS. If the picamera library is not installed for any reason you can install it by the following command:
sudo apt install python3-picamera
Now, for accessing Pi Camera we need to create a Python script. We can do it in different way. Either we can use SSH terminal, VNC or we can make the file to our host PC and then transfer the file through WinSCP file transfer client.
As we are using SSH lets create a Python file from terminal. I am using nano text editor here. You can use your favorite text editor instead of nano. To create a Python file and open it with nano use the command bellow:
sudo nano camera_script.py
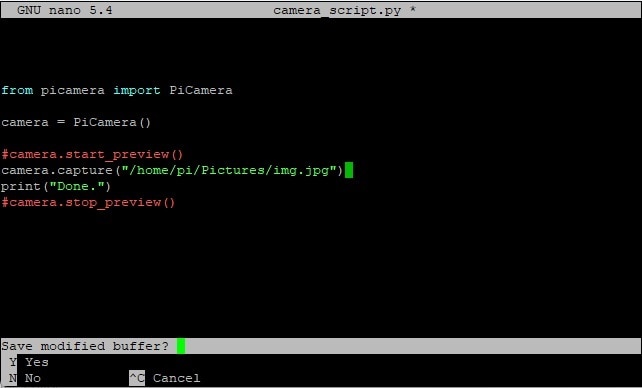
Now paste the following code to the file
from picamera import PiCamera

camera = PiCamera()
#camera.start_preview()
camera.capture("/home/pi/Pictures/img.jpg") print("Done.")
#camera.stop_preview()
Now press CTRL+X from the keyboard to close the script. It will ask to save the file. Just press y from the keyboard.
Your file is now ready to run. Before run the code let understand the code line by line.
First, we import the PiCamera class from the picamera module. We are going to use that class to get access to the physical camera.
from picamera import PiCamera
Then we create an object from the PiCamera class. When we create this object, the camera will start initializing itself.
camera = PiCamera()
You can use the capture() function from the camera object to take a picture. You will have to give at least one argument: the path and name of the file to store the picture. Here we store the picture in the Pictures/ directory of the pi user, which is the default user on Raspberry Pi OS. Don’t forget the extension (most common: “.jpg”, you can also use “.png”), this will be helpful if you want to share and open the picture in Windows for example.
camera.capture("/home/pi/Pictures/img.jpg")
Note: the camera preview only works when a monitor is connected to your Raspberry Pi. If you are using remote access (such as SSH or VNC), you won’t’ see the camera preview. As, I am using SSH, I keep commented the preview command.
Now, run the code from the terminal using the following command:
sudo python3 camera_script.py
If everything goes fine you will get done message printed in the terminal.

For getting details about image setting please refer to the official getting started with camera page here.