In this blog, I will show you step by step how to connect each of the sensors that make up Pi-Sense. To do this, you will need the following:
Materials
- Raspberry Pi 4 Model B
- Protoboard
- LCD I2C display
- Temperature and humidity sensor
- Motion sensor
- Flame sensor
- Rain sensor
- Active buzzer
- T-cobbler
Connecting the Sensors
Connecting the sensors is quite easy. I created the diagrams in Fritzing for easy understanding.
Temperature Sensor
The temperature and humidity sensor is a widely used device for measuring temperature and humidity in electronic projects. It is a cost-effective and easy-to-use option. It can measure temperature in a range of 0 to 50 degrees Celsius and relative humidity in a range of 20% to 90%. However, it's important to note that this sensor has limited accuracy, with a temperature measurement accuracy of ±2 degrees Celsius and a relative humidity measurement accuracy of ±5%.
This sensor uses a single-wire communication protocol, which means it only requires one digital pin for transmitting and receiving data. This makes it easy to integrate into different projects and platforms. Additionally, it operates on a power supply of 3.3 to 5V DC, making it compatible with a wide variety of microcontrollers and development boards. Below, I'll show you how I connected it to my Raspberry Pi.

Motion Sensor
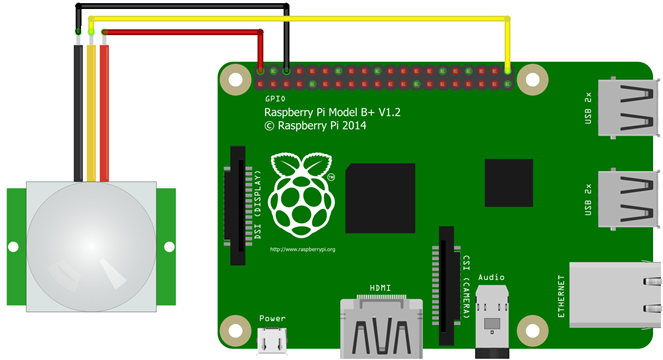
The Passive Infrared (PIR) motion sensor is a component used to detect the presence of motion within its coverage area. PIR relies on detecting changes in infrared radiation emitted by bodies as heat. The PIR sensor consists of an optical lens, a sensor element, and a processing circuit. When a moving object enters the sensor's field of view, it causes changes in the pattern of infrared radiation, which is captured by the sensor element. This change is processed by the circuit, which generates an output signal when motion is detected.
The motion sensor is widely used in security systems, automatic lighting, and home automation. It can be integrated with alarm systems to trigger alarms when unwanted motion is detected. It is also used to automatically turn on and off lights when a person enters or leaves a room.
Flame Sensor
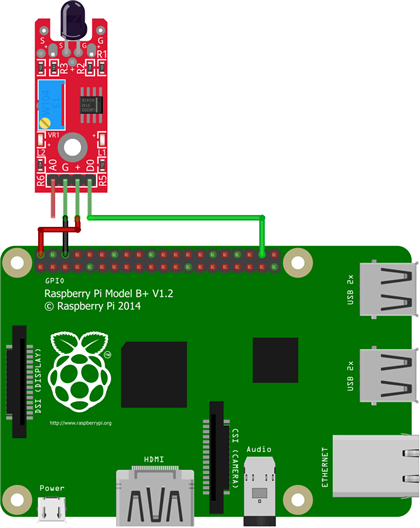
The flame sensor is a device used to detect the presence of fire or flames. It utilizes an optical receiver that is sensitive to the infrared radiation emitted by the flame. When the radiation reaches the sensor, it generates an electrical signal indicating the presence of fire.
Flame sensors are designed to be highly sensitive to the infrared radiation emitted by flames, allowing them to reliably detect the presence of fire.
Rain Sensor
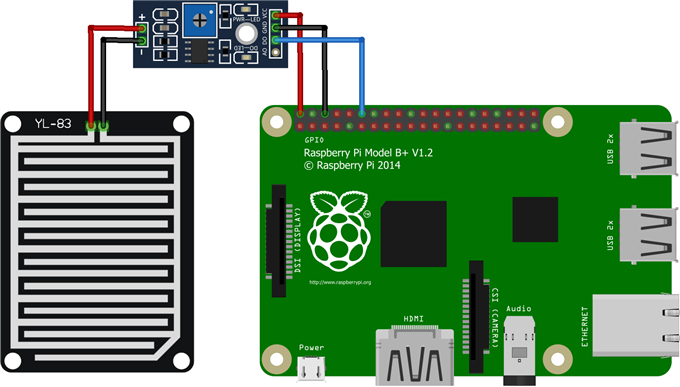
The rain sensor is a device designed to detect the presence and quantity of rainfall. It consists of a plate with exposed conductive elements that corrode when they come into contact with water. By measuring the resistance between these elements, the sensor determines whether it is raining or not. It is compatible with microcontrollers such as Arduino and Raspberry Pi. This sensor is widely used in weather monitoring projects, automatic irrigation systems, and home automation.
LCD display
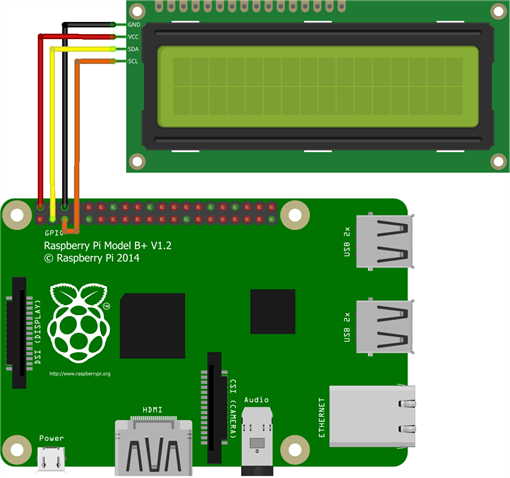
To show the important data, we will connect an I2C LCD screen as shown in the image. I2C LCD screens are devices that combine an alphanumeric or graphic LCD display with an integrated I2C chip. The I2C protocol allows bidirectional communication between the microcontroller and the display using only two wires, simplifying the connection and freeing up pins on the microcontroller. These screens are easy to use and can be programmed to display text, numbers, and graphics. They are widely used in electronics and robotics projects to visualize data and messages in a clear and readable manner.
Buzzer
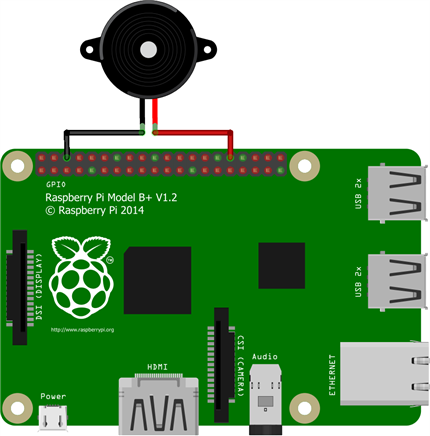
Finally, we connect the buzzer, which will serve as an alarm.
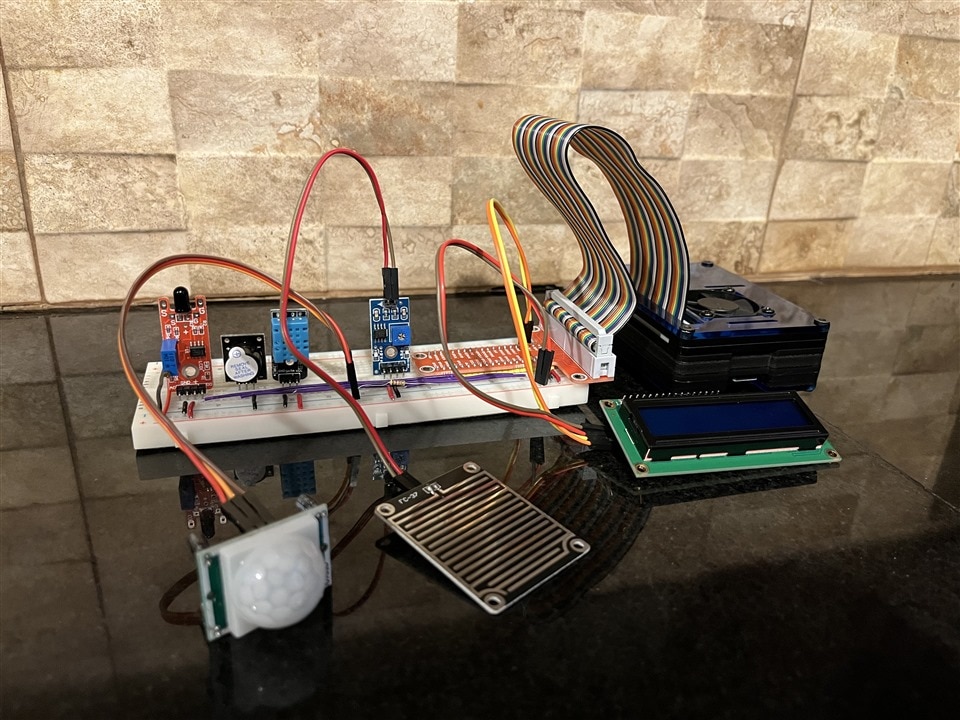
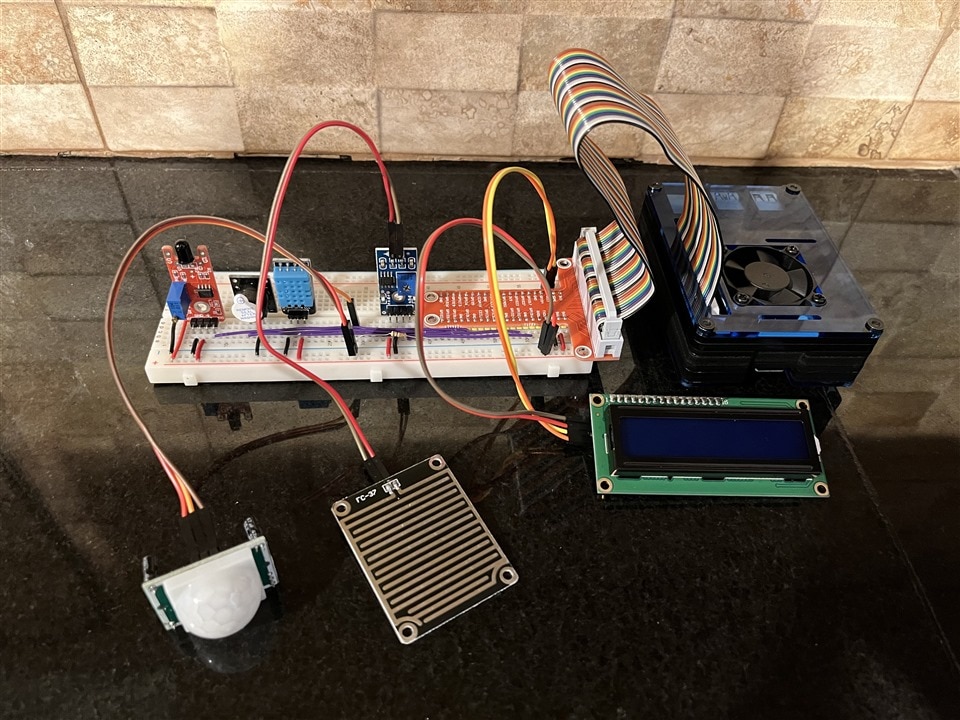
To make the project look more organized, I acquired a T-cobbler and connected it to a breadboard. The final result was this:
Setup
Now it's time to bring the project to life. For that, we will use Thonny, an integrated development environment (IDE) for Python programming. It is a tool designed to facilitate writing, debugging, and running Python programs, especially for beginners and students.
To test that everything is working correctly, I wrote this code. Of course, it will be subject to changes as we progress with the project.
import Adafruit_DHT
from RPi_GPIO_i2c_LCD import lcd
from gpiozero import MotionSensor
from gpiozero import Buzzer
from gpiozero import Button
from time import sleep

sensor = Adafruit_DHT.DHT11
LCD = lcd.HD44780(0x27)
pir = MotionSensor(21)
flame = Button(12)
rain = Button(18)
zumb = Buzzer(20)
zumb.off()

humidity, temperature = Adafruit_DHT.read_retry(sensor, 23)

while True:

    zumb.off()
    LCD.set("  Temp: " + str (temperature) + chr (223) + "C  ", 1)
    LCD.set("Humidity: " + str (humidity) + " %", 2)
    print("Temperature: " + str (temperature) + "*C" + "  Humidity: " + str (humidity) + "%")

    if rain.is_pressed:
        LCD.set("      Rain      ", 1)
        LCD.set("    detected    ", 2)
        zumb.on()
    else:
        if flame.is_pressed:
            pir.wait_for_motion()
            LCD.set("    Movement    ", 1)
            LCD.set("    detected    ", 2)
            zumb.on()
        else:
            LCD.set("      Flame     ", 1)
            LCD.set("    detected!   ", 2)
            zumb.on()
    sleep(1.5)
Please note that this code assumes you have installed the required libraries (Adafruit_DHT) for the DHT sensor and have imported them correctly. Make sure to modify the pin numbers according to your specific connections.
This code reads the temperature and humidity from the DHT sensor, checks if it is raining using the rain sensor, and detects motion using the motion sensor. If motion is detected, it activates the buzzer as an alarm. The program continuously loops and provides the readings and status updates.
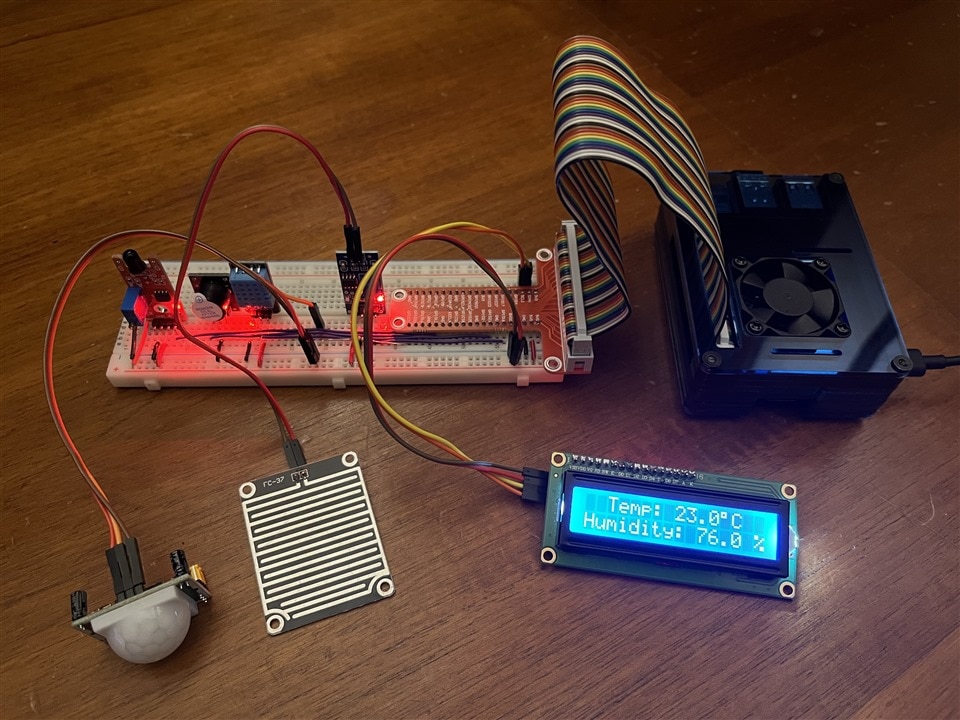
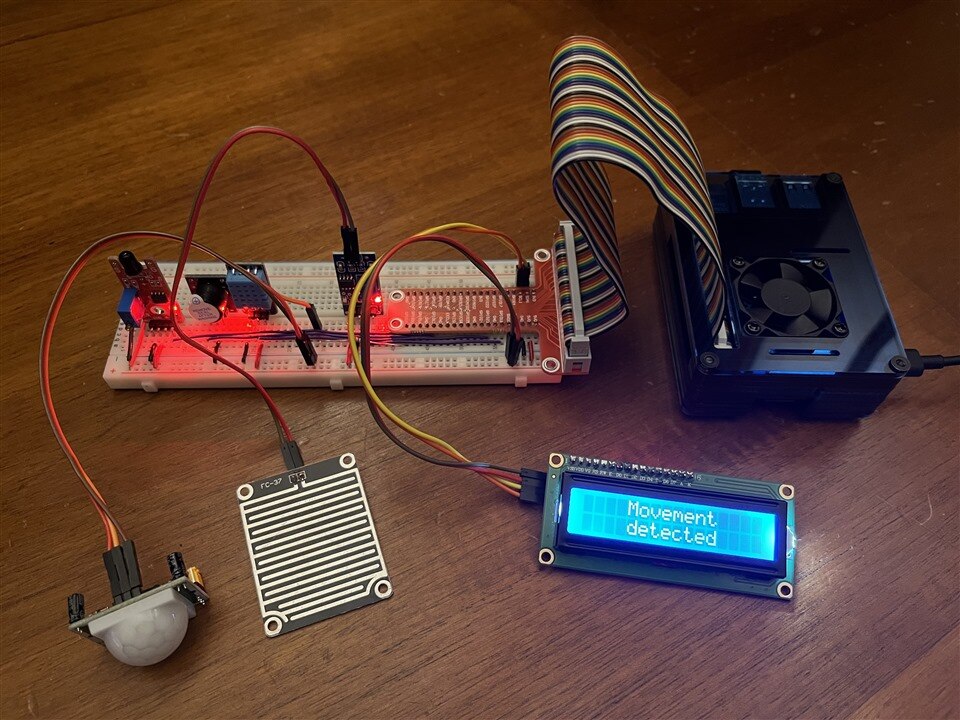
After running the program, the project should look like this:
As the next step, we will create a graphical user interface (GUI) that allows us to visualize the sensor data in a more appealing way
