element14 Community
element14 Community
    Register Log In
  • Site
  • Search
  • Log In Register
  • About Us
  • Community Hub
    Community Hub
    • What's New on element14
    • Feedback and Support
    • Benefits of Membership
    • Personal Blogs
    • Members Area
    • Achievement Levels
  • Learn
    Learn
    • Ask an Expert
    • eBooks
    • element14 presents
    • Learning Center
    • Tech Spotlight
    • STEM Academy
    • Webinars, Training and Events
    • Learning Groups
  • Technologies
    Technologies
    • 3D Printing
    • FPGA
    • Industrial Automation
    • Internet of Things
    • Power & Energy
    • Sensors
    • Technology Groups
  • Challenges & Projects
    Challenges & Projects
    • Design Challenges
    • element14 presents Projects
    • Project14
    • Arduino Projects
    • Raspberry Pi Projects
    • Project Groups
  • Products
    Products
    • Arduino
    • Avnet Boards Community
    • Dev Tools
    • Manufacturers
    • Multicomp Pro
    • Product Groups
    • Raspberry Pi
    • RoadTests & Reviews
  • Store
    Store
    • Visit Your Store
    • Choose another store...
      • Europe
      •  Austria (German)
      •  Belgium (Dutch, French)
      •  Bulgaria (Bulgarian)
      •  Czech Republic (Czech)
      •  Denmark (Danish)
      •  Estonia (Estonian)
      •  Finland (Finnish)
      •  France (French)
      •  Germany (German)
      •  Hungary (Hungarian)
      •  Ireland
      •  Israel
      •  Italy (Italian)
      •  Latvia (Latvian)
      •  
      •  Lithuania (Lithuanian)
      •  Netherlands (Dutch)
      •  Norway (Norwegian)
      •  Poland (Polish)
      •  Portugal (Portuguese)
      •  Romania (Romanian)
      •  Russia (Russian)
      •  Slovakia (Slovak)
      •  Slovenia (Slovenian)
      •  Spain (Spanish)
      •  Sweden (Swedish)
      •  Switzerland(German, French)
      •  Turkey (Turkish)
      •  United Kingdom
      • Asia Pacific
      •  Australia
      •  China
      •  Hong Kong
      •  India
      •  Korea (Korean)
      •  Malaysia
      •  New Zealand
      •  Philippines
      •  Singapore
      •  Taiwan
      •  Thailand (Thai)
      • Americas
      •  Brazil (Portuguese)
      •  Canada
      •  Mexico (Spanish)
      •  United States
      Can't find the country/region you're looking for? Visit our export site or find a local distributor.
  • Translate
  • Profile
  • Settings
Sci-Pi Design Challenge
  • Challenges & Projects
  • Design Challenges
  • Sci-Pi Design Challenge
  • More
  • Cancel
Sci-Pi Design Challenge
Blog Blog #4 testing the electronics almost done
  • Blog
  • Forum
  • Documents
  • Leaderboard
  • Polls
  • Files
  • Members
  • Mentions
  • Sub-Groups
  • Tags
  • More
  • Cancel
  • New
Join Sci-Pi Design Challenge to participate - click to join for free!
  • Share
  • More
  • Cancel
Group Actions
  • Group RSS
  • More
  • Cancel
Engagement
  • Author Author: GustavoMorales
  • Date Created: 26 Jun 2023 7:24 PM Date Created
  • Views 345 views
  • Likes 4 likes
  • Comments 1 comment
  • raspberry pi
  • attiny85
Related
Recommended

Blog #4 testing the electronics almost done

GustavoMorales
GustavoMorales
26 Jun 2023

Last time, I mentioned that I would try to build something on a breadboard to demonstrate its functionality. So, I took on the task of constructing my circuit using local components. It was quite challenging to find the IR2104 driver, and although I was told it could be possible to proceed without it, I realized that if, for any reason, my microcontroller stopped functioning correctly in this configuration without the driver, it would pose a problem. Therefore, I decided to continue with my setup.

To test it and truly showcase my ability to create something homemade, I am aware that it may not be the most professional approach and could potentially introduce a lot of noise. This setup is not intended for error-free projects but rather for beginners, which was my initial idea. Ultimately, I managed to achieve the goal of varying the voltage and being able to connect loads to its output. Based on the transistor's data, we could work with a power of 10W, but as the creator, I would suggest operating it at half the power to avoid straining the power supply and damaging circuit components during testing.

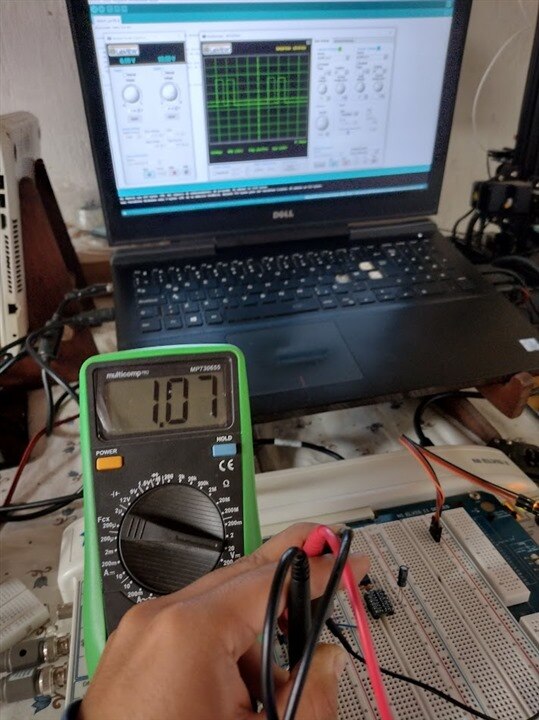
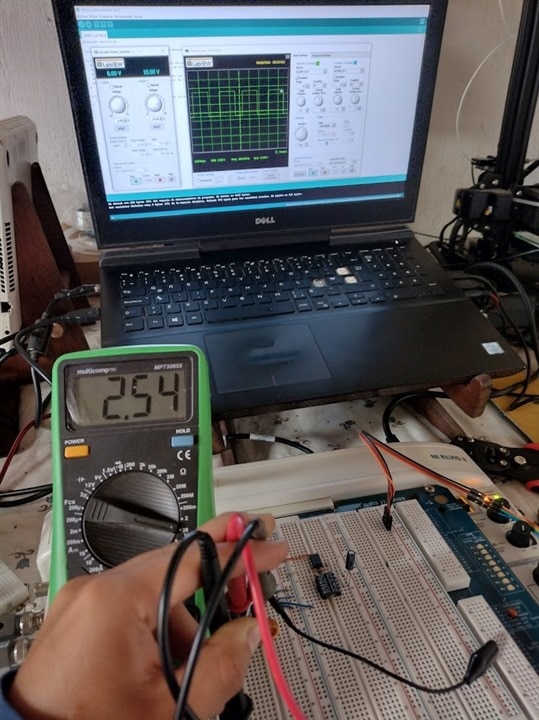
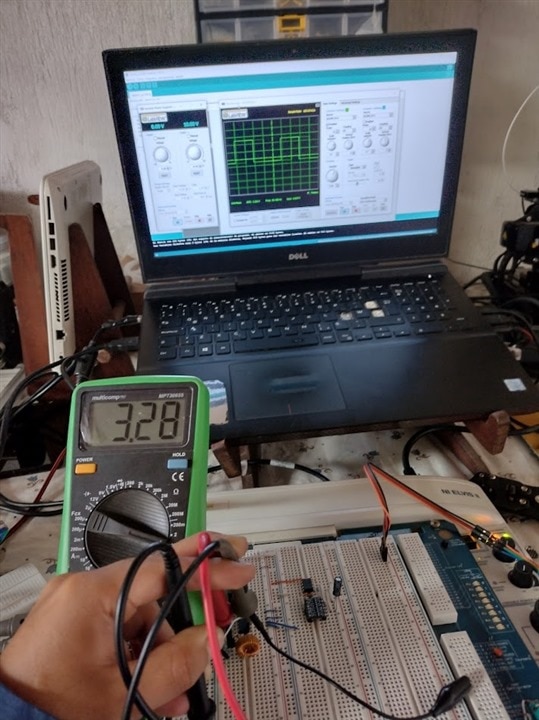
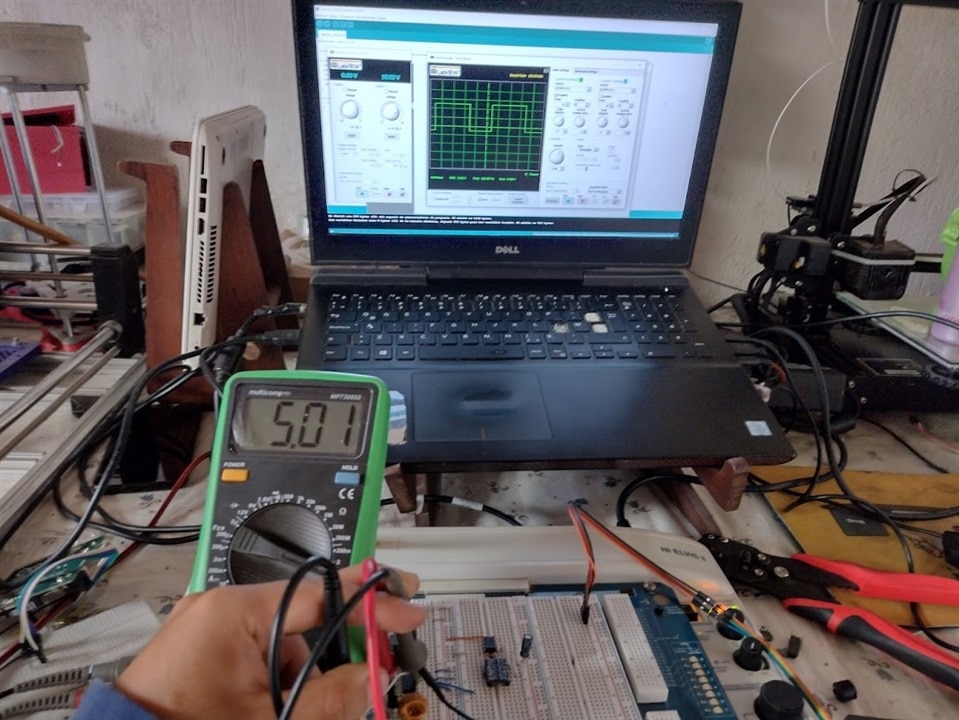
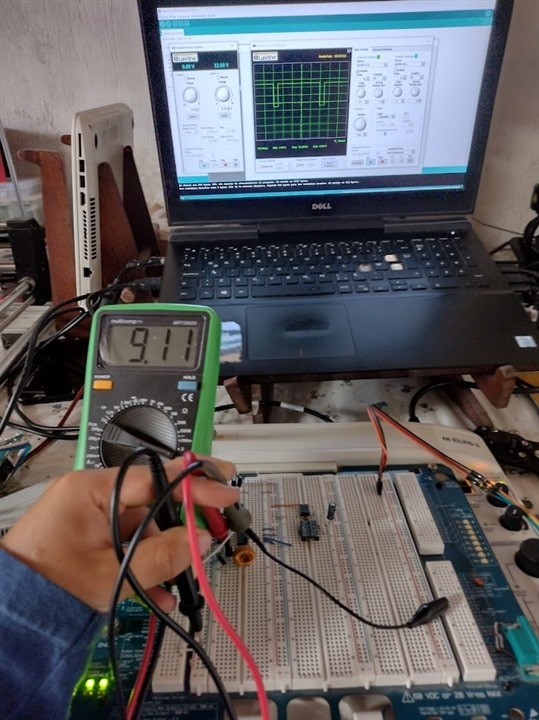
The electronics part was relatively easy and tested, as you can see in the images. As the duty cycle changes, the voltage varies, while I keep the frequency constant. This allows me to control the voltage. I documented the process with the help of an oscilloscope, and you will see that it is indeed possible.

To generate the pulse or PWM signal, I used the ATtiny85 microcontroller, as I mentioned before. Why not an Arduino or a more popular controller? The idea behind this choice was to keep the cost low and ensure a compact size.

{gallery}Testing

image

Duty Cycle 10%

image

Duty Cycle 27%

image

Duty Cycle 36 %

image

Duty Cycle 47%

image

Duty Cycle 90%

I didn't follow any mathematical formula to determine the duty cycle. It was more of a trial-and-error process until I found the optimal values. Programming the ATtiny85 repeatedly to achieve the desired outcome was a time-consuming task, but it was definitely worth it. In the future, I plan to establish these optimal values as fixed values in the graphical user interface (GUI). While the objective was to create a variable power supply, I prefer to set commonly used fixed values in electronics that are safe for operation. However, I will keep them variable.

Finally, I'm sharing the code for the ATtiny85 so that you can see how I varied the duty cycle to obtain the ideal values. I also experimented with different frequencies to find the most suitable and stable one.

#include <avr/io.h>

const int pinPWM = 6;  // Especifica el pin donde deseas generar la señal PWM

void setup() {
  DDRB |= (1 << pinPWM);  // Configura el pin como salida
  TCCR0A = (1 << COM0A1) | (1 << WGM00);  // Modo de salida PWM no invertido
  TCCR0B = (1 << CS01);  // Prescaler de 8
  OCR0A = 39;  // Valor del comparador para obtener una frecuencia de 1 kHz
  OCR0B = 9;  // Valor del comparador para un ciclo de trabajo del 25%
}

void loop() {
  // No se requiere ninguna lógica adicional en el bucle principal
}

In the next and final installment, I hope to have my graphical user interface (GUI) ready and establish communication with the Raspberry Pi to bring this challenge to a conclusion.

  • Sign in to reply
  • DAB
    DAB over 2 years ago

    Nice update.

    • Cancel
    • Vote Up 0 Vote Down
    • Sign in to reply
    • More
    • Cancel
element14 Community

element14 is the first online community specifically for engineers. Connect with your peers and get expert answers to your questions.

  • Members
  • Learn
  • Technologies
  • Challenges & Projects
  • Products
  • Store
  • About Us
  • Feedback & Support
  • FAQs
  • Terms of Use
  • Privacy Policy
  • Legal and Copyright Notices
  • Sitemap
  • Cookies

An Avnet Company © 2025 Premier Farnell Limited. All Rights Reserved.

Premier Farnell Ltd, registered in England and Wales (no 00876412), registered office: Farnell House, Forge Lane, Leeds LS12 2NE.

ICP 备案号 10220084.

Follow element14

  • X
  • Facebook
  • linkedin
  • YouTube