Pollinator Pollster (Powered by Pi)
One week to go until the contest deadline, but things are coming together now - exciting and slightly nerve-wracking in equal measure! In this blog post I'll be showcasing the sensor assembly, and demonstrating some simple tests of its weatherproofing.
Project Plan
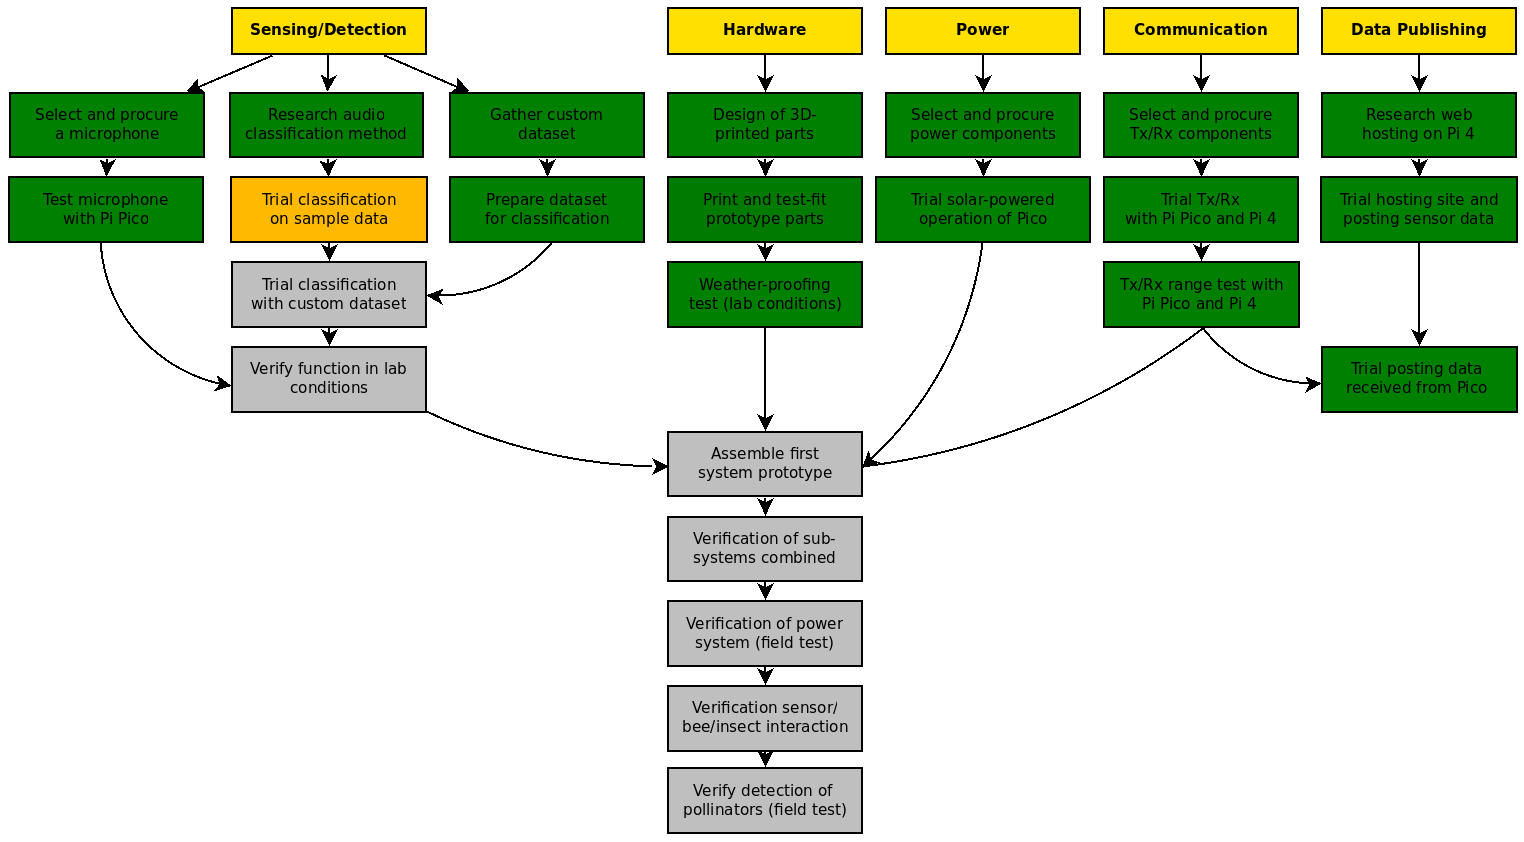
Two more green boxes this time; 'Test microphone with Pi Pico', as I now have the analogue microphone and have tested this, and also 'Weather-proofing test' - the sensor has been 'rained on' and survived (see video below). The two major remaining chunks are getting the audio classification method finalised, and to progressively test the whole system prototype.

Assembly Video
Since completing the printing of the 3D printed parts I've been looking forward to showing you how it goes together, a task which is definitely better done in video rather than words:
Please note you may need to click the 'Watch on YouTube' button if the video doesn't load on this page.
Weather-proofing Tests
The sensor, as it will be used outside, and operational 24/7, it must be able to survive rainfall without malfunction. When doing the 3D design as I discussed in Part 4, I tried to build in various features to ensure this, such as a double wall around the electronics bay, overhangs to deflect dripping water away from the microphone bay, and the waterproof solar panel itself functioning as a mini umbrella for the whole device.
However, the proof of the pudding is as they say in the eating, so I had to give it a try for real! Test 1 contained no electronics in the electronics bay, but only absorbent kitchen paper, which would reveal if it was any water was leaking in, and then Test 2 was to be with the full system. Needless to say, I was a little bit anxious not to see my whole project end at this point! You can see the results in this short video:
Power System Test
With the sensor built, it's also a nice opportunity to test the solar power/battery/power system function by leaving it to run and seeing if it runs out of power through a day/night cycle. The Pi Pico, attached to the HC-12 transceiver, is set to transmit a message every five minutes. Although the new analogue microphone isn't attached, the transceiver is the most power-hungry device so while not fully representative, this test if successful will give me confidence that the power system is sized correctly. As of this evening, the sensor is set up in the garden running under its own power, I will let it run for 24 hours then see if the power was interrupted. I'll know this because the transmit code numbers each message sequentially, so 24 hours of messages every 5 minutes means that the message received after 24 hours should read "No. 288". I'll plug in the matching HC-12 in 24 hours (I have it attached to an Arduino Mega) to my laptop inside every now and then to keep an eye on it - checking it this morning I can see that the sensor did not lose power overnight which is pleasing.
Getting There
There's still a lot to complete at this stage, but the major system elements have come together. My focus this weekend now will be utilising the new analogue microphone and testing the Fast Fourier Transform code, and then if this is successful at classifying bumblebees, integrate this with code for the transmit function, and set up this alongside the Raspberry Pi 4 to ensure data is being passed back to the 'hub' correctly.
Good luck with your projects too as we get to the final stage, and thank you for your support and interest in this project as we've gone along.


.png-1440x400x2.png?sv=2016-05-31&sr=b&sig=NCzR8ZBSTUqkqM%2BC025Y8mBur8Rm30gqlAFFlaICUB4%3D&se=2026-02-17T23%3A59%3A59Z&sp=r&_=alK6vtGXN99oYdBllr69AQ==)
-

dougw
-
Cancel
-
Vote Up
0
Vote Down
-
-
Sign in to reply
-
More
-
Cancel
-

soldering.on
in reply to dougw
-
Cancel
-
Vote Up
0
Vote Down
-
-
Sign in to reply
-
More
-
Cancel
Comment-

soldering.on
in reply to dougw
-
Cancel
-
Vote Up
0
Vote Down
-
-
Sign in to reply
-
More
-
Cancel
Children