


 Intelligent Extra Arm
Arduino MKR WiFi 1010 and Alexa Integration
In the last forum discussion, I explained the project idea. In this forum discussion, I’ll get started with the project implementation and I’ll begin it with the Arduino MKR WiFi1010 board and Alexa integration.
Arduino MKR WiFi 1010 board will control the robotic arm movements. It must know how to move. For that, I’ll be using voice commands captured and processed through Amazon Echo Dot device running virtual assistant, Alexa.
Out of the box when plugged, Arduino MKR WiFi 1010 blinks default/ built-in LED and RGB LED in an alternate fashion. I’ll quickly test the integration which is to be set up through a simple turn ON and OFF of the default/ built-in LED in Arduino MKR WiFi 1010 board based on the voice commands to Alexa. Let’s get started!
Arduino MKR WiFi 1010 setup
- In Arduino Cloud (https://app.arduino.cc/), click on ‘Things’ in the left-hand side menu.
- Then click on ‘+ THING’ button to create a new Thing.
- A new Thing setup page will open. In this,
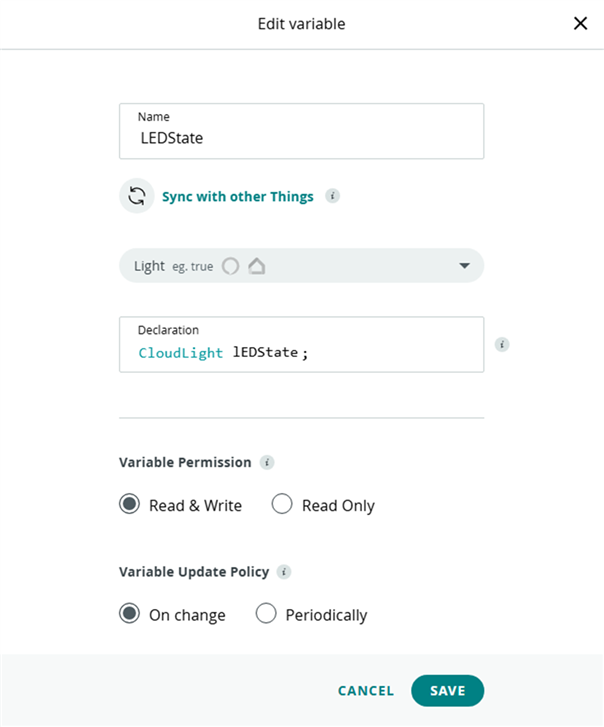
- In ‘Cloud Variables’ heading click on the ‘Add’ button and then enter values as shown in screenshot below and click on ‘Add Variable’ button.
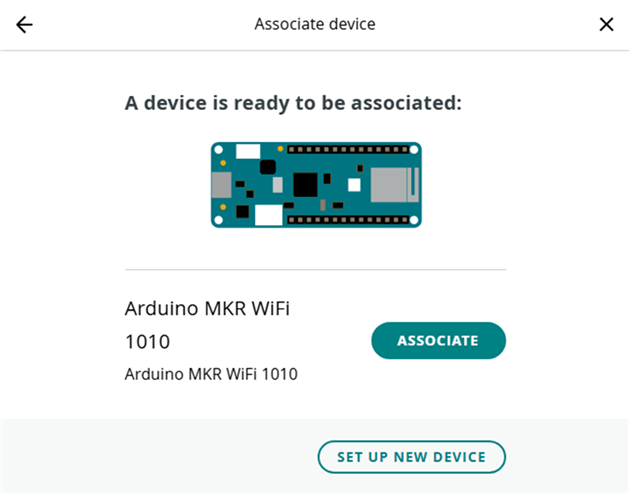
- Under ‘Associated Device’ heading click on the button above ‘Select Device’ text and associate Arduino MKR WiFi 1010 board. Click on ‘Set up new device’ button to create a new device and then associate it.
- Under ‘Network’ heading click on the button above ‘Configure’ text and add your home WiFi network credentials which can be used by Arduino MKR WiFi 1010 board to connect to the Internet. Once done, save to exit.
- In ‘Cloud Variables’ heading click on the ‘Add’ button and then enter values as shown in screenshot below and click on ‘Add Variable’ button.
- In the top right corner, click on the ‘Sketch’ tab to switch to Sketch section.
- Add the following line under the function void setup()
pinMode(LED_BUILTIN, OUTPUT);
- Add the following line under the function void onLEDStateChange()
if(lEDState) {
    digitalWrite(LED_BUILTIN, HIGH); //Turn on the LED
}
else {
    digitalWrite(LED_BUILTIN, LOW); //Turn off the LED
}
- Add the following line under the function void setup()
- Verify and Upload the sketch to Arduino MKR WiFi 1010 board.
Now Arduino setup part is completed. Let’s look into the setup of Alexa.
Alexa setup
- I’m using Amazon Echo Dot device to use virtual assistant, Alexa. However, Alexa can be used through mobile phones or other devices compatible running Alexa.
- To configure, I’ve installed Alexa app on my android phone. Go to ‘More’ tab and then click on ‘Skills & Games’ option. In the search bar, type Arduino and enter. Select the Arduino skill as shown in screenshot below and click on ‘Enable to Use’

- After a while, it would show like ‘1 Other light found and connected’.
- Click on ‘Next’ button and then ‘Skip’ followed by ‘Done’.
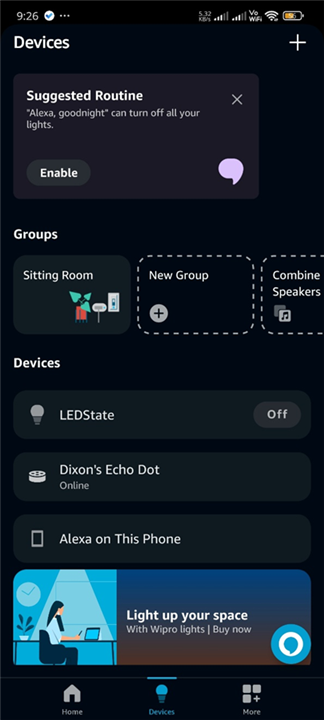
- Under ‘Devices’ both Echo Dot and ‘LEDState’ (Cloud variable created in previous section) would be visible.
- Click on ‘LEDState’ and then you would be presented with a page having power button. Turn it ON and OFF to see it in turn Turn ON and OFF default LED in Arduino MKR WiFi 1010 board.
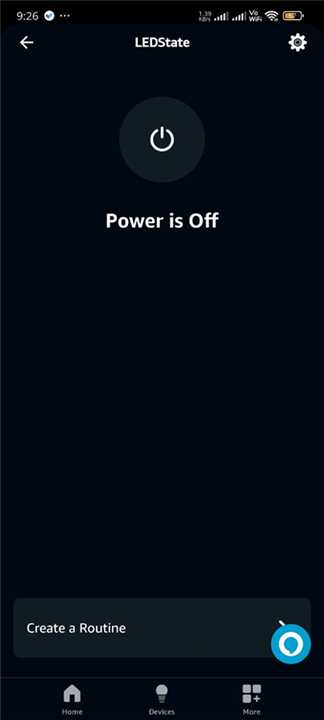
- In the bottom, click on ‘Create a Routine’. You can see by default two routines created ‘turn off/on the light’.
- Click on one of them and under ‘Alexa Will’, click ‘+’ button to add an action.
- Select ‘Smart home’ and then ‘Lights’ followed by ‘LEDState’.
- Click on ‘Next’ in top right corner and choose respective state ON/OFF and click on ‘Next’ followed by ‘Finish’.
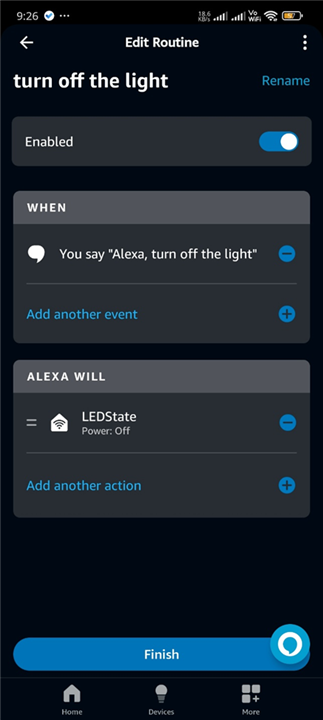
- Repeat the same for the other routine.
- Now you can ask ‘Alexa, turn on/off the light’.
With this Alexa setup is also completed. Now you have an integrated Arduino-Alexa setup.
If you have any trouble in setting up, check this documentation in Arduino website - https://docs.arduino.cc/arduino-cloud/guides/alexa/