


The sensortile website at https://www.st.com/content/st_com/en/campaigns/sensortile-edu.html provides wealth of information though somewhat confusing
(e.g in the curriculum tutorial suddently it has Linux based beaglebone)
Anyhow, we follow the tutorial
Note: out of box, the SensorTile is using https://www.st.com/en/embedded-software/fp-sns-allmems1.html , so we want to revert to it out of box state, that enable the SensorTile to be connected to phone, we should revert to using this
As prerequisite, we need to register an account with OpenSTM32 community and install System Workbench, which is an Eclipse with proper configuration and compiler tools.
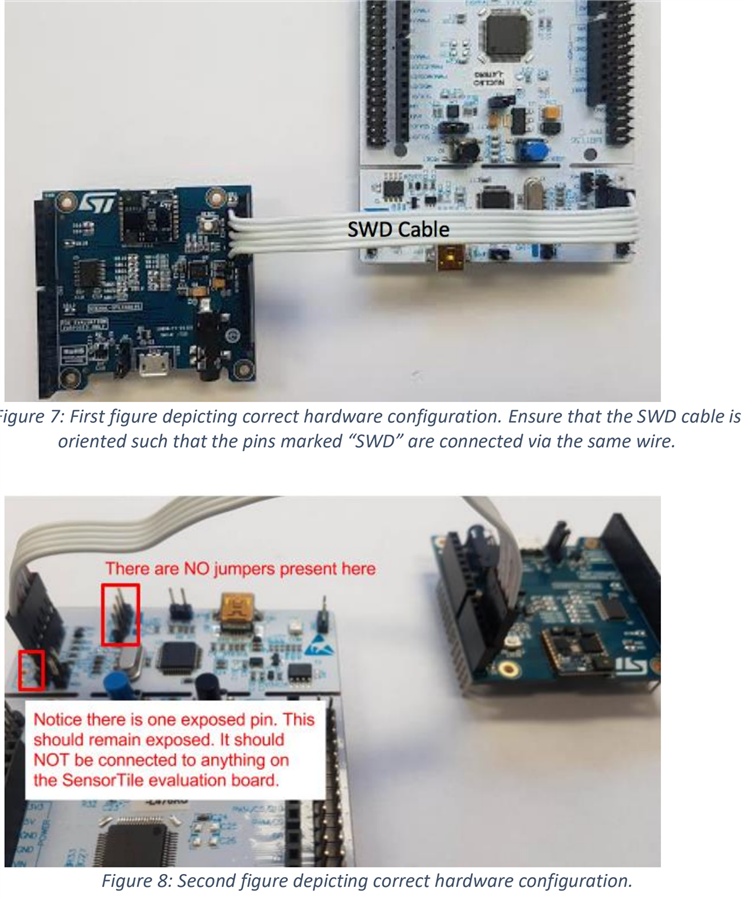
What's important is do the proper wiring as indicated in https://drive.google.com/file/d/1tjZSjwKYYoZ9eZGaUF-SJqWffQehxrOn/view
(this is file from tutorial 1 on UCLA - STMicroelectronics - STMicro ). It is important to note the pin marked "SWD" are connected via the same wire.
Now, why do we need to do so? The reason is on page 16 and 18 of [4] https://www.st.com/content/ccc/resource/technical/document/user_manual/98/2e/fa/4b/e0/82/43/b7/DM00105823.pdf/files/DM00…


We then reach page 29 of the tutorial
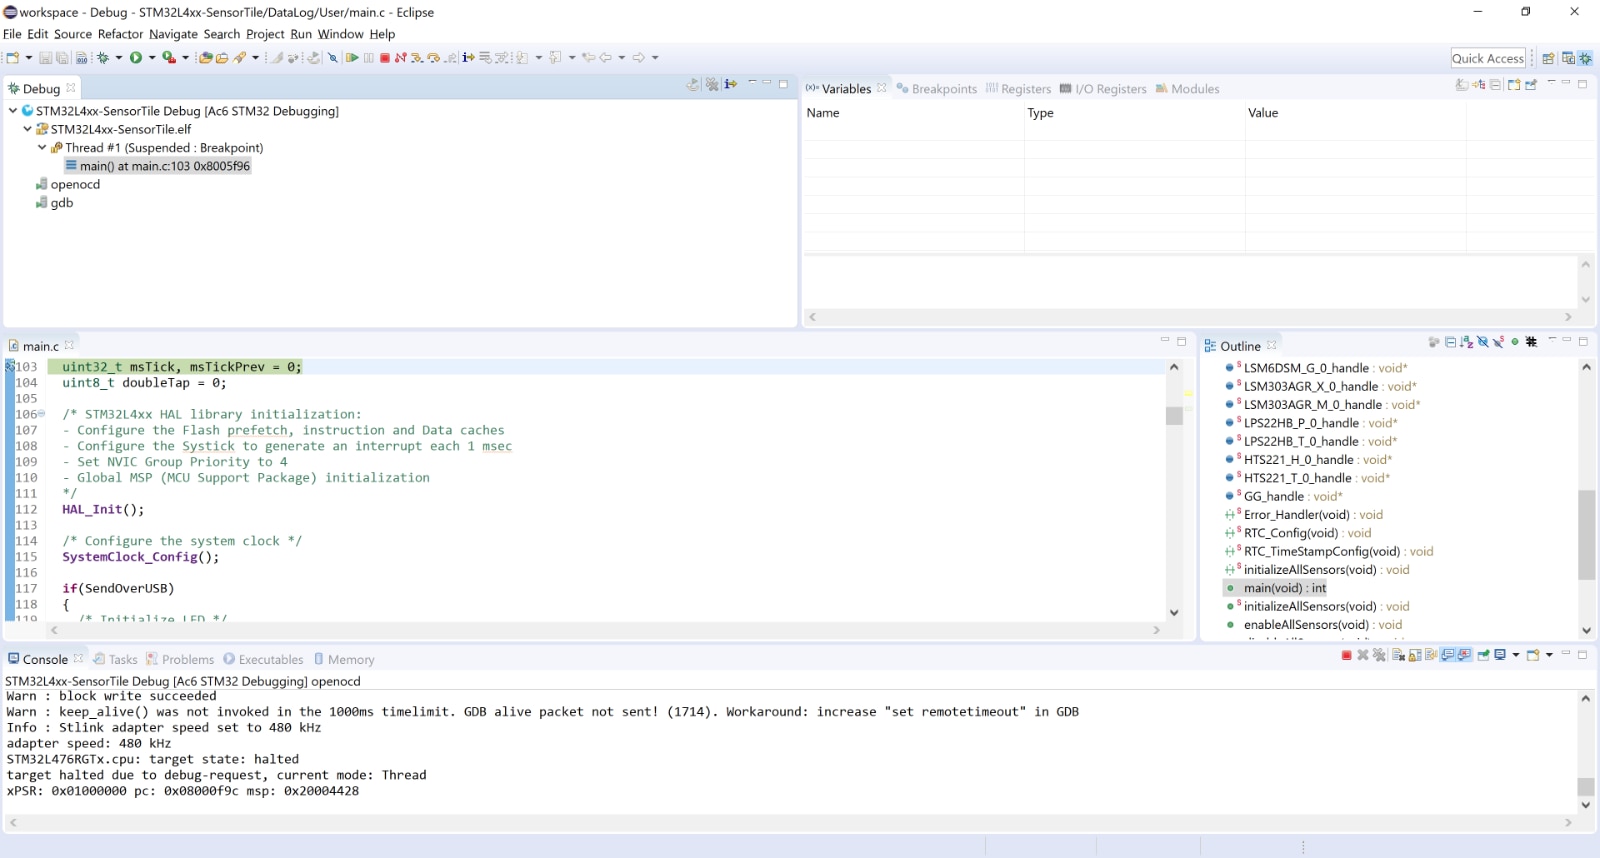
click resume (F8) and the LEDs are blinking on the sensortile
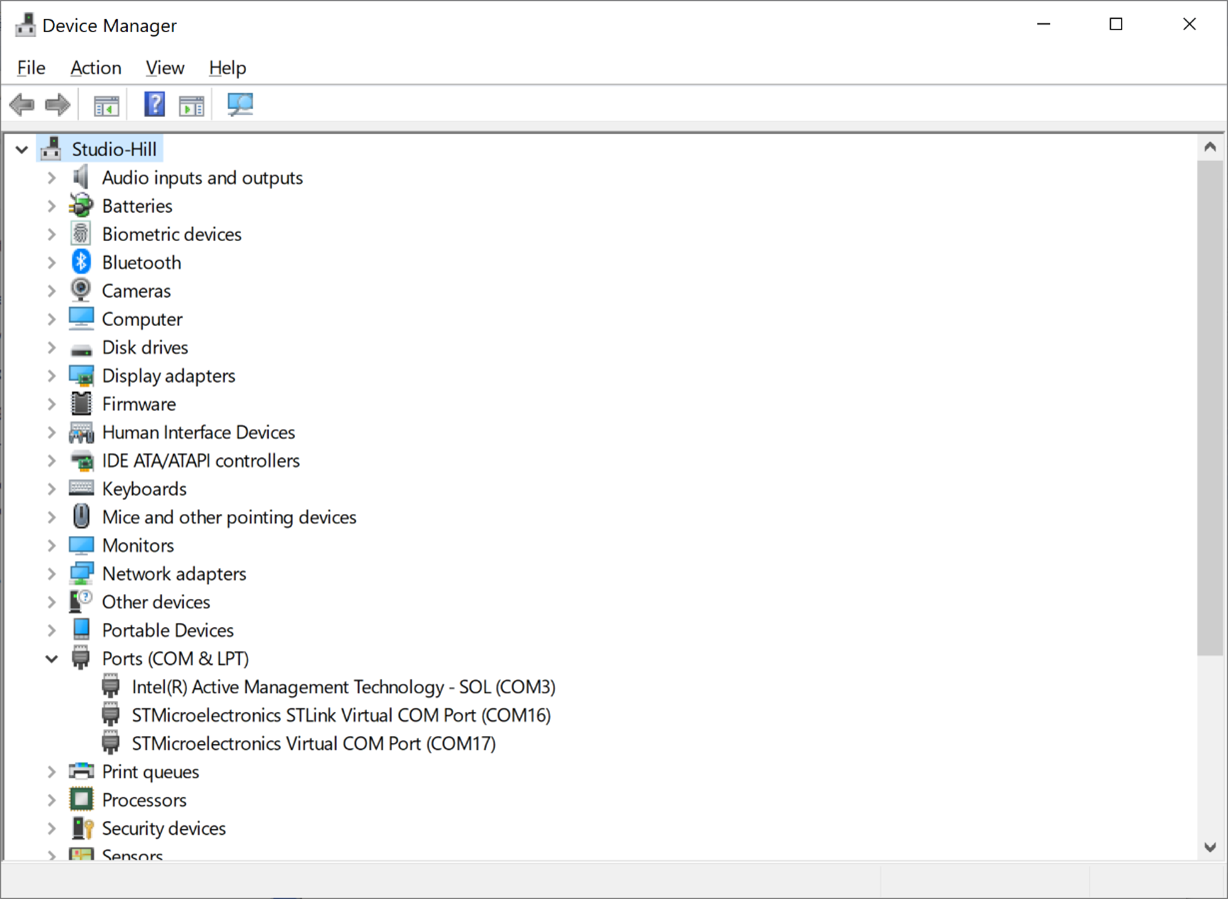
on my laptop, the nucleo is detected as COM16 and the SensorTile as COM17
Note: they only gets detected after we click resume in the debug
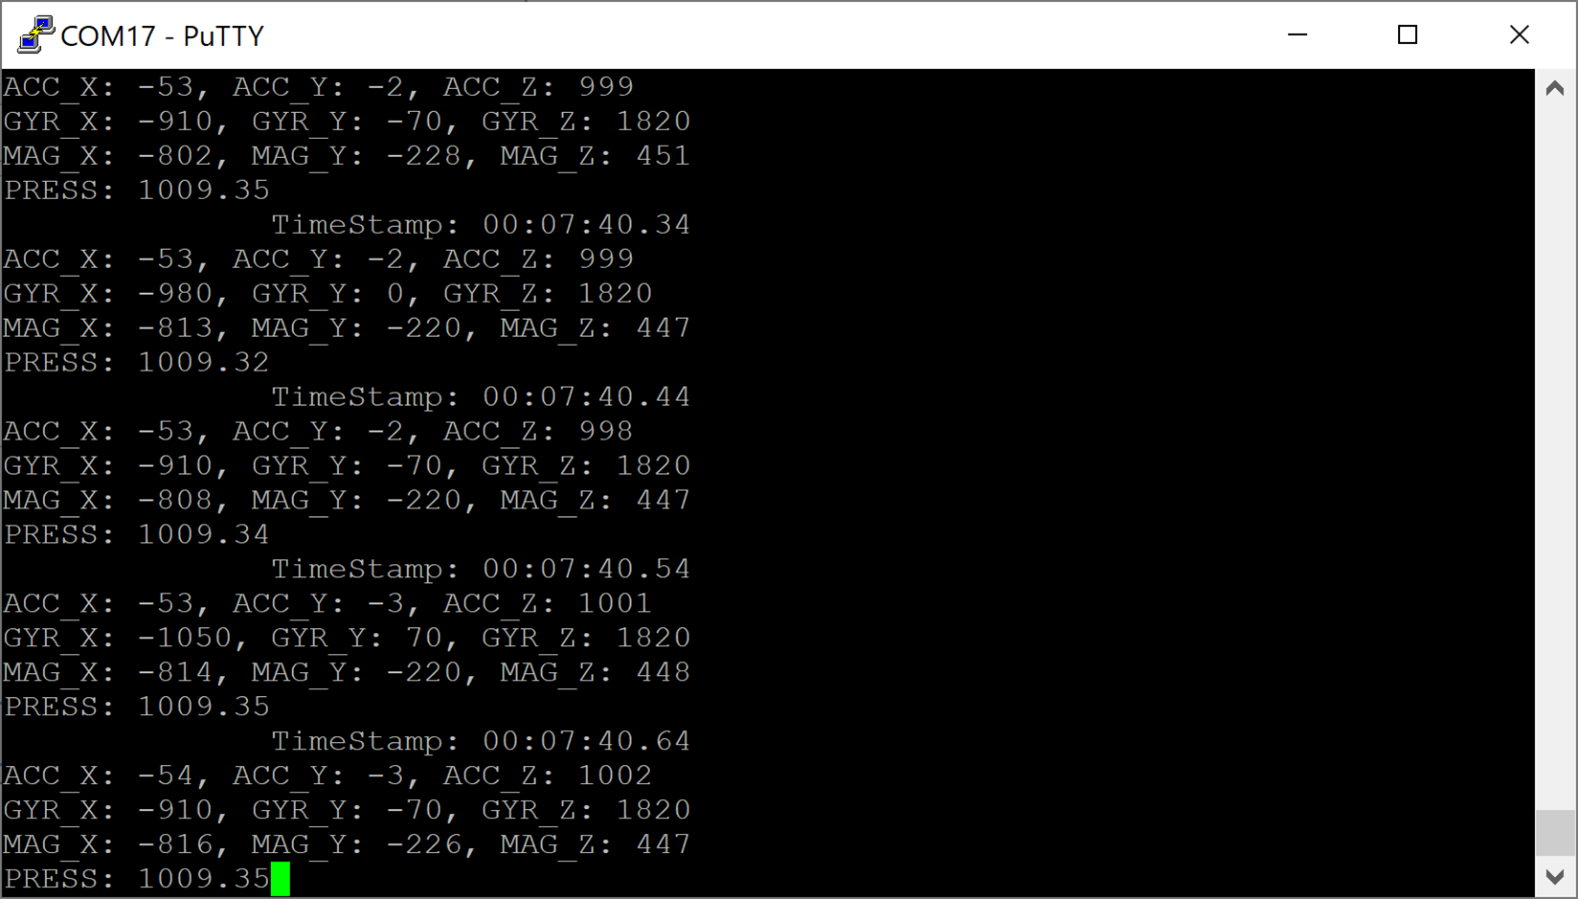
my SensorTile is correctly functioning, after connecting it via PuTTY
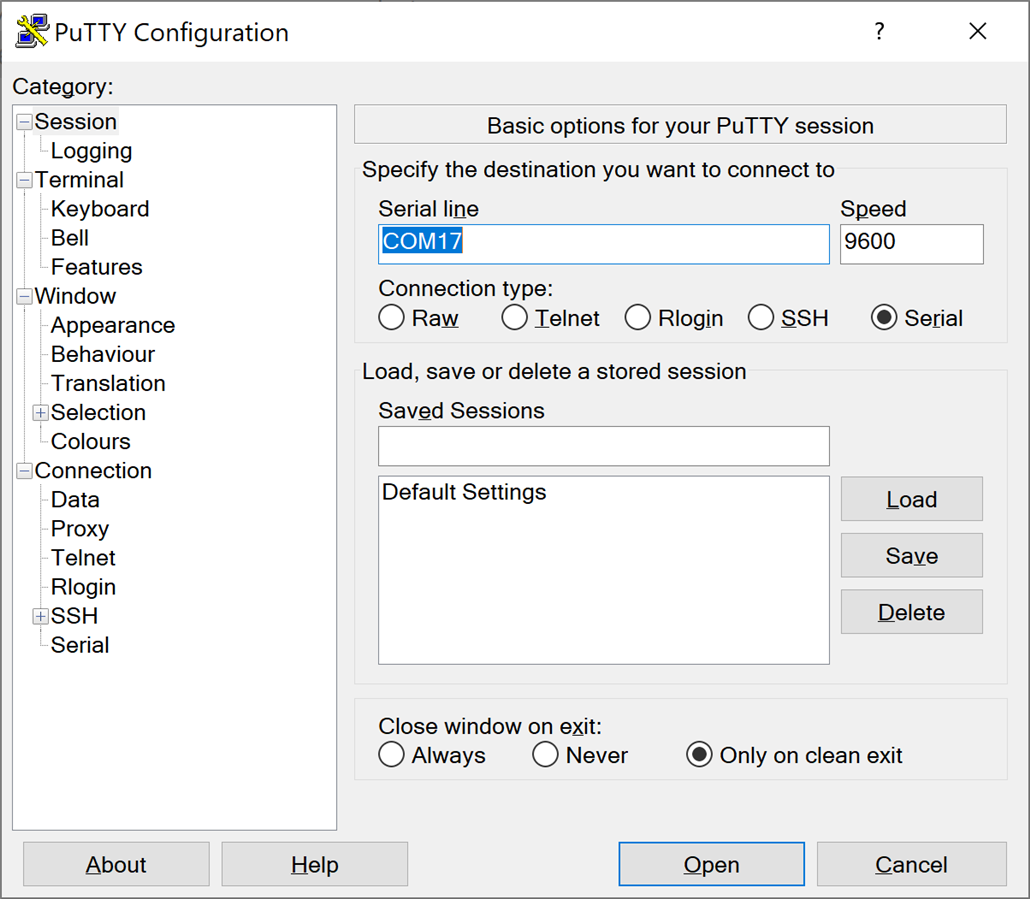
click open and we will see
The weeding robot will use the accelerometer, gyro and magnetometer for orientation. We want to run it everytime it boots
hence we will flash our program onto SensorTile every time the SensorTile is powered. The SensorTiles needs not be connected to Nucleo nor System Workbench.
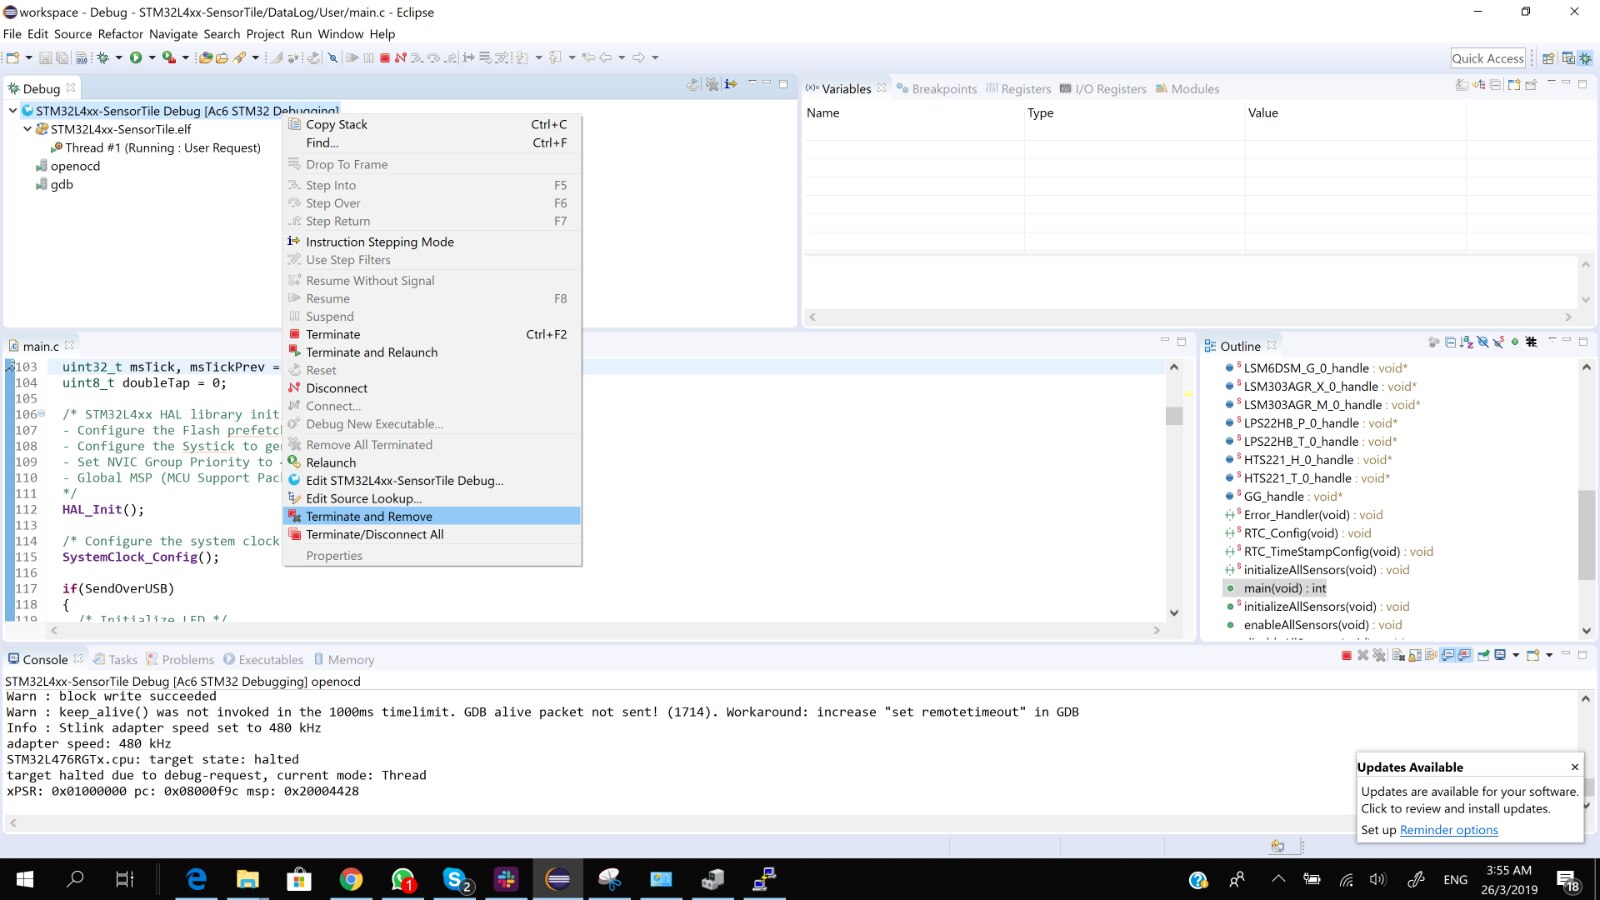
We terminate and remove, like screen below
we then use the ST-Link Utility.
for mine it is at C:\Program Files (x86)\STMicroelectronics\STM32 ST-LINK Utility\ST-LINK Utility
follow page 34 of the tutorial
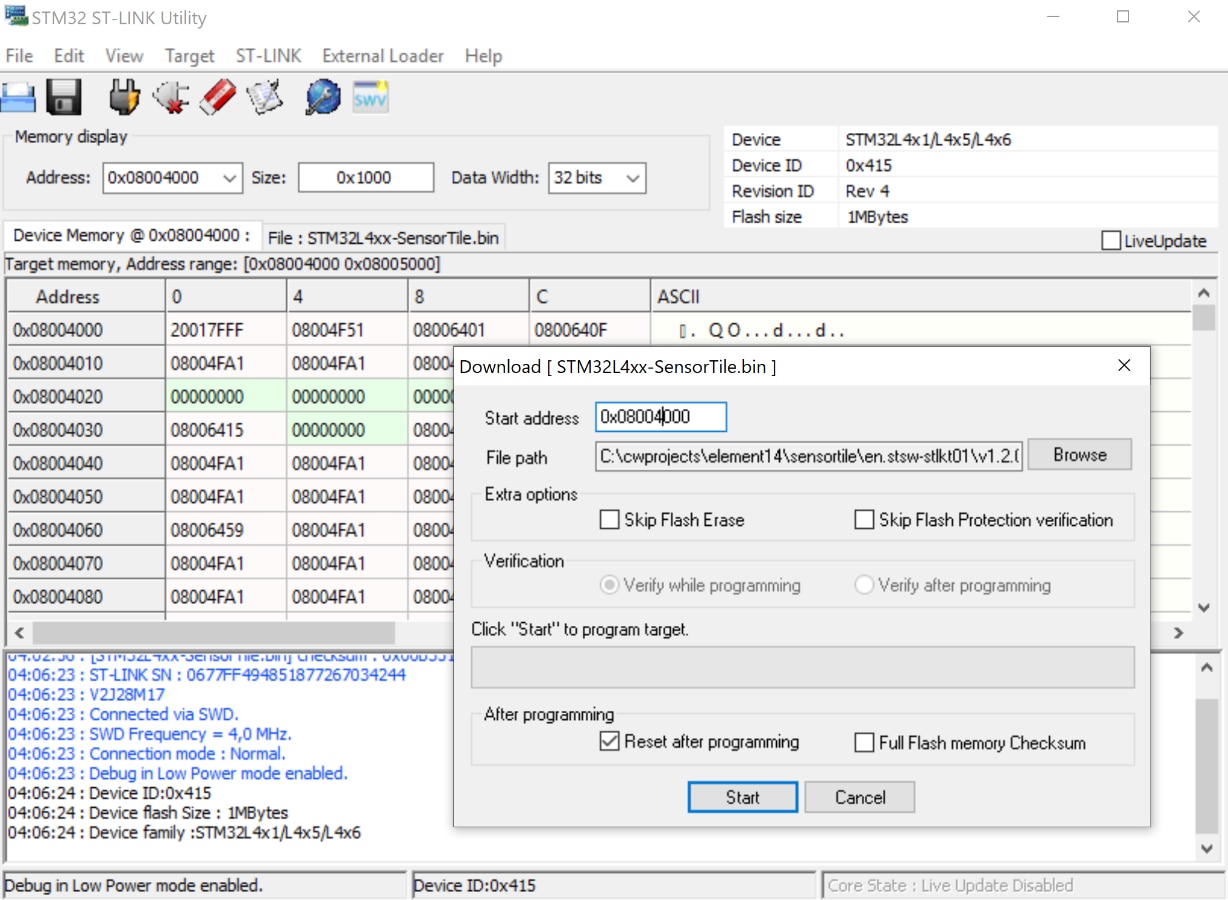
at the change address to 0x08004000, one cannot press enter else will address out of range error
click start from below screen
and we get this screen

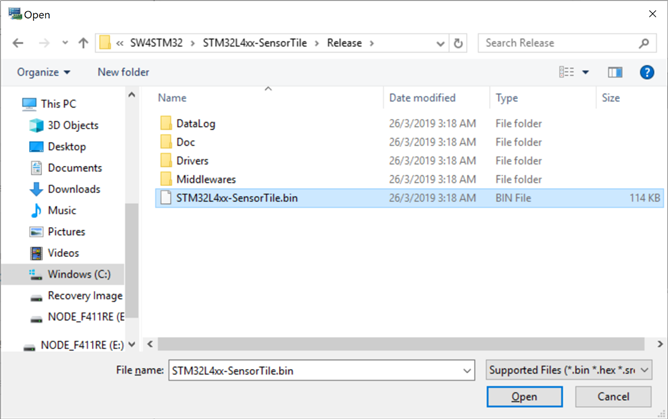
We close the file and browse to the bootloader file created here as screen below
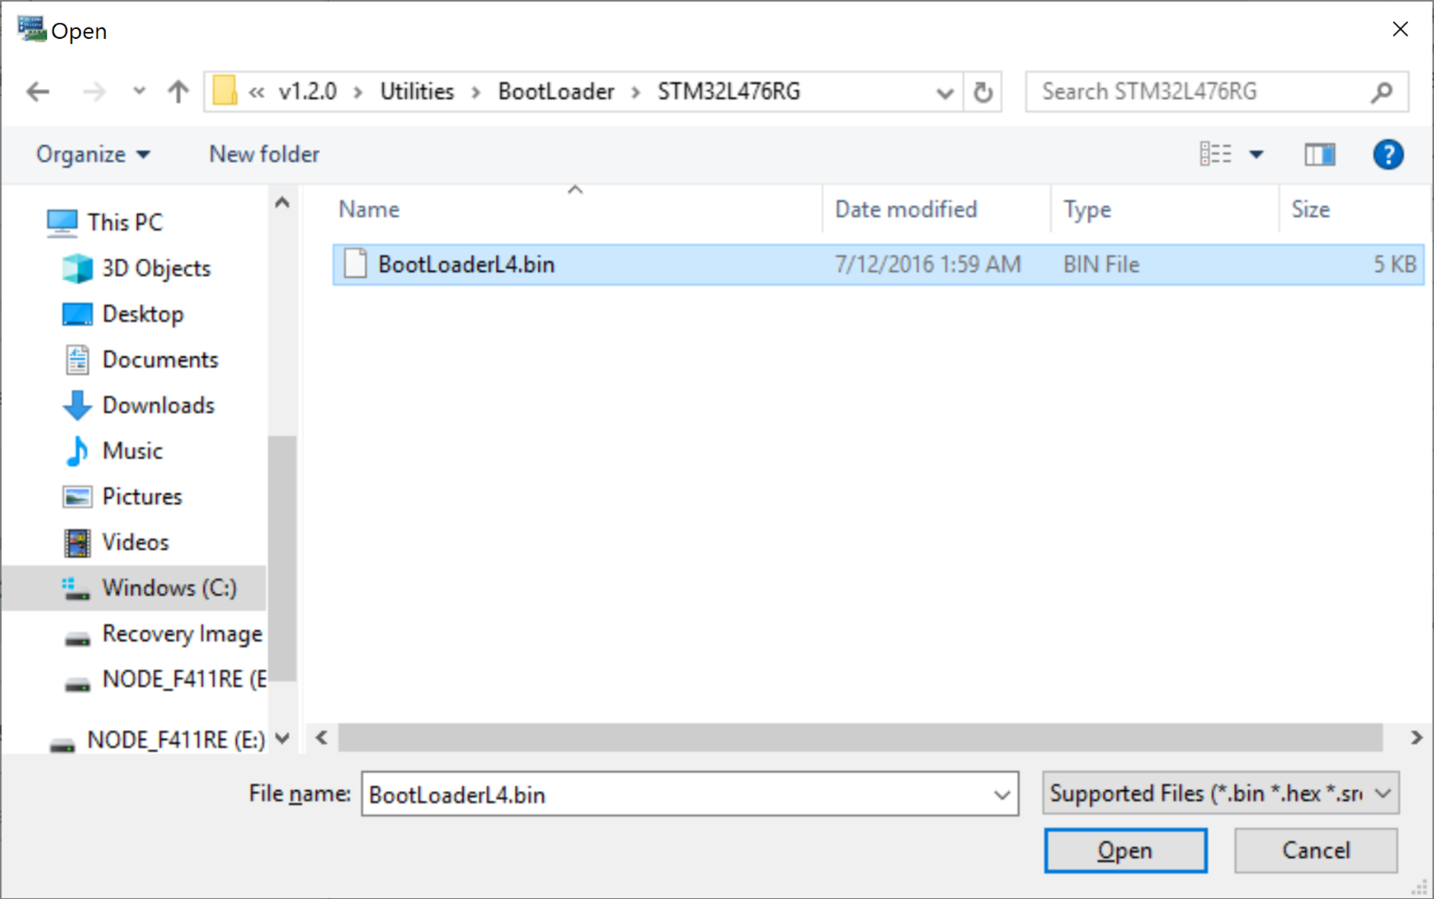
follow page 38 of the tutorial, now with the address change back to 0x08000000 (don't know why ...)
by following page 39 (disconnecting the cable SWD connecting Nucleo and SensorTile), and reconnecting SensorTile only, then we can see that it can run standalone
Appendix
*************
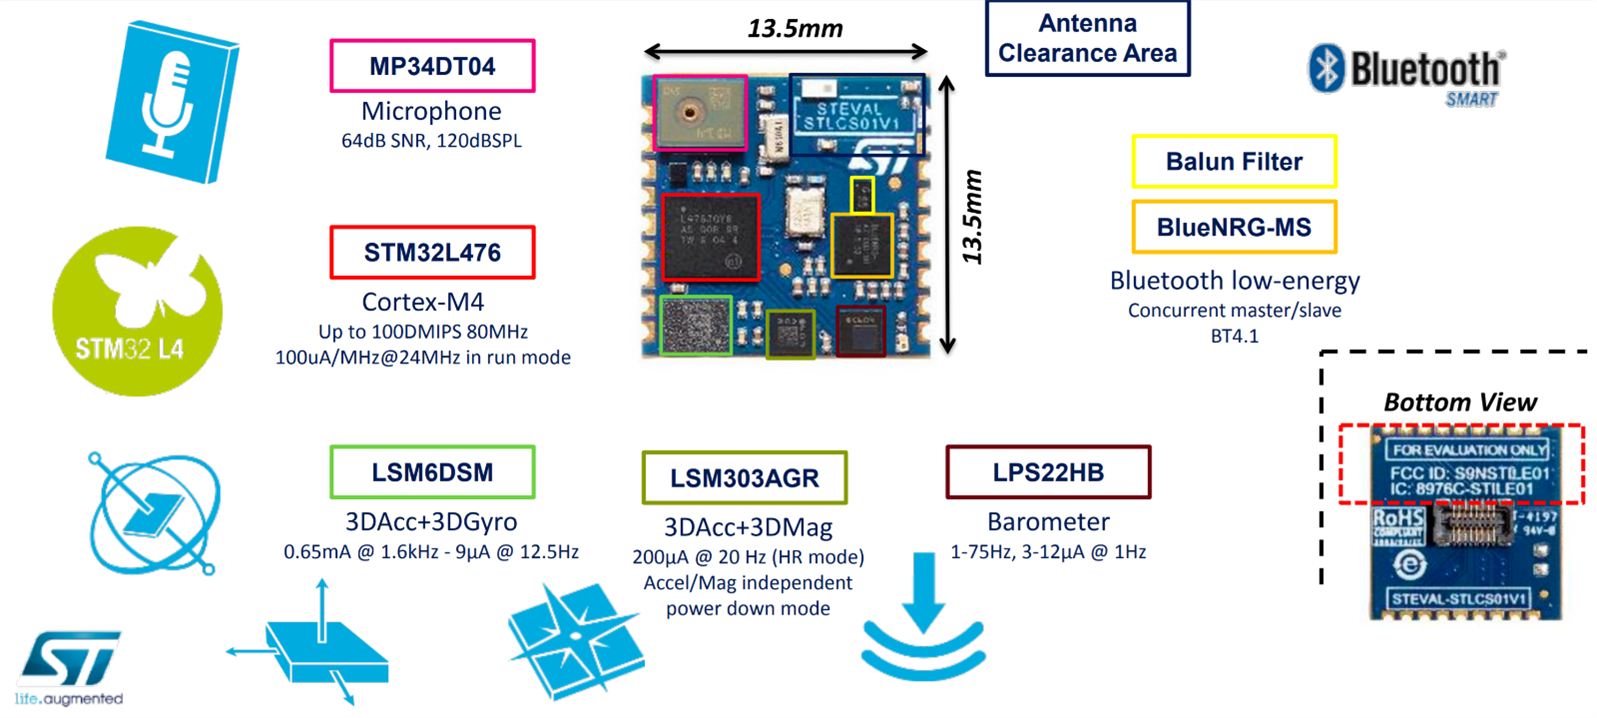
Now looking back at the STLCX01V1 cradle expansion board we have (the shield that the SensorTile sits onto), it has
-SensorTile cradle expansion board with SensorTile plug connector --> where we put our SensorTile onto
-compatible with our Nucleo-F411RE board through Arduino UNO R3 connector
-ST2378ETTR - 8 bit dual supply 1.71V to 5.5V level translator
-16 bit stereo audio DAC
-LDK120M-R 200mA LDO

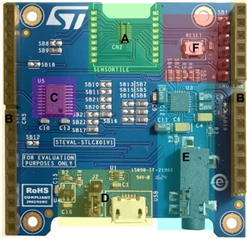

surprisingly i have some hard time locating its schematic. i eventually find it at page 9 of [5].
STEVAL-STLCS01V1 (SensorTile) is a highly integrated reference design that can be plugged into form-factor prototypes, adding sensing and connectivity capabilities to new designs through a smart hub solution
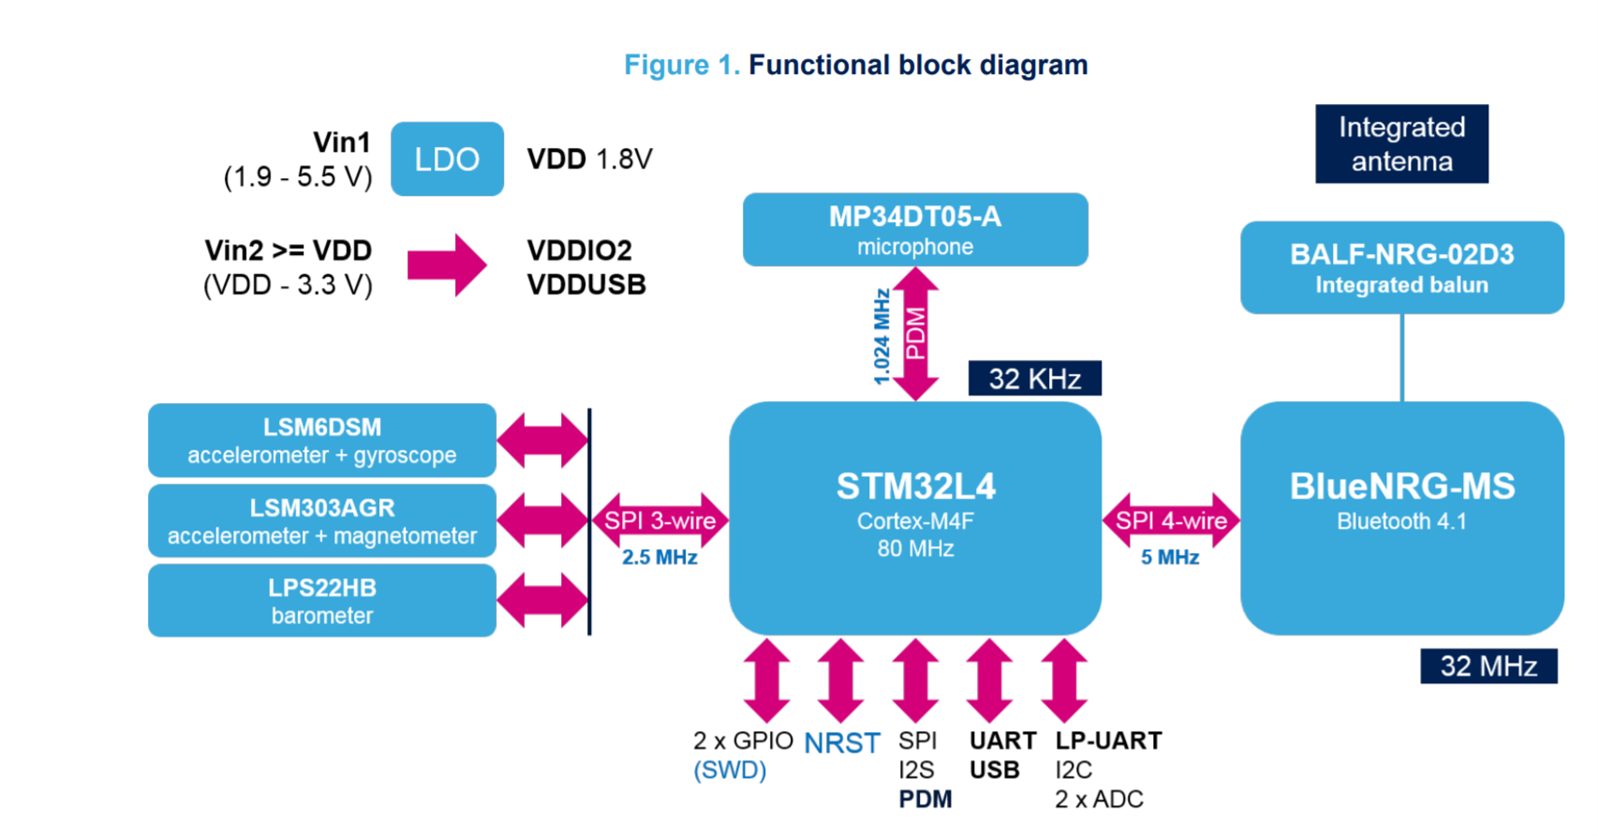
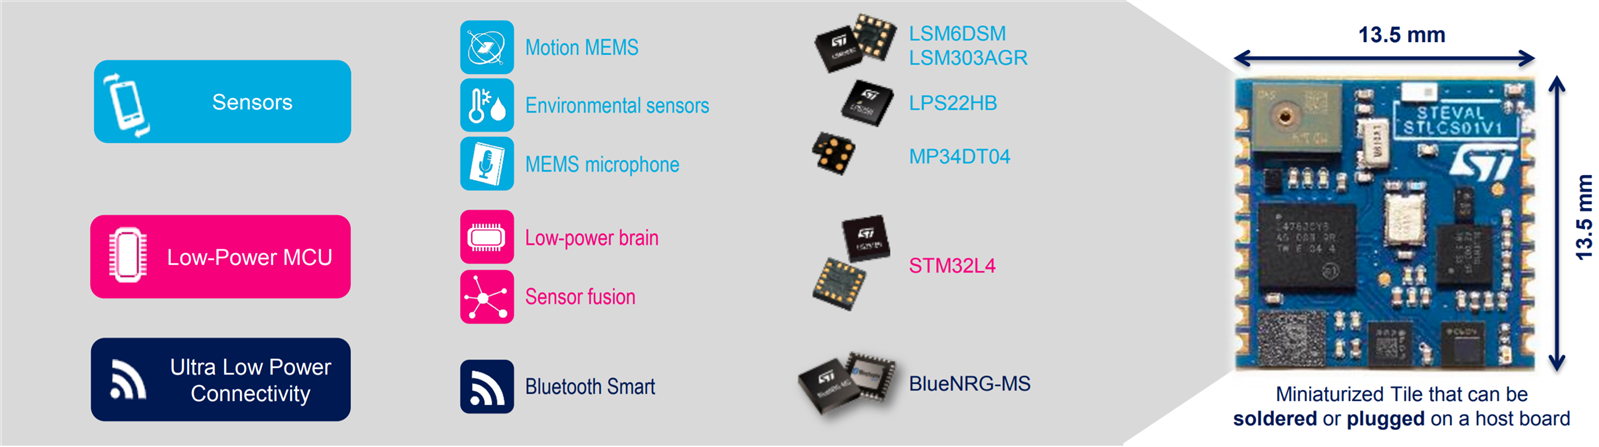
Main components:
- STM32L476JG – 32-bit ultra-low-power MCU with Cortex
 M4F
M4F - LSM6DSM – iNEMO inertial module: 3D accelerometer and 3D gyroscope
- LSM303AGR – Ultra-compact high-performance eCompass module: ultra-low power 3D accelerometer and 3D magnetometer
- LPS22HB – MEMS nano pressure sensor: 260-1260 hPa absolute digital output barometer
- MP34DT05-A – 64 dB SNR digital MEMS microphone
- BlueNRG-MS – Bluetooth low energy network processor
- BALF-NRG-02D3 – 50 Ω balun with integrated harmonics filter
- LD39115J18R – 150 mA low quiescent current low noise LDO 1.8 V
Connection to Nucleo
As in Francesco Doddo's slides [3], The SensorTile can be standalone or hub mode
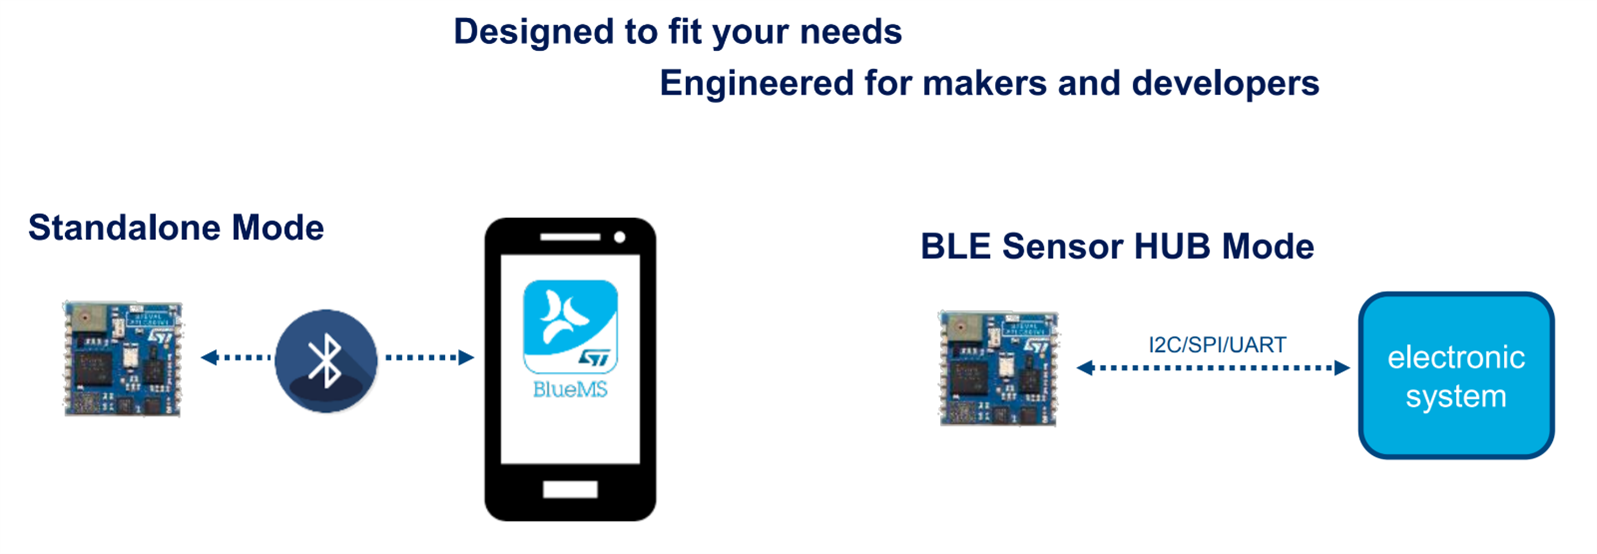
however, i having hard time to figure out how to do in HUB mode. found some thread online that use cube32 ...but didn't manage to resolve it
...anyhow, due to lack of time, i didn't use SensorTile, use load cell instead. But it is a bit challenging as the front become too heavy
the code to use the fx1901 is relatively straight forward. connection is shown in next blog 15
put in the Hx711.h which is available on MBED and create a function call GrassDetect. in the function, use read
#include "mbed.h"
#include "CytronMotorDriver.h"
#include "Hx711.h"


DigitalOut myled(LED1);
DigitalOut scissor(D8);//scissor on
CytronMD motorRight(PWM_DIR,D3,D4); //D3==PB_3 for PWM, D4=PB_5 for direction
CytronMD motorLeft(PWM_DIR,D6,D7); //D6==PB_10 for PWM, D7=PA_8 for direction
void JogForward();
void JogBackward();
bool GrassDetect();
void cutgrass();

Serial pc(SERIAL_TX,SERIAL_RX);
Hx711 scale(A2,A3);
bool GrassDetect()
{
    bool result=false;
    double gram=scale.read();
    pc.printf("weight is %d\r\n", gram);

    if(gram>0)
    {
        result= true;
        }
        else
        {
            result=false;
            }
    return result;
    }
Reference
[1] FP-SNS-ALLMEMS1 is an STM32 ODE function pack https://www.st.com/en/embedded-software/fp-sns-allmems1.html
[2] https://www.st.com/en/ecosystems/stm32-open-development-environment.html
[4] UM1724 user manual for STM32 Nucleo-64 https://www.st.com/content/ccc/resource/technical/document/user_manual/98/2e/fa/4b/e0/82/43/b7/DM00105823.pdf/files/DM00…
[5]UM2101 Getting started with the STEVAL-STLKT01V1 SensorTile integrated development platform