


 Introduction
Hey everyone
Welcome to my project journey!
This is actually my first post in this series, and I’m starting a complete build log where I will develop a smart security system from scratch as part of the element14 Community Smart Security and Surveillance Design Challenge, in collaboration with Analog Devices.
I’m really excited to be part of this challenge and to document my full development process step by step.
 About the Project – EchoGuard
For this challenge, I’ll be building a project called:
EchoGuard – Intelligent Edge-Based Security System
 Why this idea?
Most modern security systems rely heavily on cameras.
But have you ever thought about what happens when:
- It is dark
- There is smoke
- The camera is blocked
In those situations, visual systems can fail.
That’s where EchoGuard comes in.
 What is EchoGuard?
Instead of “seeing”, EchoGuard listens.
It uses sound-based intelligence to detect unusual events like:
- Glass breaking
- Forced entry
- Sudden loud impacts
- Distress sounds
And responds in real time using embedded processing.
 Important Update (Hardware Plan)
Before going further, I want to mention an important addition:
I will also be using an external analog microphone module connected to the system.
This will allow EchoGuard to capture real-world sound signals and detect intrusion events accurately.
 Unboxing the Hardware Kit
Alright, now let’s move to the unboxing part.

“Let’s open the kit and see what we’ve got.”
 Stickers

The kit also included some stickers from element14.
One of them says:
“Never enough women in tech”
I really liked this message because even though women are already part of the tech world, they are still underrepresented in many areas.
I believe more balance and representation in technology is important for the future.
Main Controller Board

The main board is the:
Analog Devices MAX32630FTHR
This is the brain of the system.
It is:
- Low power
- Programmable
- Designed for embedded applications
It will run all the logic for EchoGuard.
 Programming / Helper Board
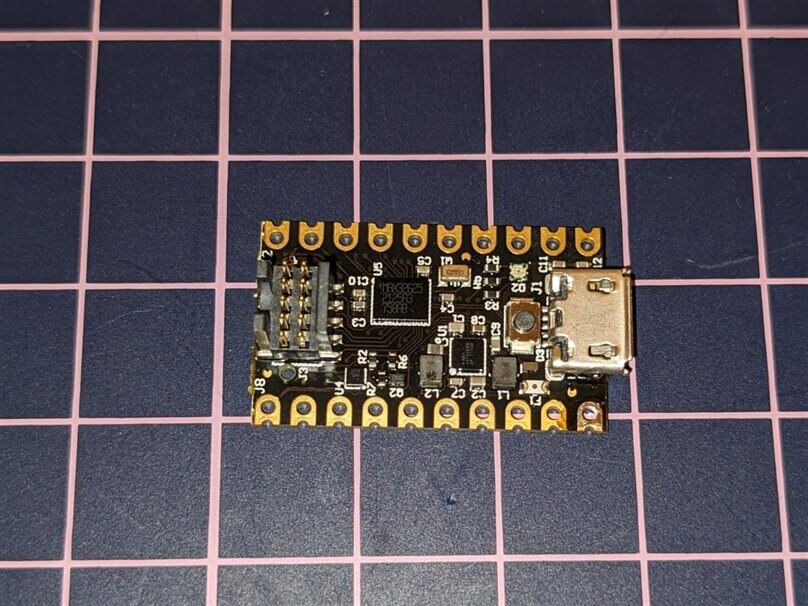
This small board is used to upload code.
It does NOT run the project itself.
Think of it as a “messenger” that transfers code from computer to the main board.
 Adapter Board

This is the:
FTHR-PMD-INTZ Adapter Board
It acts like a connector bridge.
It allows the main board to connect with additional sensor modules (like my microphone input later).
 ️ Motor Control Module
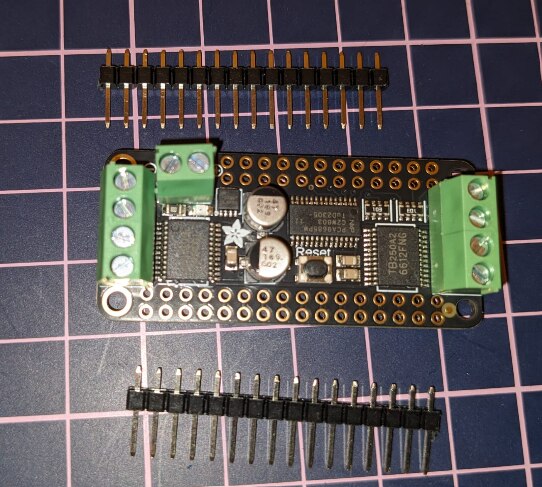
Adafruit DC Motor + Stepper FeatherWing
This module allows control of:
- 4 DC motors
- 2 Stepper motors
In EchoGuard, it will be used for physical alert actions like:
- Alarm movement
- Mechanical warning system
 Internet Connectivity Module

Particle Ethernet FeatherWing
This board adds internet connectivity using LAN cable.
It allows EchoGuard to:
- Send alerts
- Communicate with a system/dashboard
- Enable remote monitoring
 Display Module
1. IC LED FeatherWing (7×15 Display)

This is a 7×15 intelligent LED display module.
It is capable of:
- Displaying text
- Showing patterns
- Creating smoother visual effects
This will be used for:
- Detailed messages like “SAFE”, “ALERT”, “INTRUDER”
- Better readability and clearer status indication
2. Adafruit CharliePlex LED Matrix FeatherWing

Adafruit CharliePlex LED Matrix FeatherWing
This is a compact LED matrix display.
It is ideal for:
- Simple icons
- Quick visual indicators
- Low-power display output
In EchoGuard, it will be used for:
- Symbol-based alerts (e.g., warning icon
 ️)
️) - Fast visual feedback during detection
 What’s Next?
In the next steps, I will:
- Test each hardware module individually
- Start reading microphone signals
 Closing
This is just the beginning of my EchoGuard journey.
Stay tuned for the next update!


