


(Complete list of all blog entries in this series)
Since none of the kits have arrived yet, I reckon I should have done like dougw and order a ADXL375 kit with my Farnell order (there are 20 of them on stock right now). I mostly ordered a large amount of components that should be useful for future projects. In addition I got another PSoC4 BLE kit because I wanted to modify its BLE module (more on that later) and some tools. This order shipped (to my home) within 24 hours, which is what is to be expected (minus some parts thats were not in stock at them moment). The delays regarding the kits are becoming quite ridiculous now - the challenge started two months ago and nobody as received any of the hardware we are supposed to use?
I wanted to go on a road test with my first prototype starting next weekend (because we are going on skiing vacation). I knew it would be a stretch, but I thought that the software side of the project would be the problem (because the PSoC4 BLE is quite new, and I never worked on Bluetooth LE projects before, esp. not in connection with Android). But now it looks as if the software would be running until then but I do not even have my hands on the hardware.
(And even in the unlikely event that the kit arrives tomorrow this leaves me just three evening to get it up and running)
Bluetooth progress
When I wrote the last article, I had success in getting the PSoC side of the BLE communication up and running, but I did use the CySmart tool as simulator (or rather as a debugger). Having that part solved I started working on the Android application.
First I outlined how it should behave. There needs to be a way to connect to the monitor device (and to disconnect again), to see the current device status, look at an overview and detailed data. From that I created a small prototypical application using just demo data (e.g. a counter again as acceleration value, and a timed script for simulating a connect / disconnect procedure).
Knowing that the application now behaves as it should, I could work on the BLE connection (having the UI up and running means there should be no additional error to search for when something doesn't work as expected). Fortunately Cypress could provide me with the source code to their CySmart Android demo application, so I could peek into it and see how it works.
So I was much relieved when I got the code up and running that detects my Ski Monitor device - this was easier than expected.
Starting on the hardware
Even though the ADXL375 module I want to use has not arrived yet I need to work on the hardware. So got started with that too (making a temporary break on the software).
First item on the list to take the PSoC4 BLE module and remove the pin headers - the are just too high to make small enclosure. After using my hot air gun, the result looked like this:
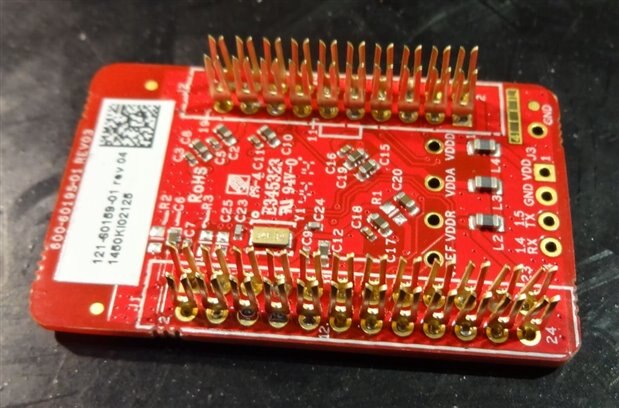
Not really what I intended - but a good place to start removing all the pins one by one (using a desolder pump). The final result was this:

Having the module now in the right for factor (OK, getting rid of all the unused PCB space would be nice, but according to Cypress a smaller, standalone version of the the module will be available soonest in march) meant I can look at charger and voltage regulator.
As already mentioned I use the LTC4054 LiIon charger IC. I had good experiences with it, it seems to be robust, comes in a reasonable package (SOT23-5) and needs just two external components (four if you need a status LED). I mounted in on a small SOT23 breakout board together with the passive components.
The PSoC4 itself would be happy running from 1.9V up to 5V, so I could connect it to the battery directly. But since the ADXL series all only run with up to 3.3V, I decided to use a 2.8V LDO regulator. I used an ADP162. It also comes in SOT23 package, and has a current consumption of down to 0.5µA.
So I mounted it on a SOT23 breakout too, and wired everything together (battery, wireless charger receiver, charger IC and LDO):
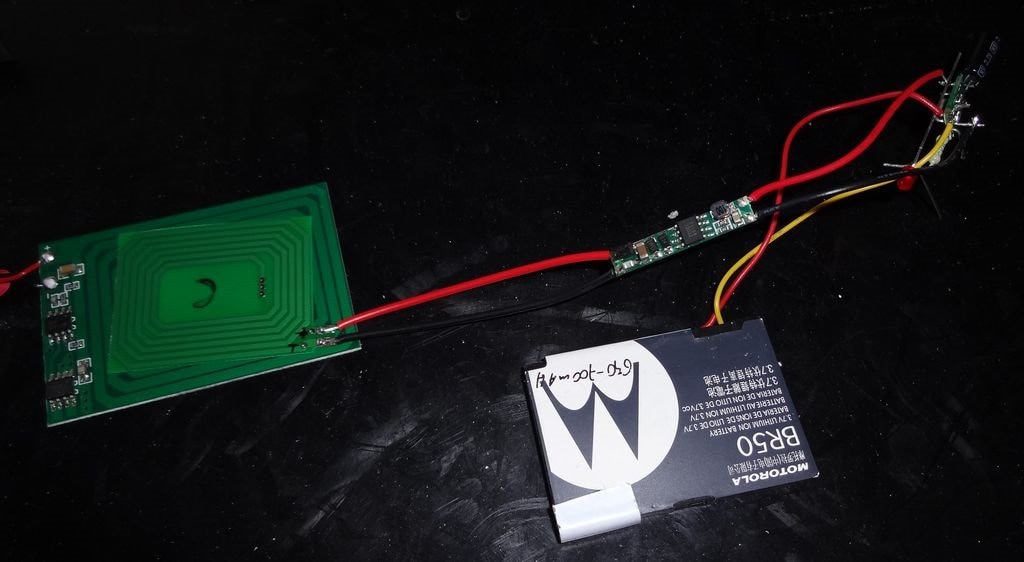
The receiver is placed on the wireless transmitter for reference - unfortunately the LDO and the charger IC are difficult to see in that picture.
As battery I used one from an old mobile phone, which provides me with all the safety and protection electronics. In this setup I verified that all works together, and that the battery gets charged properly.
Next step was top put everything in the enclosure I want to use for my prototype. That meant shortening the wires, and stacking all the parts on top of each other:
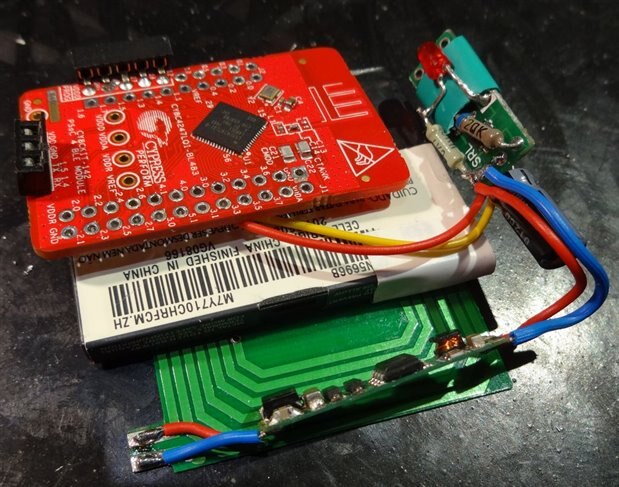
I found a old sample box I had laying around for many years (anybody guesses where its from?), which fit the form factor of battery, receiver coil and PSoC4 module perfectly:
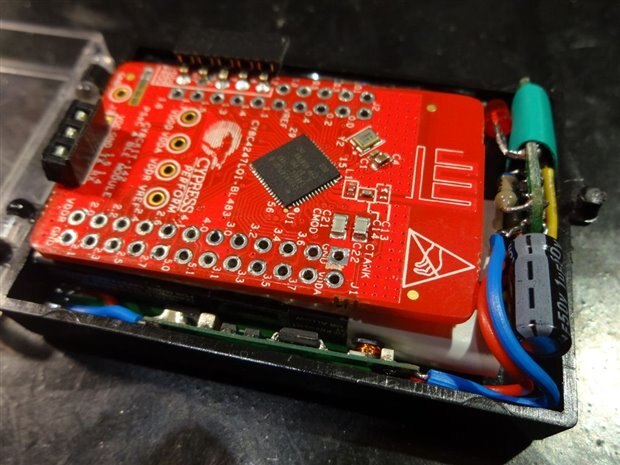
I have added a programming connector on the PSoC4 module, to be used with the MiniProg3 programmer. On the left is also a serial port connector, so I can get debug information (when mounted on the carrier board the PSoC5 there acts as a bridge, but now I don't have any connectors for that).
For all the hardware thats left (ADXL375 module, maybe a LED and a touch button) I will add flat header pins to the PSoC4 module, mount a perf board on it which then holds all of them. I think this all should still fit inside of the enclosure. The ADXL375 module is 20x20mm, but from the pictures it looks as if it can be reduced to 15x15mm, maybe even smaller).
I skipped on the programming port protection I outlined in my overview, since the case I'm using is protected enough not have snow inside of it (at least I hope so...).
Next steps
Having finished everything to be done on the hardware side, I will keep my fingers crossed so the kits arrive soon. Otherwise I will continue working on the software, getting the BLE data transfer between PSoC4 BLE and my phone ready.
I will also start working on a board containing all the components in one place, which should allow making the whole device even smaller (currently its 60x40x18mm), and I would like it to be at most 10mm high. We will see how this turns out...
Top Comments