


Considering the ease and great support that Arduino has. I preferred to use (for the time being) the XMC4700 Relax Kit which features a powerful ARM Cortex M4 microcontroller.
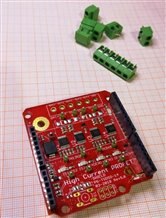
We add the pin headers to the XMC4700 board and we also solder the terminal blocks to the Prophet + 12V board.

In order to program our XMC4700 Relax Kit in Arduino we must do the following:
Follow the instructions in the following link:
https://github.com/Infineon/XMC-for-Arduino
Where we will install the support of the Infineon XMC boards for Arduino as well as install the SEGGER J-Link programmer to upload the sketches


Once this procedure is finished we can do a test with the classic Blink Led in the Arduino IDE. If all goes well, let's move on.
In my case I feel more comfortable using the Visual Studio Code editor with the Arduino extension, this allows me to have more control in the process. Since it has IntelliSense and other benefits such as being able to study the libraries that we will be adding to the project. For this you have to add some things manually such as includePath, forceInclude and as for the C / C ++ compiler, use the one of your preference in my case as I am a Windows user I use Mingw-64.


In the next installments I will explain part of the code of the environmental sensors