


This week I will focus on create function control and create simple prototype for development environment.
I had designed the control panel as the following picture.
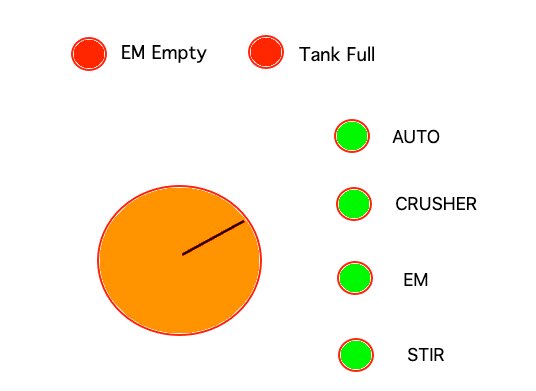
There is one knob to control everything by turning knob (using 3D sensor) to select each function. Users can control
each motor separately or set auto to let the machine start from the beginning until end process. When each motor works the LED will blink.
It works like washing machine which will tell you what is machine doing now. To start just click on the knob and click again to stop.
There are two LEDs to indicate when the EM tank empty and When Waste food bin full. I have not decided yet which sensors will be used.
I got all the kits from infineon. So I start to create simple prototype as in the picture

I always use LEGO as a prototype. Because it’s very simple and easy to layout wherever you need and after that, we can reuse it again. From the picture I have Motor Control, XMC 4700 kit, 3D sensor, and LED panel for testing the user interface. For knob, I use some LEGO with Shampoo cap to make simple knob with magnetic at the end of the shaft. Now I will ready to start programming for the panel and motor control.
For those who would like to know about LEGO part. I always use these components to install PCB with the LEGO plate

Use lego 1x1 and drill a hole on top with small screw. This will connect your PCB with LEGO plate. However, there are sometimes that the PCB holes do not fit on LEGO plate-like this XMC4700 kit. In this case, you can use the black LEGO components (as in the picture) to adjust between PCB holes and LEGO. I always use small protoboard ( can order from eBay or Banggood) for Power jumping. This will save you space from big protoboard. You can plug in port from kits directly on the sensors.
Next
I am now ready to start programming while I am waiting for meat grinder to come.
Top Comments