


So where did we leave off, oh yes, finish up the survival suit. In the past week I got a lot accomplished, below is my "to do" list of things to complete from Blog #11. The list has gotten short, the project is almost complete, so little left. Here is my update:
Things to complete: (Blog #11)
So, what is left to do? Here is my list:
- Solder the sensors to the leads
- Attach everything to the suit
- Add in the carbon fiber power quick disconnects
- Heater manual over ride
- Case for computer and switch
- Make pockets in the suit to hold the power supplies (Ohhhh Chrystal!!!)
- Water proof the computer and hardware
- Testing of completed suit
So lets start at the top of the list.
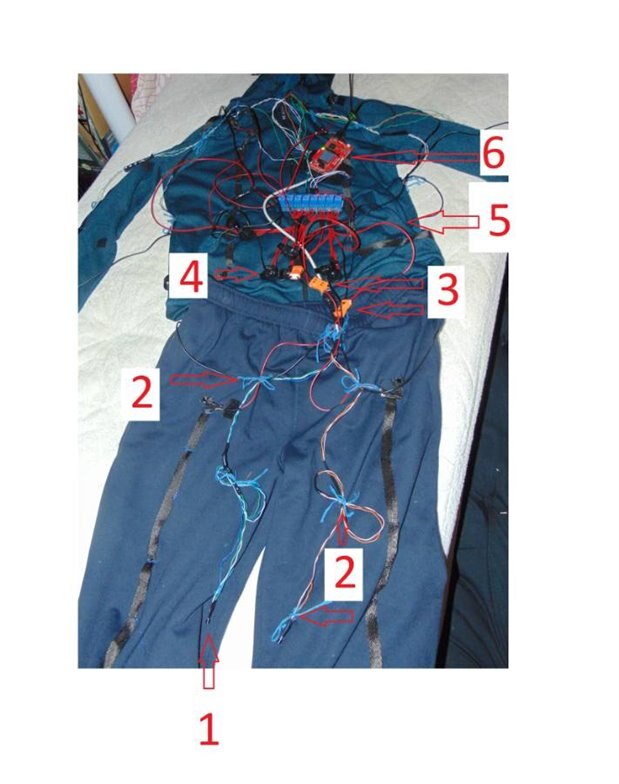
1) Solder the sensors to the leads: I used CAT5 wire for my leads to the sensors as it is small and light. I have a lot of CAT5 wire laying around so it was put to good use. The wires are connected to the computer and work great. This wasn't until after a long battle with sensors. You can read about that in previous blogs.
2) Attach everything to the suit: Chrystal wanted to do this part so I left it up to her. The battery packs fit perfectly into the pockets of the top half of the suit **I don't think she wanted to sew more pockets**. She then sewed in tie-off strings to secure the wires in place so they won't get tangled up or caught on each other. This isn't the perfect solution but it does work. Chrystal did her best and I am proud of her.
3) Quick disconnects: These work very well and are located in a spot where easy access is.
4) Power over ride: I soldered in switches to over-ride the power to the heating elements. This will allow the user to turn on the heat if anything were to fail.
5) Sew in pockets: As written above, Chrystal got lazy and used the existing pockets 
6) Water proof computer: This is now complete, like shown in a previous blog I used an acrylic conforming spray that waterproofs electronics.
Below is some update pictures with labels 1-6 for each of the above:

So close, things to finish:
- Enclosure for the computer and switches
- Final testing and Blog
Thank you for reading and following my project:
Dale Winhold
Top Comments