Blog 4: Steppers for Steering controls - Analysis
A steering control could seriously be done in couple minutes using a servo, but then it wouldnt much be of a challenge, would it ?
Blog #4 was to be about the stepper motors and steering controls design, but in my opinion, the blog would get long and tedious for the reader. Blog #4 is shortened just to share the stepper motor data observed, analysis and observations.
The cool thing about an airboat is the engine and prop are both above water. The steering is accomplished by redirecting the exit airflow thrust and create a torque at the boat stern. It is intended for shallow water so a deep rudder is not used to steer.
First why would anyone of sound mind & body use a stepper motor for position control on an air vane/rudder application ?
Well,…. the challenge provided qty 2 H bridge shields. Using a stepper motor is a piece of cake for an open loop positioner, but is a challenge for a closed loop positioner, lets see if it can be made to work.
Assumption #1 The airboat steering rudders are expected at most to turn + - 45 degrees. Blade angles greater than 45 to the airflow reduce the X component of the airflow for making turning torque.
Assumption #2 The steering vanes may need to move fairly fast.
Assumption #3 The steering vanes position control is desired to be repeatable, but high resolution positioning is not required.
Assumption #4 I don’t like it, but a home switch will likely be needed, or limit switch on each side for finding the steering position on power up. For sure a pot for analog position feedback isnt desired.
Trade off #1 – Most real designs of airboat steering vanes seem use 2 wind vanes for steering. The RC models use one per prop. The first prototype will give it a go with one vane for steering. Keep it simple.
Here are a couple good explanations on stepper fundamentals:
https://www.teachmemicro.com/control-28byj-48-stepper-motor-arduino/
There are 2 stepper motors under consideration for the steering, they are very different from each other.
STEPPER #1 12V 4-wire bipolar https://www.adafruit.com/product/324 https://cdn-shop.adafruit.com/product-files/324/C140-A+datasheet.jpg
- 200 steps per revolution, 1.8 degrees
- Coil #1: Red & Yellow wire pair. Coil #2 Green & Brown/Gray wire pair.
- Bipolar stepper, requires 2 full H-bridges!
- 4-wire, 8 inch leads
- 42mm/1.65" square body
- 31mm/1.22" square mounting holes, 3mm metric screws (M3)
- 5mm diameter drive shaft, 24mm long, with a machined flat
- 12V rated voltage (you can drive it at a lower voltage, but the torque will drop) at 350mA max current
- 28 oz*in, 20 N*cm, 2 Kg*cm holding torque per phase
- Weight .5 lbs if this stepper is used it needs to be in the bottom of the boat.
Stepper #2 - 5V 28BYJ-48 Stepper Motor Specs from https://lastminuteengineers.com/28byj48-stepper-motor-arduino-tutorial/
- torque of 34.3mm
- speed around 15 RPM (slow)
- 28BYJ-48 typically consumes around 240mA
- 2038 steps (32*63.68395 steps per revolution = 2037.8864 approximately 2038 steps).
BUT WAIT !!! 28BYJ-48 is a 5-wire stepper motor. To drive it from an H bridge like stepper #1, it needs modified to a 4 wire stepper, lucky it is easy to do. I like these modification instructions the best: https://coeleveld.com/wp-content/uploads/2016/10/Modifying-a-28BYJ-48-step-motor-from-unipolar-to-bipolar.pdf
Performance TEST Using a generic L298N H bridge module with an Arduino nano to check for speed and stepping angle checks
The steppers observations to be taken:
- top speed when controlled by the Arduino stepper library, stepper_oneRevolution.
- # of steps to travel 90 degrees
- No load current
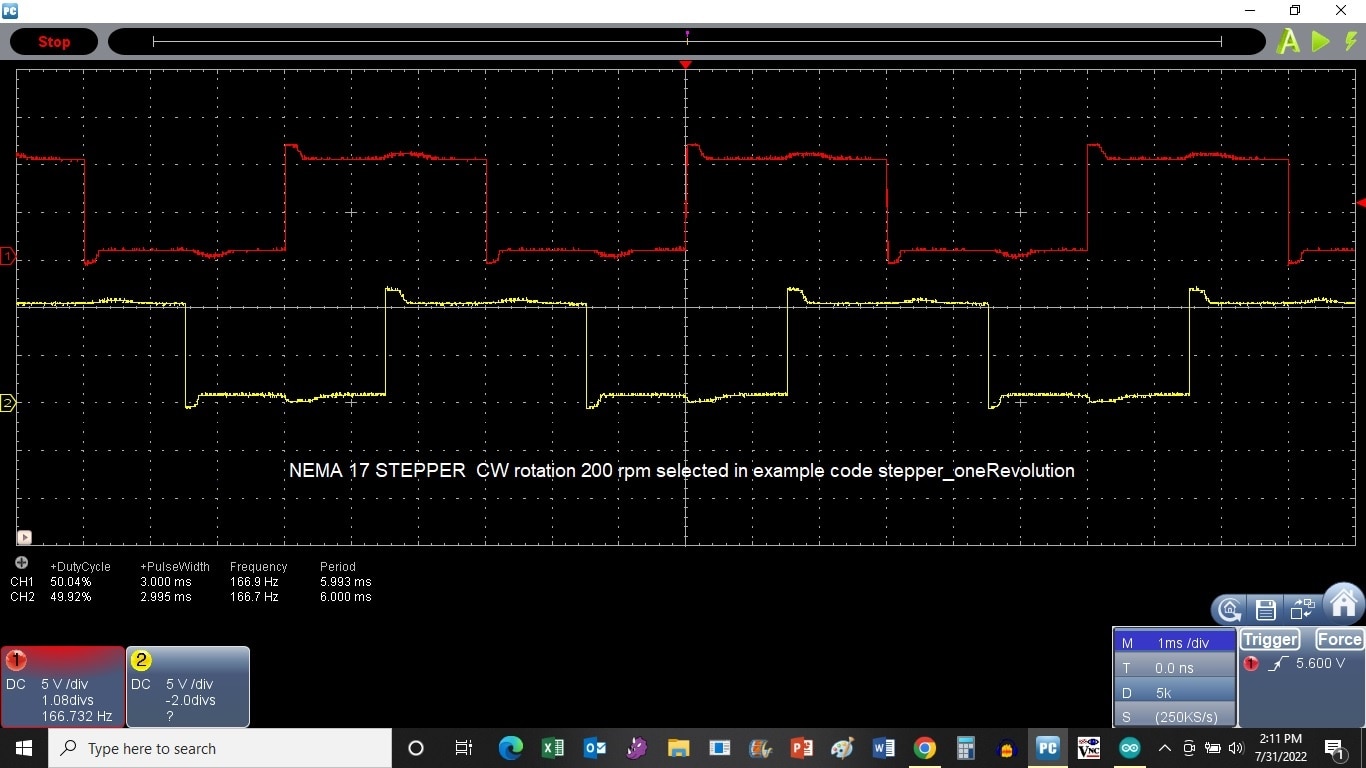
Multicomp Pro MP720017 USB scope is used to get timing and waveshape, screen shots saved.
Top speed was determined by setting rpm as fast as possible, and being able to rotate a full 180 degrees. The motor "locks up" (slips poles) if it cant keep up with rpm set in SW.
|
|
NEMA 17 |
28BYJ-48 |
|
Volts |
12 |
5 |
|
# Steps/Rev |
200 |
2038 |
|
shaft torque (mNm) |
20,000 |
34.3 |
|
observed top speed (rpm) using stepper_oneRevoltion.ino example code |
200 |
10 |
|
measured no load milliamps |
550 |
100 |
|
weight (grams) |
226 |
34 |
The 28BYJ-48 is questionable if it can be fast enough for real time adjustment, but hands down wins on battery amp consumption and weight.
28BYJ-48_StepperScopePhSeqTiming_CCW_rot.jpg

28BYJ-48_StepperScopePhSeqTiming_CWrot.jpg


The waveforms will be important in blog #5, where the stepper library is thrown out, and a straightforward simplified step cycle sequencing is introduced.
